Linking Containers to a Shipment or Movement
Users have the ability to link a shipment or a movement in the system.
Complete the following steps to link a container to a shipment:
Log in to the ONE system.
Find a shipment for a container to be assigned to. For information on finding shipments, please see the "Searching Shipments" section of the Online Help.
On the Search Shipments screen, select a shipment by checking the relevant box on the left.
Click the Actions button
A menu of options appears.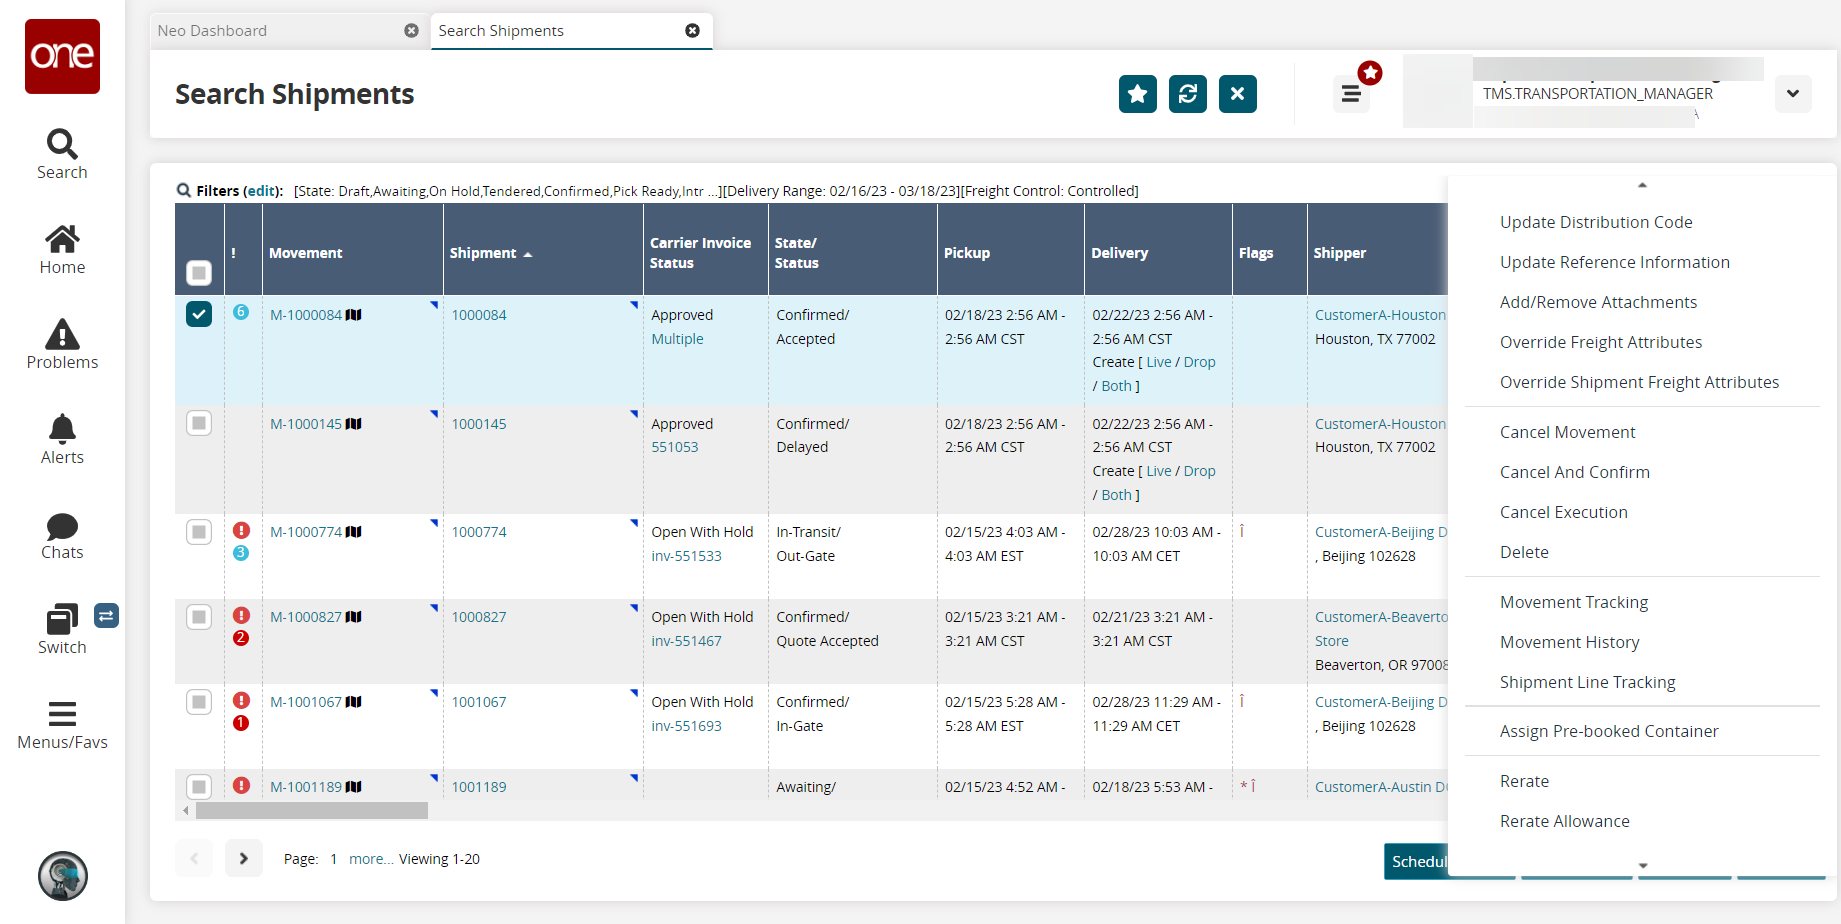
Click Assign Pre-booked Container.
The Assign Pre-booked Container popup appears.
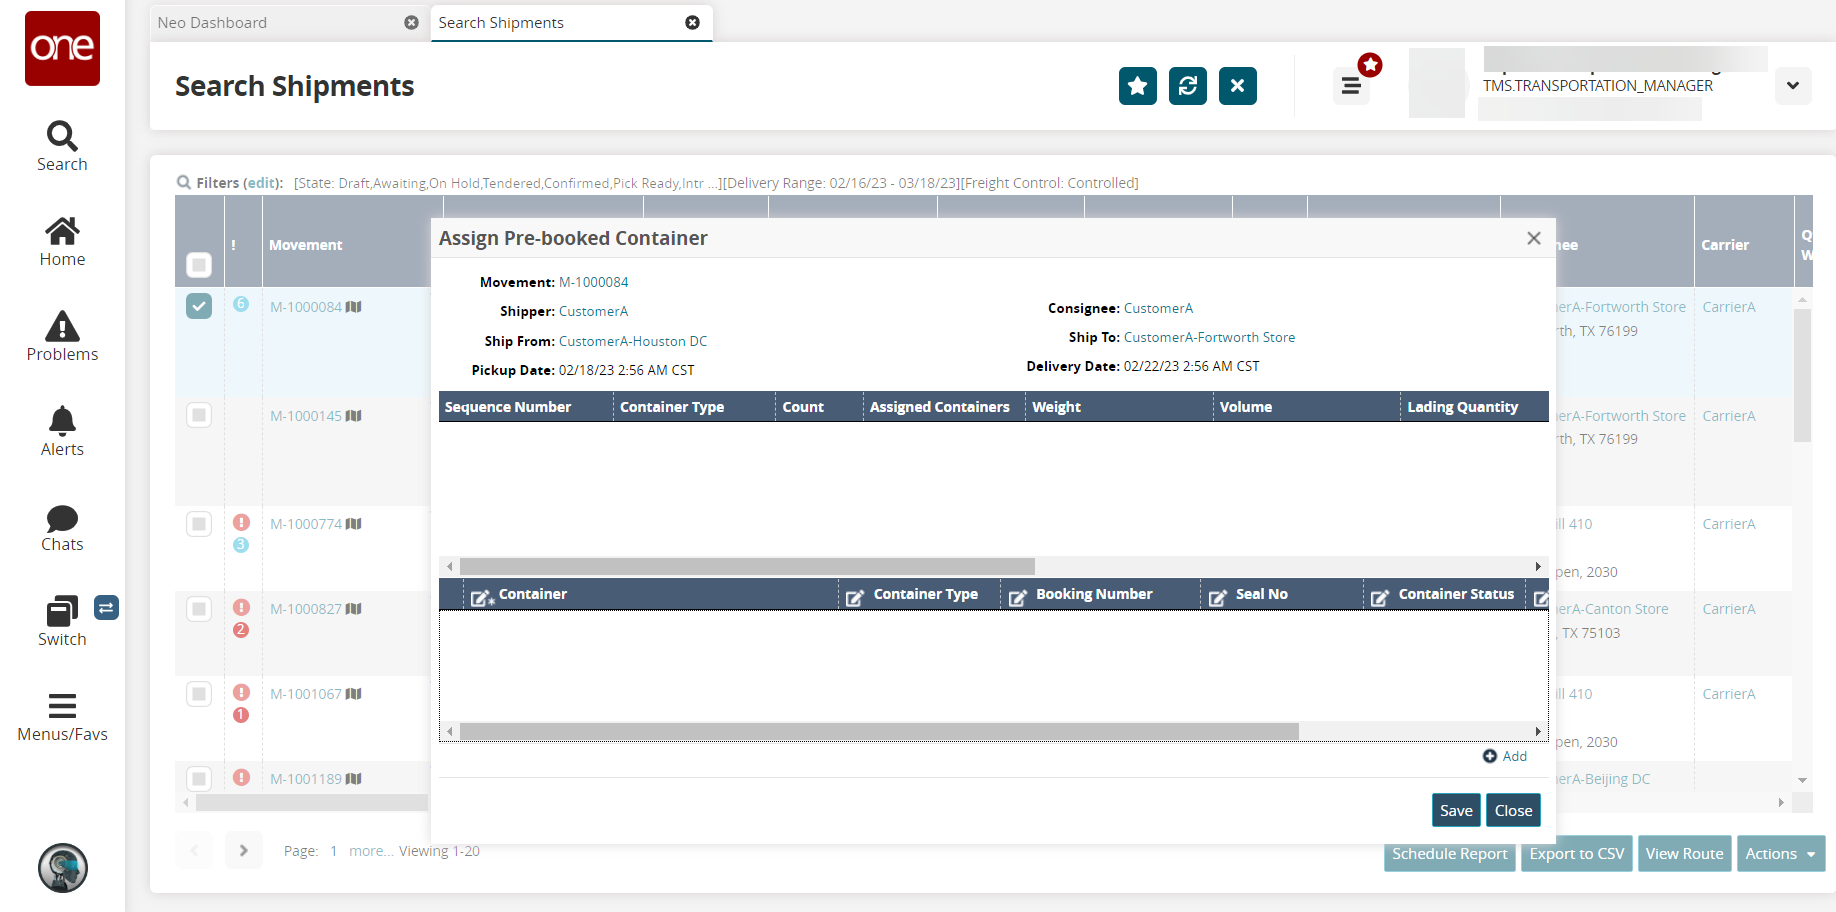
Click the Add link to add a container line to the bottom portion of the window.
A new row appears.
In the Container column, select either In-Network or Off-Network from the dropdown menu,to choose where the container is located. Then use the picker tool to select a container in the next field.
The container details populate on the line.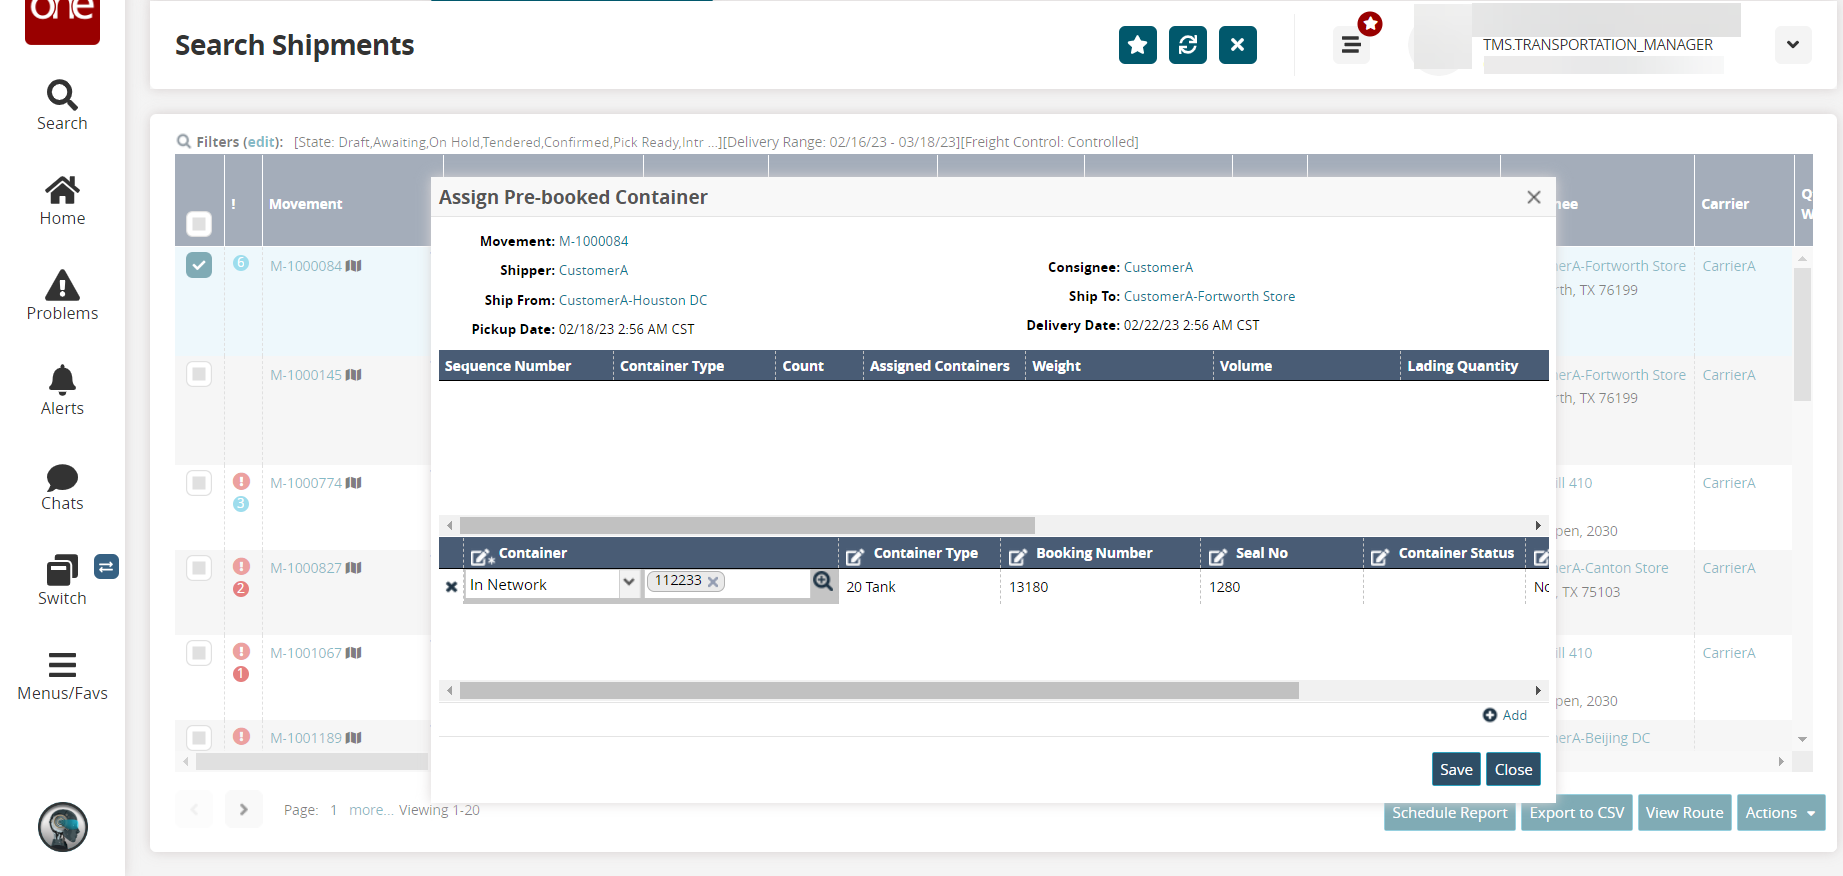
When all containers have been added, click the Save button.
A success message appears. The containers are now linked to the movement.