Managing Cost Limits
You can create new cost limits or view a list of cost limits. Afterward, you can apply actions or export details to a spreadsheet.
Complete the following steps to update cost limits:
L og in to the ONE system.
Click Menu/Favs > Contract Mgmt > Cost Limits.
The Cost Limits screen appears with the Explorer pane visible, showing the Cost Limits hierarchy in a collapsed state.Click a cost limit folder.
The Update Cost Limit pane appears.
Select new values for * Start Date, and * End Date.
Click Update Cost Limit to save the edits.
A green success message appears.
Complete the following to create new cost limits:
L og in to the ONE system.
Click Menu/Favs > Contract Mgmt > Cost Limits.
The Cost Limits search screen displays.Navigate to the Cost Limit Setting level in the Explorer pane on the left side of the screen.
The existing cost limit setting display in the right pane.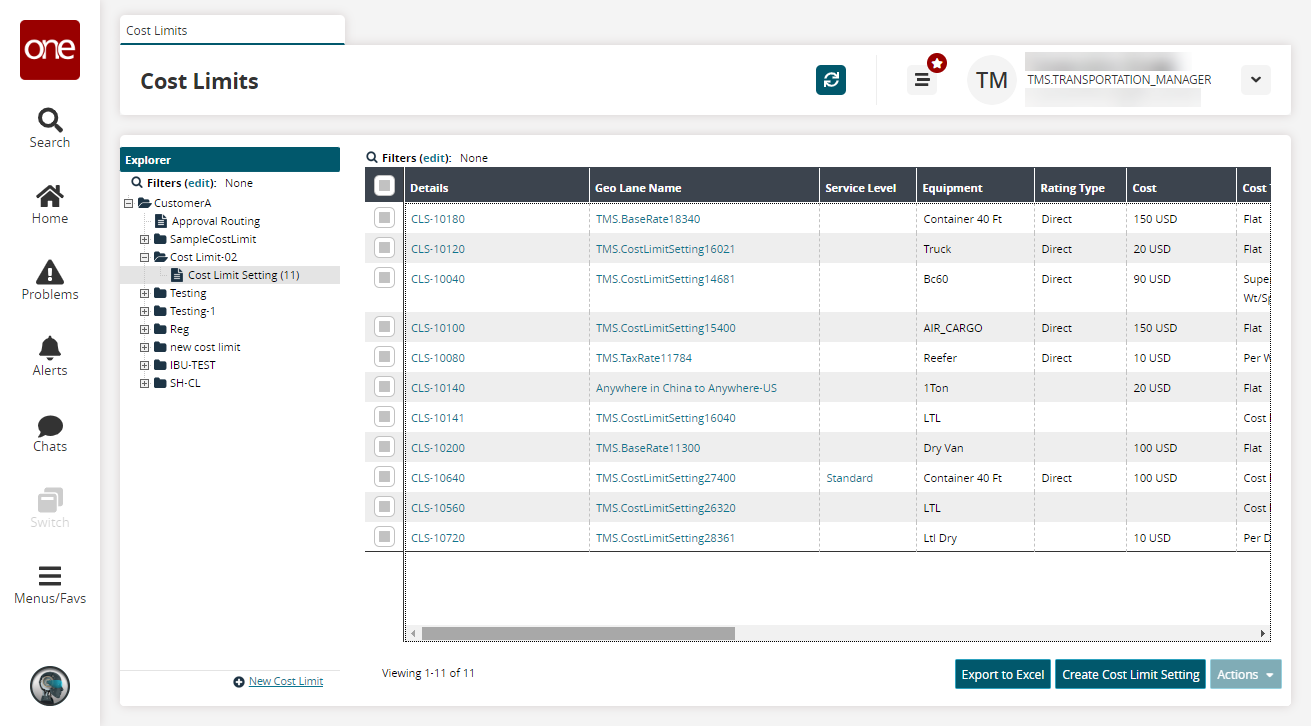
Click the New Cost Limit link at the bottom of the Explorer pane.
The Create Cost Limit pane appears.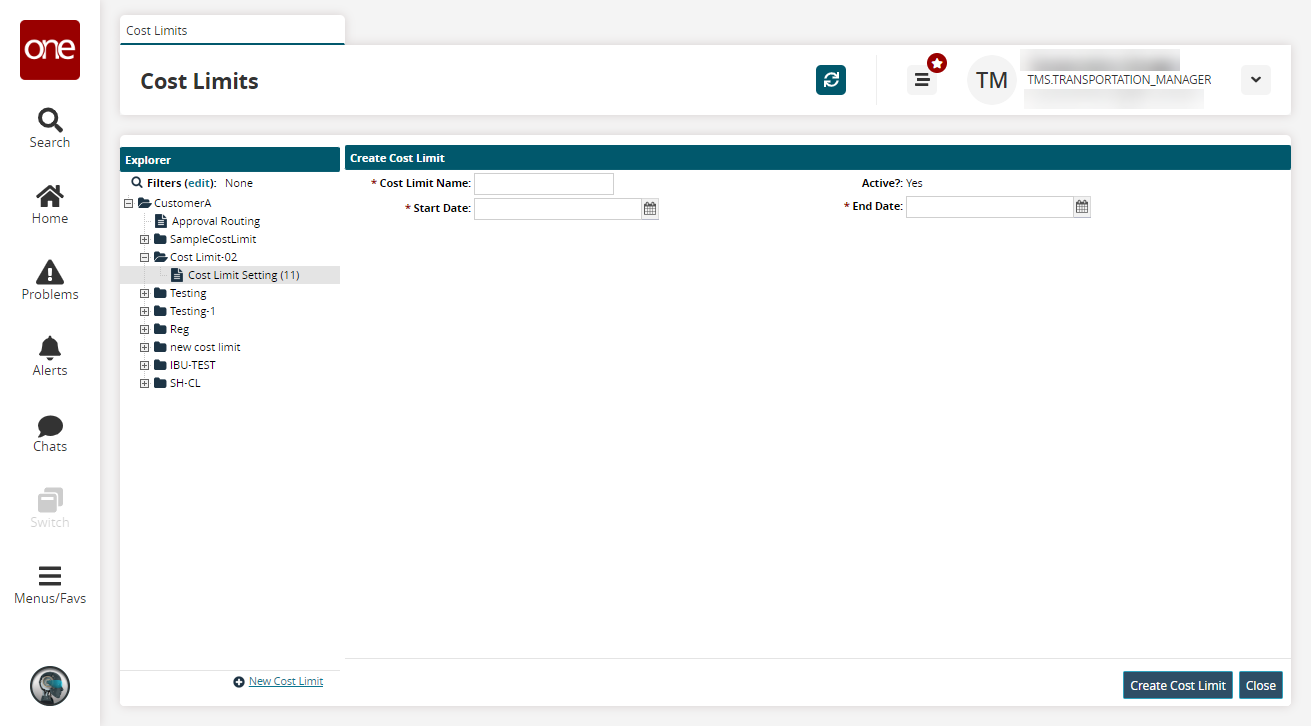
Select values for * Cost Limit Name, * Start Date, and * End Date.
Click the Create Cost Limit button.
A success message appears.To see the new cost limit in the cost limit hierarchy, click the Refresh button.
The New Cost Limit appears with no defined cost limit settings.
Complete the following steps to create new cost limit settings:
L og in to the ONE system.
Click Menu/Favs > Contract Mgmt > Cost Limits.
The Cost Limits search screen displays.Navigate to the Cost Limit Setting level in the Explorer pane on the left side of the screen.
The existing cost limit setting display in the right pane.Click the Create Cost Limit Setting.
The Create Cost Limit Setting screen appears.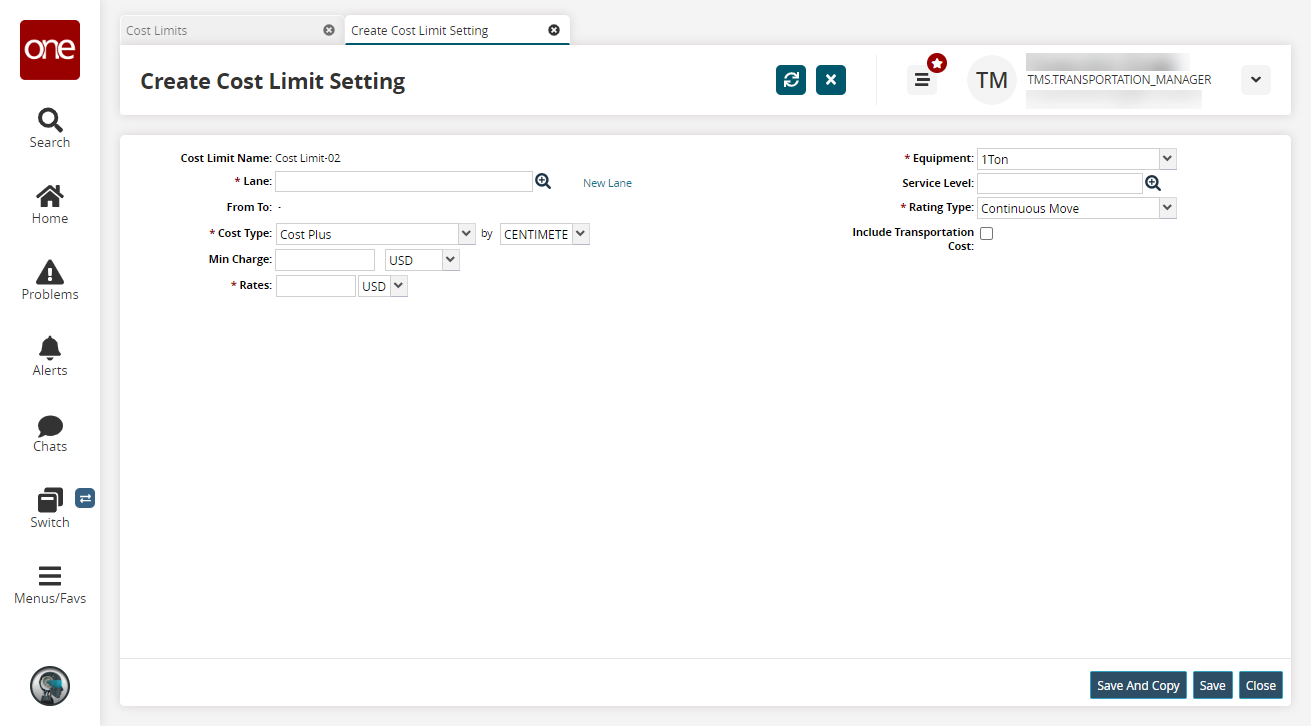
Fill out the following fields. Fields with an asterisk ( * ) are required.
Field
Description
* Lane
Select an existing lane using the picker tool or click the New Lane link. Additional fields appear for defining lane options.
Select a * Lane From option in the dropdown list and use the picker tool to choose the option item from the list. For example, if you choose Site for the * Lane From field, the list from the picker tool will be existing sites.
Select a * To option in the dropdown list and use the picker tool to choose the option item from the list. For example, if you choose Site for the * To field, the list from the picker tool will be existing sites.
* Cost Type
Select a cost type from the dropdown menu and a unit of measure.
Min Charge
Enter a minimum charge and currency.
* Rates
Enter a rate and currency.
* Equipment
Select an equipment option from the dropdown menu.
Service Level
Select a service level using the picker tool.
* Rating Type
Select a rating type from the dropdown menu.
Include Transportation Cost
Select this checkbox to include transportation costs.
Click Save.
A success message appears.Click the Refresh button.
The new cost limit setting appears.
Complete the following steps to update cost limit settings:
L og in to the ONE system.
Click Menu/Favs > Contract Mgmt > Cost Limits.
The Cost Limits search screen displays.Navigate to the Cost Limit Setting level in the Explorer pane on the left side of the screen.
The existing cost limit setting display in the right pane.Click a Details link.
The details screen appears.
Update fields as necessary.
Click the Add link in the table.
A new row appears.Click in the Approving Role or Approving User columns and use the picker tool to select a role or a user.
Enter an Approval Timeout in days, hours, and minutes.
Enter an Approval Amount.
Click on the Add link to add more rows for the approval path hierarchy.
Click on the Save button.
A green success bar displays.
Complete the following steps to activate or deactivate a cost limit setting:
L og in to the ONE system.
Click Menu/Favs > Contract Mgmt > Cost Limits.
The Cost Limits search screen displays.Navigate to the Cost Limit Setting level in the Explorer pane on the left side of the screen.
The existing cost limit setting display in the right pane.Select one or more rows.
Click Actions, and then select Activate Cost Limit Setting or Deactivate Cost Limit Setting.
A popup window displays.Click on the Submit button.
A success message appears.
Complete the following steps to create an approval routing rule at the global level:
L og in to the ONE system.
Click Menu/Favs > Contract Mgmt > Cost Limits.
The Cost Limits screen appears with the Explorer pane showing the cost limits hierarchy in the collapsed state.Click the Approval Routing option.
The right pane updates.
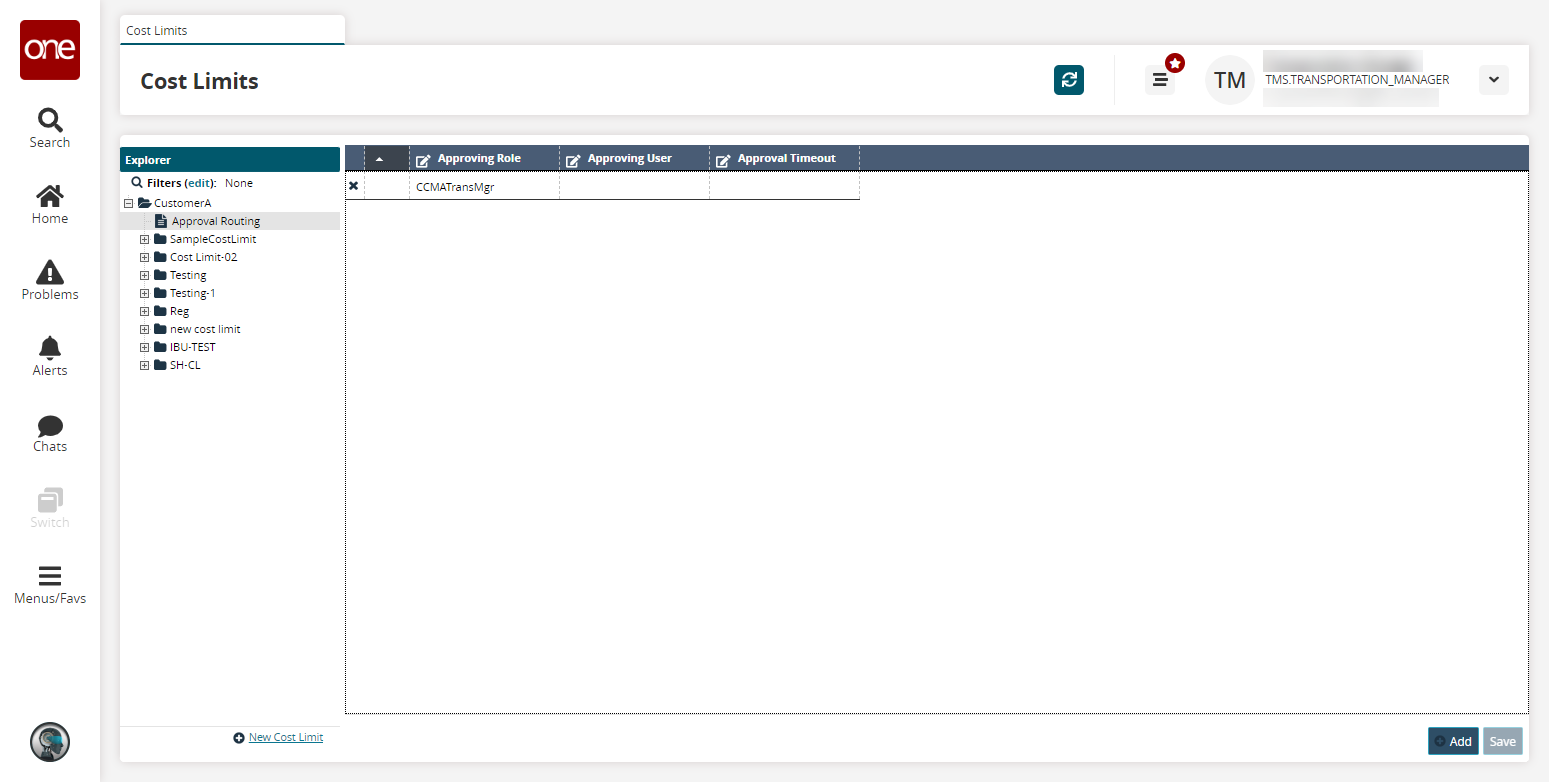
Click the Add button to add a new approval routing rule.
A new row appears.Select an Approving Role or Approving User using the picker tool. Note that both cannot be specified for the same row.
Enter an Approval Timeout in days, hours, and minutes.
Click Save to save the approval routing rule.