Dispatch Routes
You can view existing dispatch routes or create new ones. Afterward, you can edit details about a specific route, apply actions, or export the search results to a spreadsheet.
Complete the following steps to manage dispatch routes:
L og in to the ONE system.
Click Menu/Favs > Contract Mgmt > Dispatch Routes.
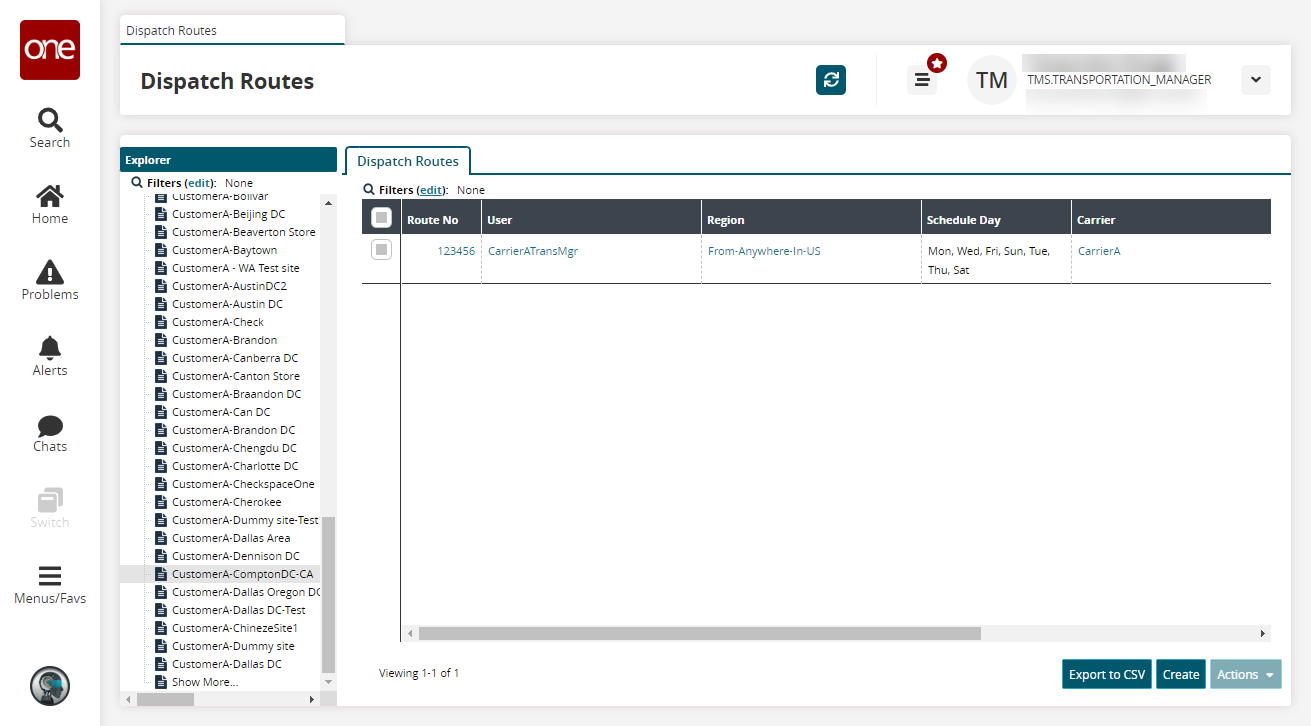
The Dispatch Routes screen appears, displaying the Explorer pane.Select a site to view the dispatch route.
The Dispatch Routes for the selected site appears to the right of the explorer pane.
Click the Export to CSV button to export the report to a CSV file.
Click a Route No link to view dispatch route details.
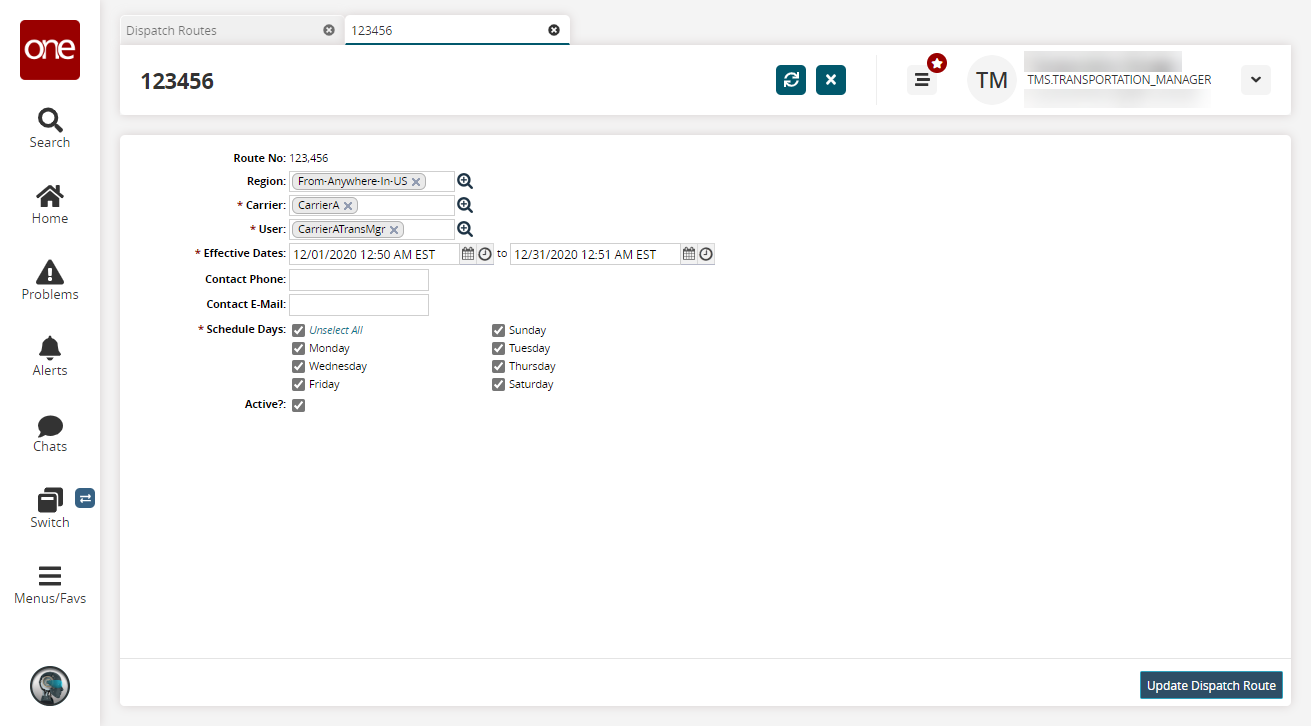
The route details screen appears.
Update the fields as desired and click Update Dispatch Route.
A success message appears.From the Dispatch Routes screen, select a dispatch route and click Actions > Deactivate Dispatch Route to deactivate a dispatch route.
Complete the following steps to create dispatch routes:
L og in to the ONE system.
Click Menu/Favs > Contract Mgmt > Dispatch Routes.
The Dispatch Routes screen appears, displaying the Explorer pane.Click Create.
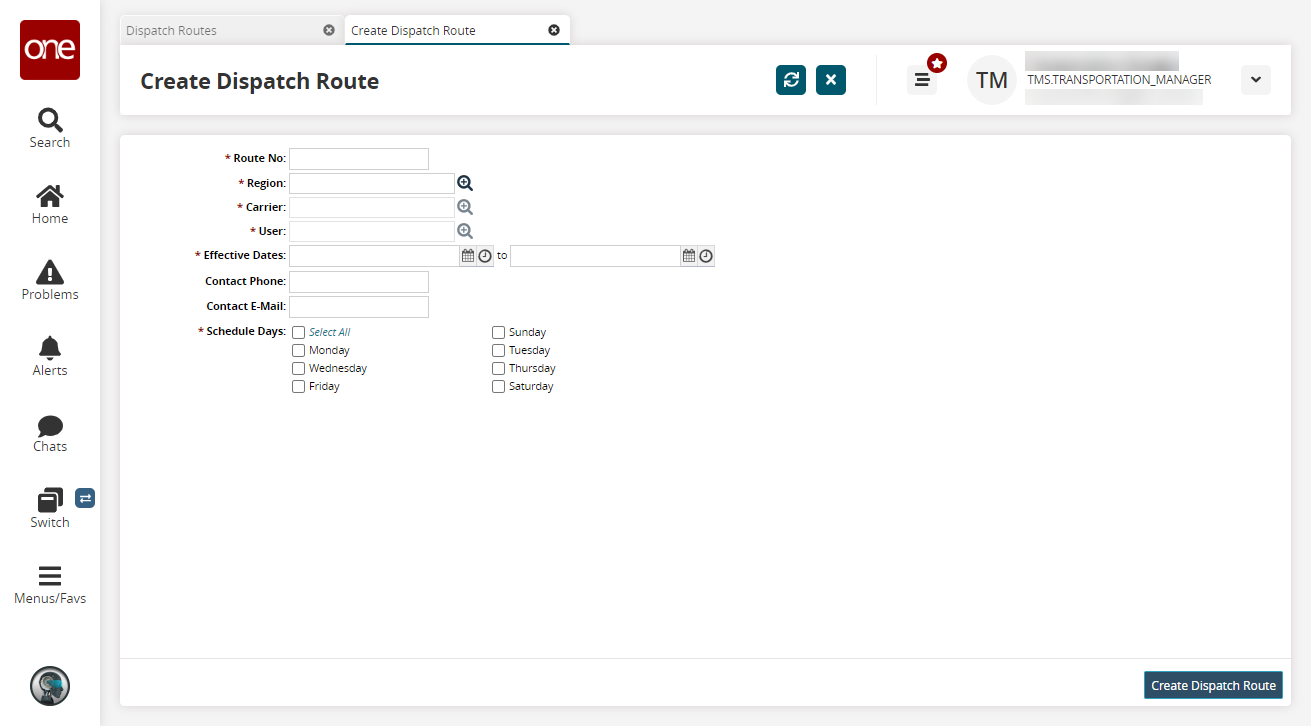
The Create Dispatch Route screen appears.
Fill out the following fields. Fields with an asterisk ( * ) are required.
Field
Description
* Route No
Enter a route number.
* Region
Select a region using the picker tool.
* Carrier
Select a carrier using the picker tool.
* User
Select a user using the picker tool.
* Effective Dates
Select an effective date and time range the dispatch route will be in effect.
Contact Phone
Enter a contact phone number.
Contact Email
Enter a contact email address.
* Schedule Days
Select each day the dispatch route is active.
click Create Dispatch Route.
A success message appears.