Multi-Split Shipments and Container Fan-In/Fan-Out UI
Users can create new multi-split shipments through the Container Fan-In/Fan-Out UI. Here users can specify a shipment number, shipper, consignee, pickup and delivery times, and many other attributes. Users can save to draft, submit, delete or clone multi-split shipments. When creating the multi-split shipment, users can copy rows to build the shipment quickly.
Complete the following steps to create a new multi-split shipment:
L og in to the ONE system.
Select Menu/Favs > Transportation > Container Fan-In/Fan-Out.
In the NEO UI, users can click on the Menus/Favs icon on the left sidebar and type in the name of the screen in the menu search bar. For more information, see "Using the Menu Search Bar."
The Container Fan-In/Fan-Out screen appears.
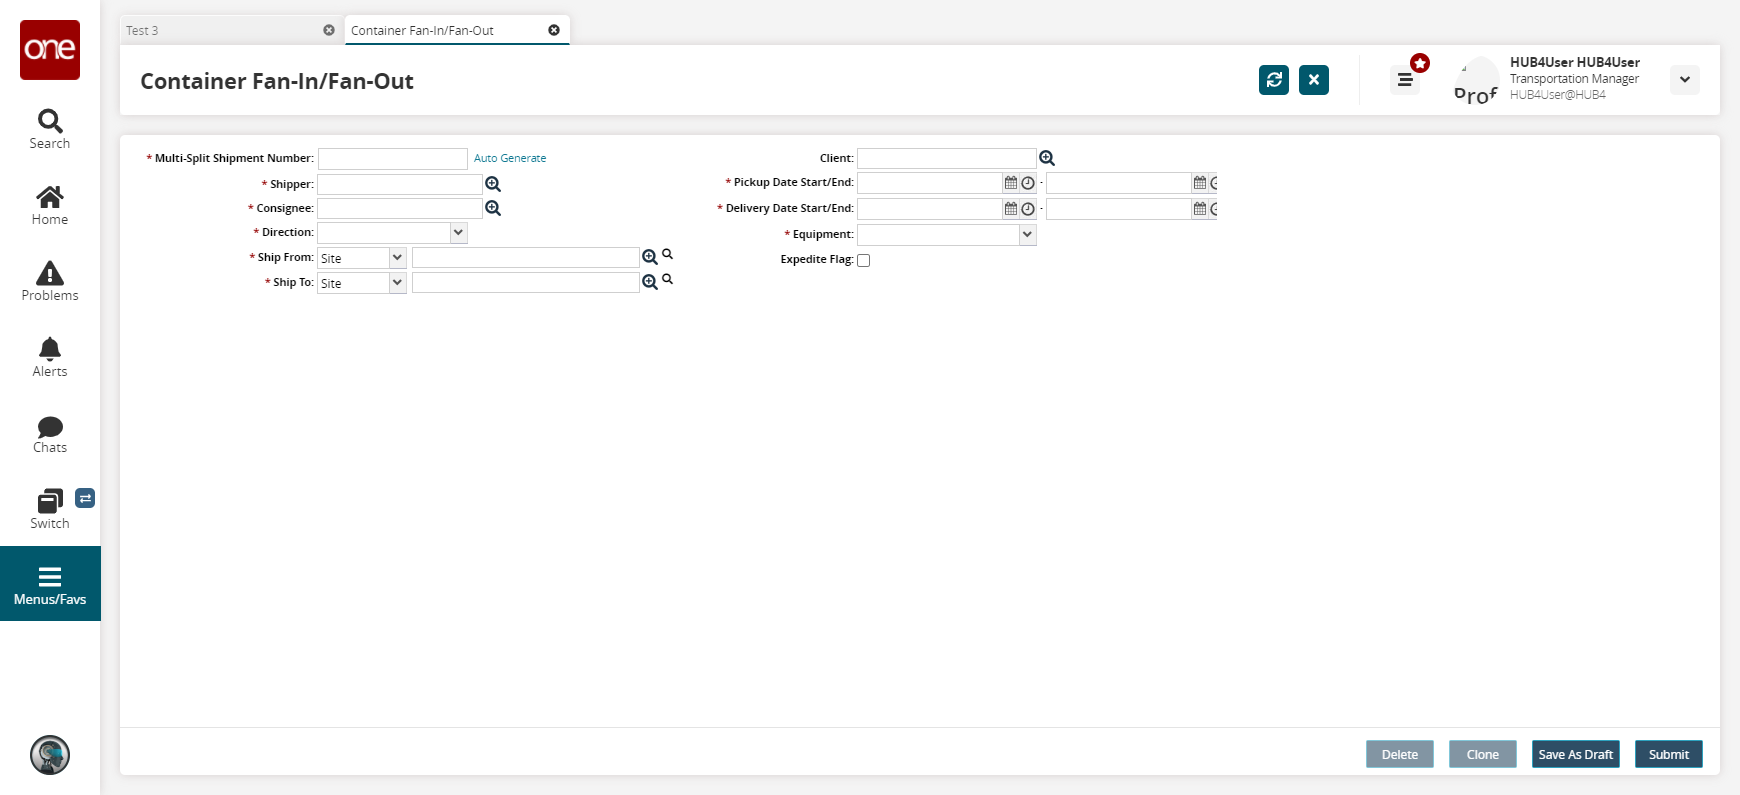
Fill out the following fields. Fields with an asterisk ( * ) are required.
Field
Description
*Multi-Split Shipment Number
Enter a shipment number or click the Auto Generate link, and the system will generate a number for you.
*Shipper
Select a shipper using the picker tool.
*Consignee
Select a consignee using the picker tool.
*Direction
Select a direction from the drop-down menu. The available options are Export, Import, and Transhipment.
*Ship From
Select either a Site or an Address from the drop-down menu and then use the picker tool to select a ship-from location.
*Ship To
Select either a Site or an Address from the drop-down menu and then use the picker tool to select a ship-to location.
Client
Select a client from the drop-down menu.
*Pickup Date Start/End
Enter a pickup start date range using the date and time icons.
*Delivery Date Start/End
Enter a delivery start date range using the date and time icons.
*Equipment
Select an equipment type from the drop-down menu.
Expedite Flag
Select the checkbox if the shipment should be expedited.
Click the Add link to add containers.
The New Container Details popup appears.
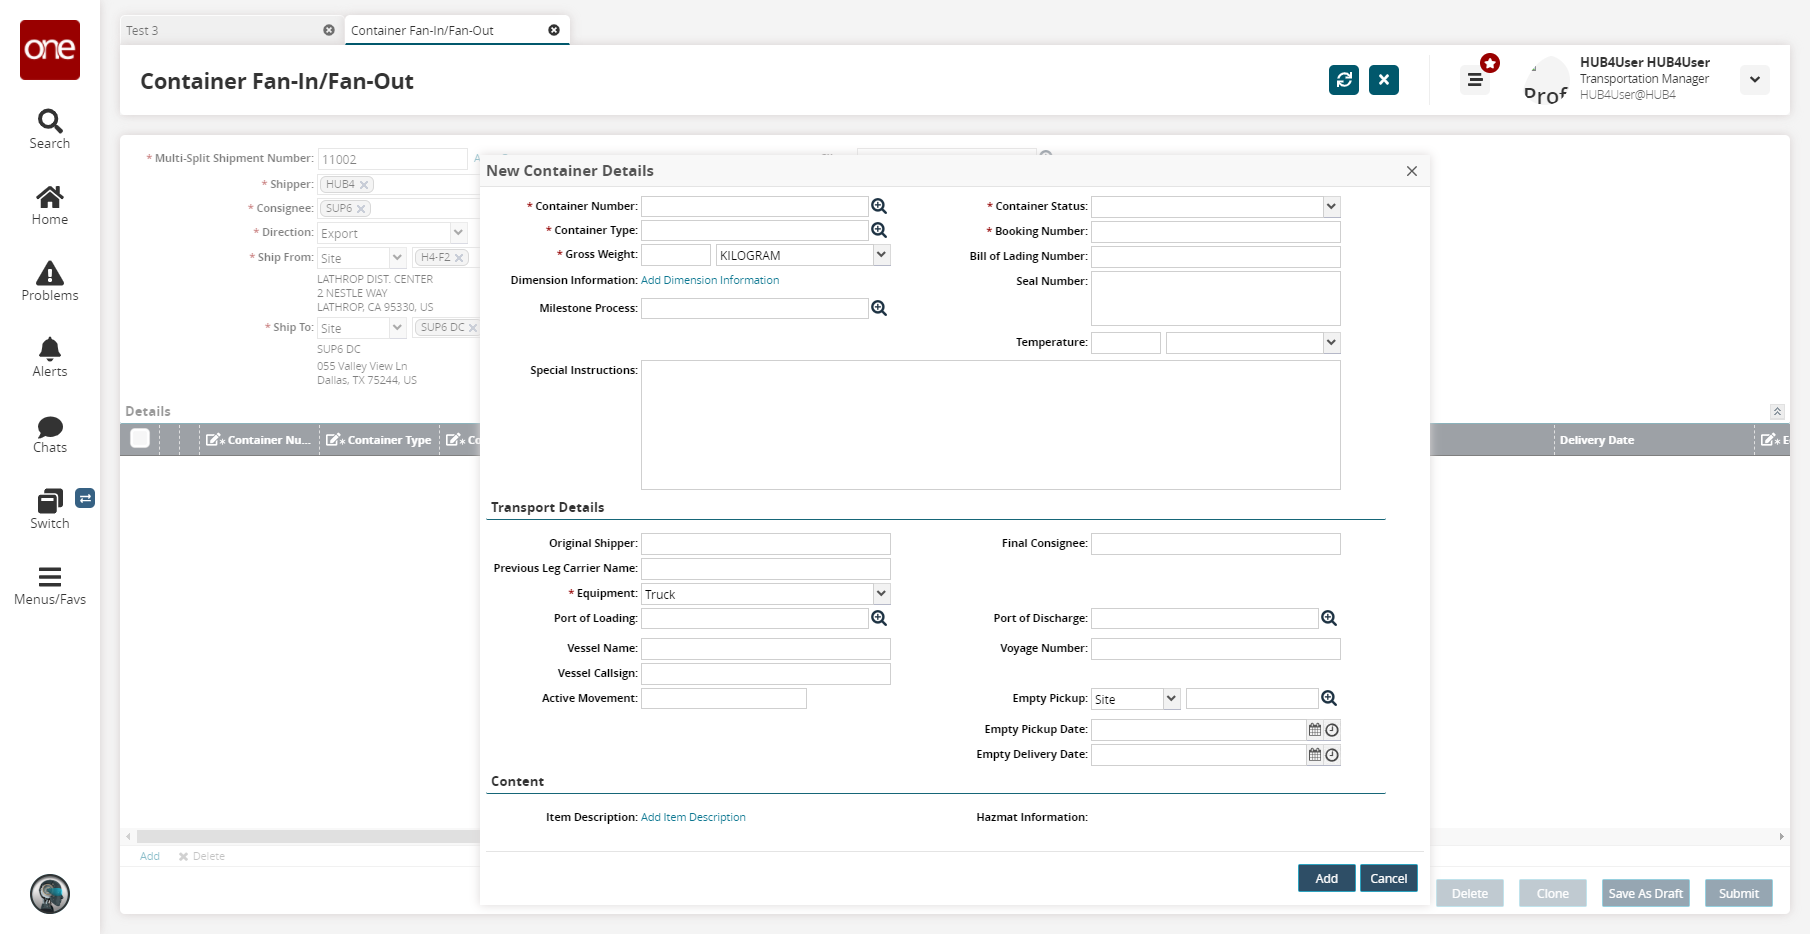
Fill out the following fields. Fields with an asterisk ( * ) are required.
Field
Description
*Container Number
Enter a container number or select a container using the picker tool.
*Container Type
Select a container type using the picker tool.
*Gross Weight
Enter a gross weight and select a UOM.
Dimension Information
Click the Add Dimension Information link.
The Add Dimension Information popup appears.
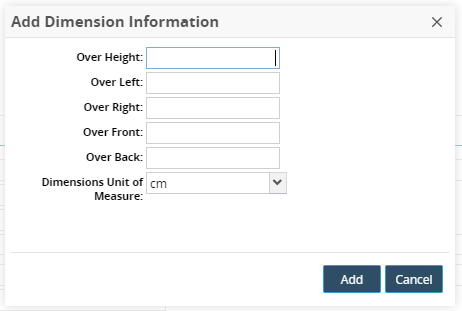
As desired, enter the following dimensions: Over Height, Over Left, Over Right, Over Front, Over Back.
Select a UOM.
Click Add.
Milestone Process
Select a milestone process using the picker tool.
*Container Status
Select a container status from the drop-down menu. The available options are Empty, Full Container Load, and Less Than Container Load.
*Booking Number
Enter a booking number.
Bill of Lading Number
Enter a bill of lading number.
Seal Number
Enter a seal number.
Temperature
Enter a temperature and select either Fahrenheit or Celcius.
Special Instructions
Enter any special instructions.
Transport Details
Original Shipper
Enter an original shipper.
Previous Leg Carrier Name
Enter the carrier name from the previous leg.
*Equipment
Select an equipment type from the drop-down menu.
Port of Loading
Select a port of loading from the drop-down menu.
Vessel Name
Enter a vessel name.
Vessel Callsign
Enter a vessel callsign.
Active Movement
Enter an active movement number.
Final Consignee
Enter a final consignee.
Port of Discharge
Enter a port of discharge.
Voyage Number
Enter a voyage number.
Empty Pickup
Select either Site or Address and then select an empty pickup location using the picker tool.
Empty Pickup Date
Select an empty pickup date using the date and time buttons.
Empty Delivery Date
Select an empty delivery date using the date and time buttons.
In the Item Description field, click the Add Item Description link.
The Add Item popup appears.
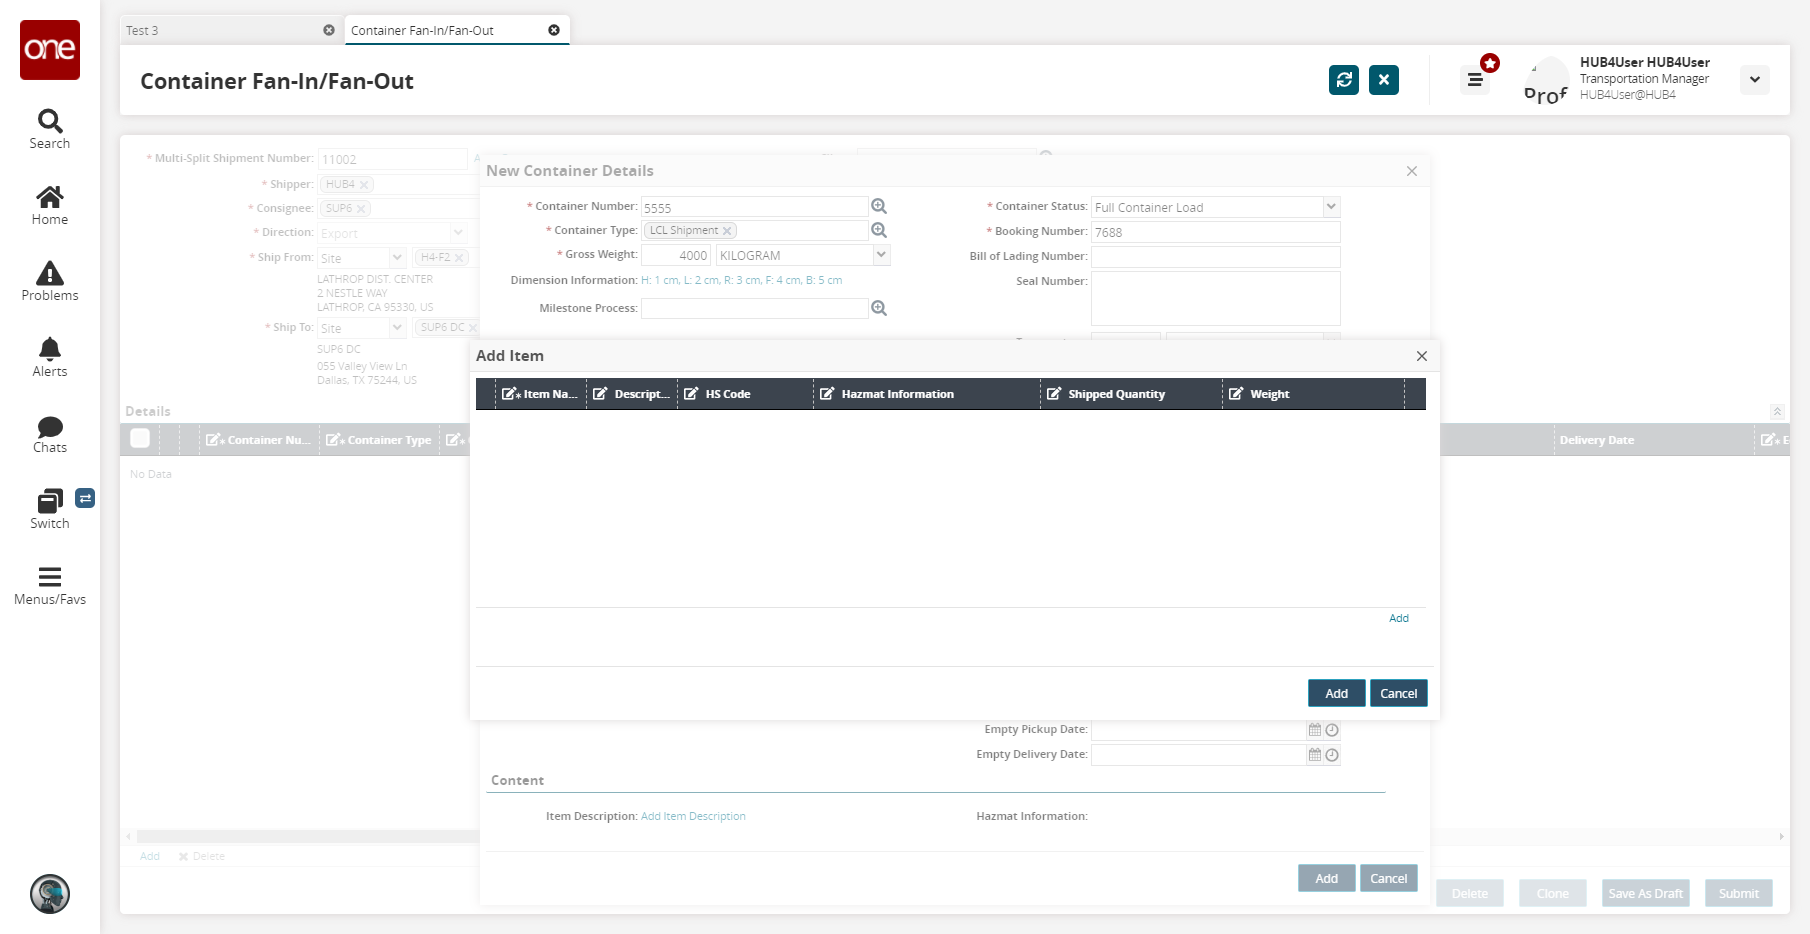
Fill out the fields as desired and then click Add.
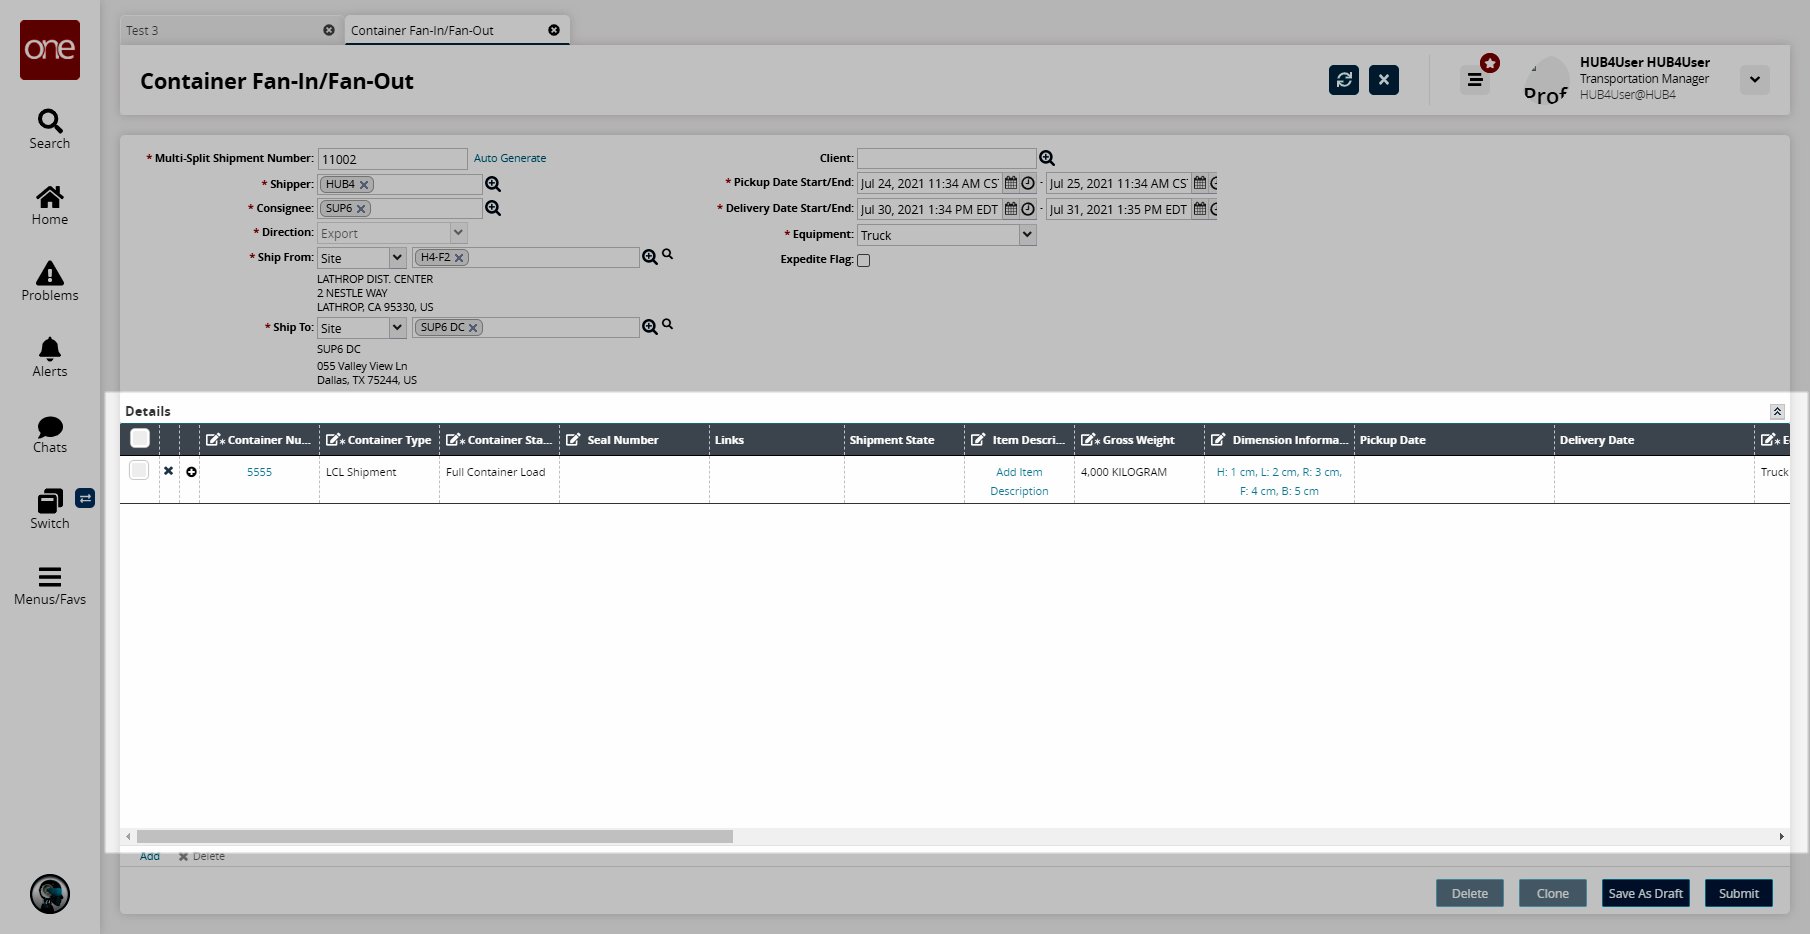
On the New Container Details popup, click Add.
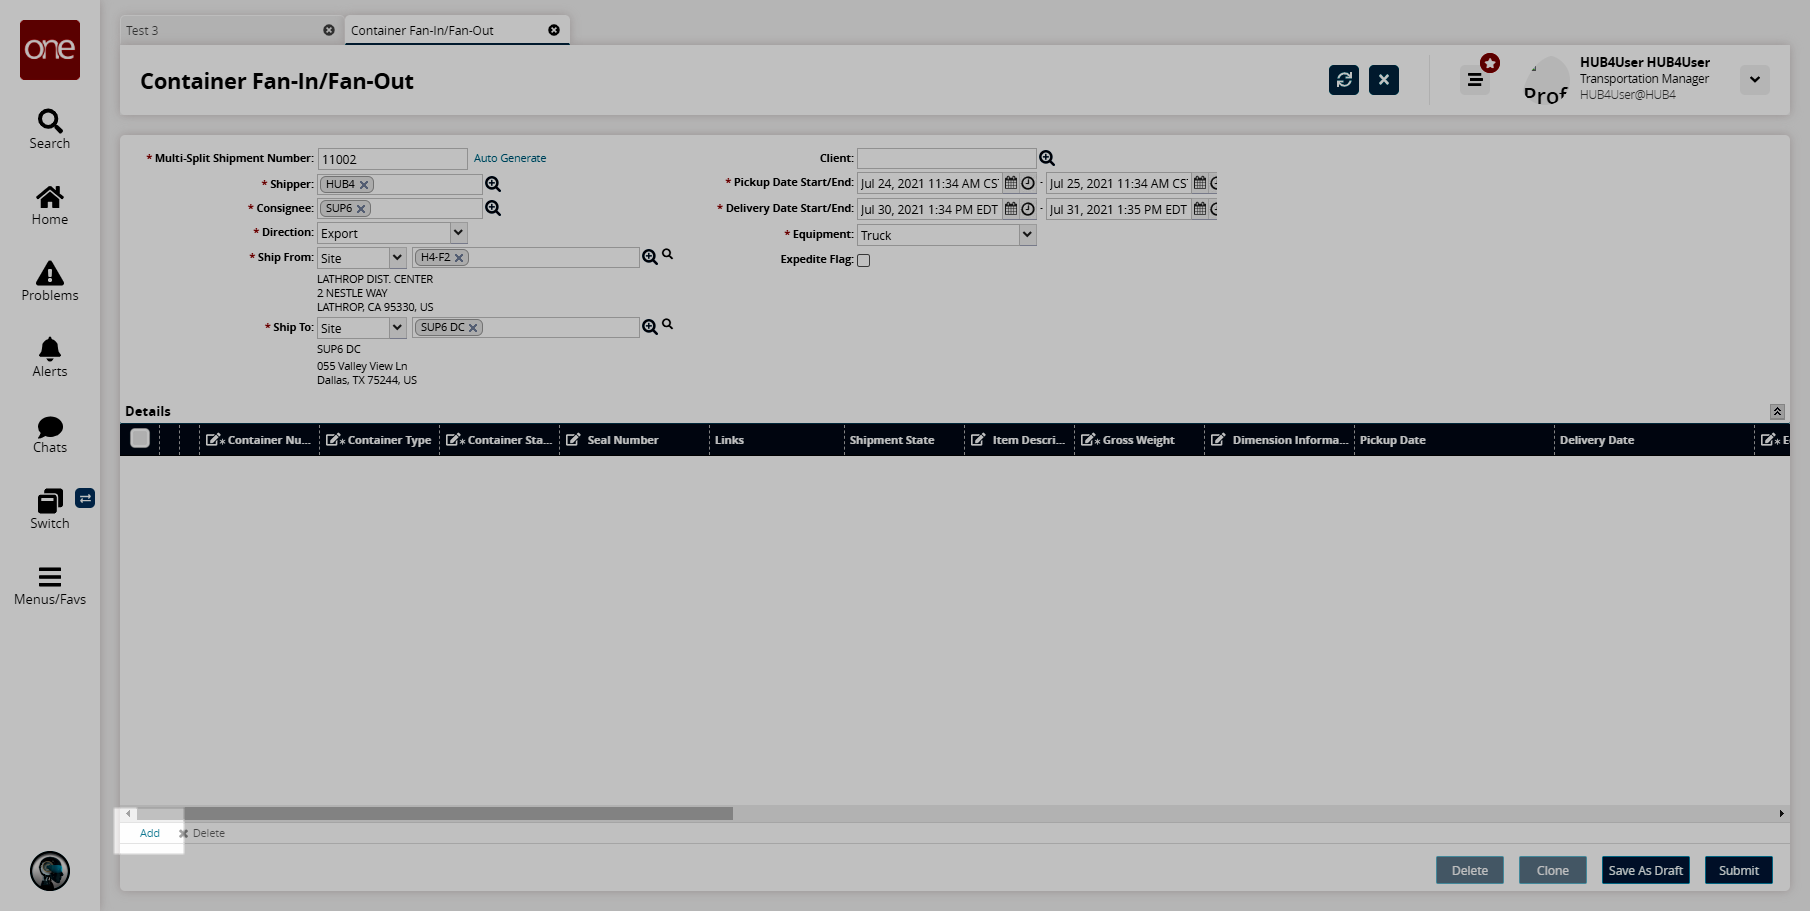
The container appears in the details pane.
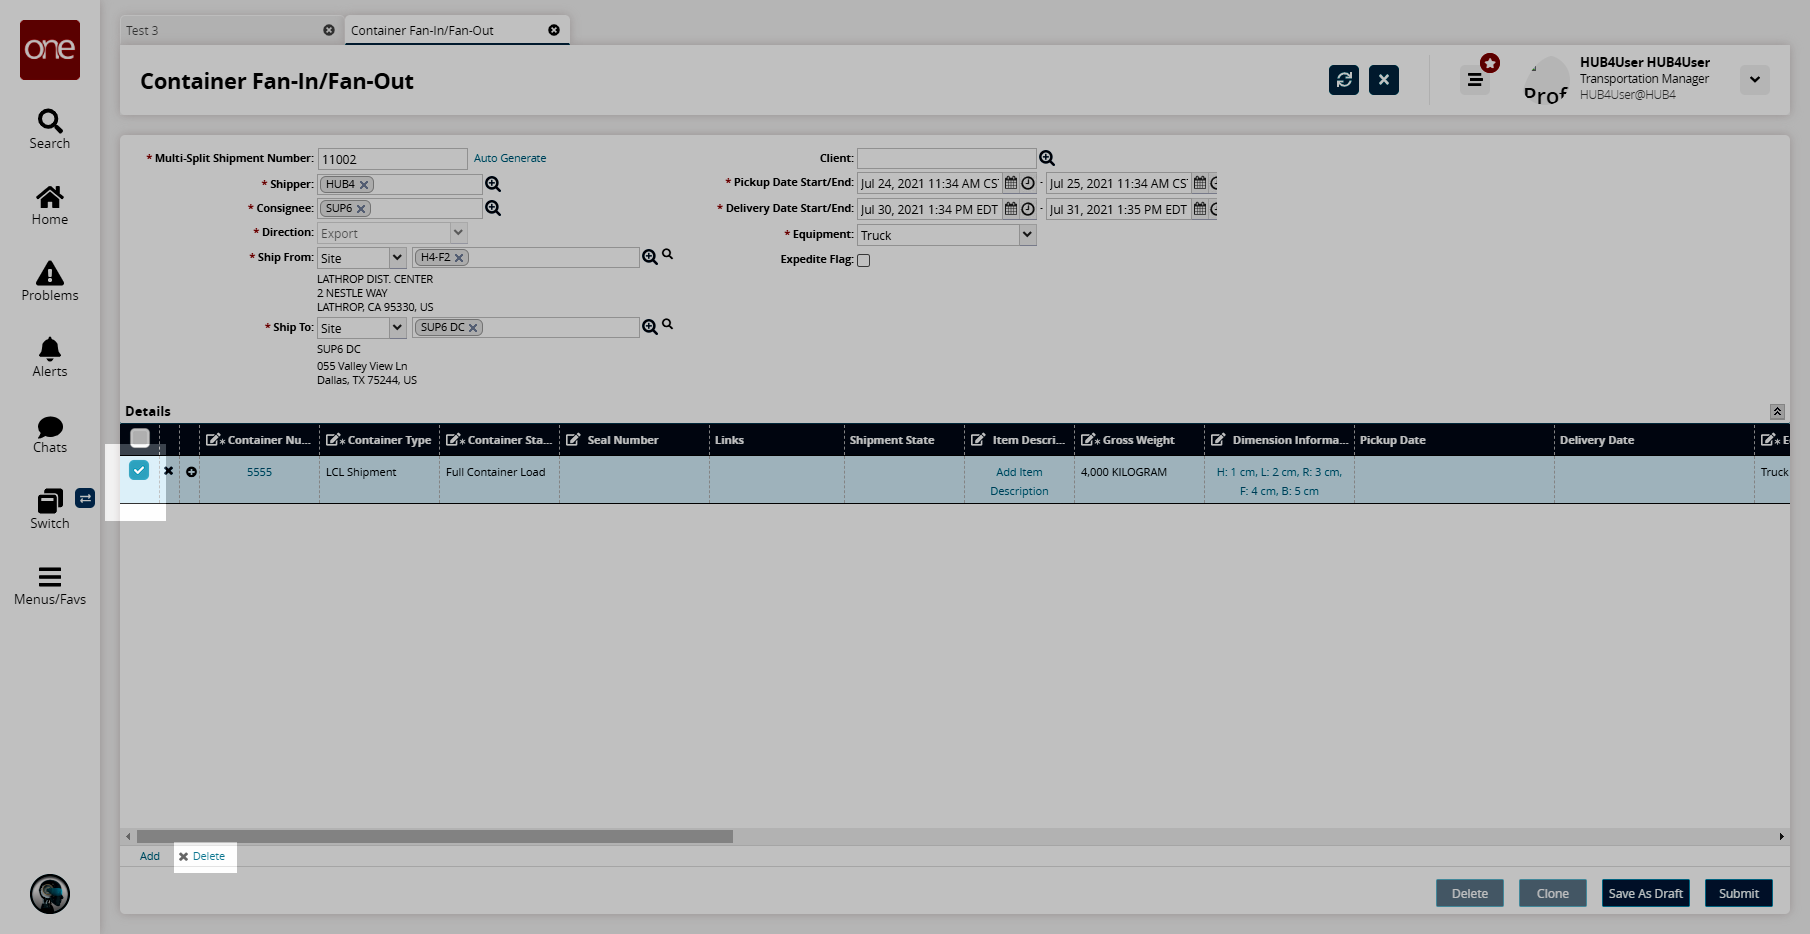
To delete a container row, select the row and click the Delete link.
To copy a container row, click the copy icon.
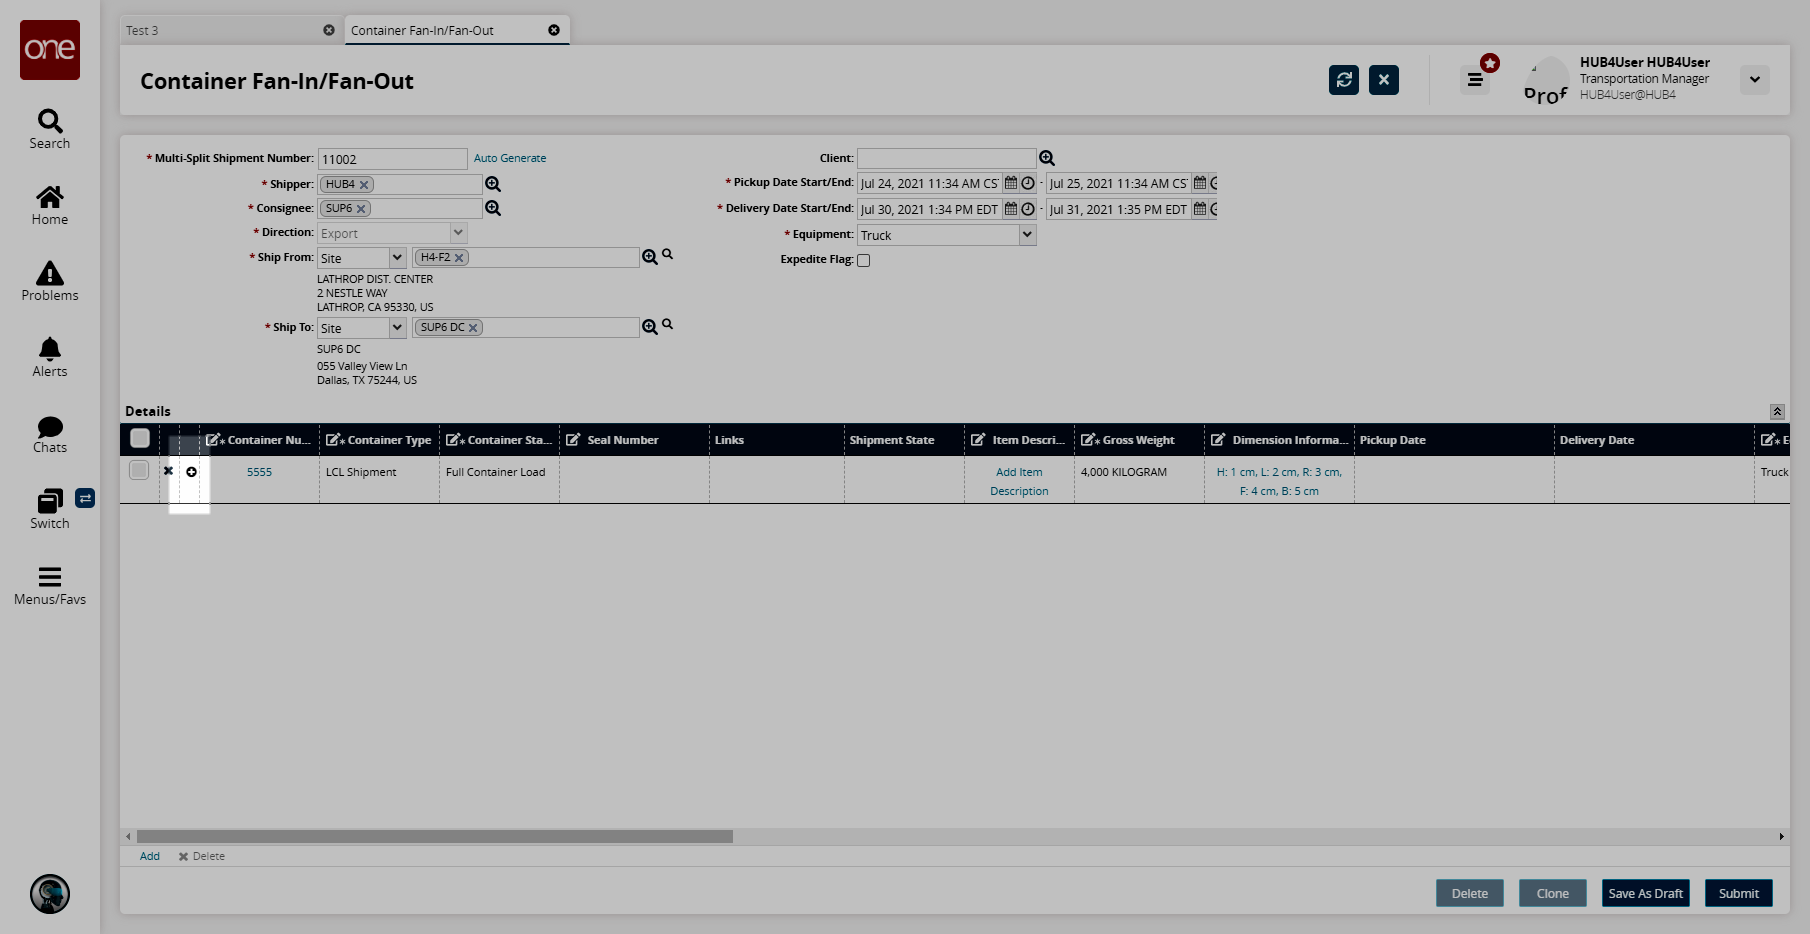
The Copy Container popup appears.
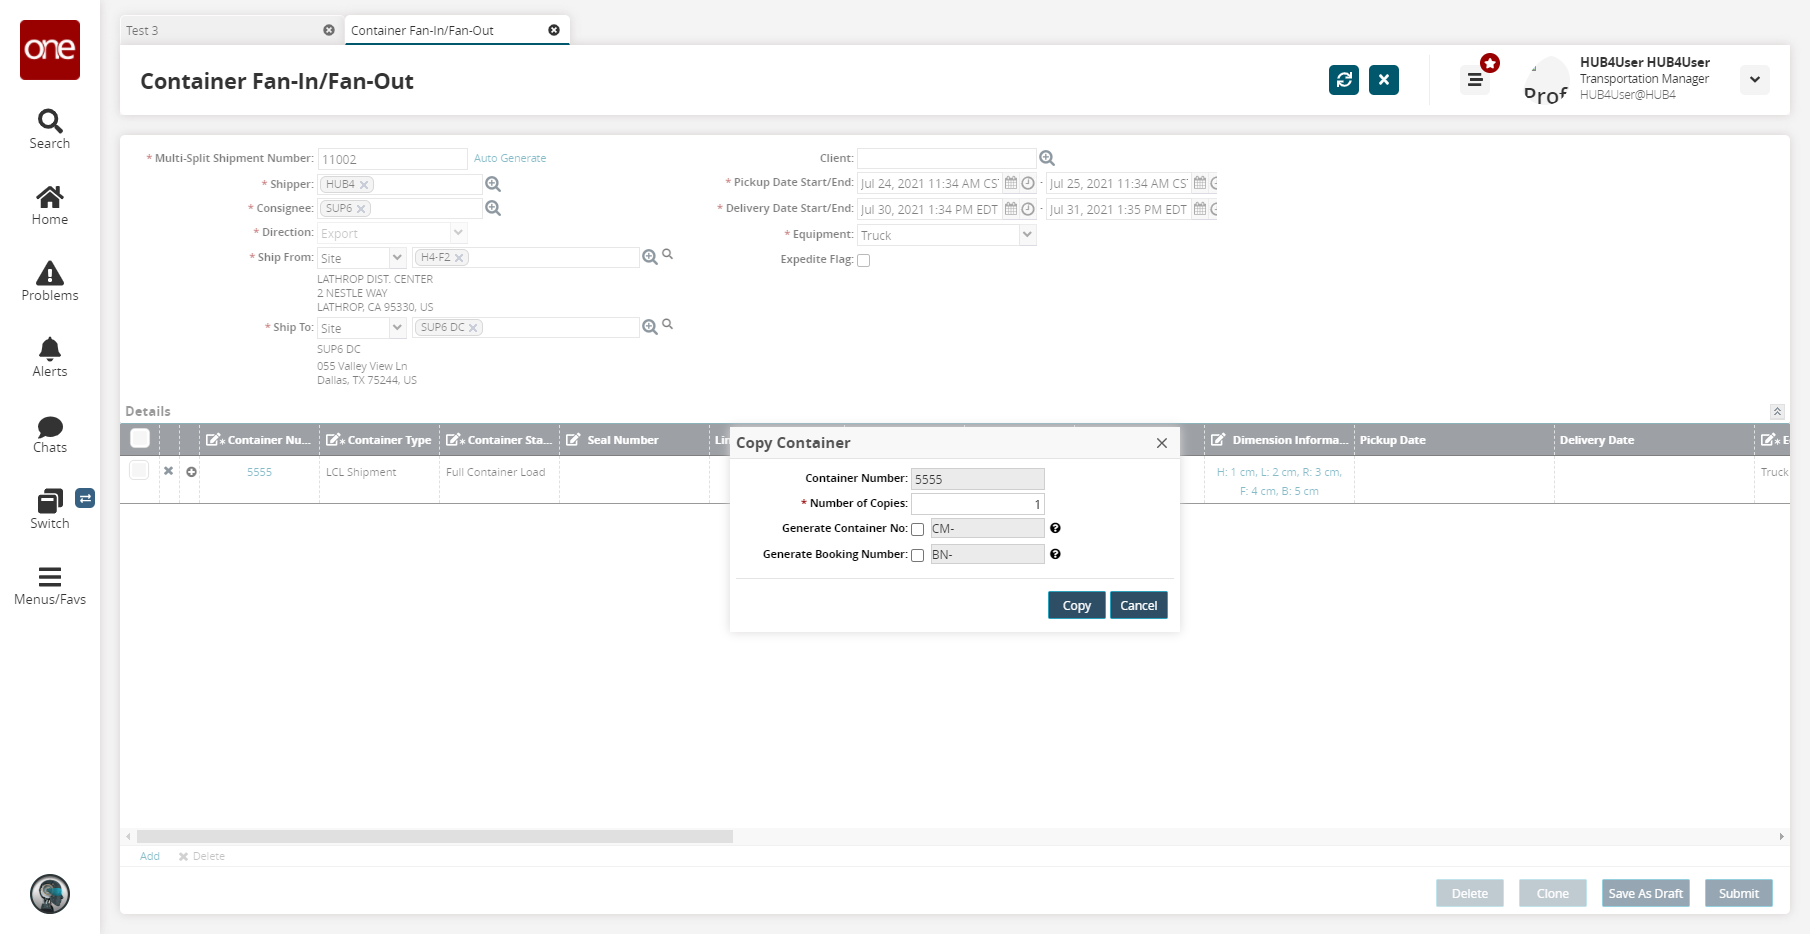
In the Number of Copies field, enter a value.
In the Generate Container No and Generate Booking No fields, select the checkbox to use a user-defined prefix when copying the container.
Click the Save to Draft button to save the multi-split shipment for further editing.
Click the Submit button to create the multi-split shipment.
A success message appears.
Complete the following steps to perform actions on multi-split shipments:
Select the Delete button to delete the multi-split shipment.
A confirmation popup appears.
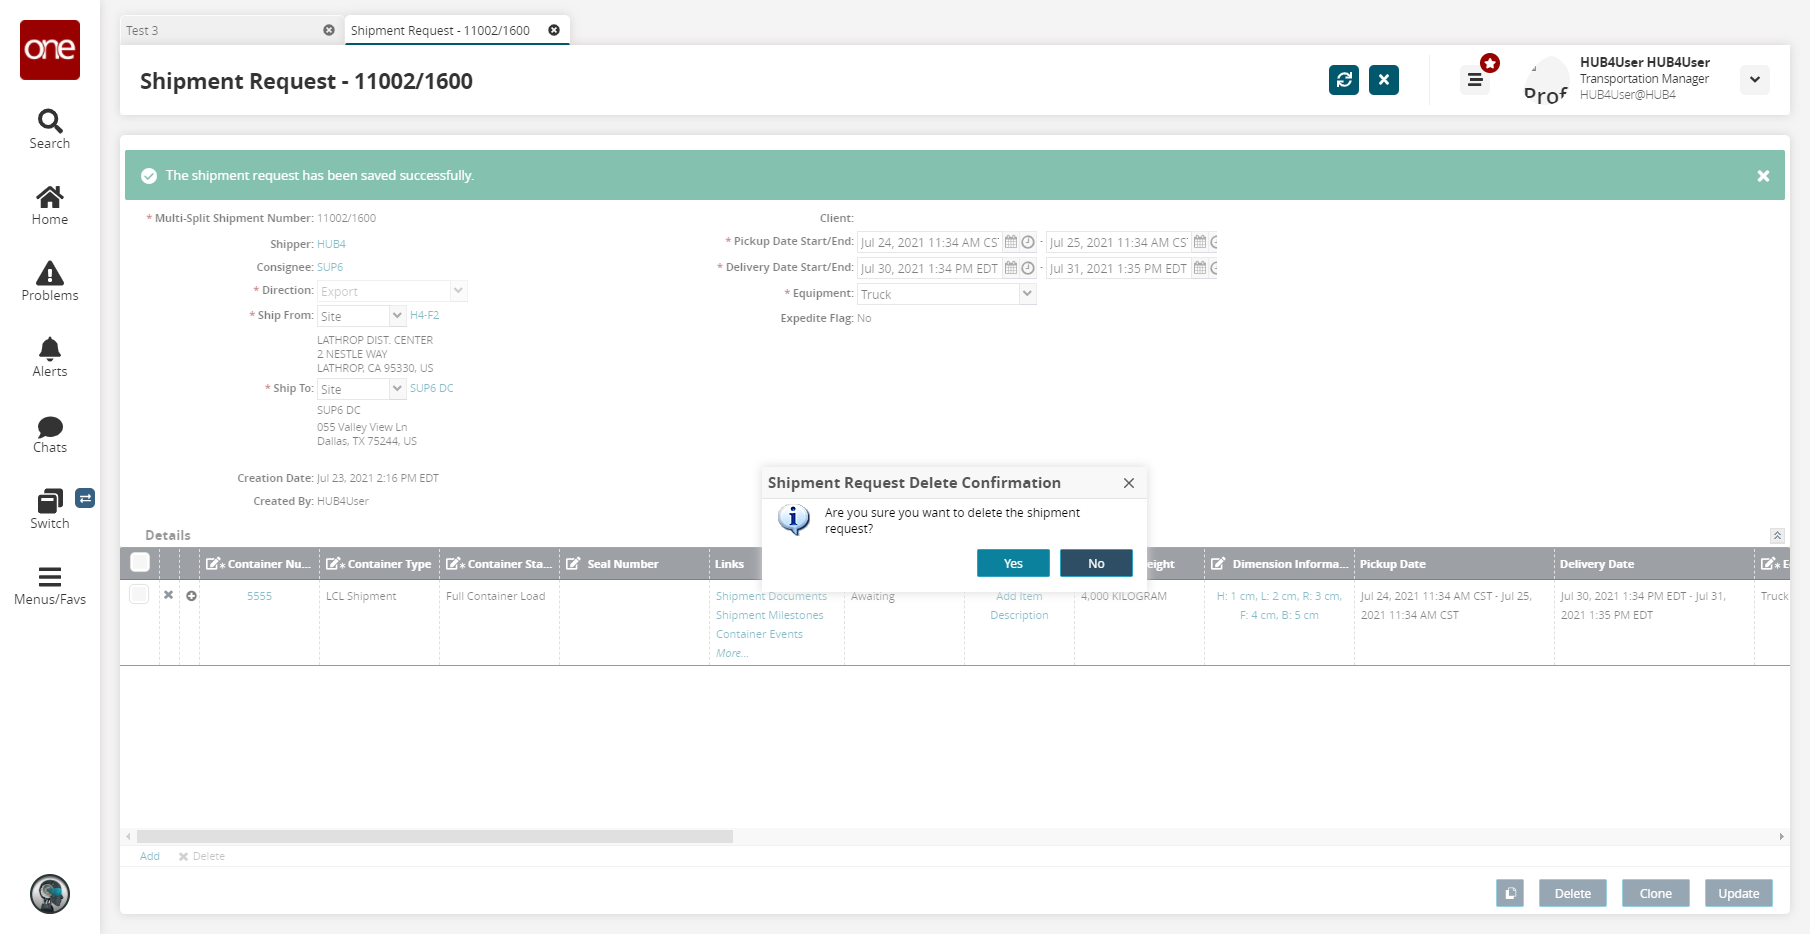
Click Yes to delete.
Select the Clone button to clone a multi-split shipment.
A popup appears.Users can copy entire multi-split shipments to a new multi-split shipment. This copies both header and detail information. For the header information, the newly created shipment will have a new system-generated shipper reference number, a default pickup date set as the one day after the current system date, and the default delivery date set as three days after the current system date. All container detail fields are copied except for the container numbers. During the copy, container numbers and booking numbers can be generated by the system or the user; if by the system, it is possible to apply a prefix to the container numbers and booking numbers.
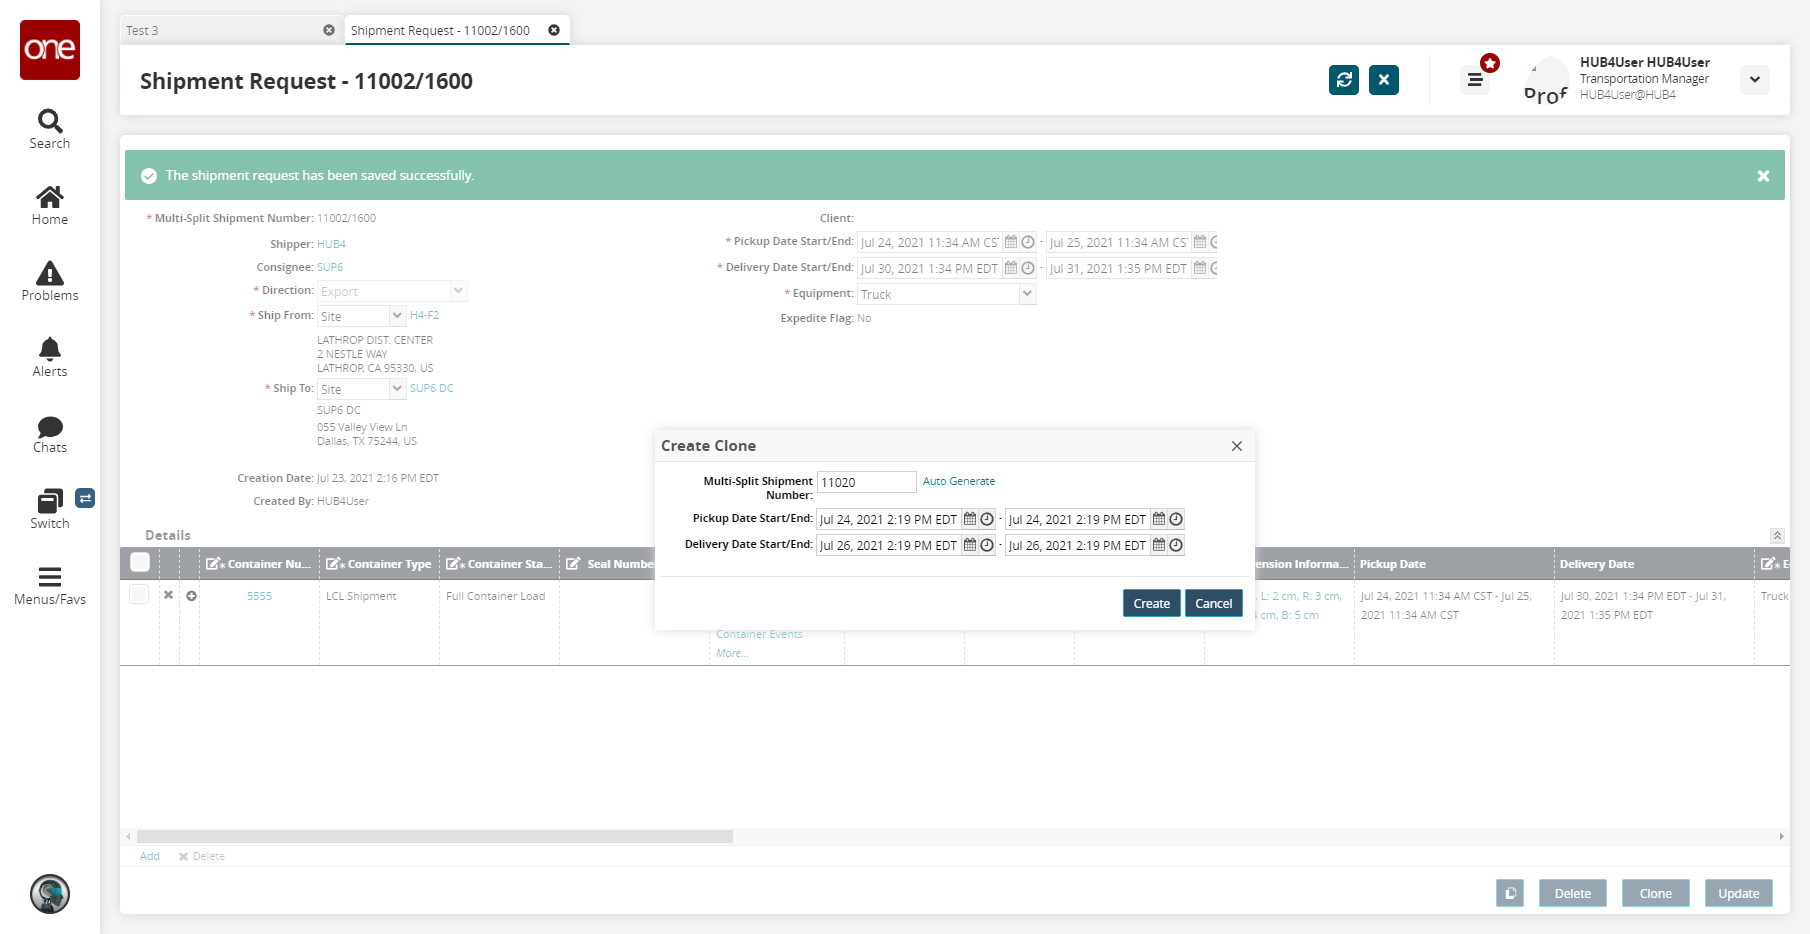
Enter a new Multi-Split Shipment Number or click the Auto-Generate link, and the system will generate a number for you.
Select a pickup and delivery date range.
Click Create.
A new multi-split shipment details screen appears.