Empty Container Support
Users can auto-create empty pickup movements and empty return movements by providing the relevant information for the empty container.
An empty pickup movement is a movement that transports an empty container from its current site to another site.
An empty return movement is a movement that transports an empty container from its current site back to its starting site. For example, if a container is loaded with product and transported from Austin to Dallas, an empty return movement tracks the empty container being transported back to Austin.
At most, there can only be one empty pickup/return movement associated with a single container move. The following components are involved in this feature:
Transportation Policies
Bookings UI and Bookings Details UI
Container View Report
Electronic Data Interchange (EDI)
Pre-Booked Container Option
Assumptions
There can be at most one empty pickup and one empty return movement associated with a container move.
Each container will have its own empty pickup and/or return movement.
Transportation Policies
Complete the following steps to modify the transportation policies:
L og in to the ONE system.
Select Menu/Favs > Transportation > Policies > Transportation Policies.
In the NEO UI, users can click on the Menus/Favs icon on the left sidebar and type in the name of the screen in the menu search bar. For more information, see "Using the Menu Search Bar."
The Transportation Policies screen appears.Check the Auto-Create Empty Pickup Movement checkbox to auto-create an empty pickup movement when the Empty Pickup Location and Empty Pickup Date fields are populated on the Bookings Details UI.
Check the Auto-Create Empty Return Movement checkbox to auto-create an empty return movement when the Empty Return Location and Empty Return Date fields are populated on the Bookings Details UI.

Click Save.
A success message appears.
Bookings UI and Bookings Details UI
The three following actions are available on the Booking Details report. These actions are visible when the booking associated with the containers is in the Assigned state and there are no empty pickup/return movements associated with those containers.
Create Empty Pickup Movement
Create Empty Return Movement
Create Empty Pickup and Return Movement
Complete the following steps to create an empty pickup movement or an empty return movement from the Bookings screen:
L og in to the ONE system.
Select Menus/Favs > Transportation > Bookings.
In the NEO UI, users can click on the Menus/Favs icon on the left sidebar and type in the name of the screen in the menu search bar. For more information, see "Using the Menu Search Bar."
The Bookings screen appears.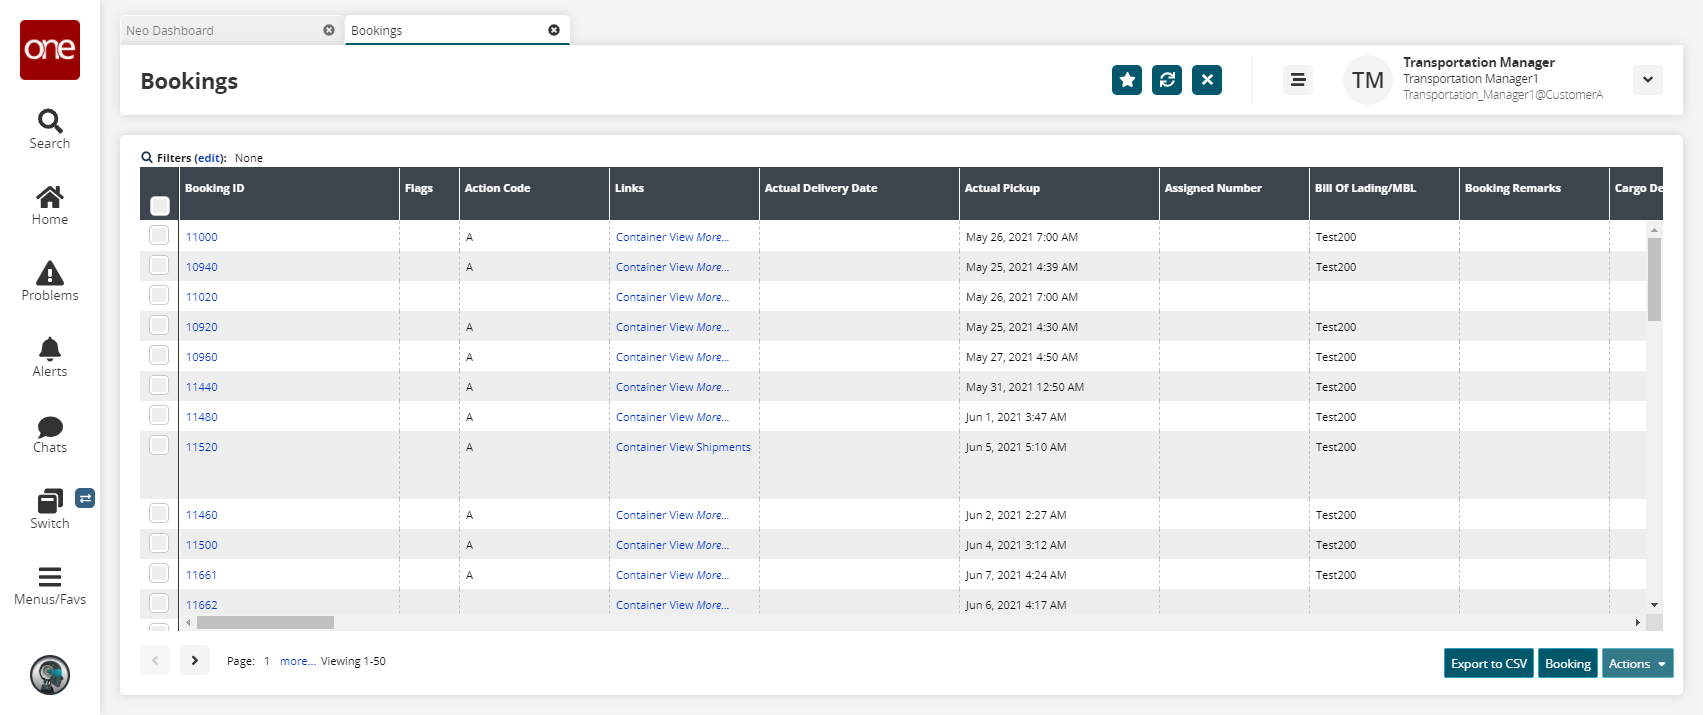
Select a booking and click the Actions button.
From here you can select Create Empty Pickup Movement, Create Empty Return Movement, or Create Empty Pickup and Return Movement. All three actions are setup up similarly. For this example, we will select Create Empty Pickup Movement.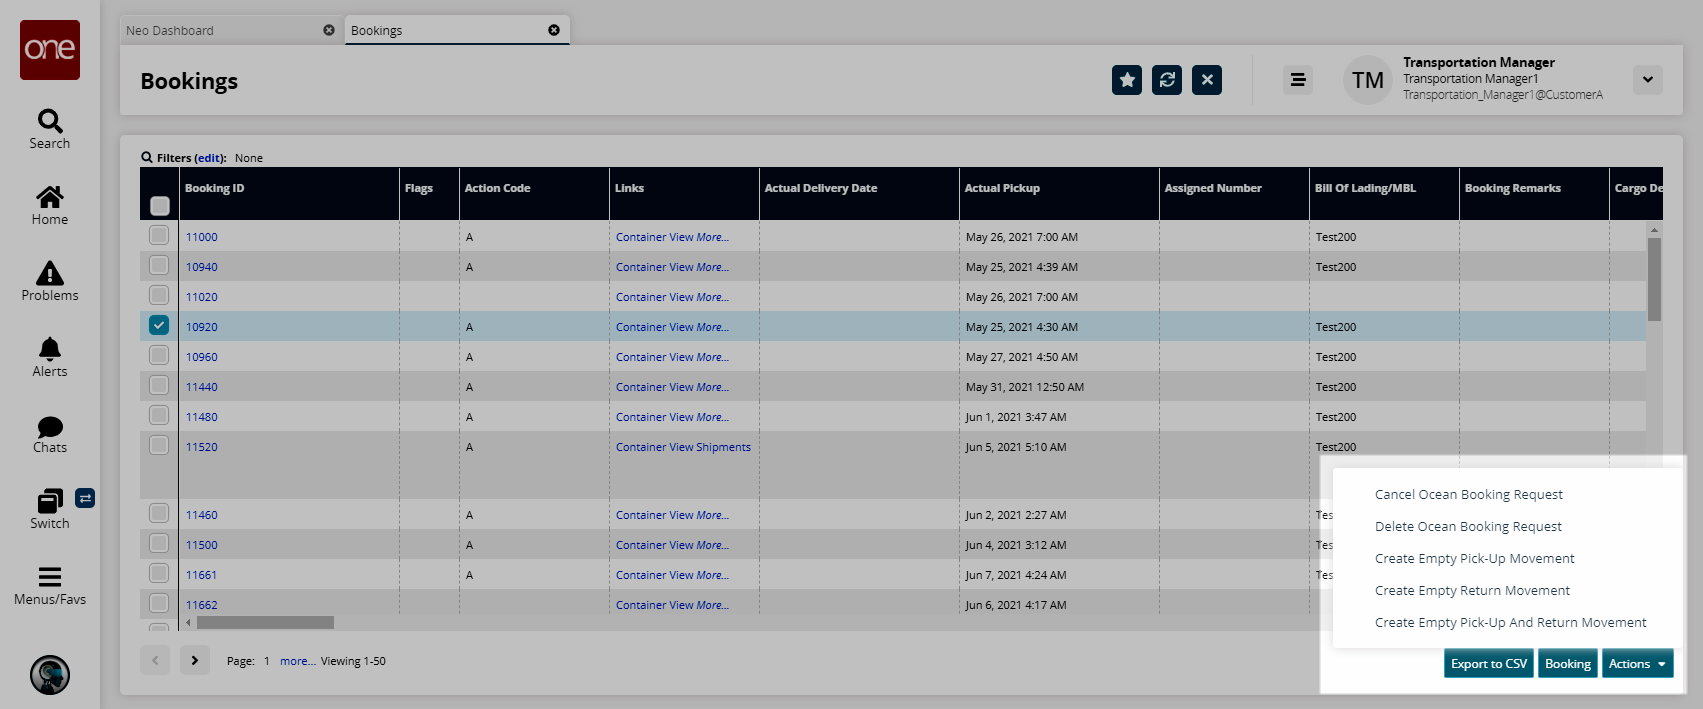
The Create Empty Pickup Movement popup appears.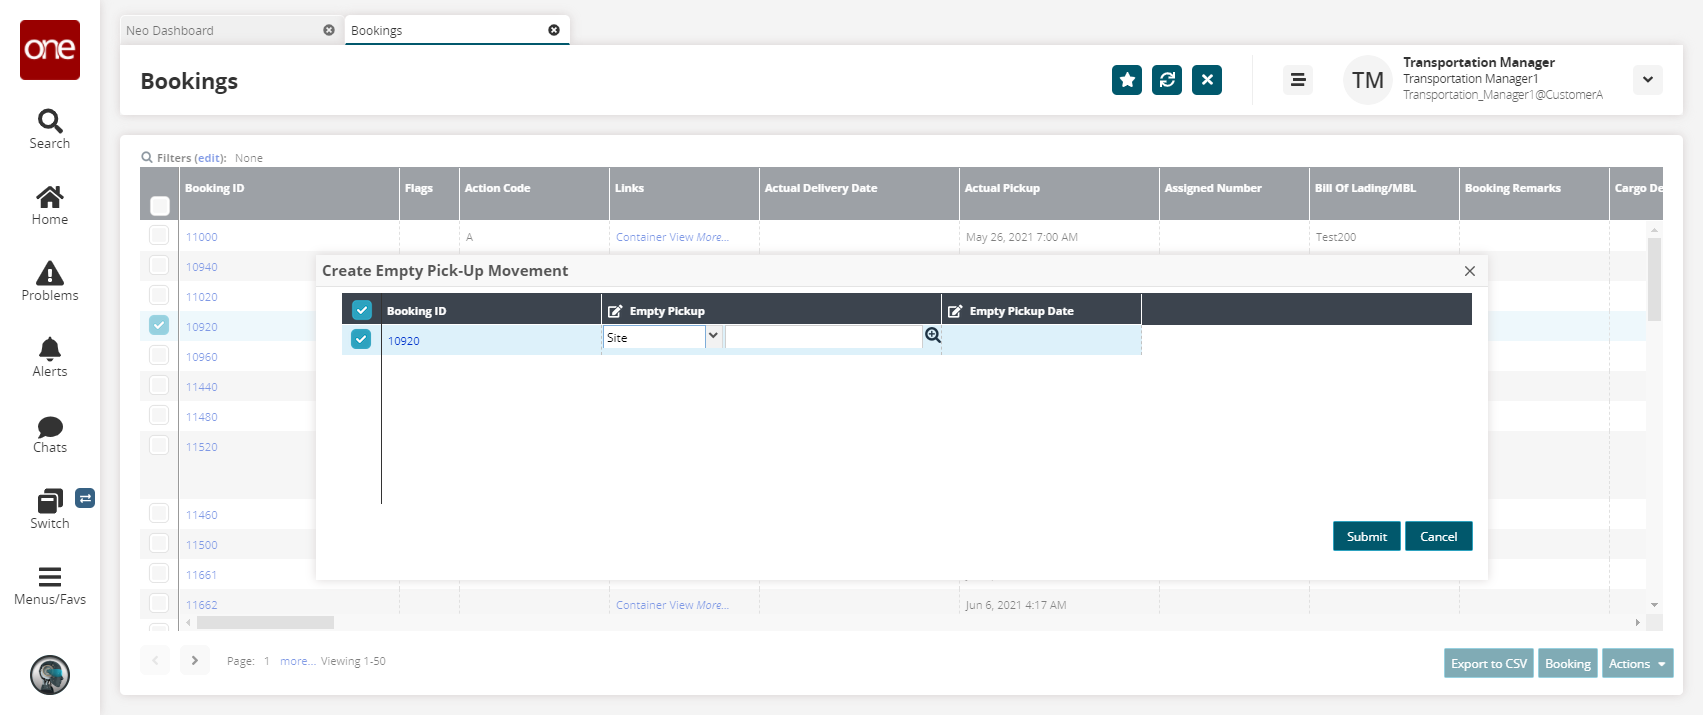
Enter an Empty Pickup Site and an Empty Pickup Date.
Click Submit.
A success message appears.
Complete the following steps to create modify the empty pickup and return fields for a booking:
L og in to the ONE system.
Select Menus/Favs > Transportation > Bookings.
In the NEO UI, users can click on the Menus/Favs icon on the left sidebar and type in the name of the screen in the menu search bar. For more information, see "Using the Menu Search Bar."
The Bookings screen appears.
Click a Booking ID link.
The Booking Details screen appears.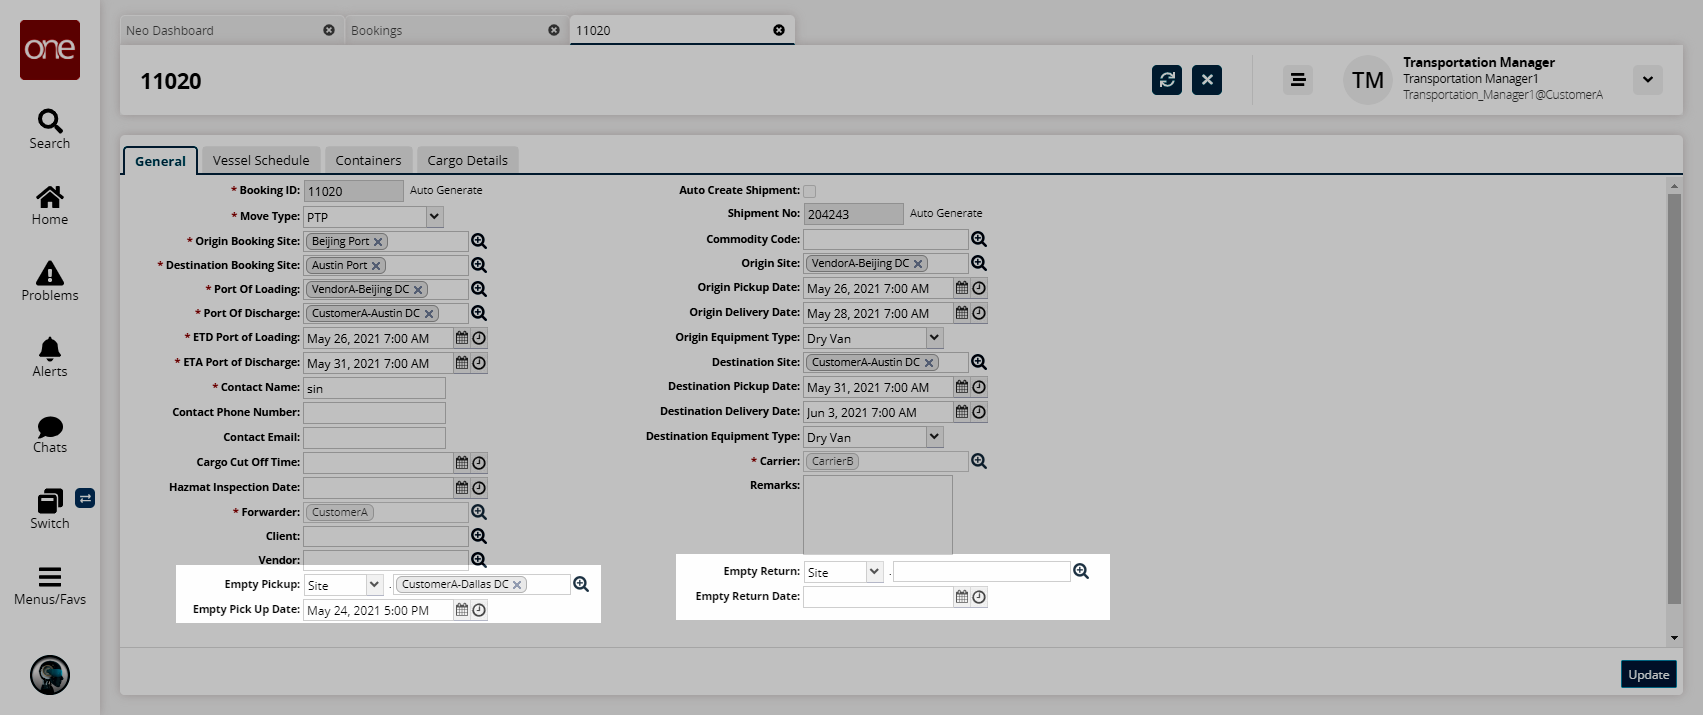
In the Empty Pickup field, select either a site or address using the picker tool.
In the Empty Pickup Date field, select a date and time using the calendar and clock icons.
In the Empty Return field, select a date and time using the calendar and clock icons.
In the Empty Return Date field, select a date and time using the calendar and clock icons.
Click Update.
A success message appears.
Container View Report
The three following actions are available on the Container View report. These actions are visible for containers in the Assigned state with no empty pickup/return movements associated with those containers.
Create Empty Pickup Movement
Create Empty Return Movement
Create Empty Pickup and Return Movement
Complete the following steps to create an empty pickup movement or an empty return movement from the Container View Report:
L og in to the ONE system.
Select Menus/Favs > Transportation > Container View.
In the NEO UI, users can click on the Menus/Favs icon on the left sidebar and type in the name of the screen in the menu search bar. For more information, see "Using the Menu Search Bar."
The Container View screen appears.
Use the Filters (edit) link to view only Assigned state containers.
Select a container and click the Actions button.
From here you can select Create Empty Pickup Movement, Create Empty Return Movement, or Create Empty Pickup and Return Movement. All three actions are setup up similarly. For this example, we will select Create Empty Pickup Movement.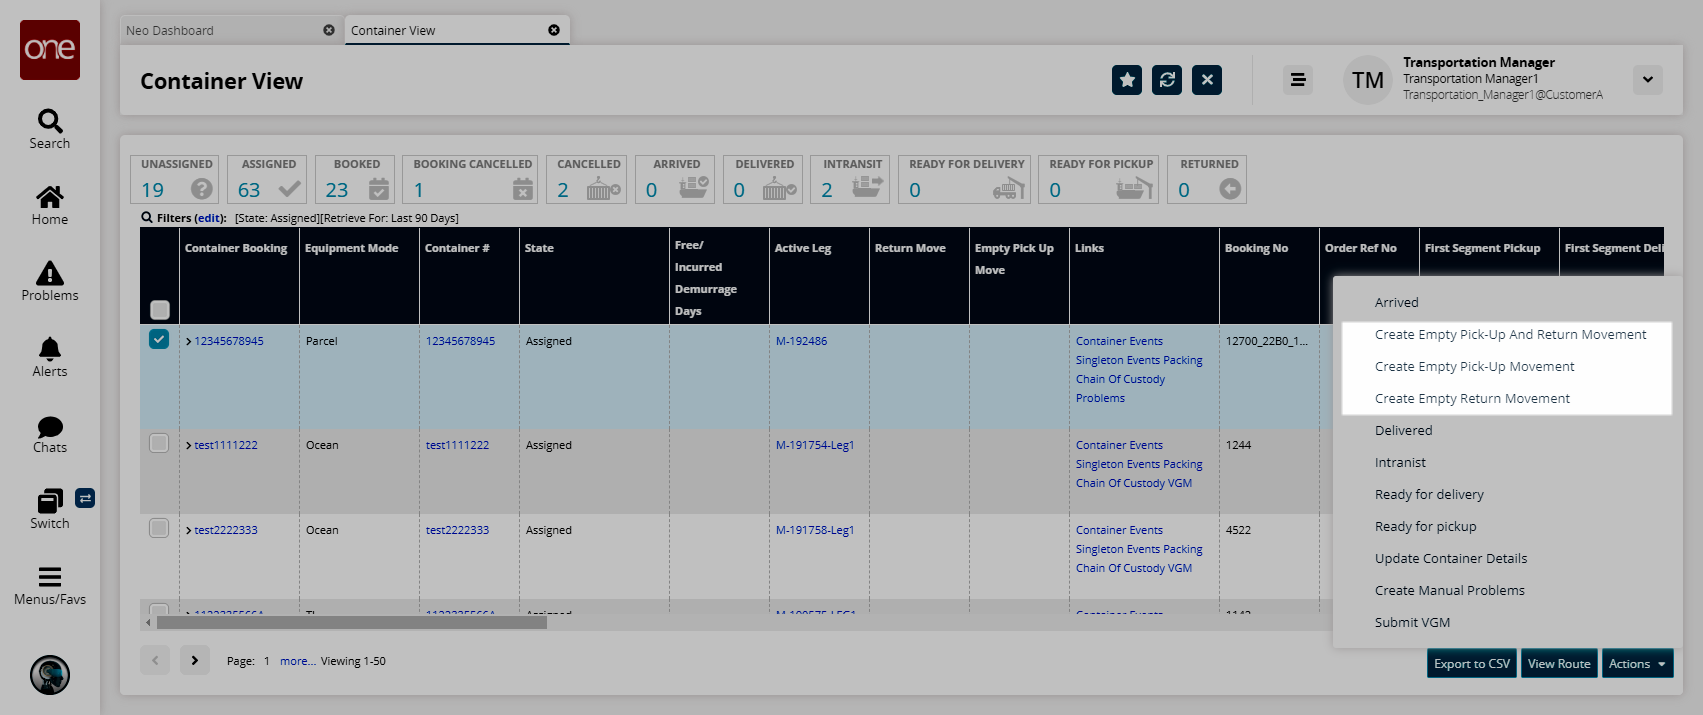
The Empty Pickup Movement popup appears.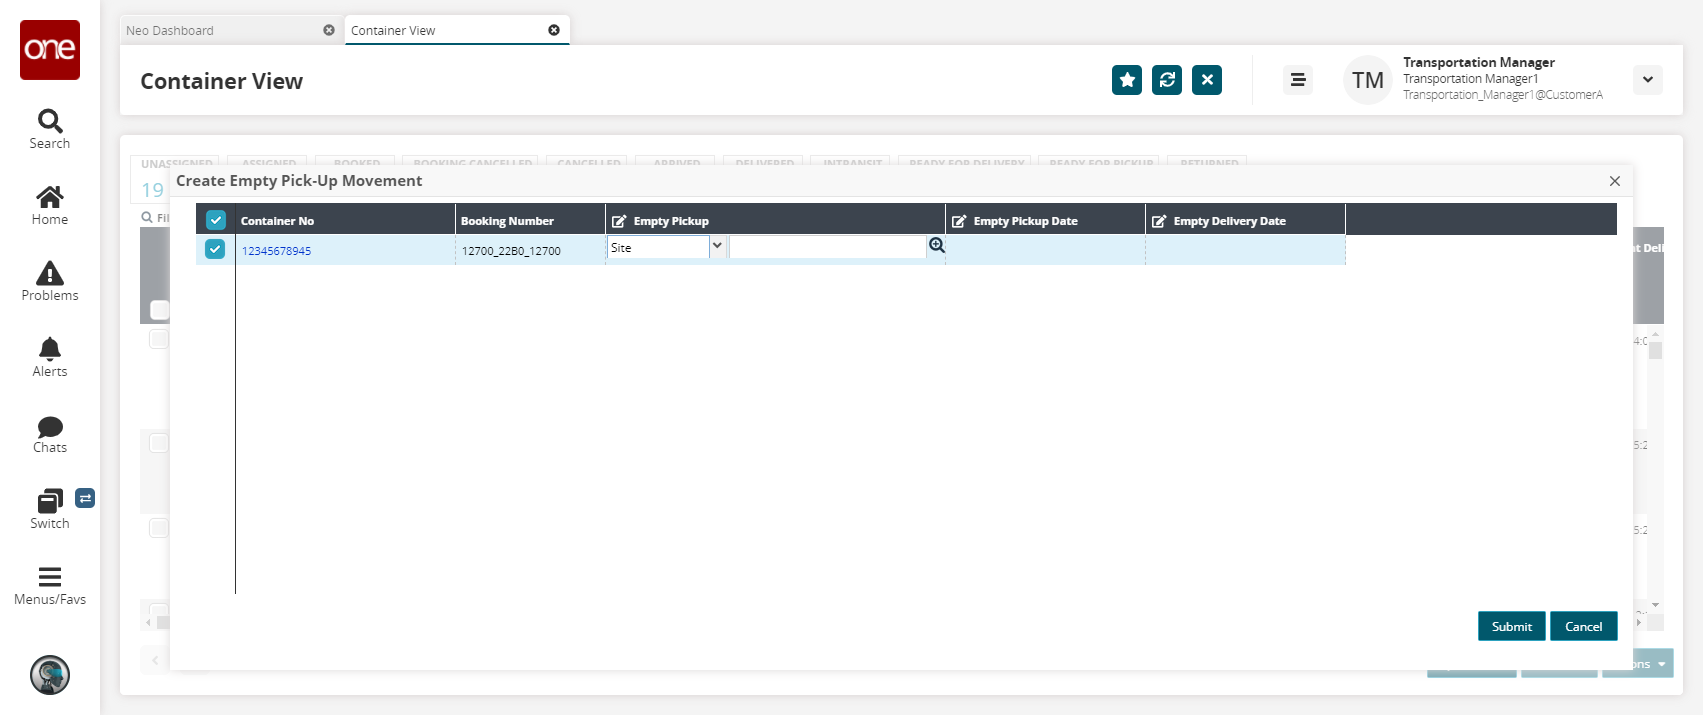
Enter an Empty Pickup Site, Empty Pickup Date, and an Empty Delivery Date.
Click Submit.
A success message appears.
Electronic Data Interchange (EDI)
If a carrier has an issue subscription for EDI 300, when a booking request is created, the system will generate an EDI 300 outbound message. Details about the empty container, such as the delivery address, are visible under the N1 loop CL segment of the message.
Pre-Booked Container Option
Under the Assign Pre-Booked Container action on the Movements UI, the Is Empty Pickup flag can be used to assign an existing movement as an empty pickup movement. When a booking request is accepted by a carrier, containers are created from the booking request. The shipper can assign the container to a movement or shipment using this action.
Complete the following steps to assign a pre-booked container to a movement:
L og in to the ONE system.
Select Menu/Favs > Transportation > Search Movements.
In the NEO UI, users can click on the Menus/Favs icon on the left sidebar and type in the name of the screen in the menu search bar. For more information, see "Using the Menu Search Bar."
The Search Movementsscreen appears.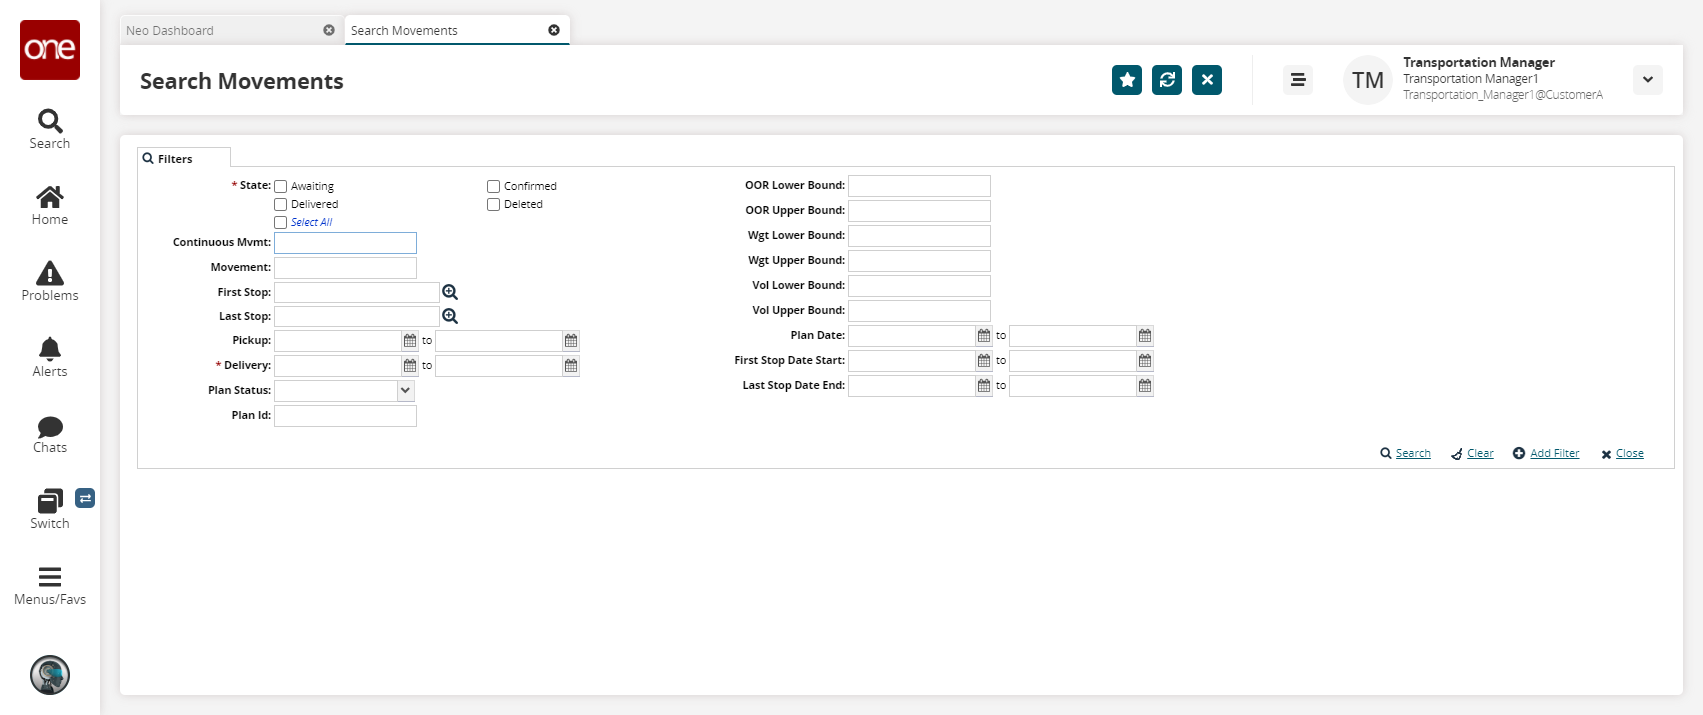
Fill in the filters as desired and click the Search link.
See the "Searching Movements" section in the Online Help for more information.
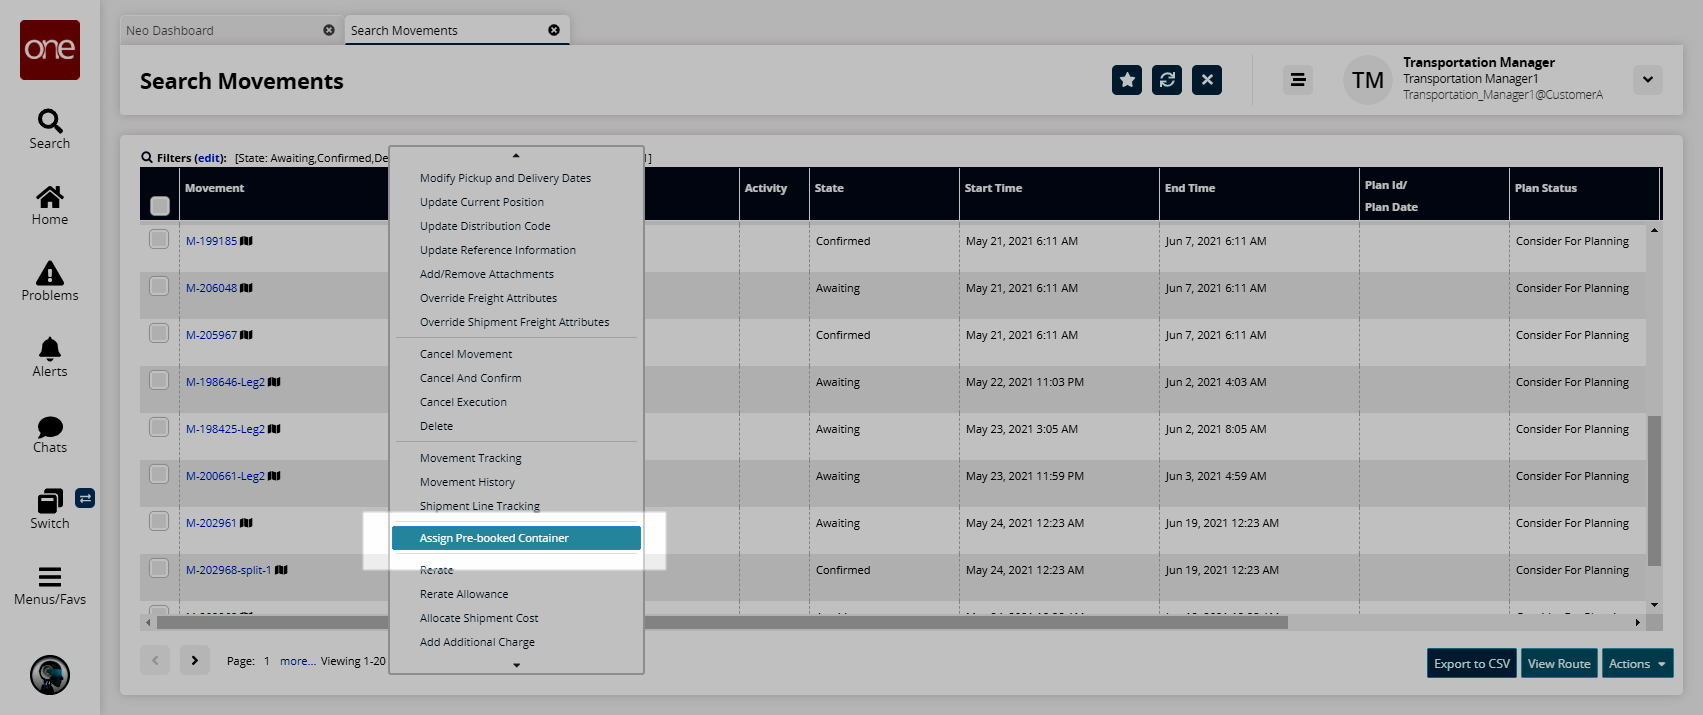
The search results appear.Click the small, triangular icon for a movement.
A context-sensitive menu displays.Select the Assign Pre-booked Container option.
A popup appears.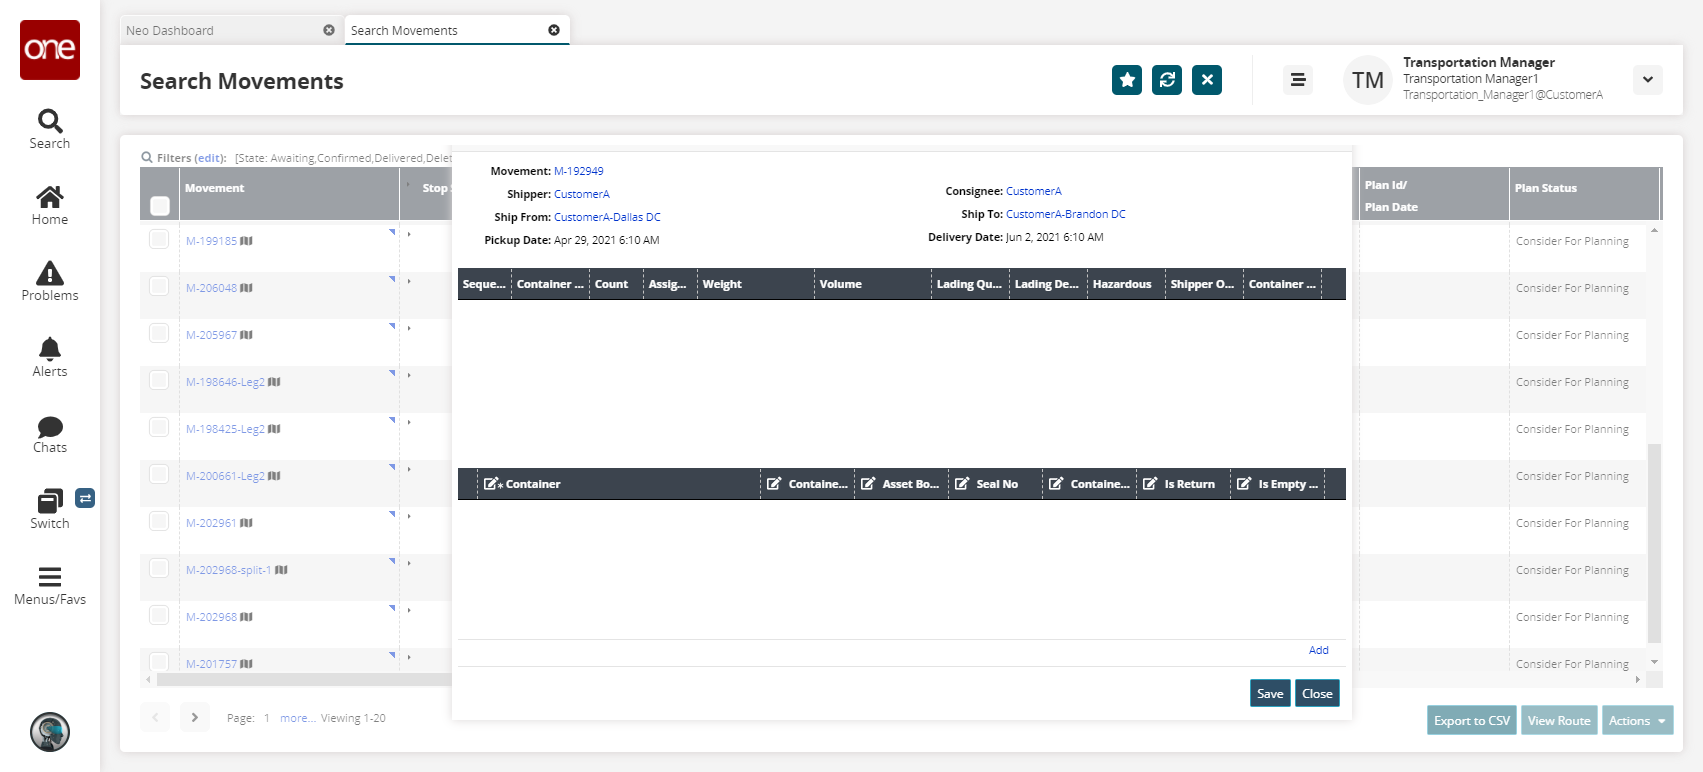
Click the Add link.
A new row appears.Select the Is Empty Pickup option to specify this container is an empty pickup.
See the "Linking Containers to a Shipment or Movement" section in the Online Help for more information on this screen.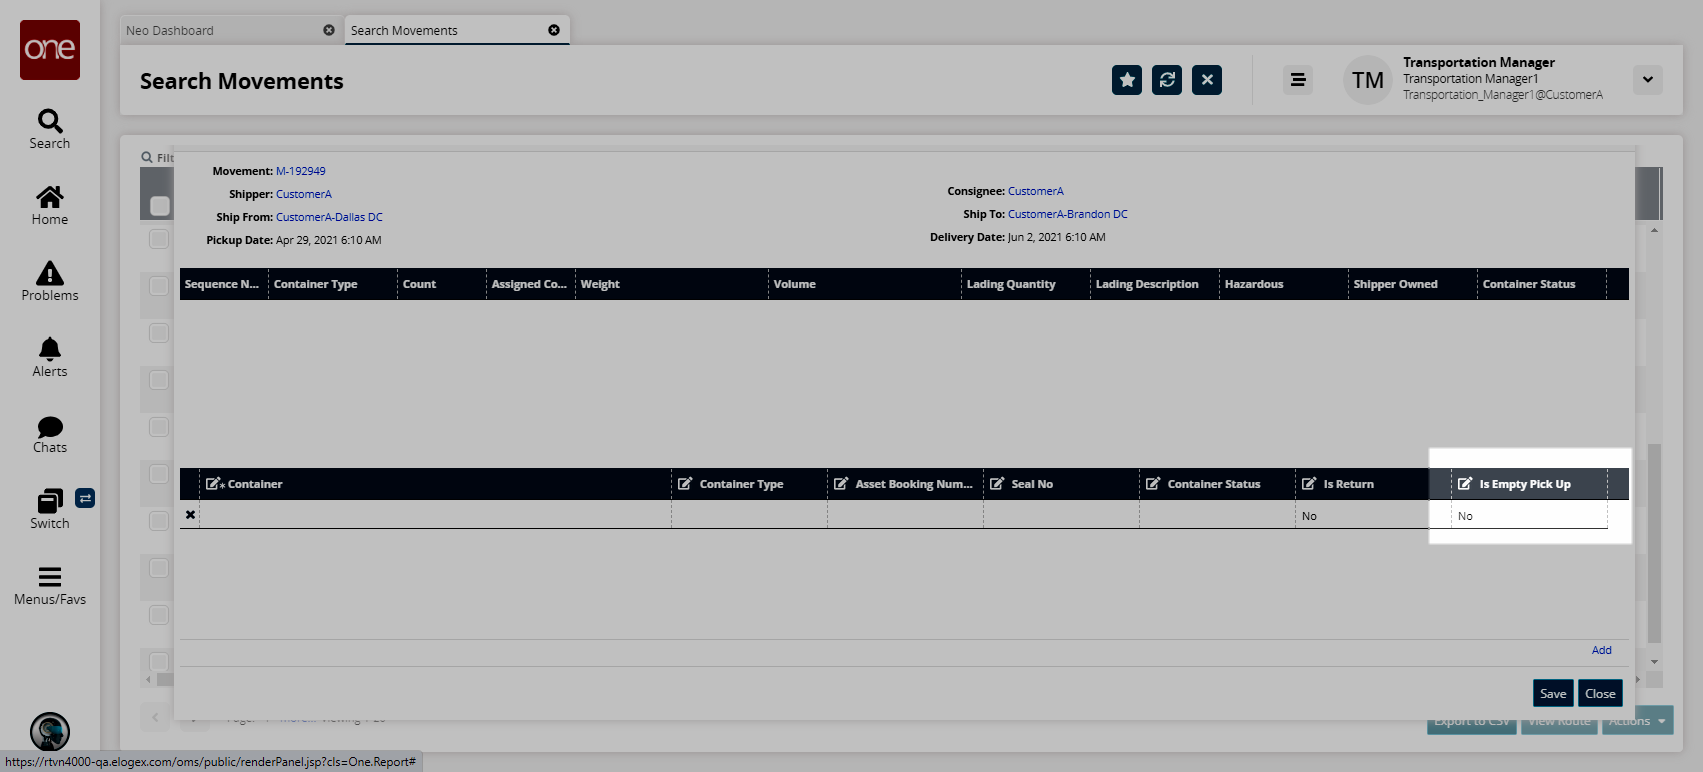
Click Save.
A success message appears.