Container Fan-Out and Breakbulking
The Container Fan-Out action supports containerized breakbulk scenarios. The Container Fan-Out action supports both breaking a multi-container shipment on the last leg or a single container of breakbulk cargo. The Container Fan-Out action splits the container(s) into multiple shipments, using a user-specified quantity, that can then be placed in separate vehicles. A single container is split to vehicles without the need for containers.
Complete the following steps to use the Container Fan-Out action:
L og in to the ONE system.
Create a shipment. See the "Creating Shipments using a Standard Template" section of the Online Help for more information.
Select Menu/Favs > Transportation > Search Shipments.
In the NEO UI, users can click on the Menus/Favs icon on the left sidebar and type in the name of the screen in the menu search bar. For more information, see "Using the Menu Search Bar."
The Search Shipments screen appears.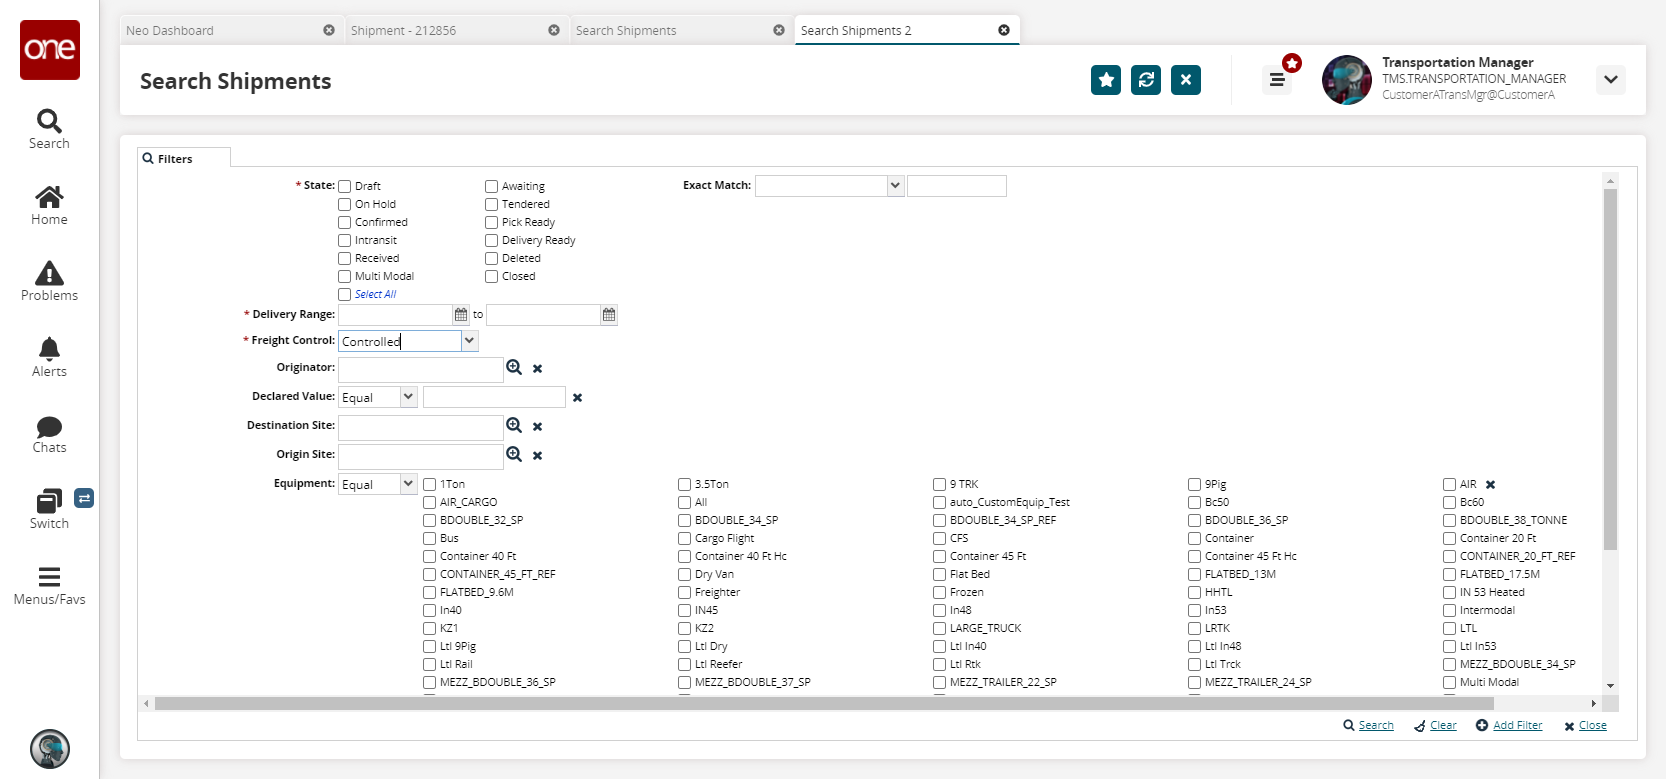
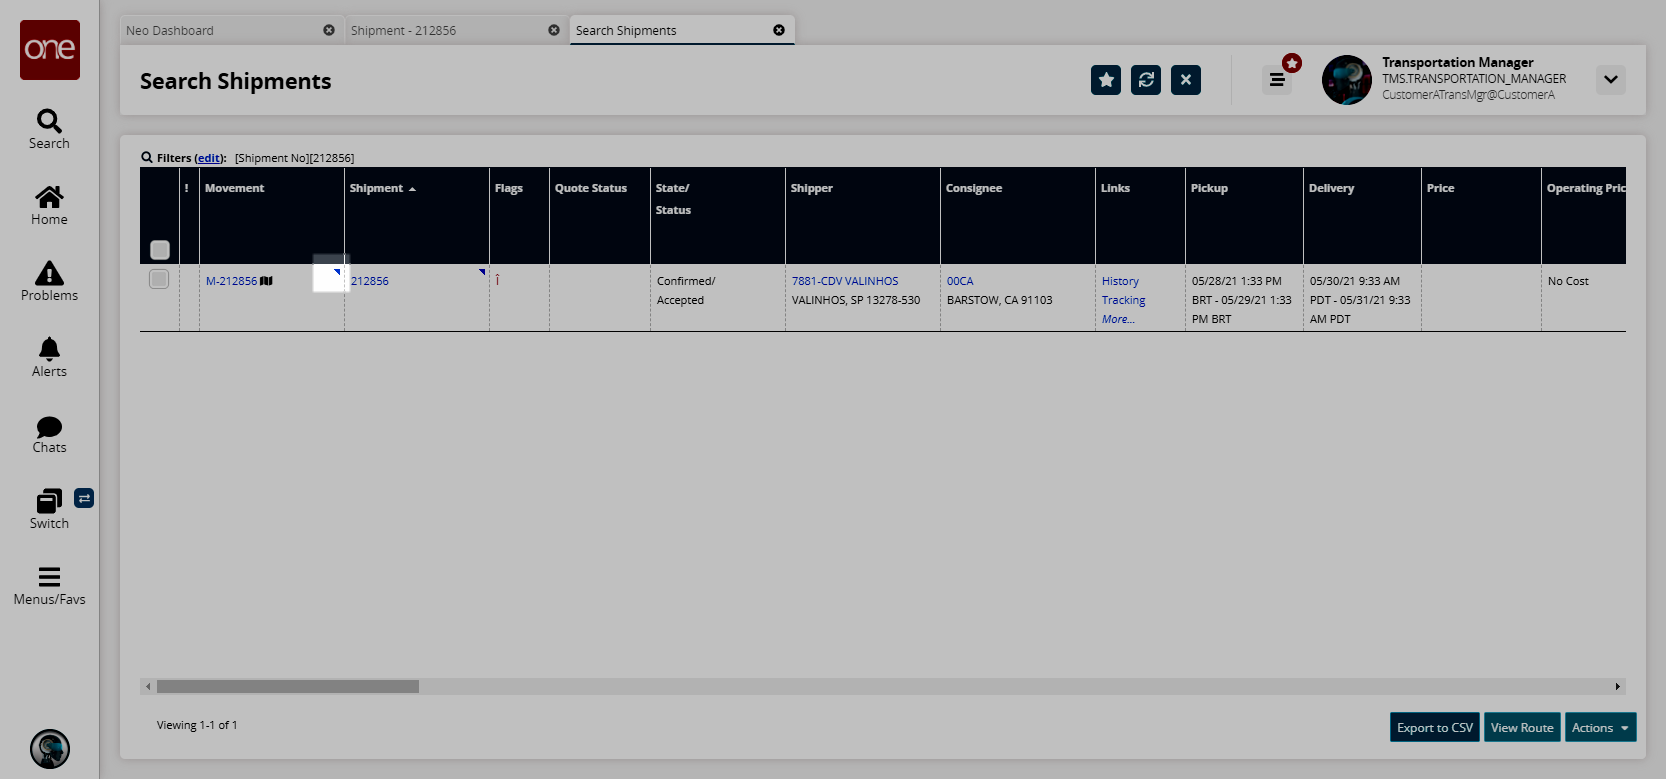
Find your shipment. See the "Searching Shipments" section of the Online Help for more information.
Click the small, triangular button for the movement your newly created shipment is a part of.
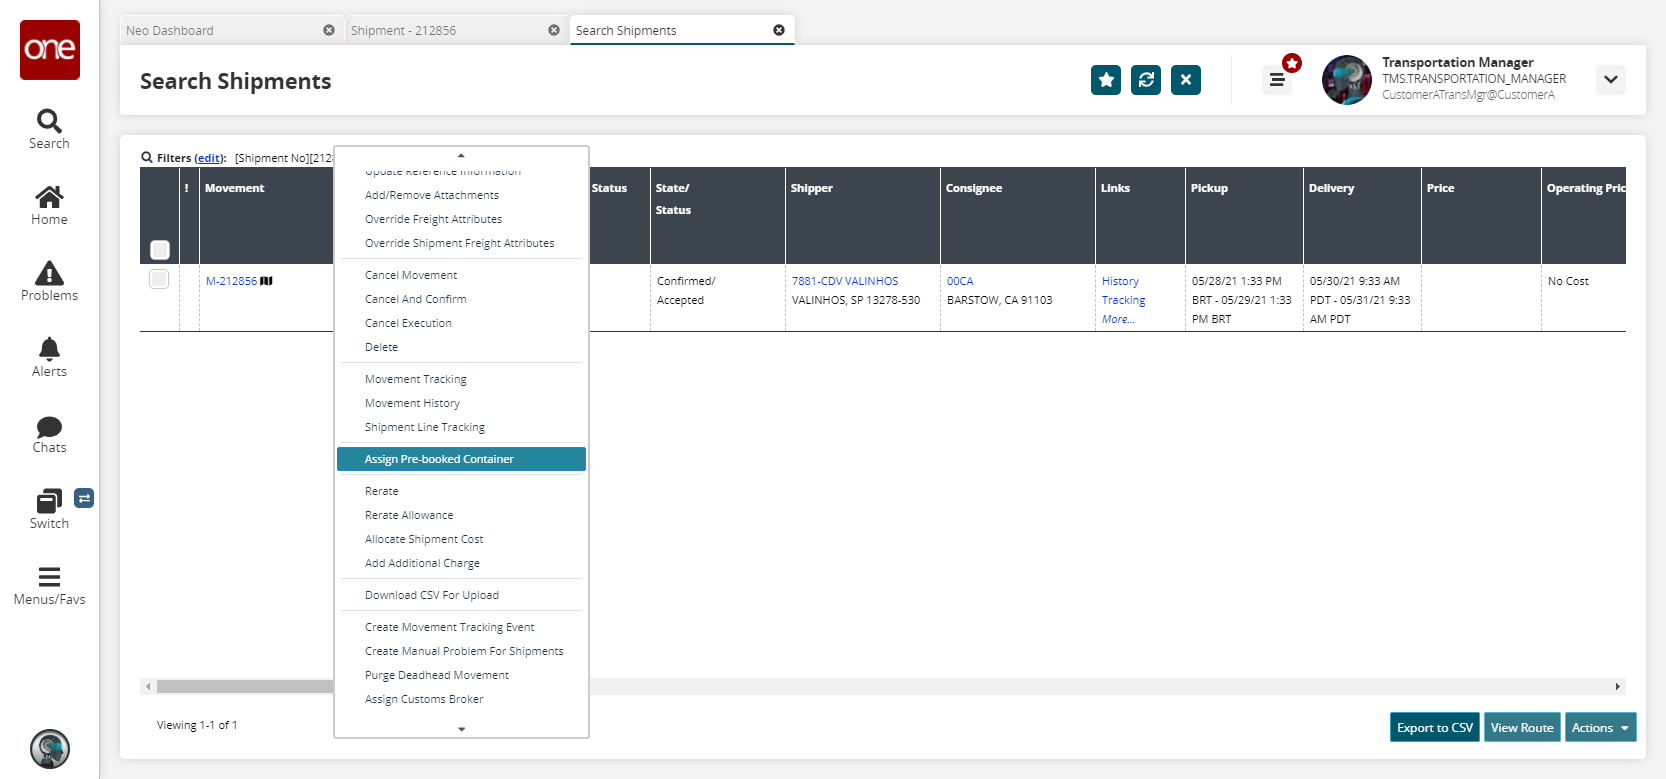
The movement actions menu appears.Select Assign Pre-booked Container.
The Assign Pre-booked Container popup appears.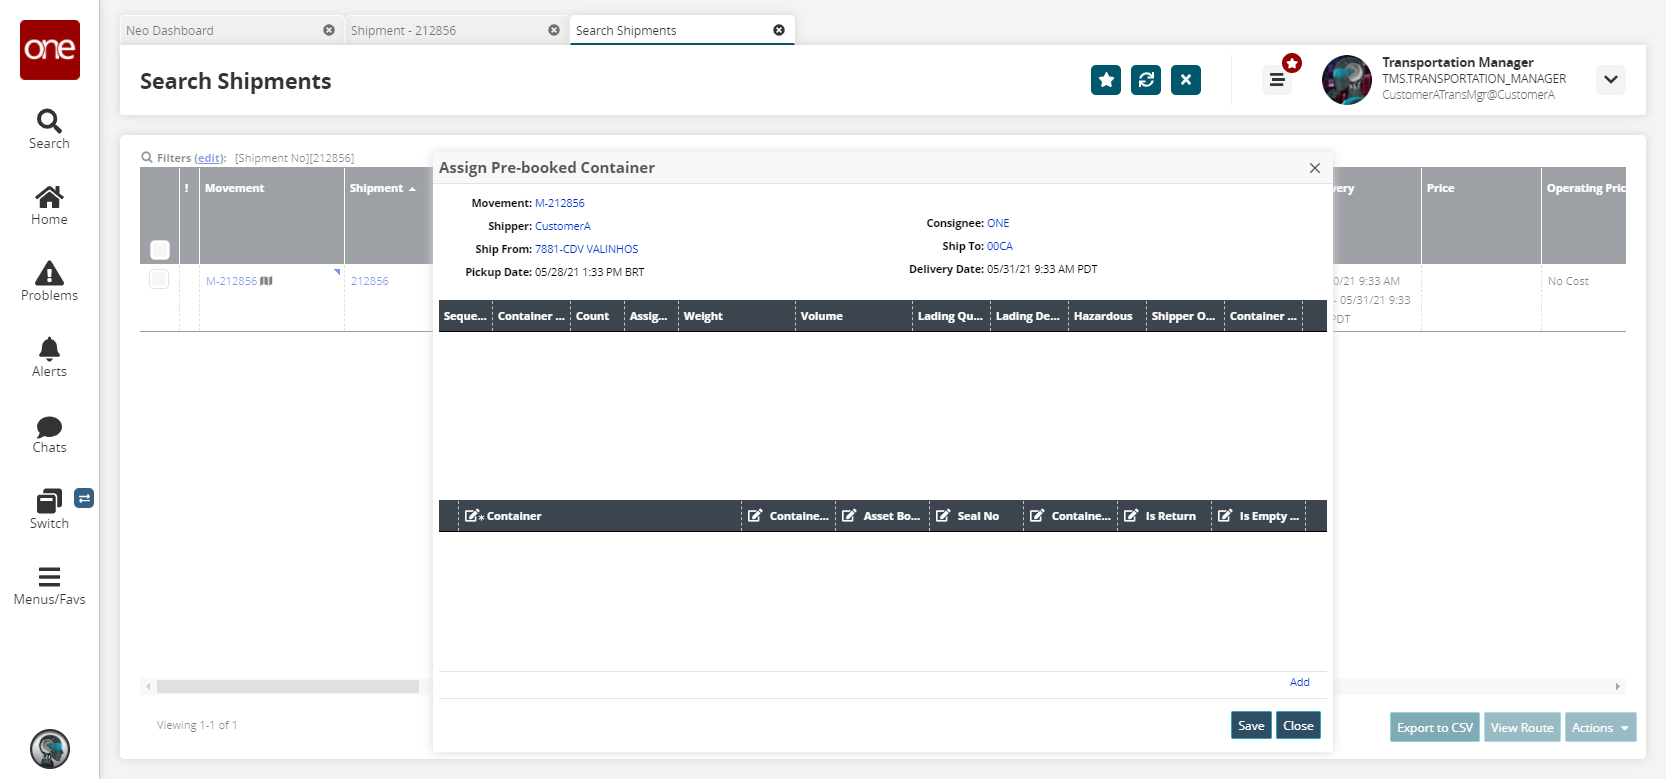
Click the Add link.
A new row appears.Click in the Container field and use the picker tool to select a container.
The Container Bookings popup displays.Select a container.
Click the OK button.
The container populates on the Assign Pre-booked Container popup.Click the Save button.
A success message appears.Click Close and Refresh.
The Search Shipments screen refreshes.Click the small, triangular button for the shipment.
The shipment actions menu appears.Select Container Fan-Out.
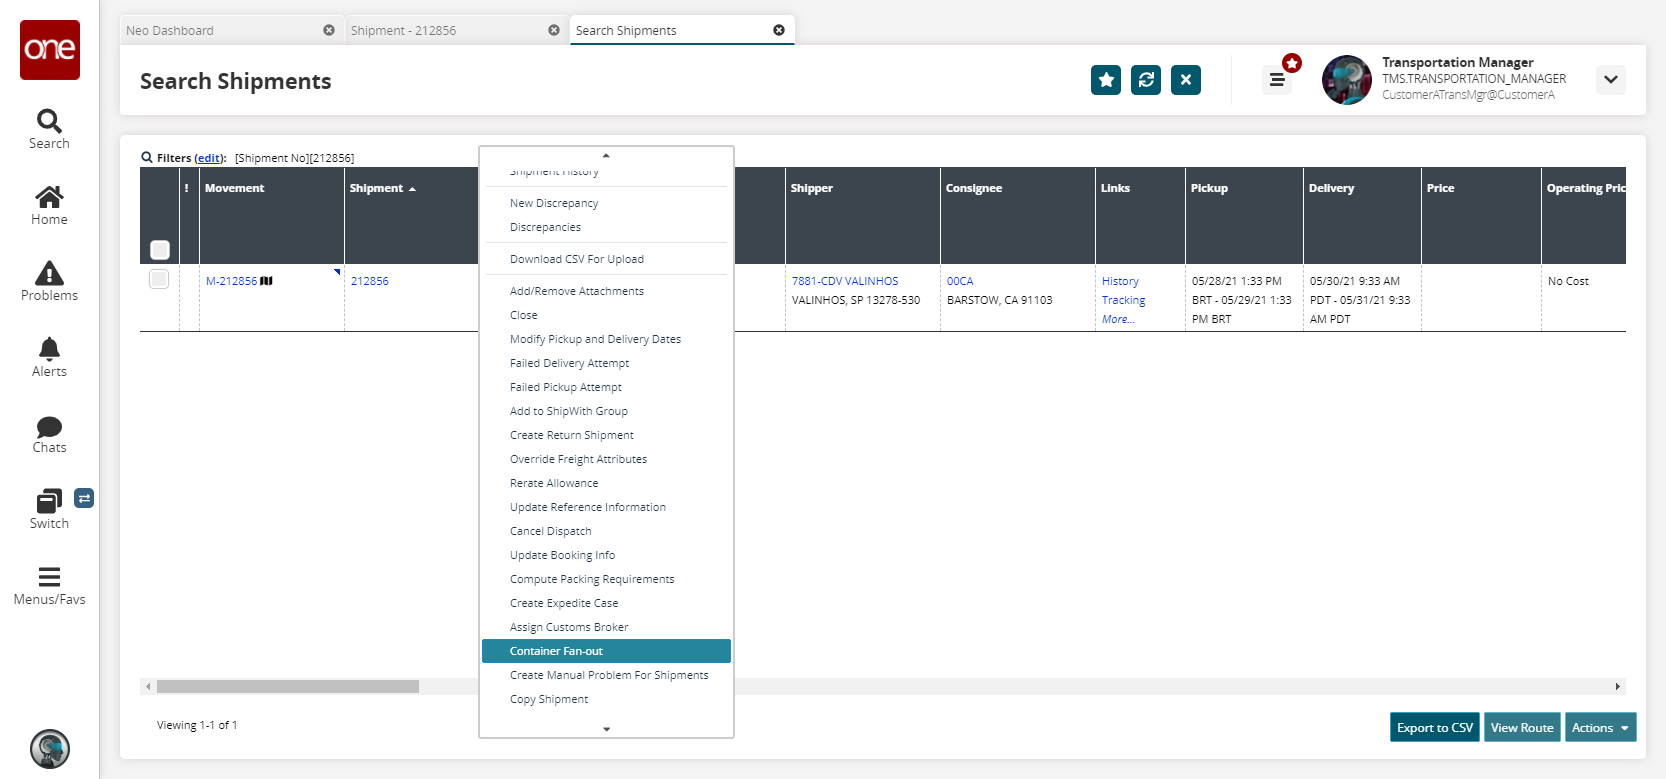
The Container Fan-Out popup appears.
Click the Add link.
A new line appears in the table.Click the Modify Items link.
The Select Items popup appears.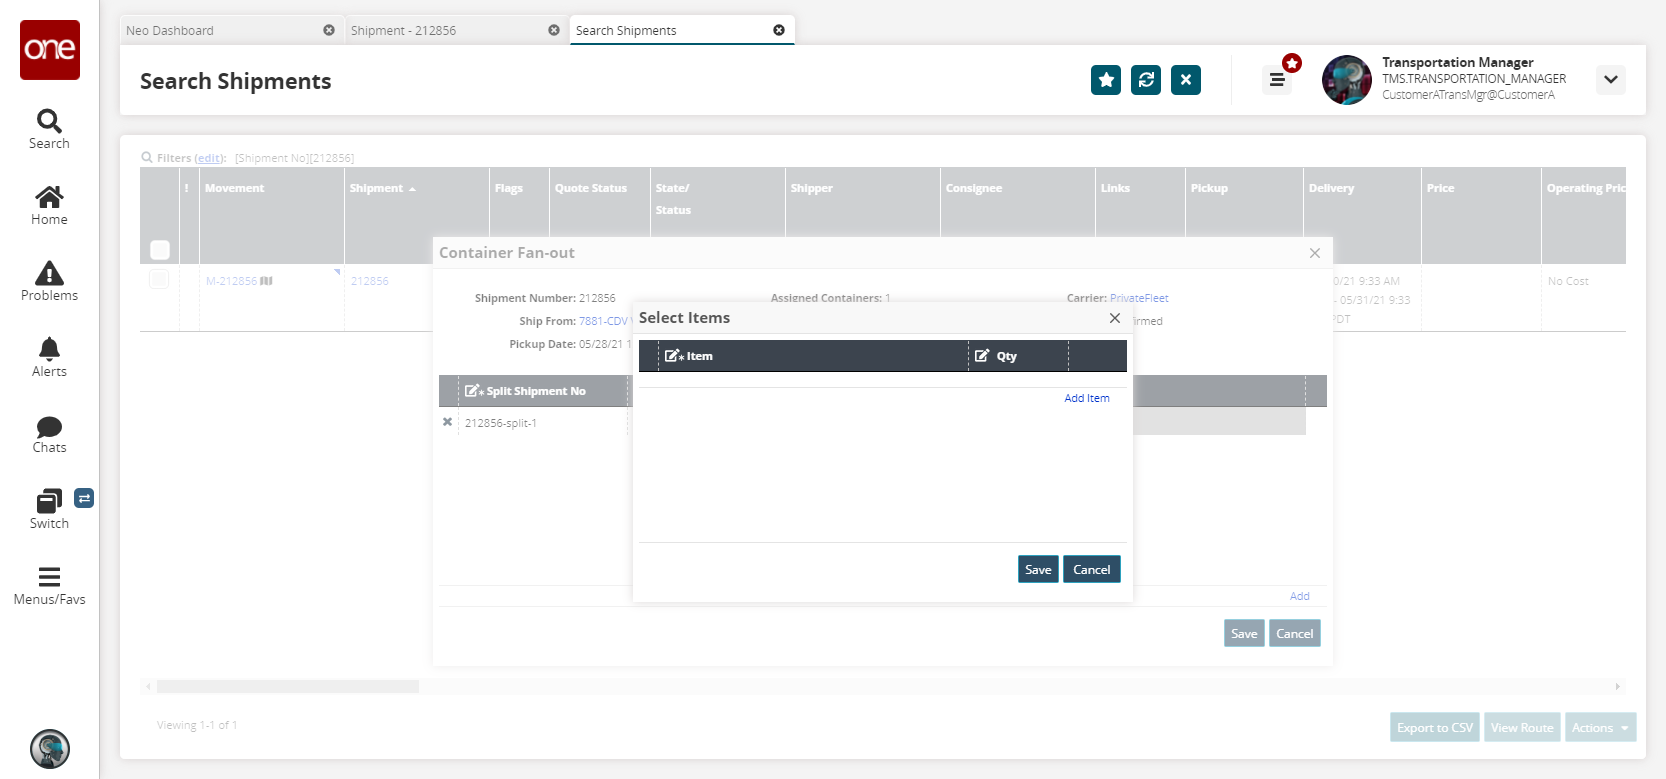
Click the Add Item link.
A new line appears in the table.Select an Item using the picker tool.
If desired, modify the Quantity.
Click Save.
The Select Item popup closes.Click Save again to close the Container Fan-Out popup.
A success popup appears.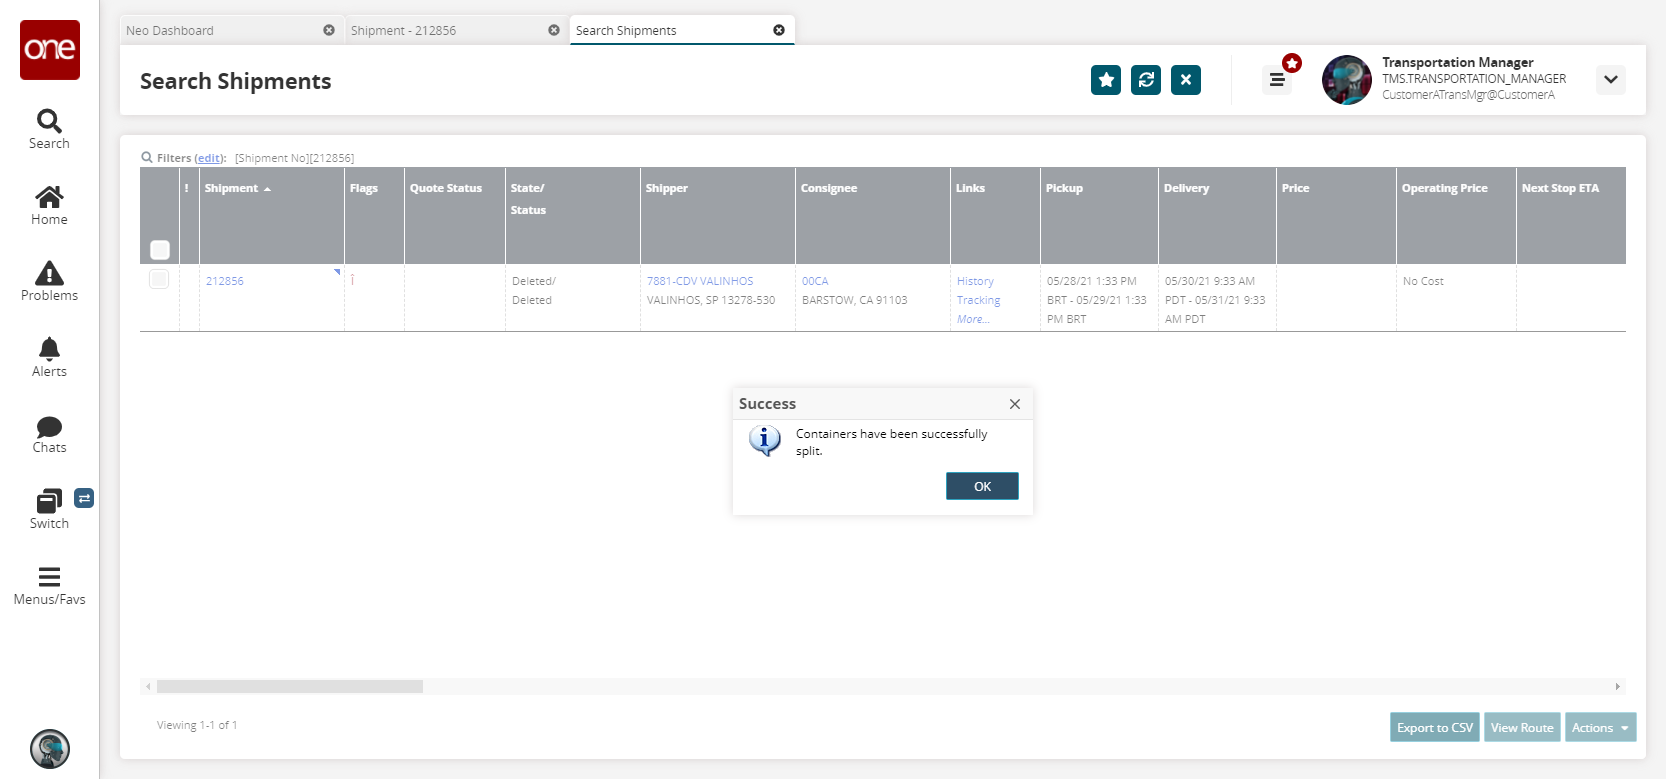
Click the OK button.
The shipment information updates on the Search Shipments screen.