NEO Prescriptions for Assets
This topic describes how users can access NEO prescriptions for assets and resolve the problems related to them.
Complete the following steps to access NEO prescriptions for assets:
Log in to the ONE system with the Asset Admin or Asset Manager role.
The Asset Dashboard appears.
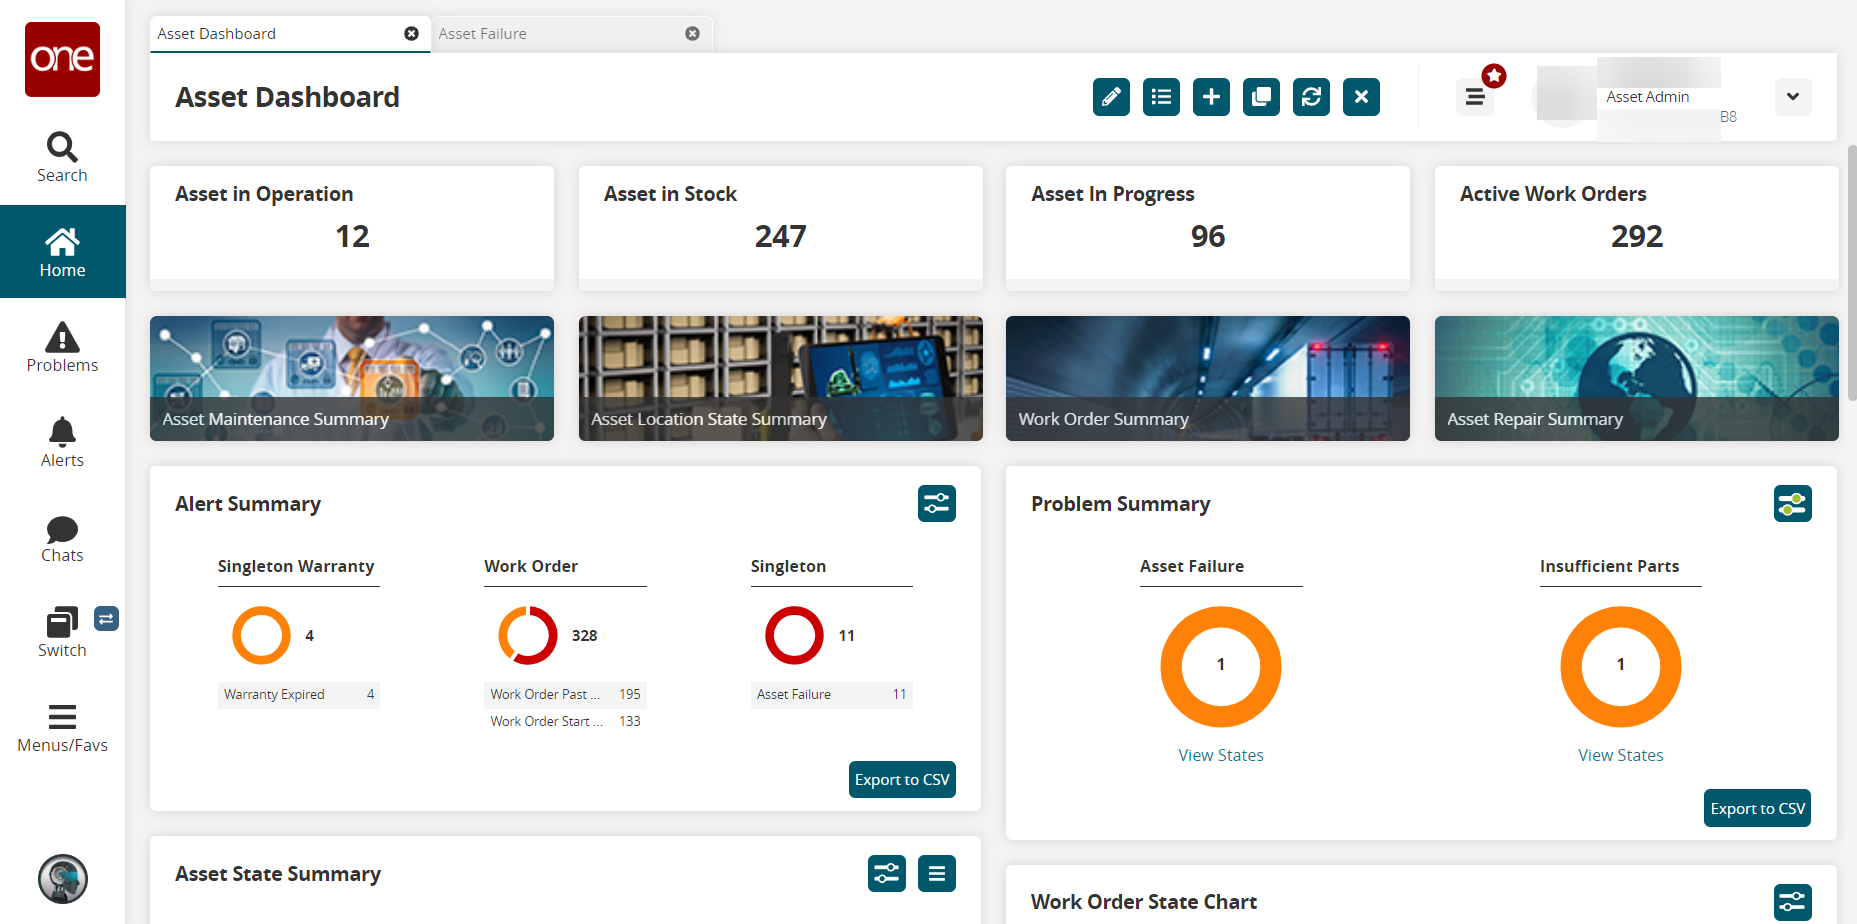
On the Problem Summary widget, click on the Filter Options (
 ) button.
The Problem Summary filter options popup window appears.
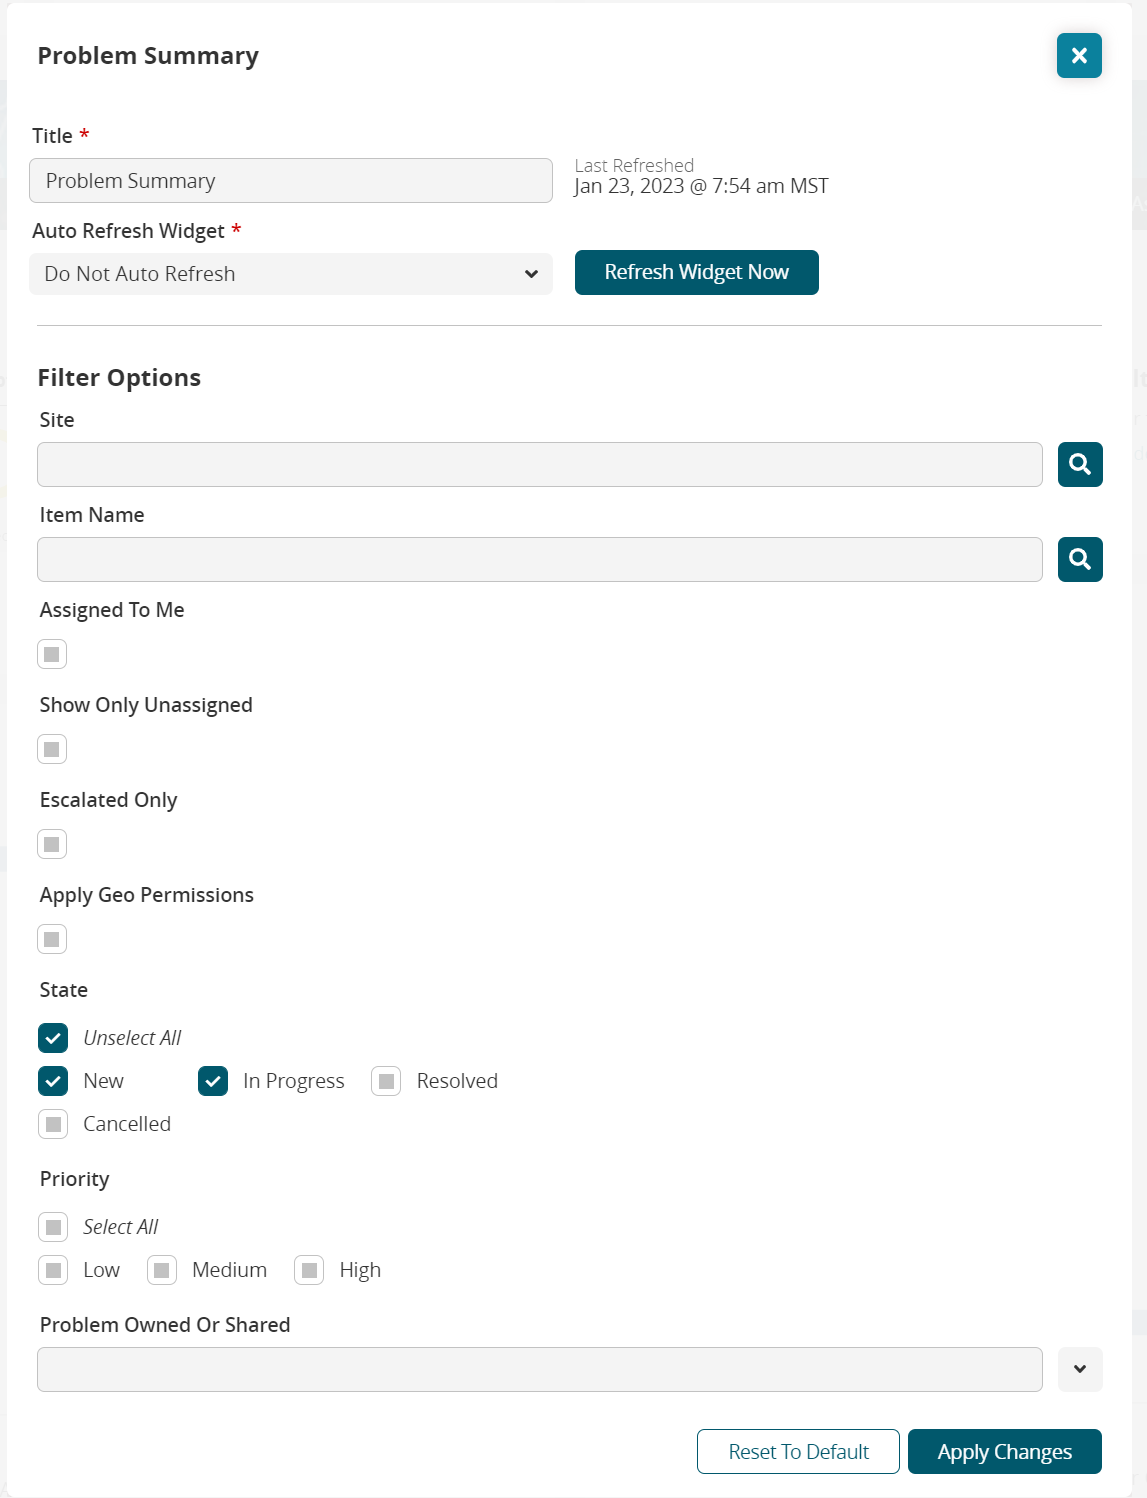
Fill out the following fields. Fields with an asterisk ( * ) are required.
Field
Description
* Title
Enter a title. By default, it is Problem Summary.
Auto Refresh Widget *
Select an option from the dropdown list. By default, it is Do Not Auto Refresh.
Refresh Widget Now
Click the button to refresh the widget immediately.
Filter Options
Site
Enter a site name or select a site with the picker tool.
Item Name
Enter an item name or select an item with the picker tool.
Assigned To Me
Select the checkbox to show items assigned to you.
Show Only Unassigned
Select the checkbox to display only assigned problems.
Escalated Only
Select the checkbox to display only escalated problems.
Apply Geo Permissions
Select the checkbox to apply geo permissions to problems.
State
Select multiple checkboxes or a single checkbox to select or deselect one, more, or all states.
Priority
Select multiple checkboxes or a single checkbox to select or deselect one, more, or all priorities.
Problem Owned Or Shared
Select a value from the dropdown menu.
Click the Apply Changes button to apply the filters selected to the problem summary widget.
Click Reset To Default to reset the applied changes to the problem summary widget.
Click the x icon at the top right of the Problem Summary popup window to close the window and return to the dashboard.
Click any problem icon listed under Problem Summary widget on the Asset Dashboard.
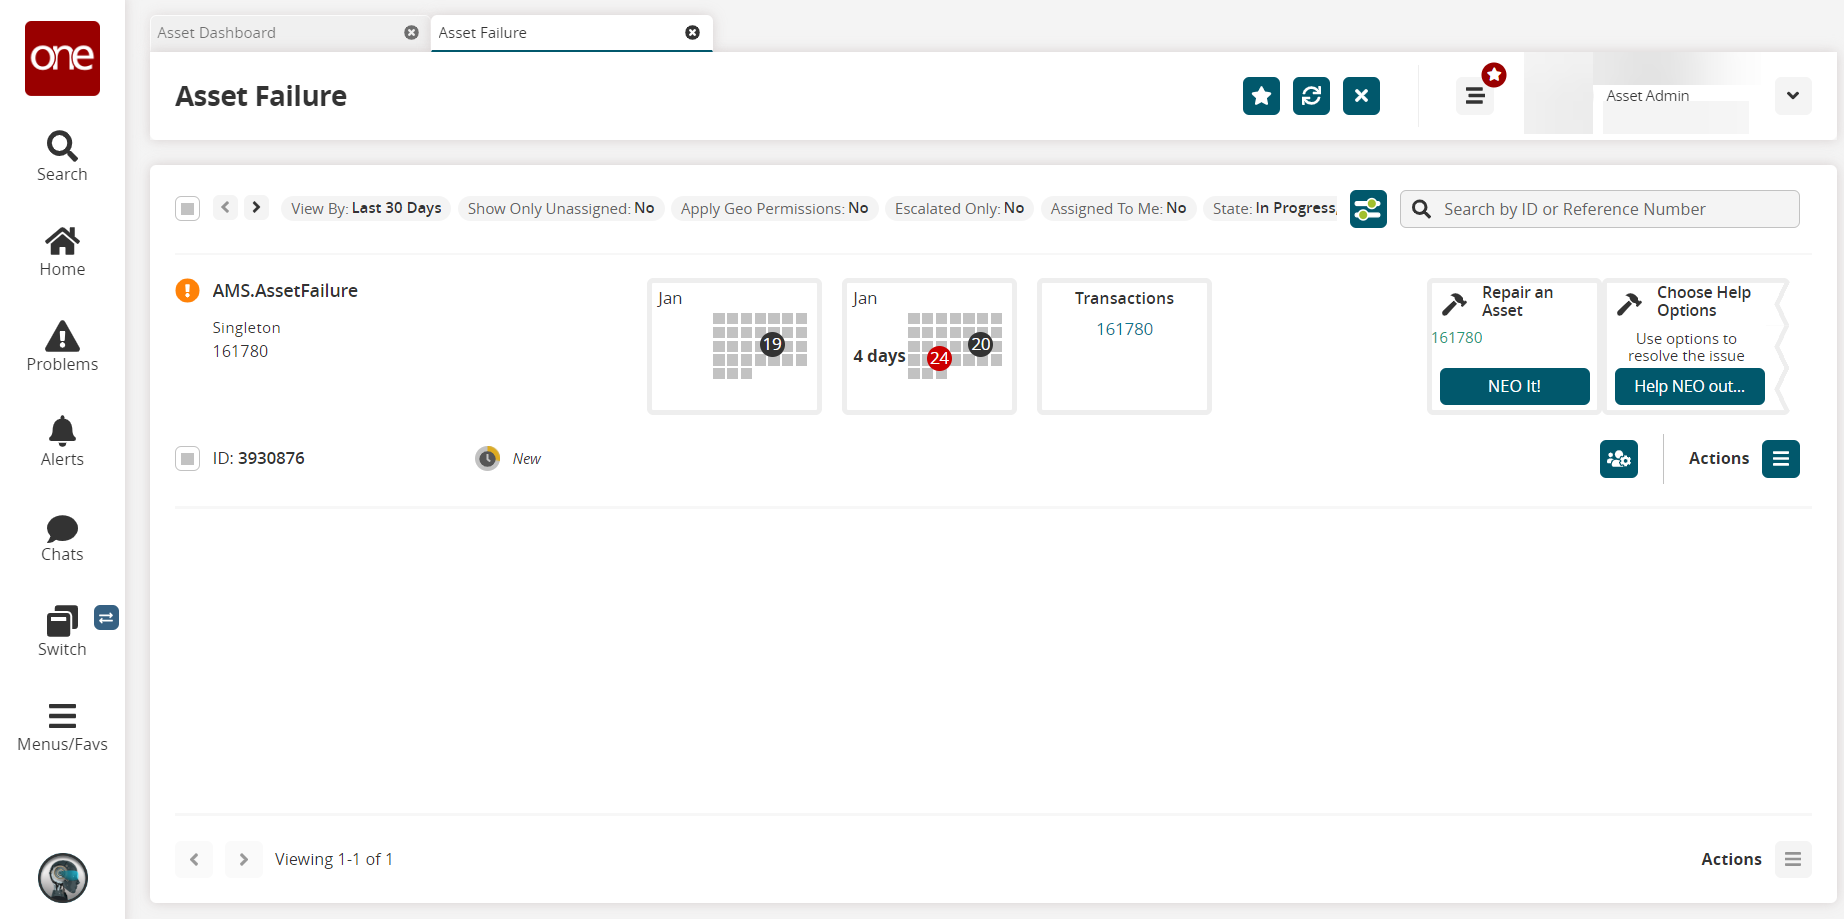
The prescription for the problem appears. the
For this workflow, we selected the Asset Failure problem. The Asset Failure screen appears.
On the Asset Failure screen, click on the Filter Options (
) button.
The Filter Options popup window appears.

Fill out the following fields. Fields with an asterisk ( * ) are required.
Field
Description
State
Select multiple checkboxes or a single checkbox to select or deselect one or more states.
Priority
Select multiple checkboxes or a single checkbox to select or deselect one or more priorities.
Assigned To Me
Select the checkbox to view the problems assigned to you.
Show Only Unassigned
Select the checkbox to display only unassigned problems.
Apply Geo Permissions
Select the checkbox to apply geo permissions to the problem.
Escalated Only
Select the checkbox to display only escalated problems.
View By
Click the icon to select a period of time.
Problem Owned Or Shared
Select a value from the dropdown list.
Sort Options *
Select the sort option from the dropdown lists.
Click Apply to apply the filters or Reset to reset the filters.
Click the ID checkbox and click the Actions button at the bottom of the screen.
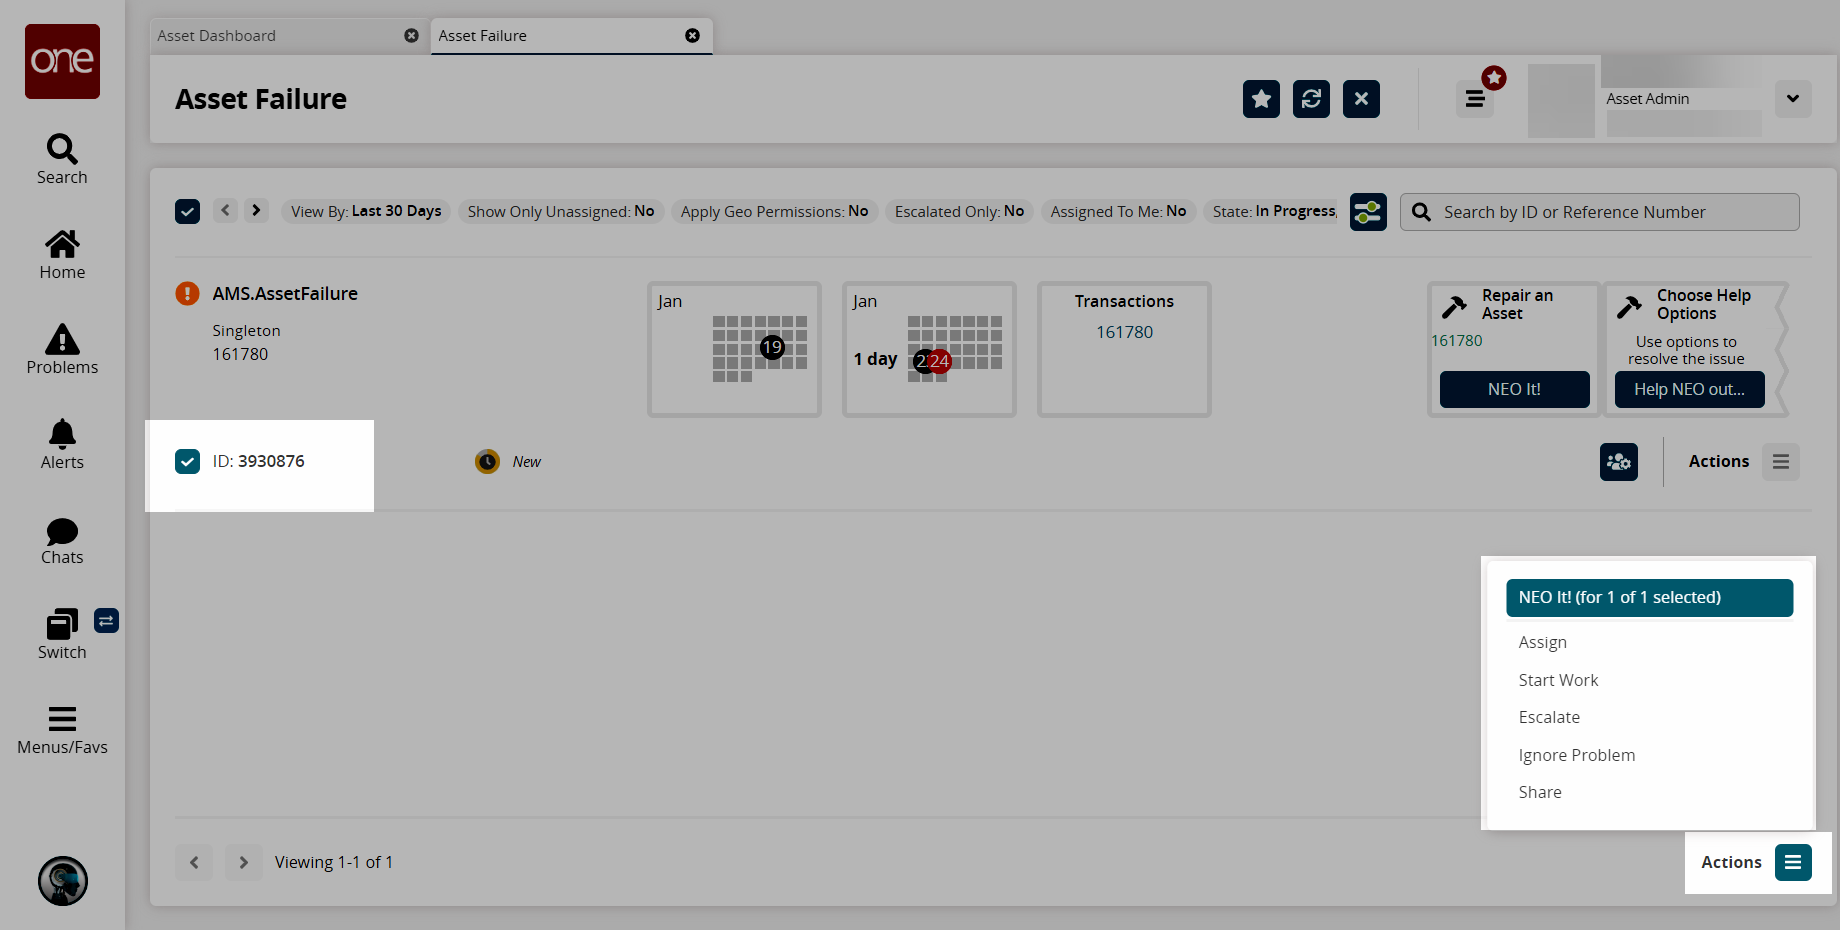
Select the desired option from the list.Click the NEO It! button.
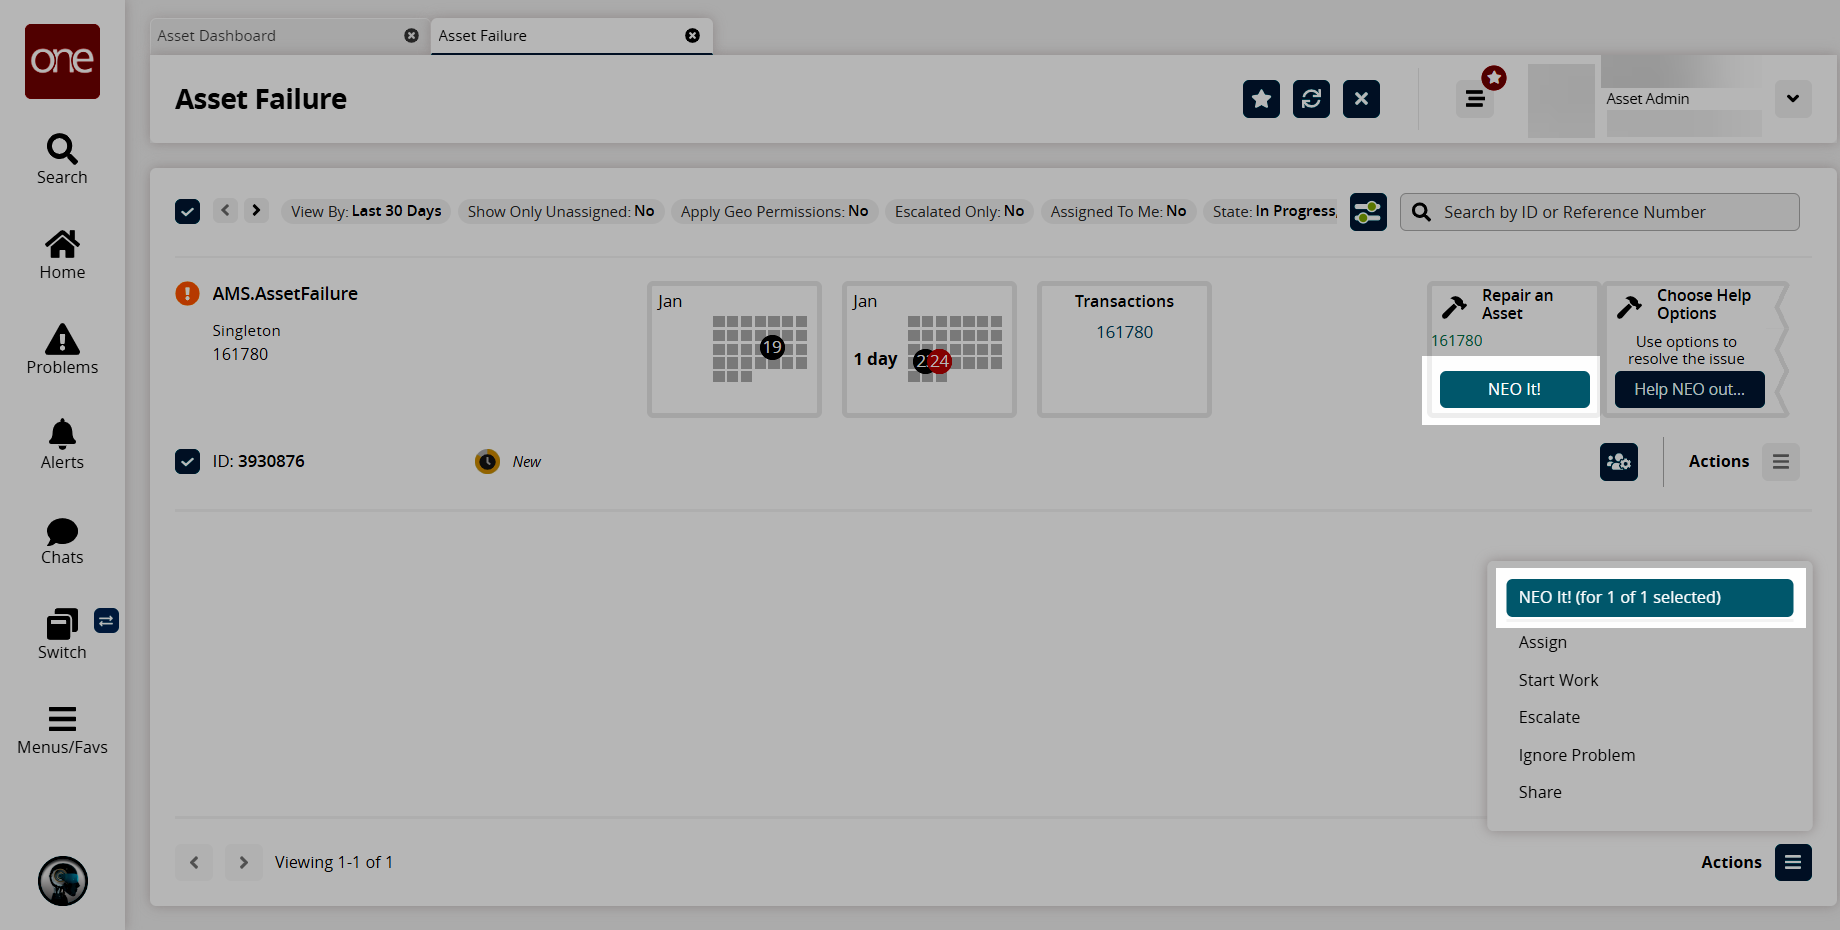
The NEO It option screen appears.Click Execute Now button to resolve the problem.
The prescription job to resolve the problem begins.Click the Help NEO out button to resolve the problem.
Click NEO It button to resolve the problem.
The prescription job to resolve the problem begins.Click the Actions icon to select a desired option.
Click the Collaborations icon to create a new collaboration.