Order Promising Workbench
The Order Promising Workbench allows vendors to view short orders, modify orders, and create supply orders for orders that were promised short.
Complete the following steps to use the Order Promising Workbench:
L og in to the ONE system.
Click Menus/Favs > Workbenches > Order Promising Workbench.
The Order Promising Workbench screen displays.
In the NEO UI, users can click on the Menus/Favs icon on the left sidebar and type in the name of the screen in the menu search bar. For more information, see "Using the Menu Search Bar."Enter a Customer, Ship From Site, and My Items.
Click Apply.
The screen updates.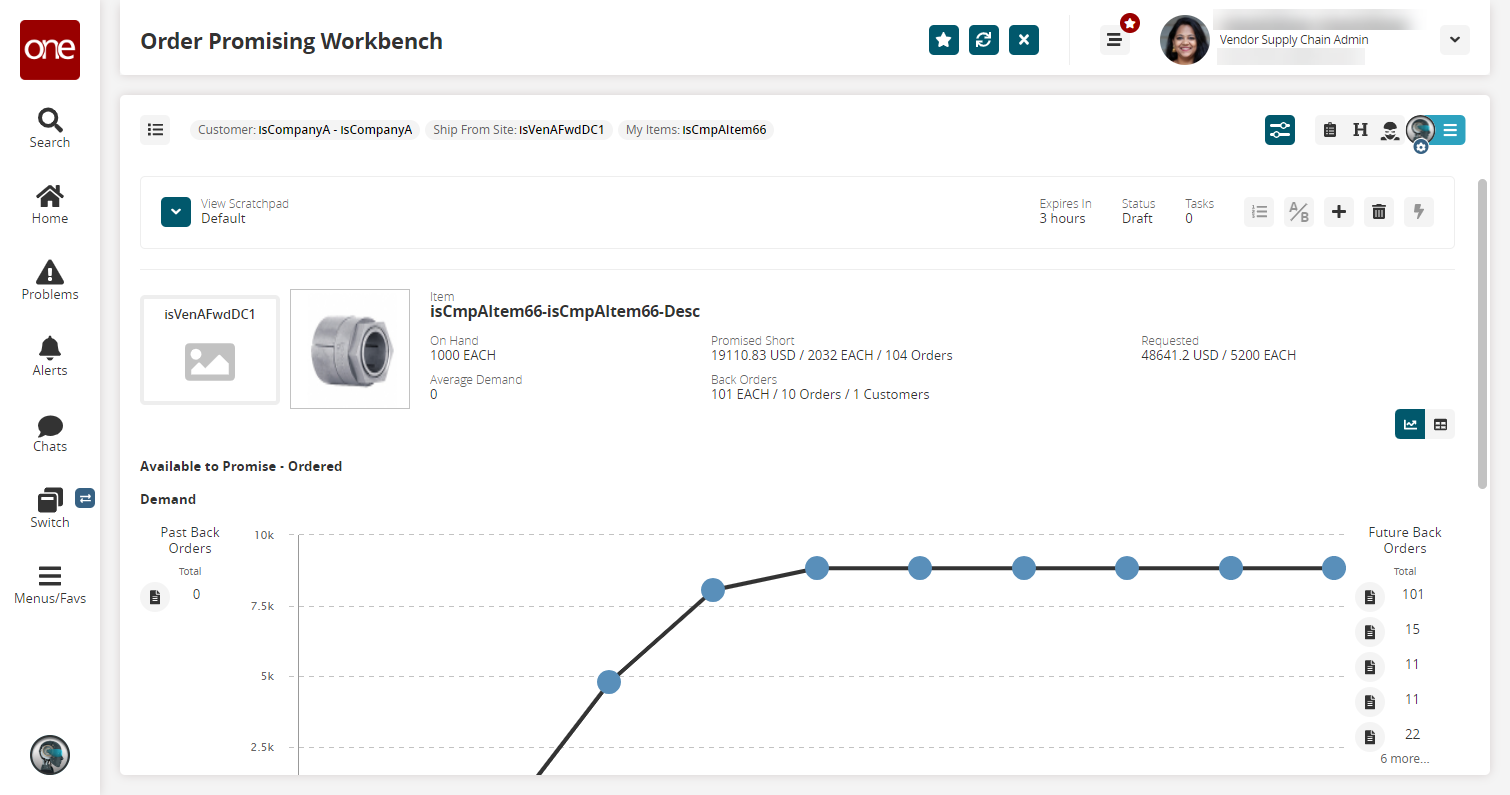
Move Out Demand
Scroll down to the Order Schedules table and click the rocket symbol (
 ), and then click Move Out Demand.
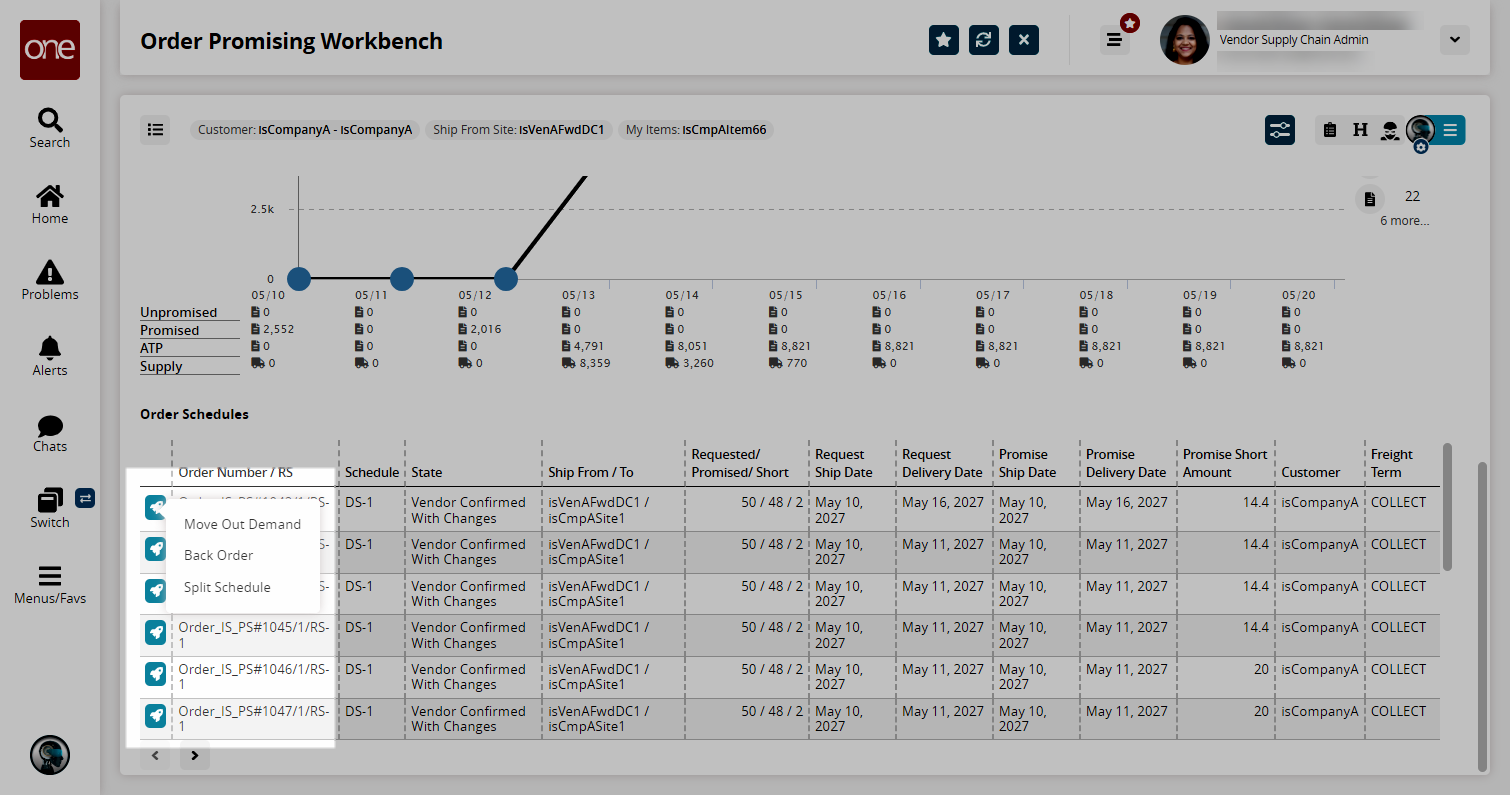
The Move Out Demand slideout appears.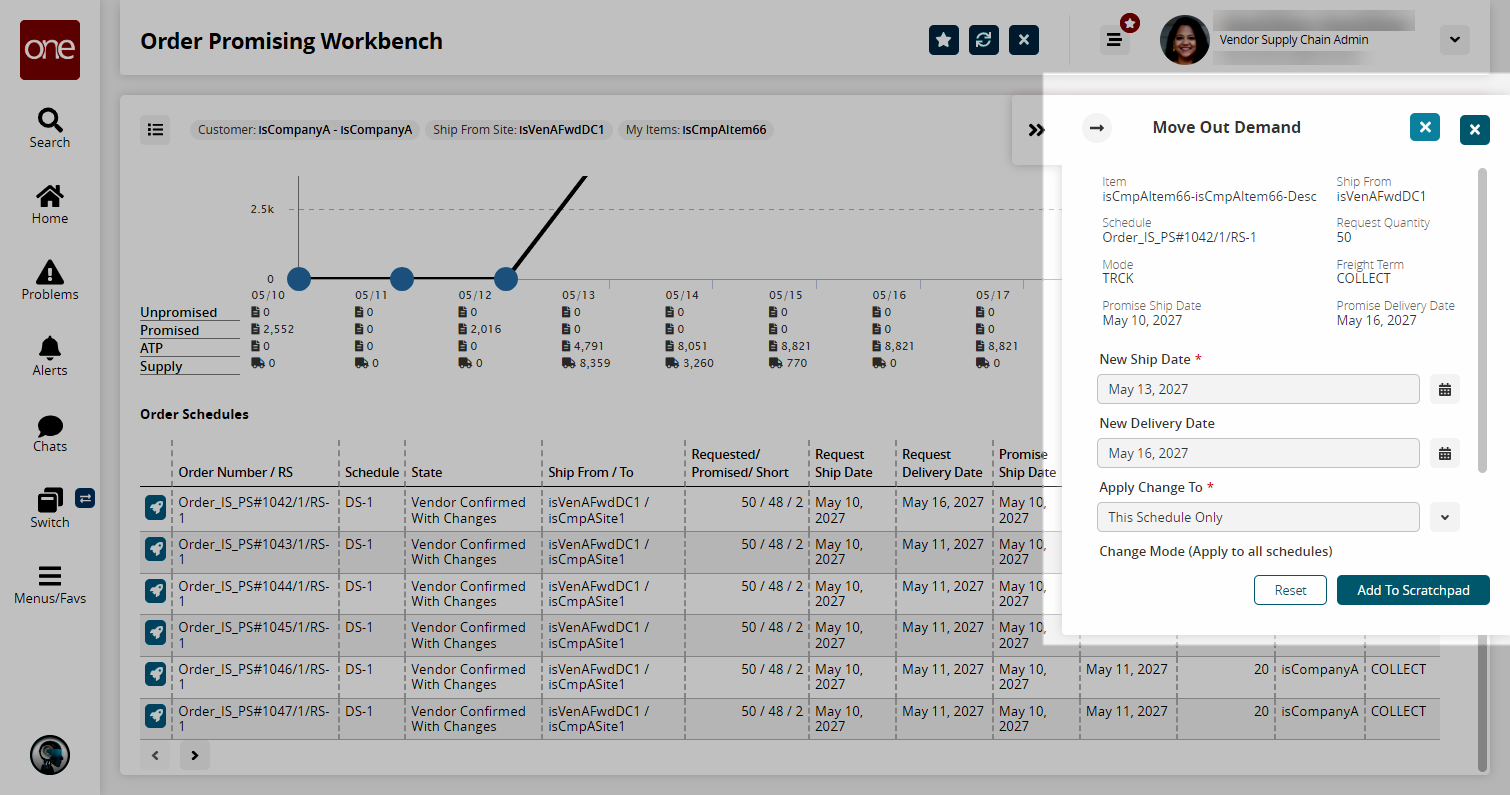
Enter a New Ship Date and a New Delivery Date.
Select an option in the Apply Changes To field.
Enter a change mode in the Change Mode (Apply to all schedules) field. If you want these changes to be applied to all schedules (below Open state), then select All Schedule in the Apply Change dropdown menu and select Value in the Change Mode field.
Click Add to Scratchpad.
The task is added to the scratchpad.Click the Execute button (
 ).
).
The task is executed and the Workbench Refreshed popup appears.
Split Schedule
Scroll down to the Order Schedules table and click the rocket symbol (
 ), and then click Split Schedule.
The Split Schedule slideout appears.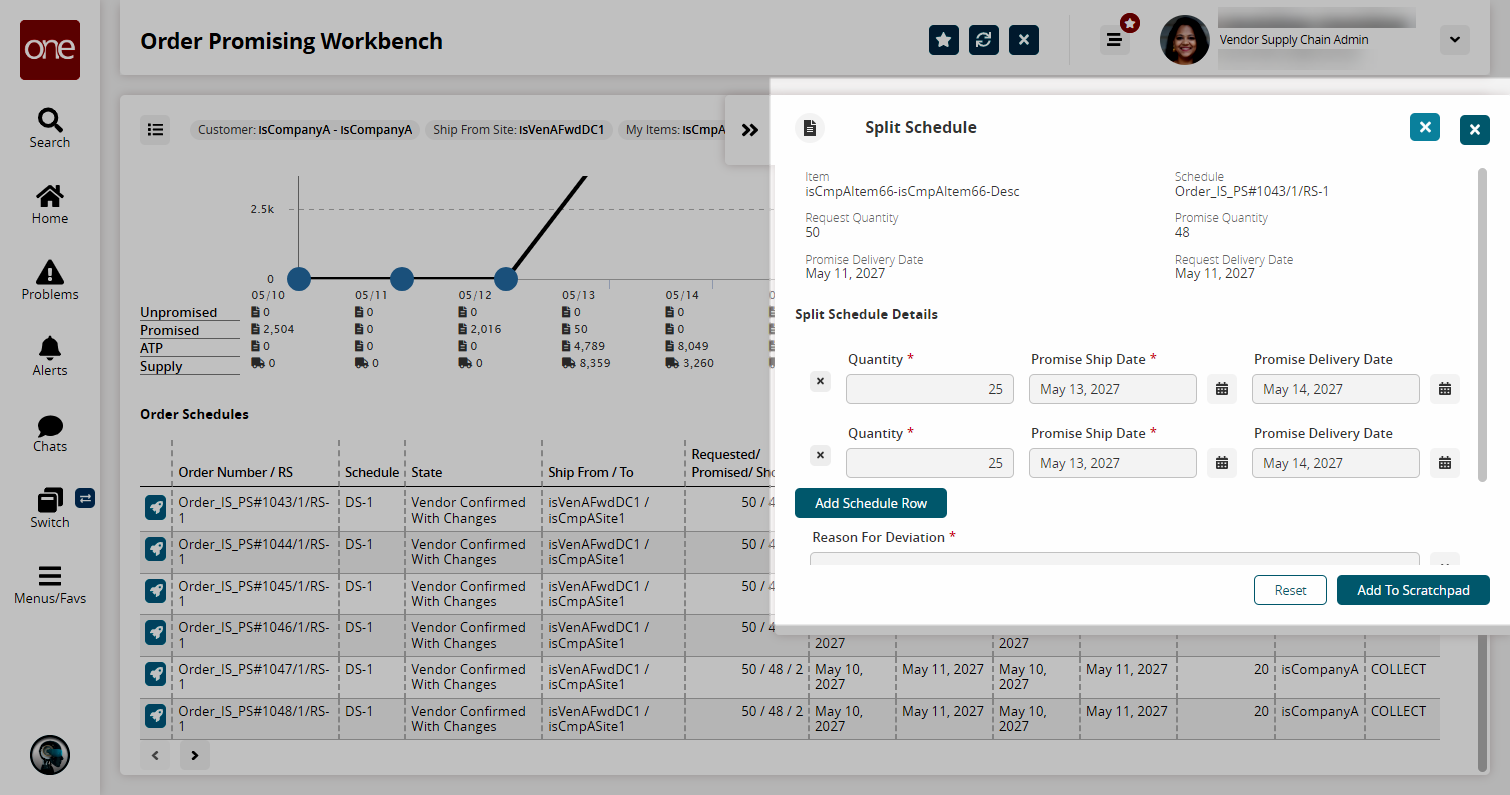
You can split the schedule into multiple schedules to resolve promise short issues.Enter a Quantity, Promise Ship Date, and Promise Delivery Date for each desired split.
Select a Reason for Deviation from the dropdown menu.
Click Add to Scratchpad.
The task is added to the scratchpad.Click the Execute button (
 ).
).
The task is executed, and the Workbench Refreshed popup opens.
Backorder
Scroll down to the Order Schedules table, click the rocket symbol (
 ), and then click Back Order.
The Back Order slideout opens.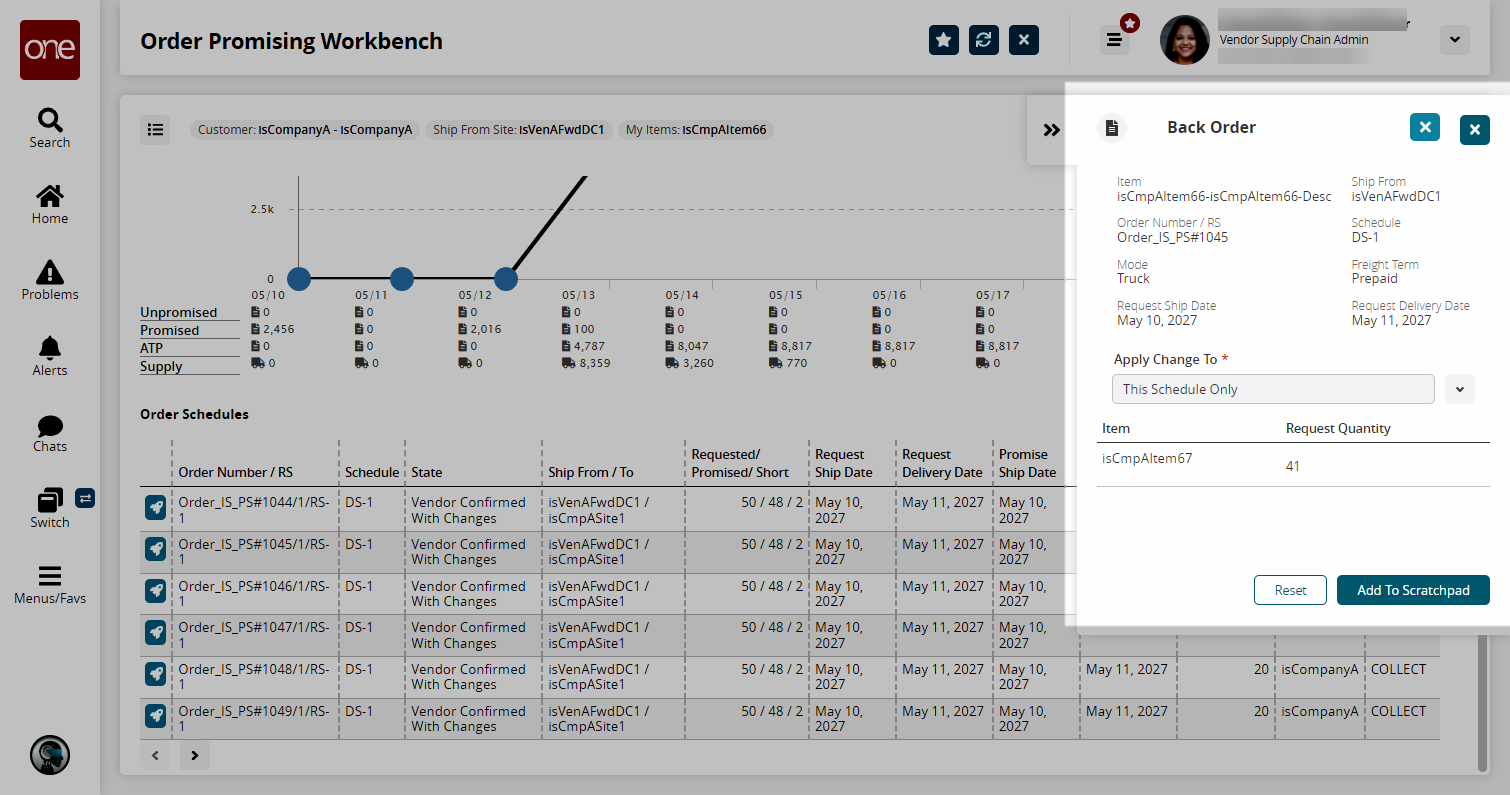
In the Apply Changes To dropdown menu, select either This Schedule Only or All Schedules.
Click Add to Scratchpad.
The task is added to the scratchpad.Click the Execute button (
 ).
).
The task is executed, and the Workbench Refreshed popup appears.