Order Schedule Dashboard
Complete the following steps to view the Order Schedule Dashboard:
L og in to the ONE system.
Click Menus/Favs > Order Mgmt > Purchase Order > Order Schedule Dashboard.
In the NEO UI, users can click on the Menus/Favs icon on the left sidebar and type in the name of the screen in the menu search bar. For more information, see "Using the Menu Search Bar."
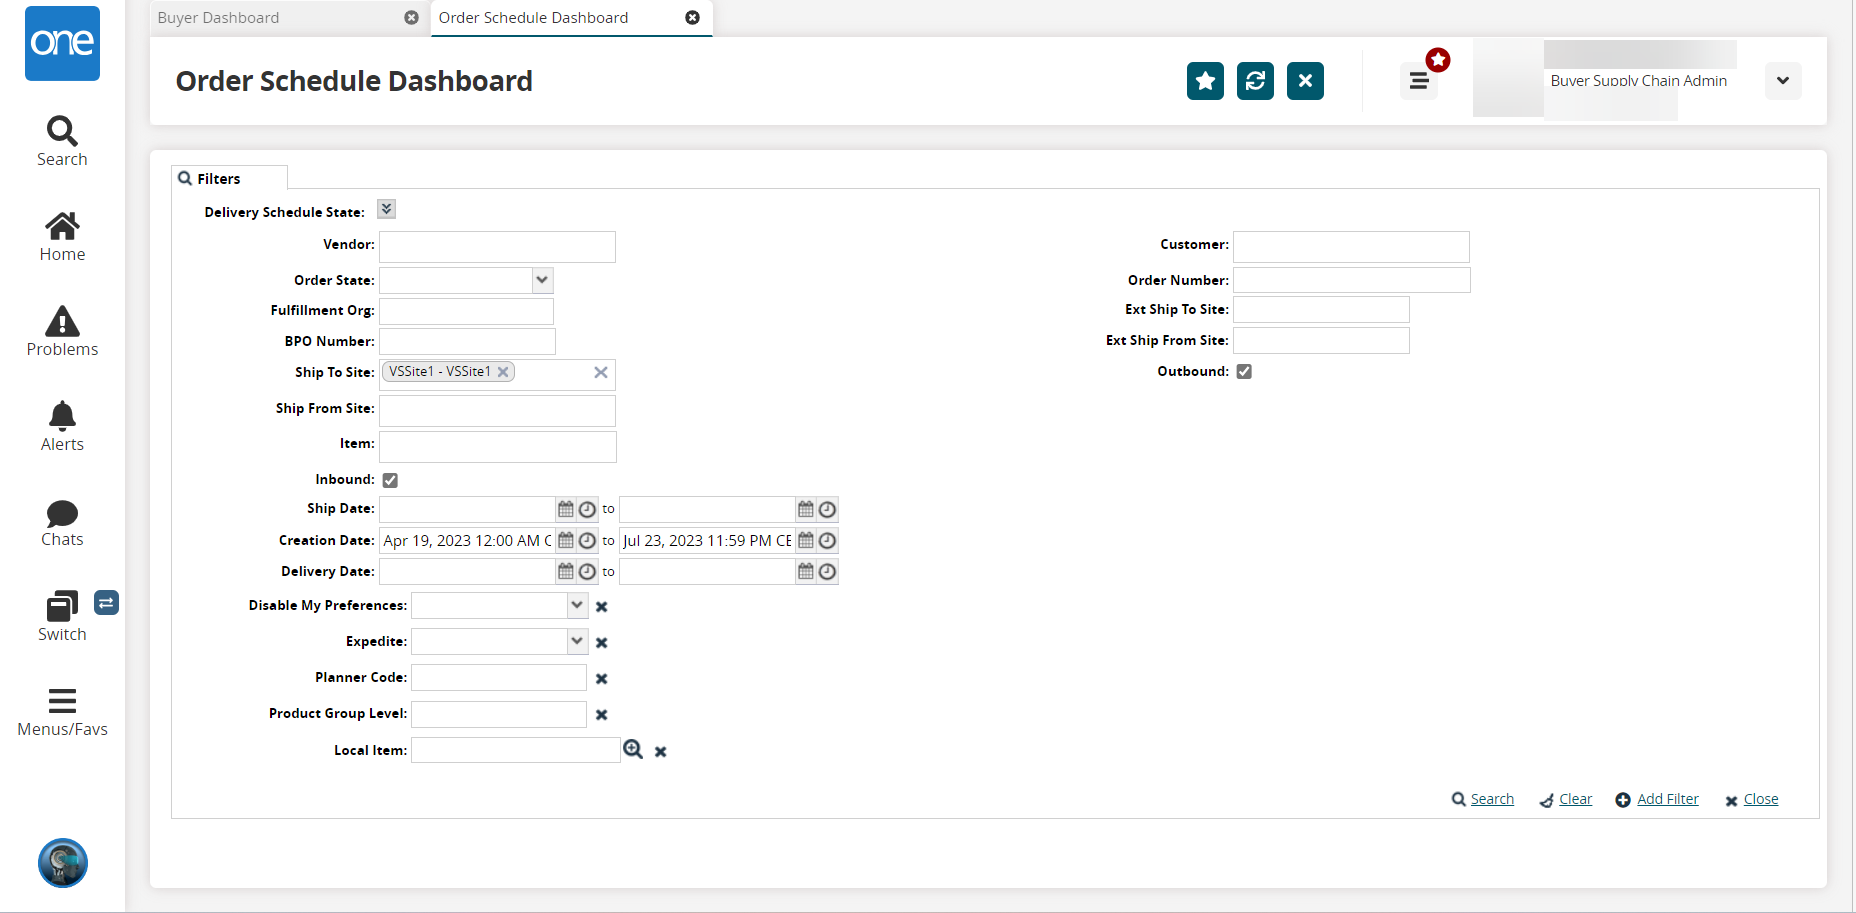
The Order Schedule Dashboard screen displays the filters.
To add more search filters, click the Add Filter link, then click one or more filter options from the Add Filter list.
Fill out the following fields. Fields with an asterisk ( * ) are required.
Field
Description
Delivery State Schedule
Click the downward arrow. The state checkboxes are displayed. These checkboxes allow you to filter search results by the current delivery schedule state. Select one or more options to include only those options selected. To include all states in the search results, click the Select All checkbox.

Vendor
The vendor associated with the order schedule.
Order State
Select an order state from the dropdown menu
Fulfillment Org
Enter a fulfillment organization name
Ship To Site
Enter a site to include only order schedules for the selected ship to site.
Ship From Site
Enter a site to include only order schedules for the selected ship from the site.
Item
Filter order schedule search results by item.
Inbound
Select this checkbox to only include inbound order schedules.
Ship Date
Enter a ship date range to include only order schedules within the entered range.
Creation Date
Enter a creation date range to include only order schedules within the entered range.
Delivery Date
Enter a delivery date range to include only order schedules within the entered range.
Disable My Preferences
Select Yes or No to disable all the selected preferences.
Expedite
Select Yes or No
Planner Code
Enter a planner code
Product Group Level
Enter a product group level
Local Item
Select a local item with the picker tool
Customer
Filter order schedule search results by customer.
Order Number
Filter order schedule search results by order number.
Outbound
Select this option to include only outbound order schedules.
Ext Ship To Site
Enter a site to include only order schedules for the selected external Ship To site.
Ext Ship From Site
Enter a site to include only order schedules for the selected external Ship From site.
Click the Search link.
The search results display.Click an order number link in the Order Number column to view order details.
Click the Export to CSV button to export the report to a CSV file.
Click the Print button to print the report to a PDF file.
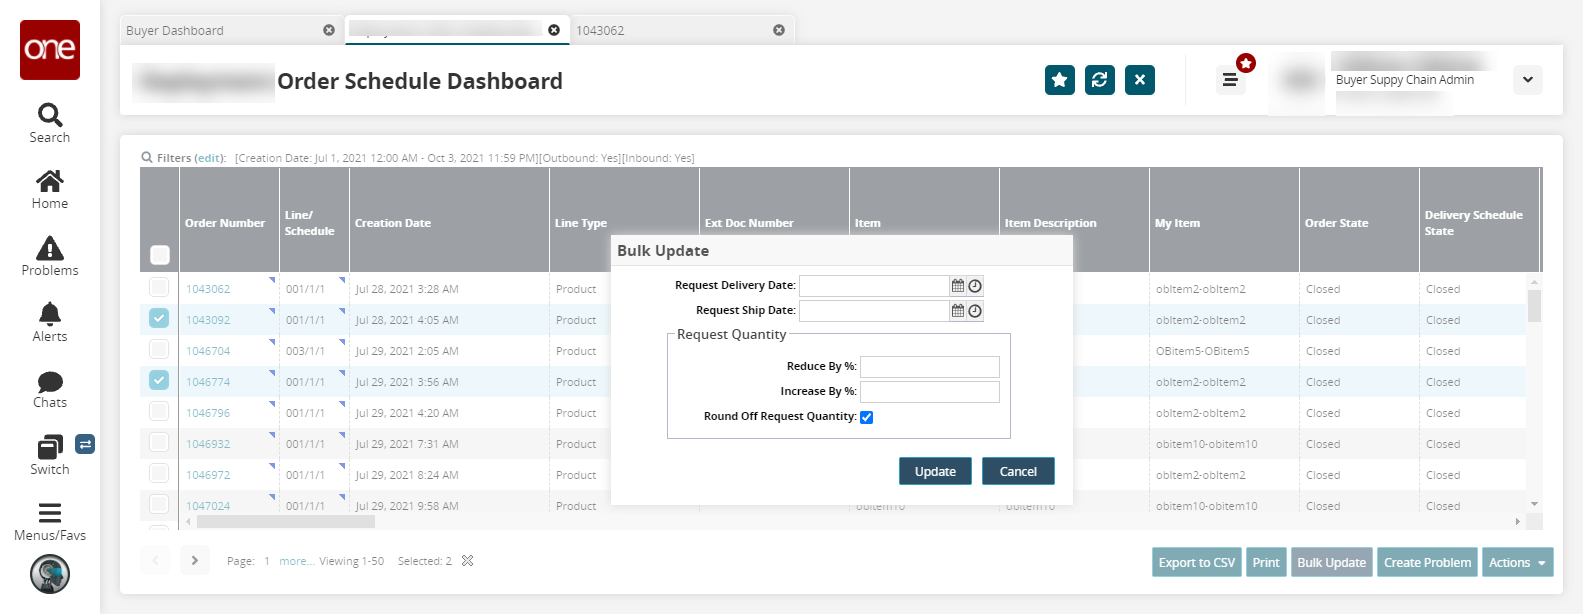
Select multiple checkboxes and then click the Bulk Update button.
The Bulk Update popup displays.
Fill out the following fields. Fields with an asterisk ( * ) are required.
Field
Description
Request Delivery Date
Select a delivery date using the date picker.
Request Ship Date
Select a ship date using the date picker.
Reduce By %
Enter a reduce by percentage value.
Increase By %
Enter an increase by percentage value.
Round Off Request Quantity
Select this checkbox to round off the requested quantity.
Click Update.
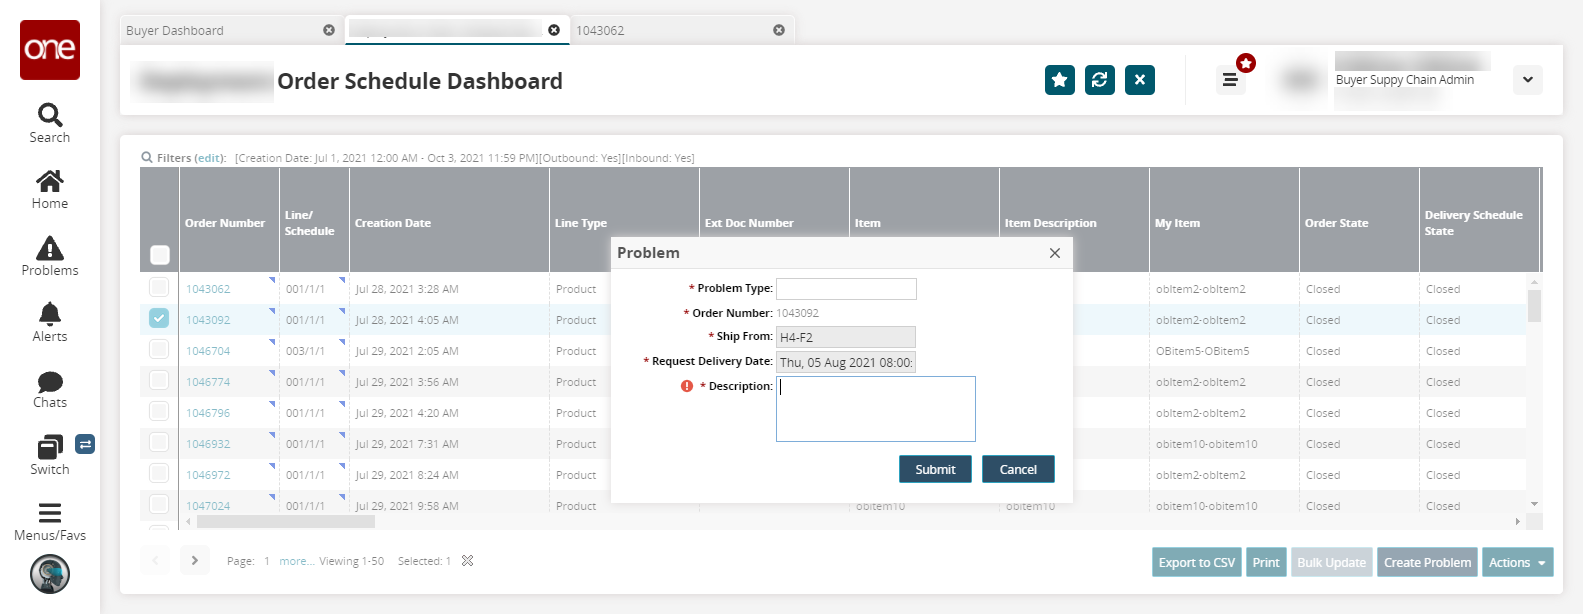
Select a checkbox for an Order Number and click the Create Problem button.
The Problem popup displays.
Fill out the following fields. Fields with an asterisk ( * ) are required.
Field
Description
* Problem Type
Begin typing a problem type and select from the results that appear in the dropdown menu, or click in the field and use the down arrow on your keyboard to select from the available options.
* Order Number
This field is auto-populated by the system.
* Ship From
This field is auto-populated by the system.
* Request Delivery Date
This field is auto-populated by the system.
* Description
Enter a description of the problem.
Click Submit.
Select a checkbox and click the Actions button to perform actions that are available depending on the order state.