Organizational Resource Administration - Working with Resource Templates
Complete the following steps to administer organizational resources:
L og in to the ONE system.
Click Menus/Favs > Fleet Mgmt > Resource Administration. In the NEO UI, users can click on the Menus/Favs icon on the left sidebar and type in the name of the screen in the menu search bar. For more information, see "Using the Menu Search Bar."
The Resource Administration screen displays.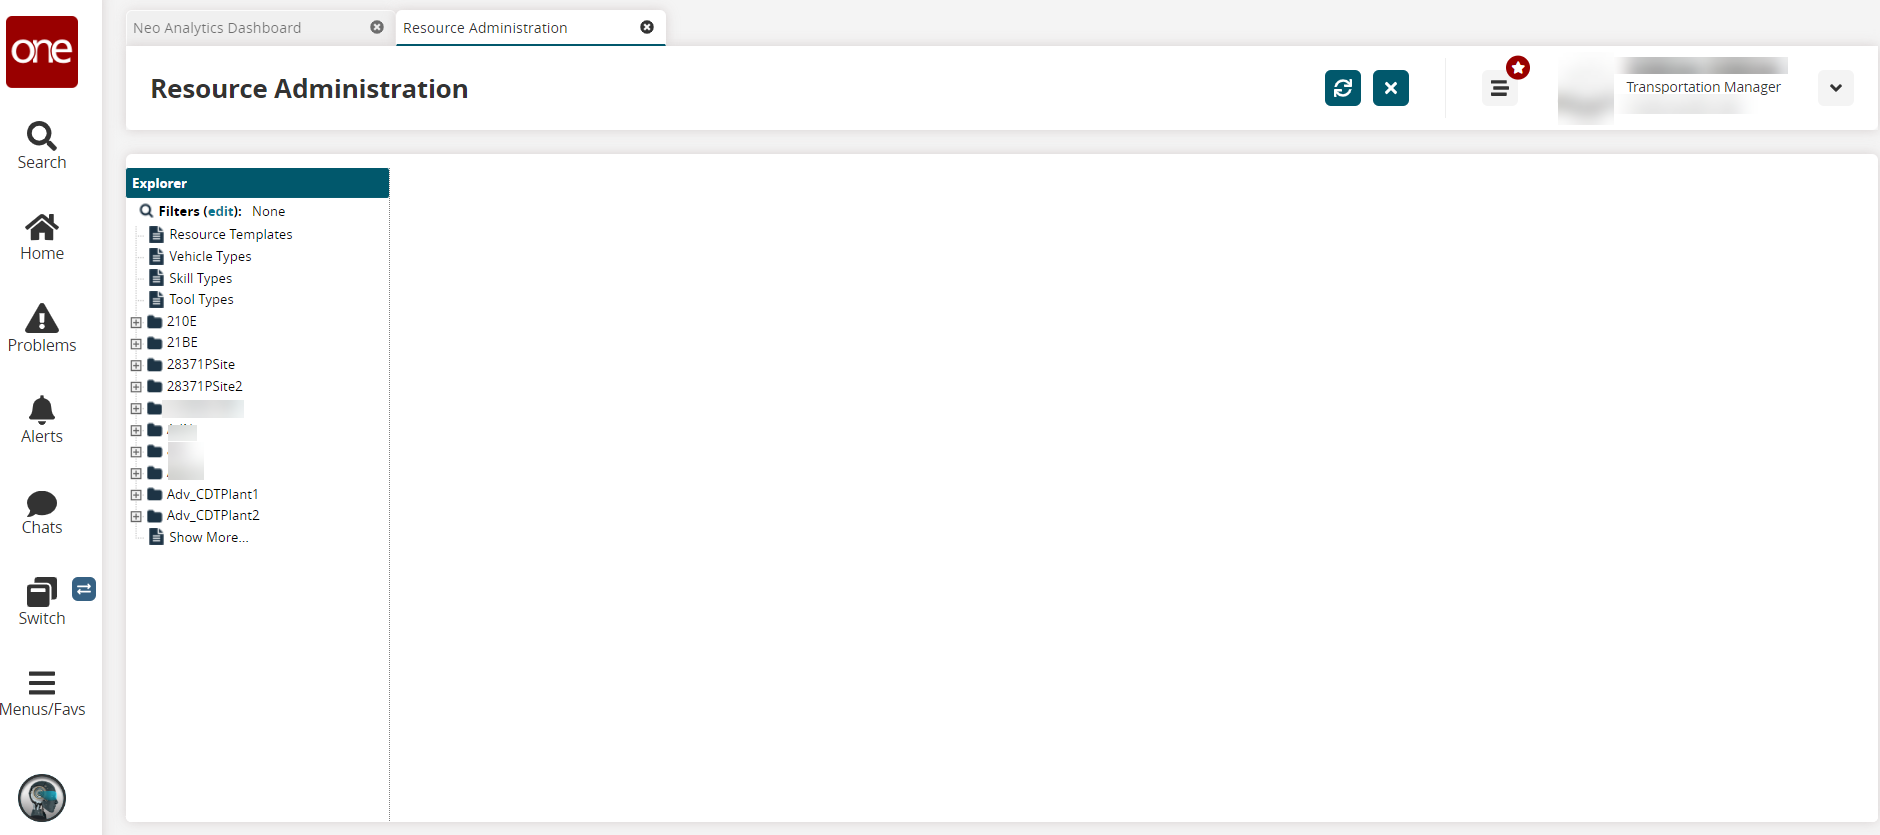
Click Resource Templates in the left Explorer pane.
The right pane updates with a list of any existing templates.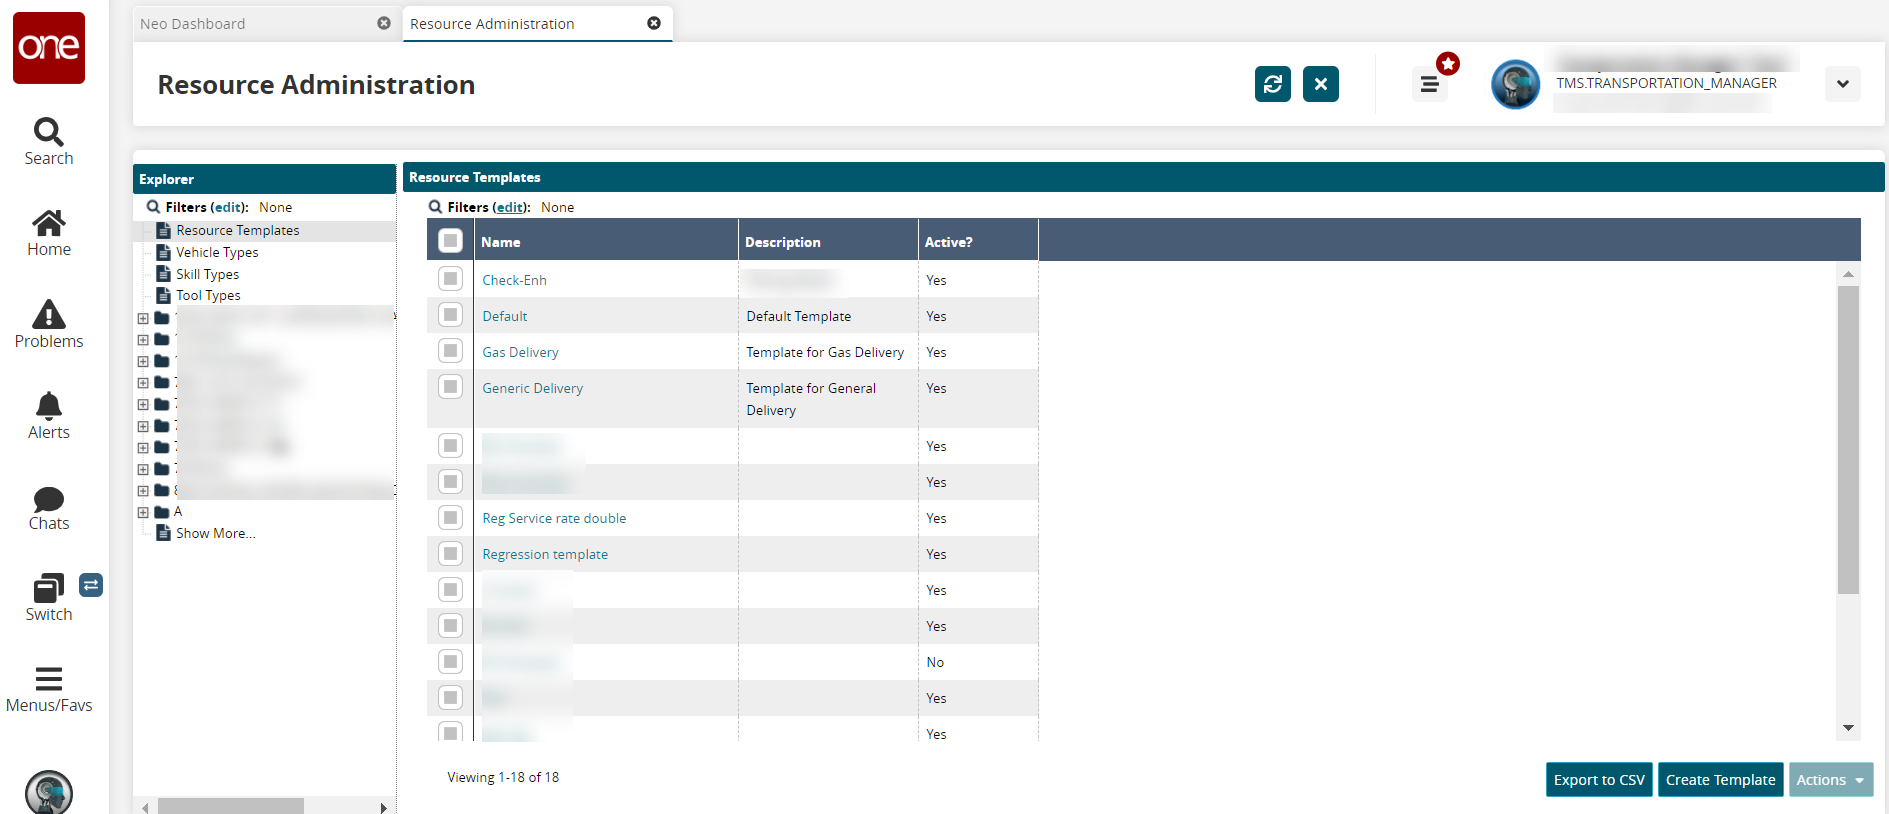
Click the Export to CSV button to export the report to a CSV file.
See the section below to create or update templates.
Check the boxes for any existing template.
The Actions button activates.Click the Actions button, and select Activate or Inactivate depending on the current status of the template.
The Activate (or Inactivate) popup displays.Click the Submit button.
The Active status for the template updates, and a green success message displays.
Creating Templates
Click the Create Template button on the Resource Templates pane to add a resource template.
The Create Template screen displays.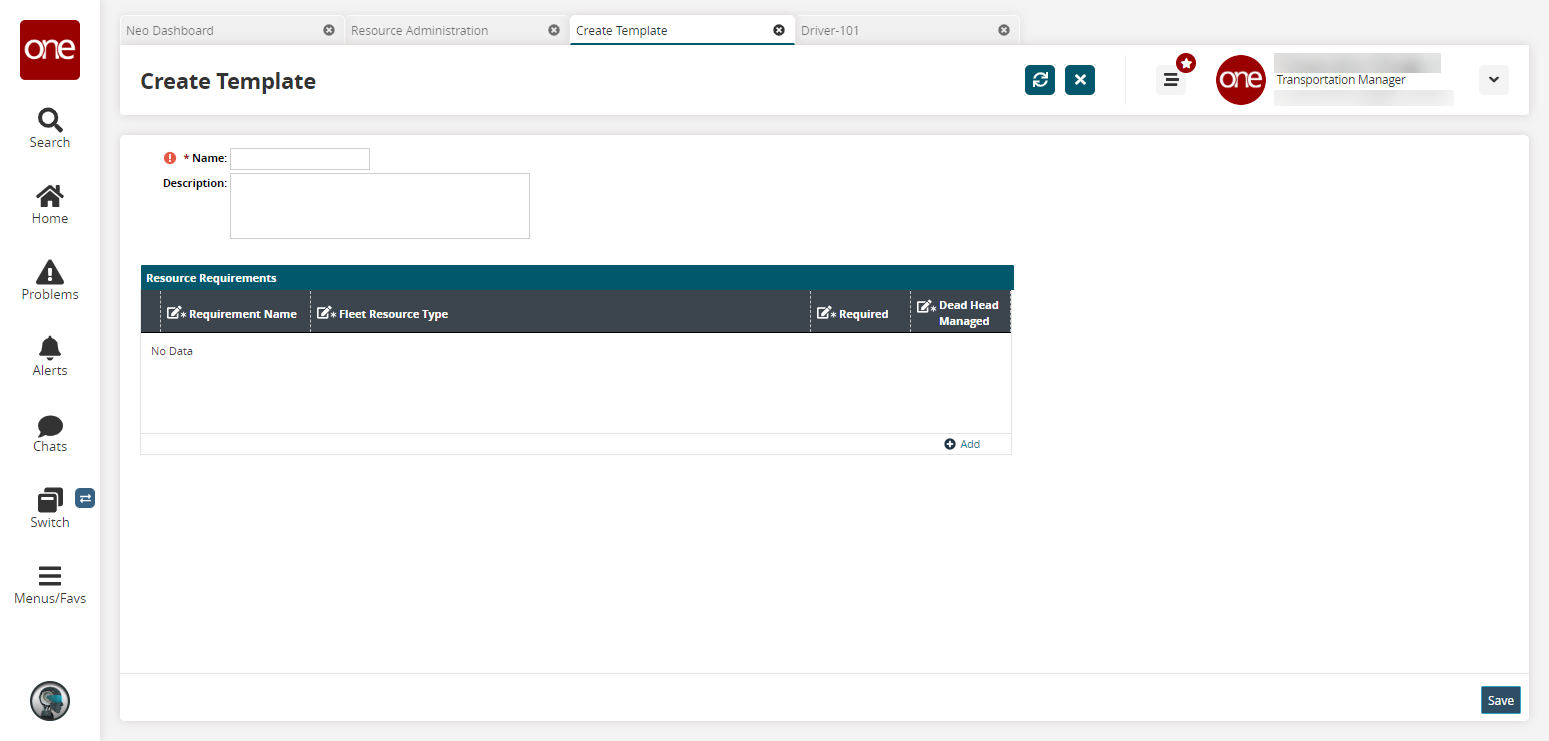
Enter the * Name and Description. Fields with an asterisk ( * ) are required.
Click the Add link to add a resource requirement.
A new row displays with editable cells.Type information for *Requirement Name.
Select a resource type from the dropdown list in the first field for *Fleet Resource Type, and select a specific type using the picker tool for the second field.
Check or uncheck the box (the field will show Yes or No) for the *Required and *Dead Head Managed fields.
Click the Save button.
The screen refreshes to show the new template details with the Active field, and a green success message displays.Check the Active? checkbox to activate this template.
Click the Save button to save the change.
A green success message displays, and the template displays on the Resource Administration screen.
Updating Resource Templates
Click a Name link.
The resource template details screen displays.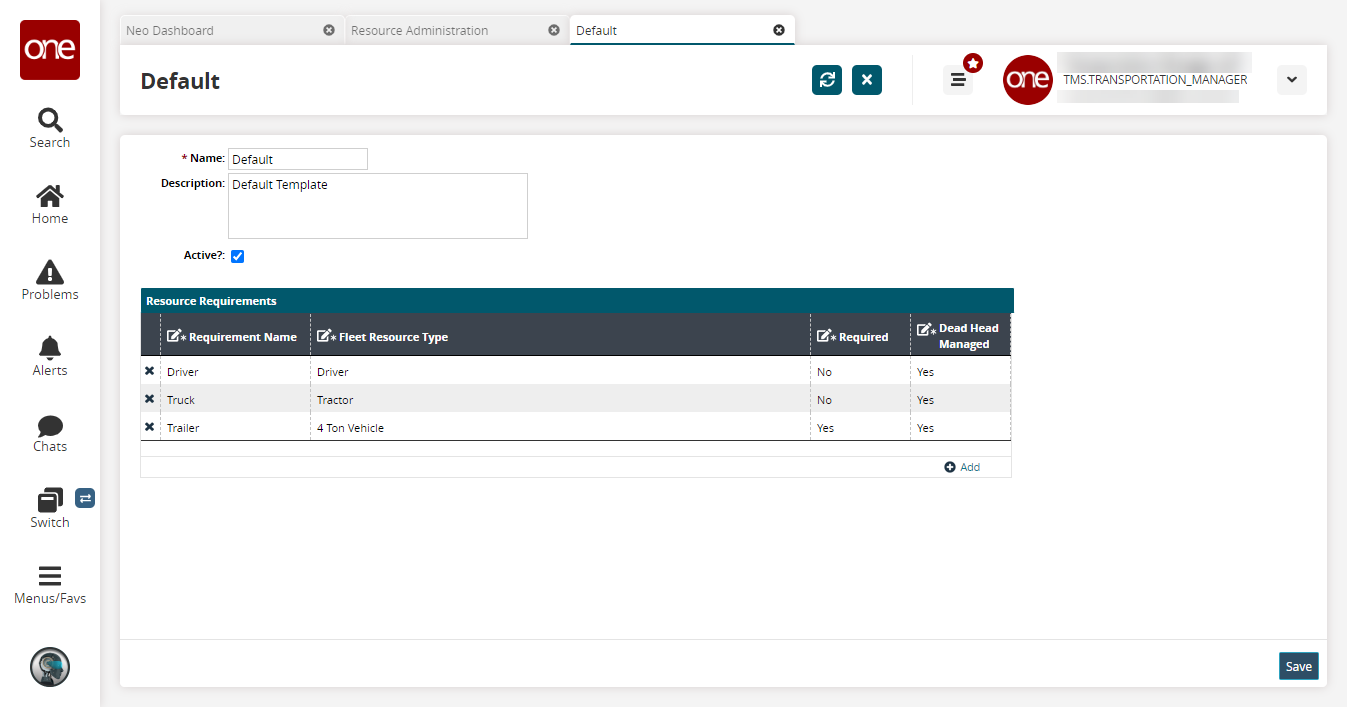
Update the fields described in the section above.
Click the Save button.
The details screen refreshes with the updated information, and a green success message displays. The new changes will also be reflected on the Resource Templates pane in the Resource Administration screen.