Organizational Resource Administration - Working with Vehicle Types
Users can create new vehicle types and update existing vehicle types at the organizational level.
Complete the following steps to work with vehicle types:
L og in to the ONE system.
Click Menus/Favs > Fleet Mgmt > Resource Administration. In the NEO UI, users can click on the Menus/Favs icon on the left sidebar and type in the name of the screen in the menu search bar. For more information, see "Using the Menu Search Bar."
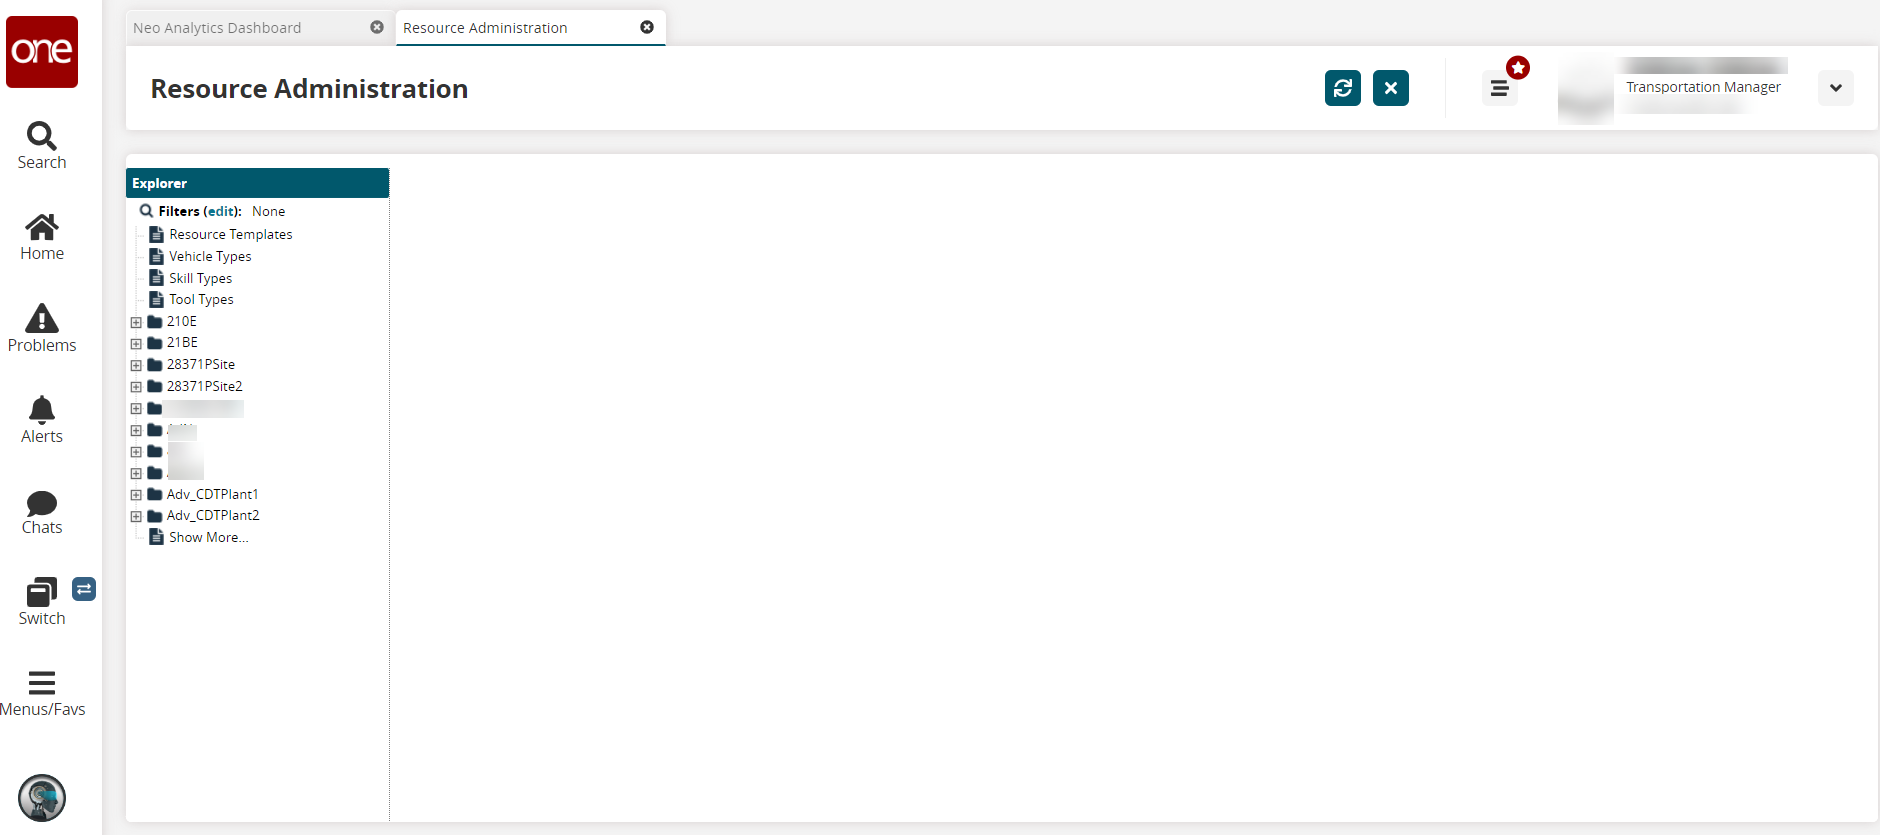
The Resource Administration screen displays.
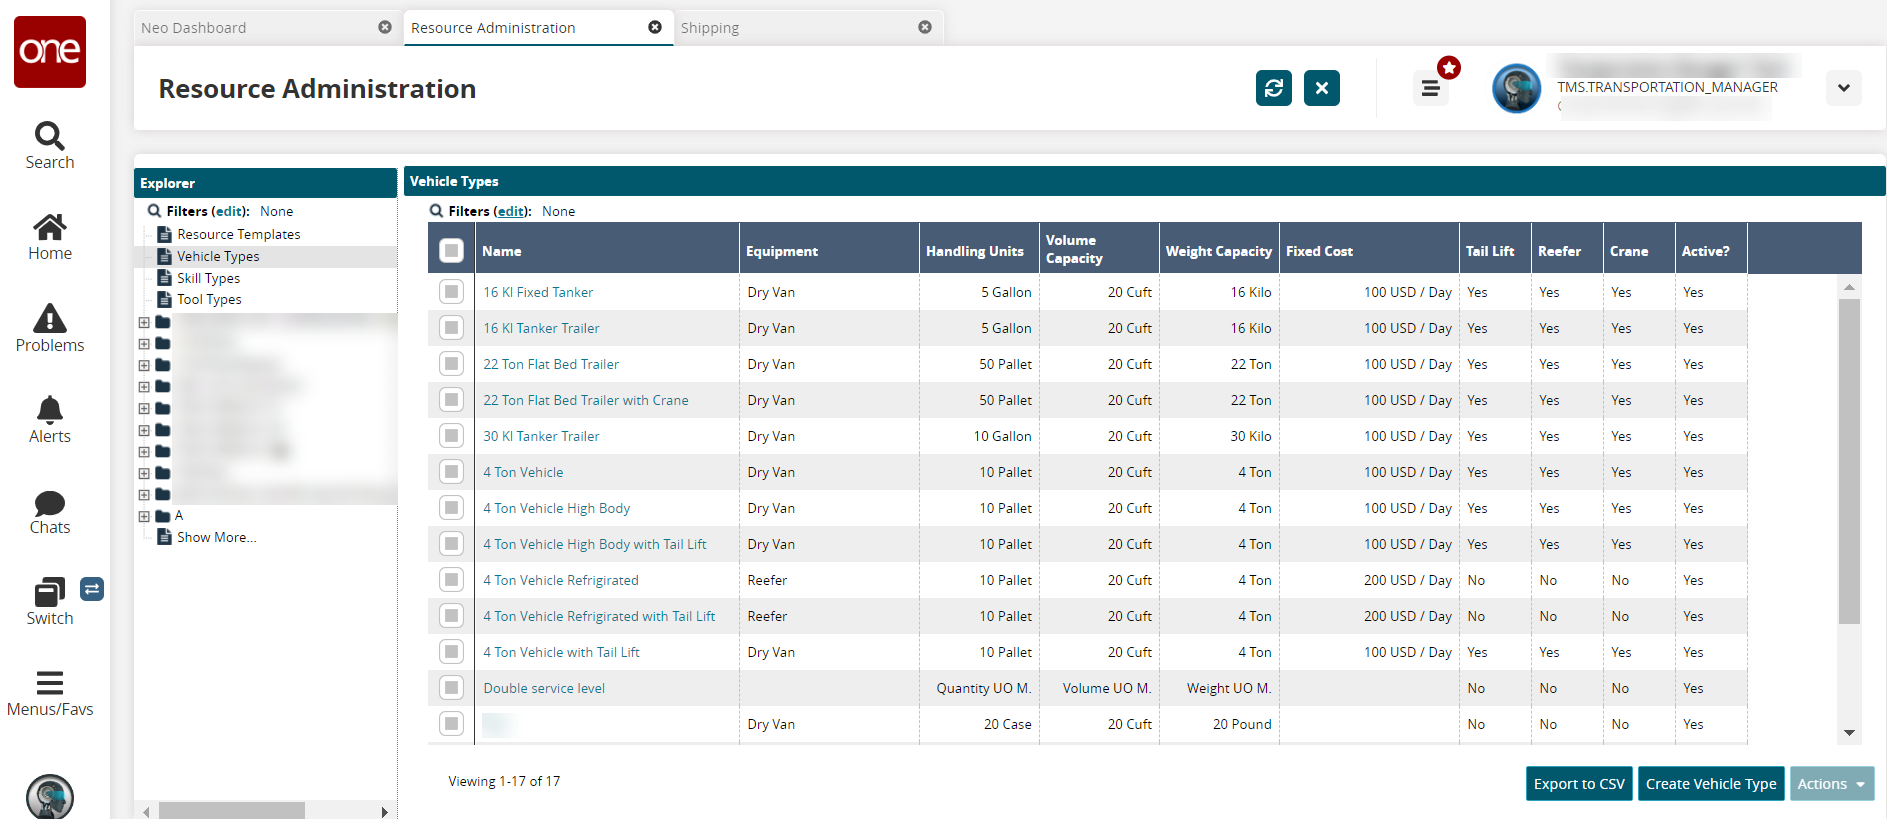
Click Vehicle Types in the left Explorer pane.
The right pane updates with a list of any existing vehicle types that can be used for resource administration. Users click the top-level option to set the vehicle type at the organization level. See the "Site Resource Administration - Working with Vehicles" for information on vehicle resource administration at the site level.
See the instructions below to create or update vehicle types.
Click the Export to CSV button to export the report to a CSV file.
Check the boxes for any existing vehicle types.
The Actions button activates.Click the Actions button, and select Activate or Deactivate depending on the current status of the vehicle type.
The Activate (or Deactivate) popup displays.Click the Submit button.
The Active status updates, and a green success message displays.
Creating Vehicle Types
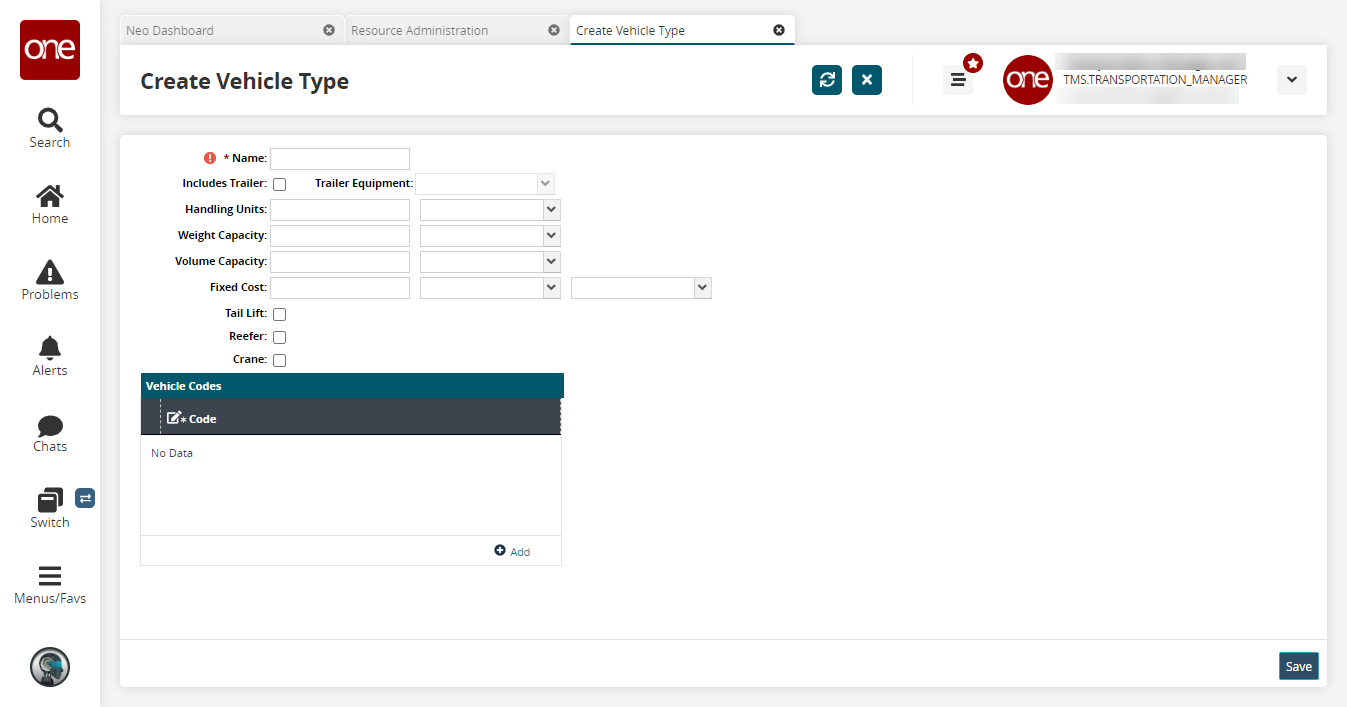
Click the Create Vehicle Type button to add a vehicle type.
The Create Vehicle Type screen displays.
Enter values for fields described in the table below. Fields with an asterisk ( * ) are required.
Field
Description
* Name
Enter a vehicle name.
Includes Trailer
Select this checkbox if the vehicle has a trailer.
Trailer Equipment
If the Include Trailer checkbox is selected, use the dropdown menu to select the trailer equipment type.
Handling Units
If the Include Trailer checkbox is selected, this field is not selectable.
If the Include Trailer checkbox is not selected, input a value and select a UOM.
Weight Capacity
If the Include Trailer checkbox is selected, this field is not selectable.
If the Include Trailer checkbox is not selected, input a value and select a UOM.
Volume Capacity
If the Include Trailer checkbox is selected, this field is not selectable.
If the Include Trailer checkbox is not selected, input a value and select a UOM.
Fixed Cost
Input a numerical value, select a currency country code, and select a frequency.
Tail Lift
Select the checkbox if a tail lift is on the vehicle.
Reefer
Select the checkbox if the vehicle is a reefer (refrigerated).
Crane
Select the checkbox if the vehicle includes a crane.
Vehicle Codes
Click the Add link.
A new row displays with editable cells.Select a code type from the *Code dropdown list in the first field, and use the picker tool to select a specific code associated with the type in the second field.
Click the Save button.
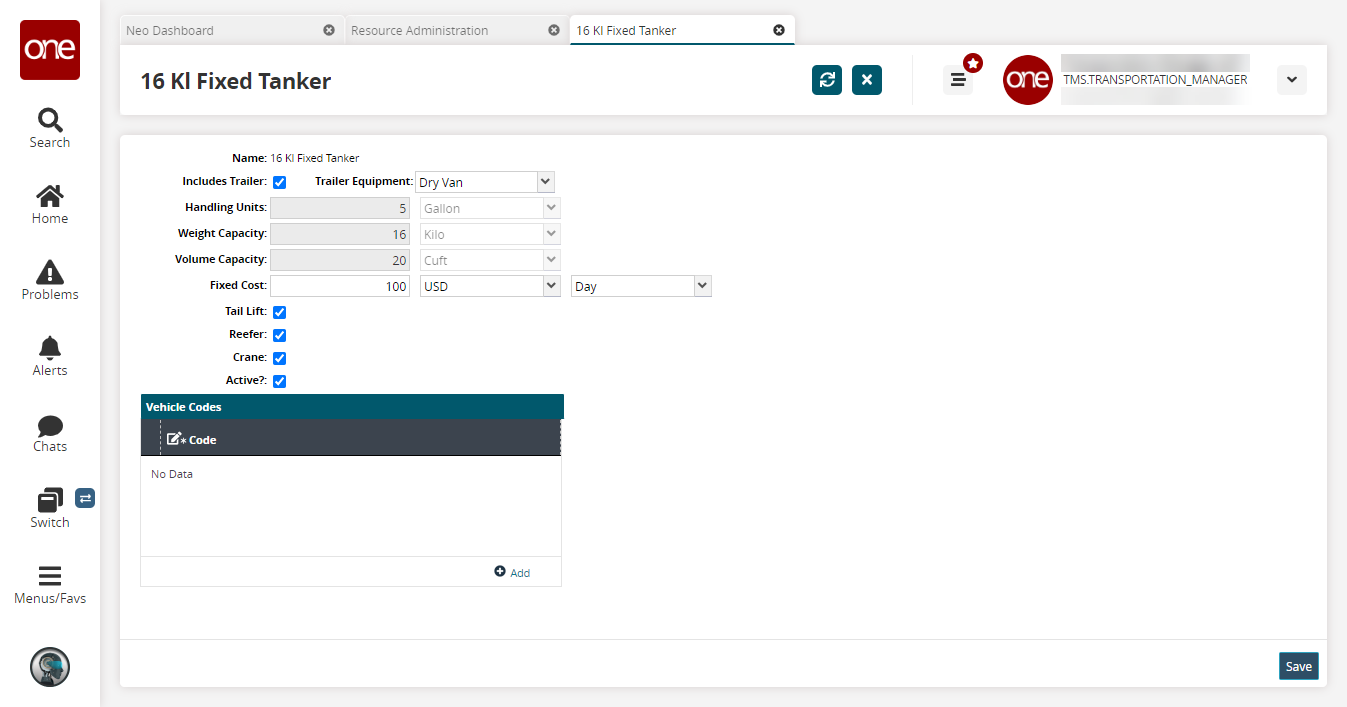
The screen updates, displaying the vehicle details with an Active? field, and a green success message displays.Check the Active? checkbox to activate this vehicle type.
Click the Save button to save the change.
A green success message displays, and the vehicle type displays on the Resource Administration screen.
Updating Vehicle Types
Click a Name link to view details of a vehicle type.
The vehicle type details screen displays.
Update the fields described in the section above.
Click the Save button.
The details screen refreshes with the updated information, and a green success message displays. The new changes will also be reflected on the Vehicle Types pane in the Resource Administration screen.