Performing Actions on Claims
You can perform actions on the created claim.
Complete the following actions to perform actions on claims:
Log in to the system as a Transportation Manager role.
Click Menu/Favs > Financials > Claims.
The included page could not be found.
The Claims screen opens.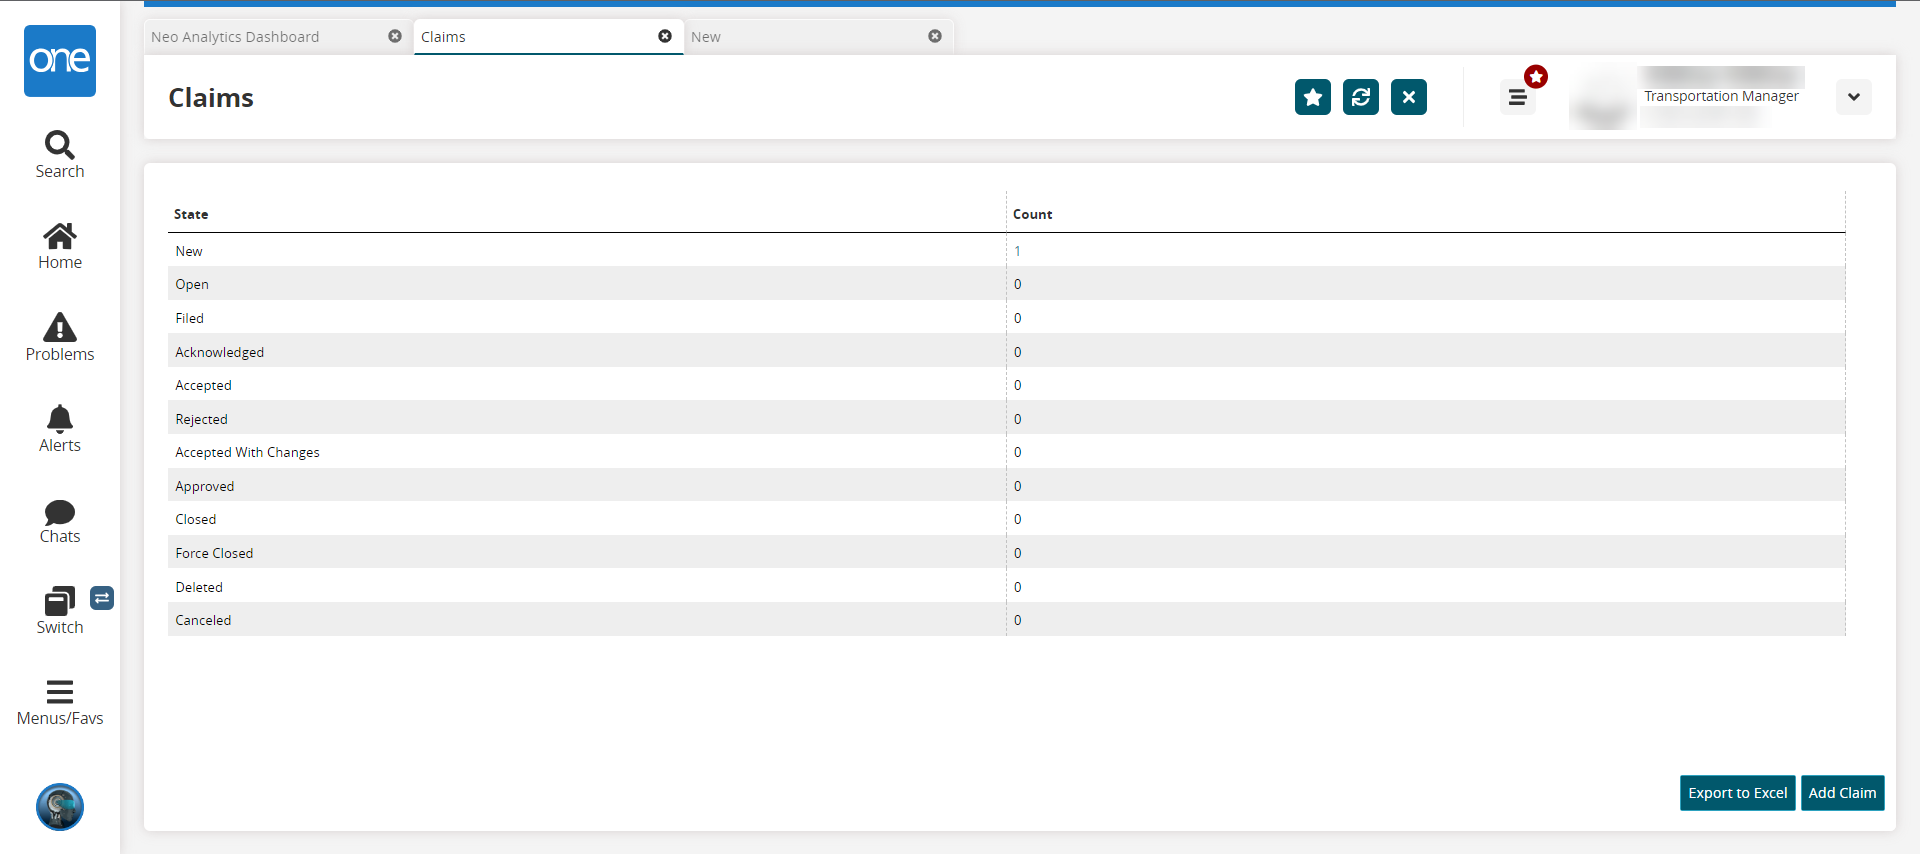
Click the desired state Count column link.
The state report screen displays.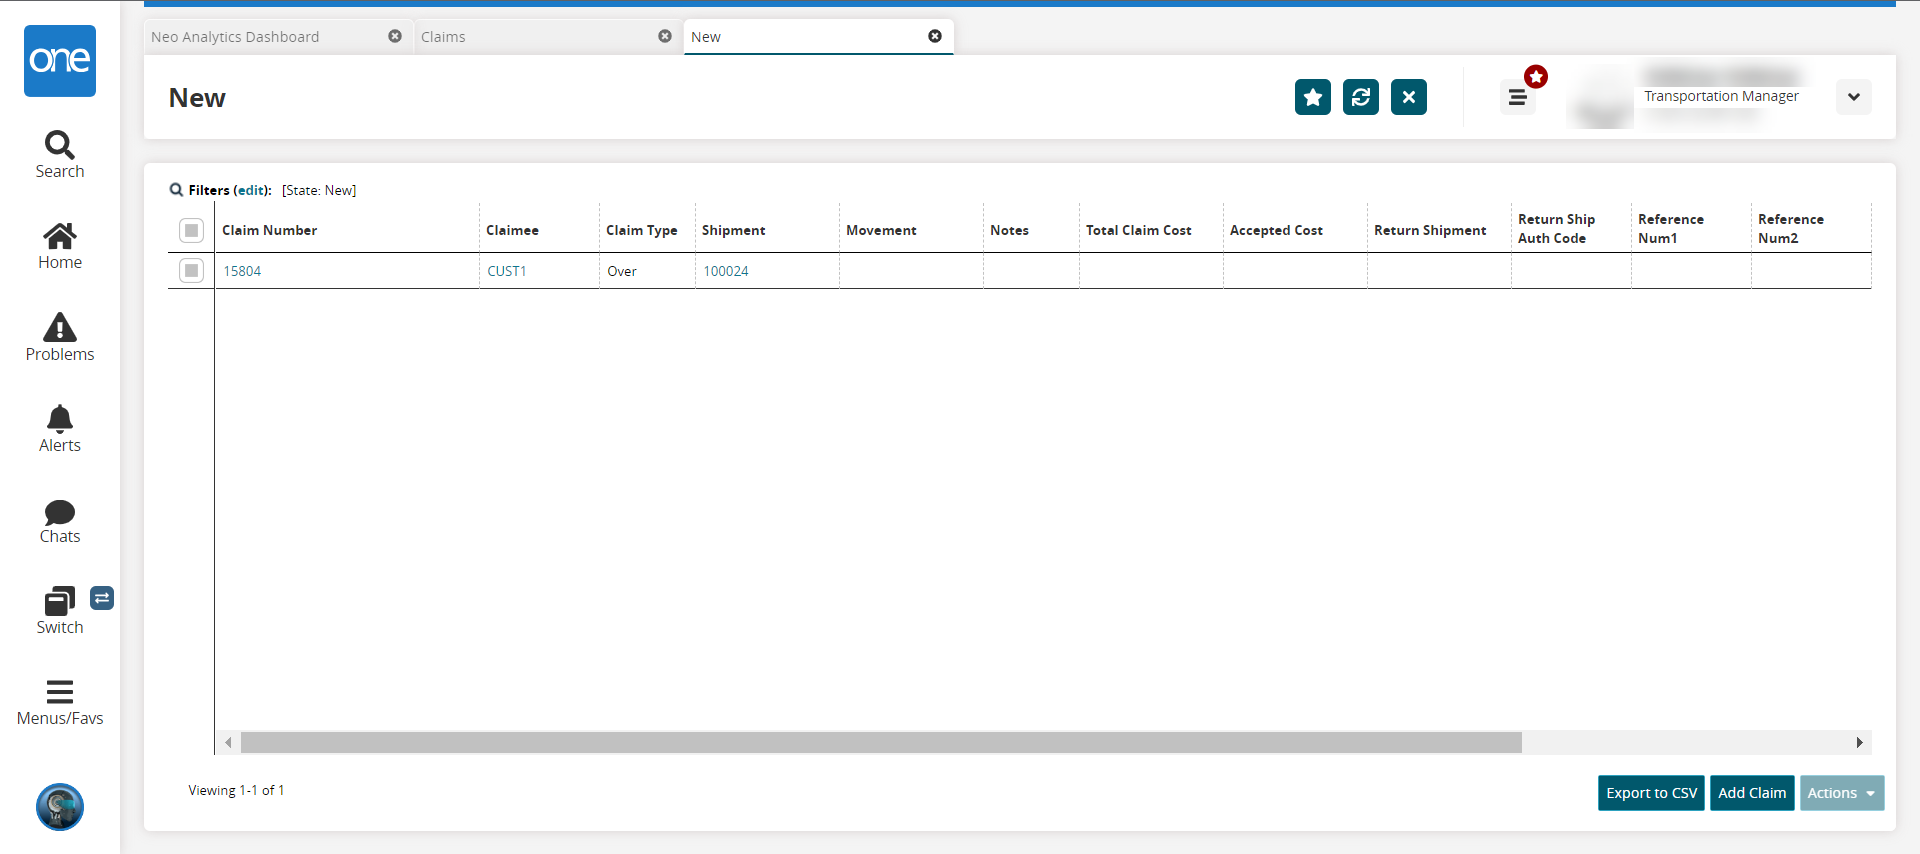
Click the Claim Number checkbox.
Click the Action button, and select an option.
The available options are: Add Response, Add/Remove Attachments, Cancel, Close, Delete Claim, Review, Submit, Submit After Review, and Update Claim. The options are dependent on the current state of the claim.
Action Option
Steps
Add Response
Click the Add Response option.
The Add Response popup displays, and the Notes and Accepted Cost fields are editable.
Click the Notes cell, and enter notes about the claim.
Click the Additional Costs cell.
Enter a numerical value in the first cell, and select a country currency code from the dropdown list.
Click the Submit button.
A green success message displays, and the new information displays in the table.
Add/Remove Attachments
See the "Adding and Removing Claims Documents" section.
Cancel
Click the Cancel option.
The Cancel popup displays.Ensure the correct claims are selected in the popup.
Click the Submit button.
A green success message displays, and the status changes.
Close
Click the Close option.
The Close popup displays.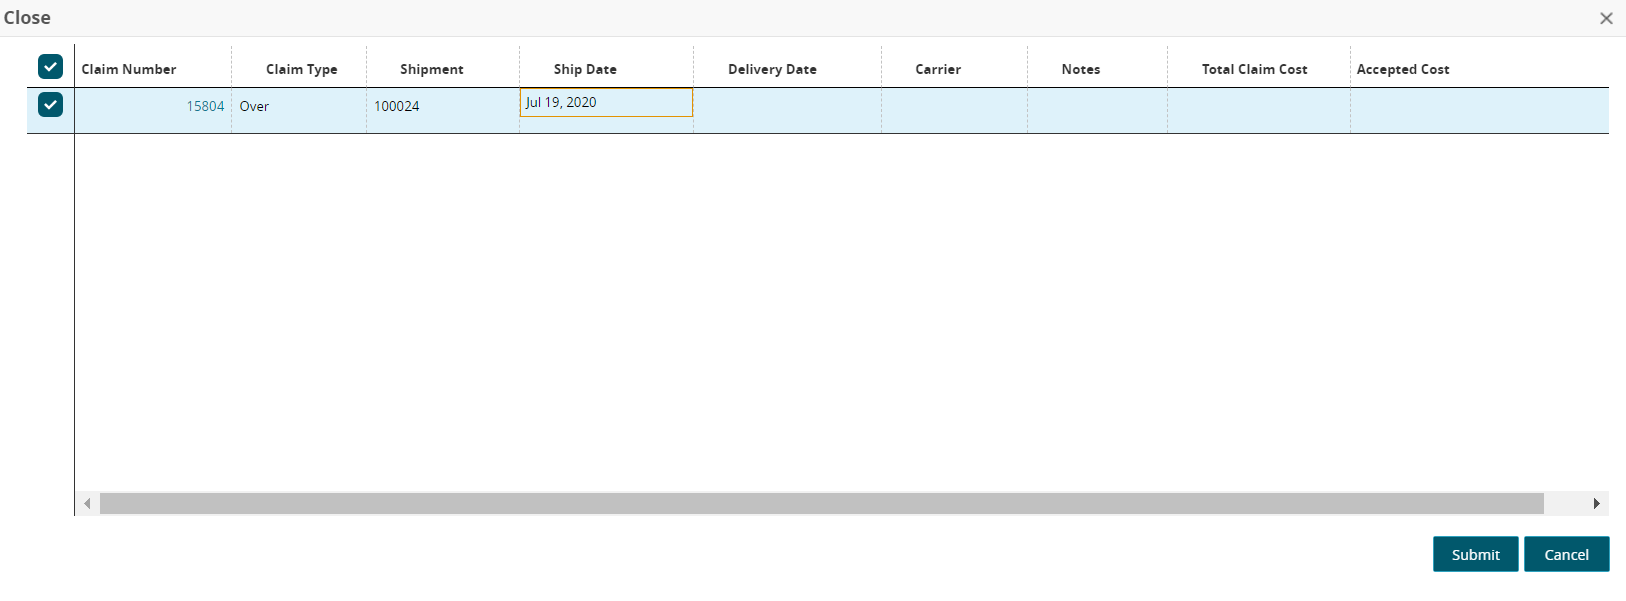
Select the Claim Type from the dropdown list.
Use the picker tool to select values in the Shipment field.
Use the calendar tool to select the Ship Date.
Use the calendar and clock tools to select a date and time for the Delivery Date field.
Enter a carrier name in the Carrier field.
Enter information in the Notes field.
Enter a numerical value and select a country currency code from the dropdown list for the Total Claim Cost field.
Enter a numerical value and select a country currency code from the dropdown list for the Accepted Cost field.
Click the Submit button.
A green success message displays, and the claim status changes.
Delete Claim
Click the Delete Claim option.
The Delete Claim popup displays.Ensure the correct claims are selected in the popup.
Click the Submit button.
A green success message displays, and the status changes.
Review
Click the Review option.
The Review popup displays.
Ensure the correct claims are selected in the popup.
Click the Submit button.
A green success message displays, and the status changes.
Submit
Click the Submit option.
The Submit popup displays.Click on the Notes cell, and enter information as necessary.
Click the Submit button.
A green success message displays, and the status changes.
Submit After Review
Click the Submit After Review option.
The Submit After Review popup displays, and the Notes and Accepted Cost fields are editable.Click the Notes cell, and enter notes about the claim.
Click the Additional Costs cell.
Enter a numerical value in the first cell, and select a country currency code from the dropdown list.
Click the Submit button.
A green success message displays, and the new information displays in the table.
Update Claim
Click the Update Claim option.
The Update Claim popup displays.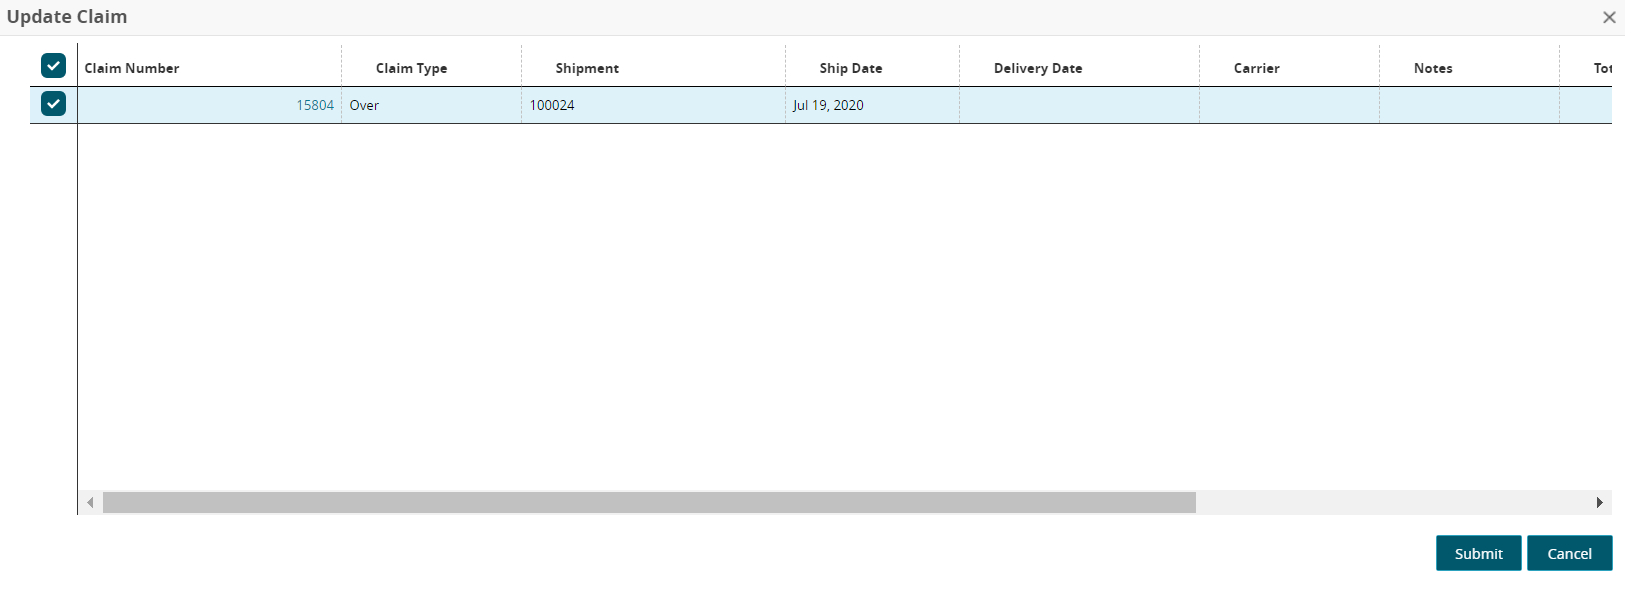
Select the Claim Type from the dropdown list.
Use the picker tool to select values in the Shipment field.
Use the calendar tool to select the Ship Date.
Use the calendar and clock tools to select a date and time for the Delivery Date field.
Enter a carrier name in the Carrier field.
Enter information in the Notes field.
Enter a numerical value and select a country currency code from the dropdown list for the Total Claim Cost field.
Enter a numerical value and select a country currency code from the dropdown list for the Accepted Cost field.
Click the Submit button.
A green success message displays, and the claim status changes.