Adding and Removing Claims Documents
This topic describes how to upload multiple documents to an existing claim.
Complete the following steps to upload claims documents in bulk:
L og in to the ONE system.
Click Menus/Favs > Financials > Claims. In the NEO UI, users can click on the Menus/Favs icon on the left sidebar and type in the name of the screen in the menu search bar. For more information, see "Using the Menu Search Bar."
The Claims screen opens.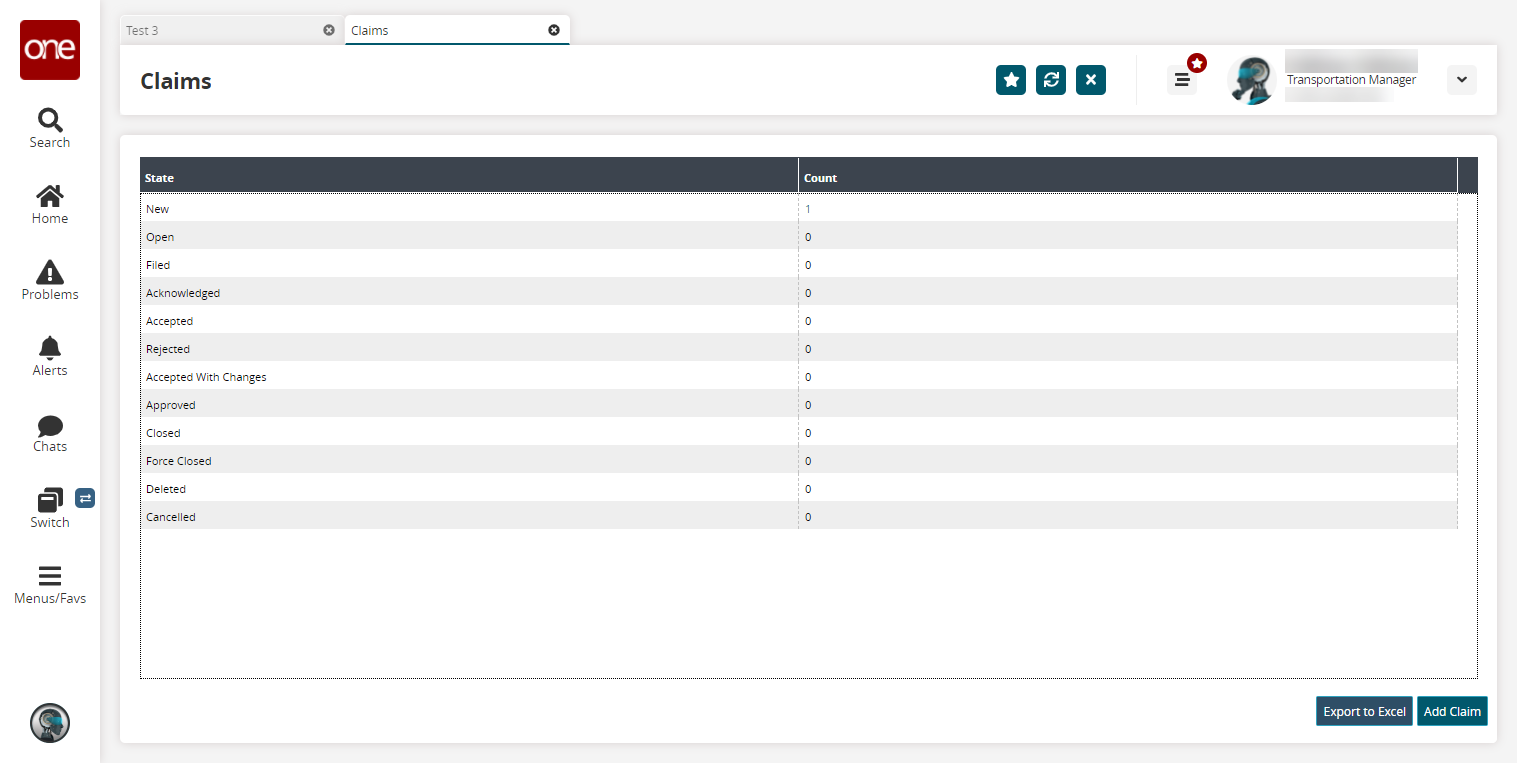
Click the desired Count link.
Info
Bulk uploading can only be performed for the following states: New, Open, Failed, Acknowledged, Accepted, Rejected, Accepted with Changes, and Approved.
The claim state details screen opens.
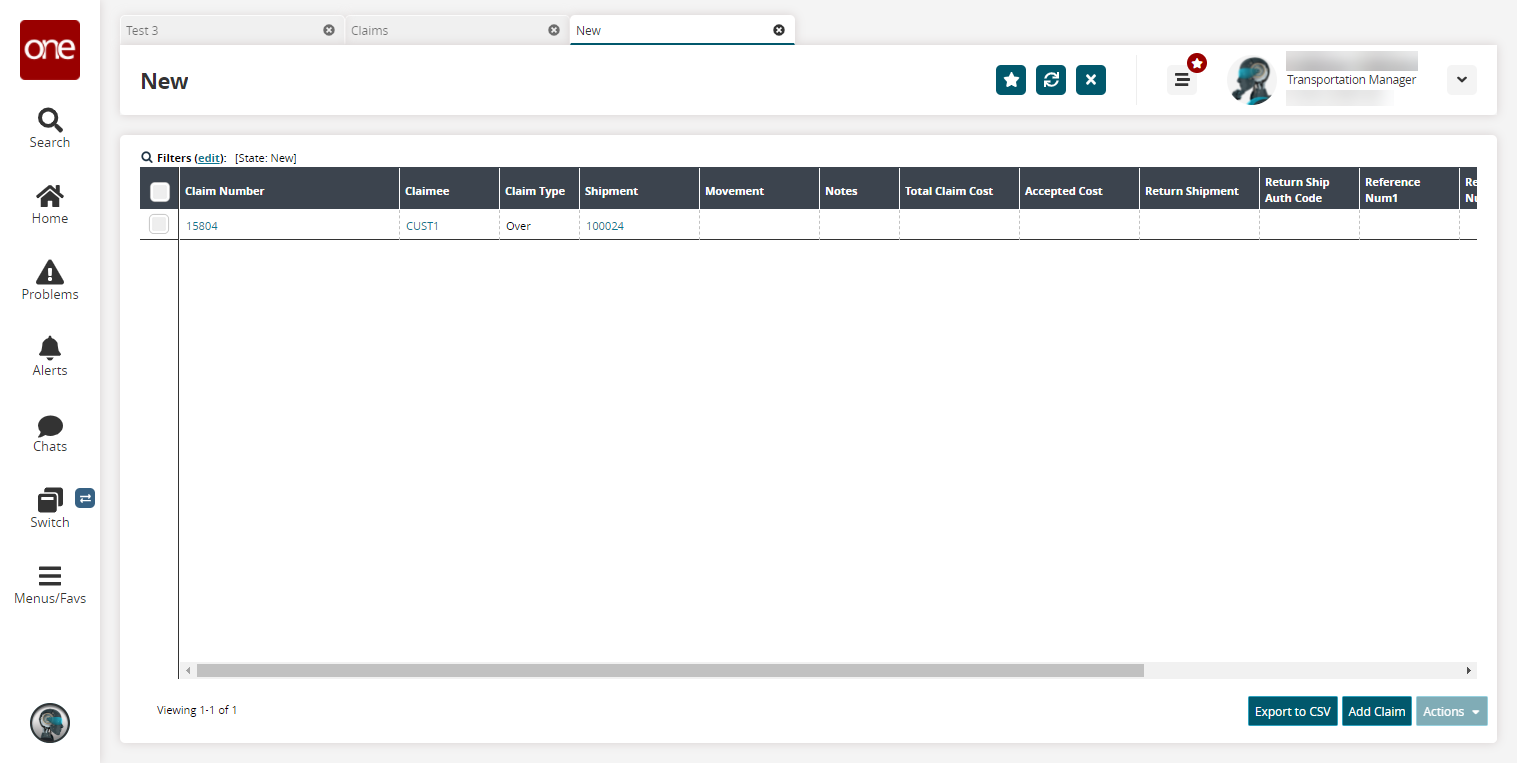
Select a checkbox, click the Actions button, and select the Add/Remove Attachment option.
The Add/Remove Attachment popup opens.
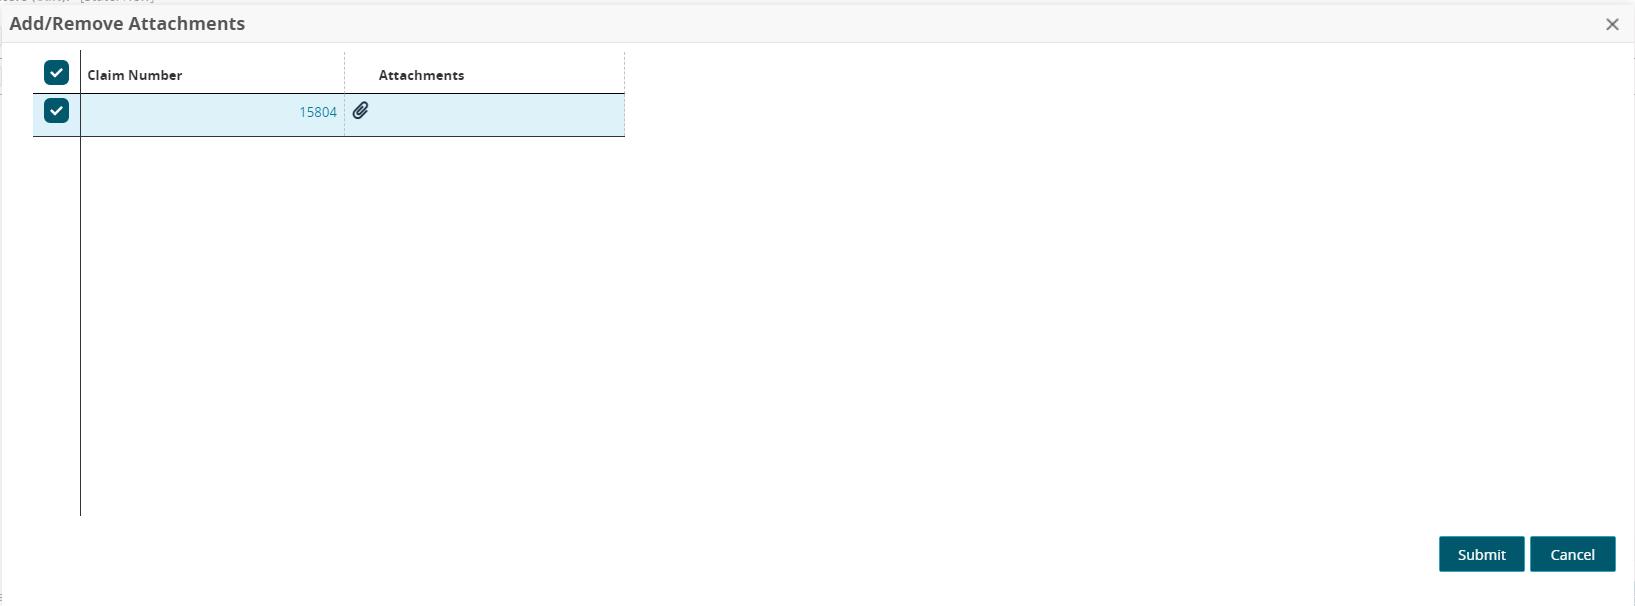
Click in the Attachments cell.
The Upload and Cancel links display.Click the Upload link to upload one or more claim documents.
Click the Submit button.
A success message opens.