Planning Workbench
The Planning Workbench allows you to view shipments simultaneously. This tool can create, modify, and delete movements manually, without using load consolidation. You can create a new movement based solely on master data, assign the shipment to any resource, and validate the policies.
Using the Workbench
Complete the following steps to use the workbench:
L og in to the ONE system.
Select Menu/Favs > Planning > Workbench.
In the NEO UI, users can click on the Menus/Favs icon on the left sidebar and type in the name of the screen in the menu search bar. For more information, see "Using the Menu Search Bar."
The planning Workbench screen displays with the Shipment Filters tab open.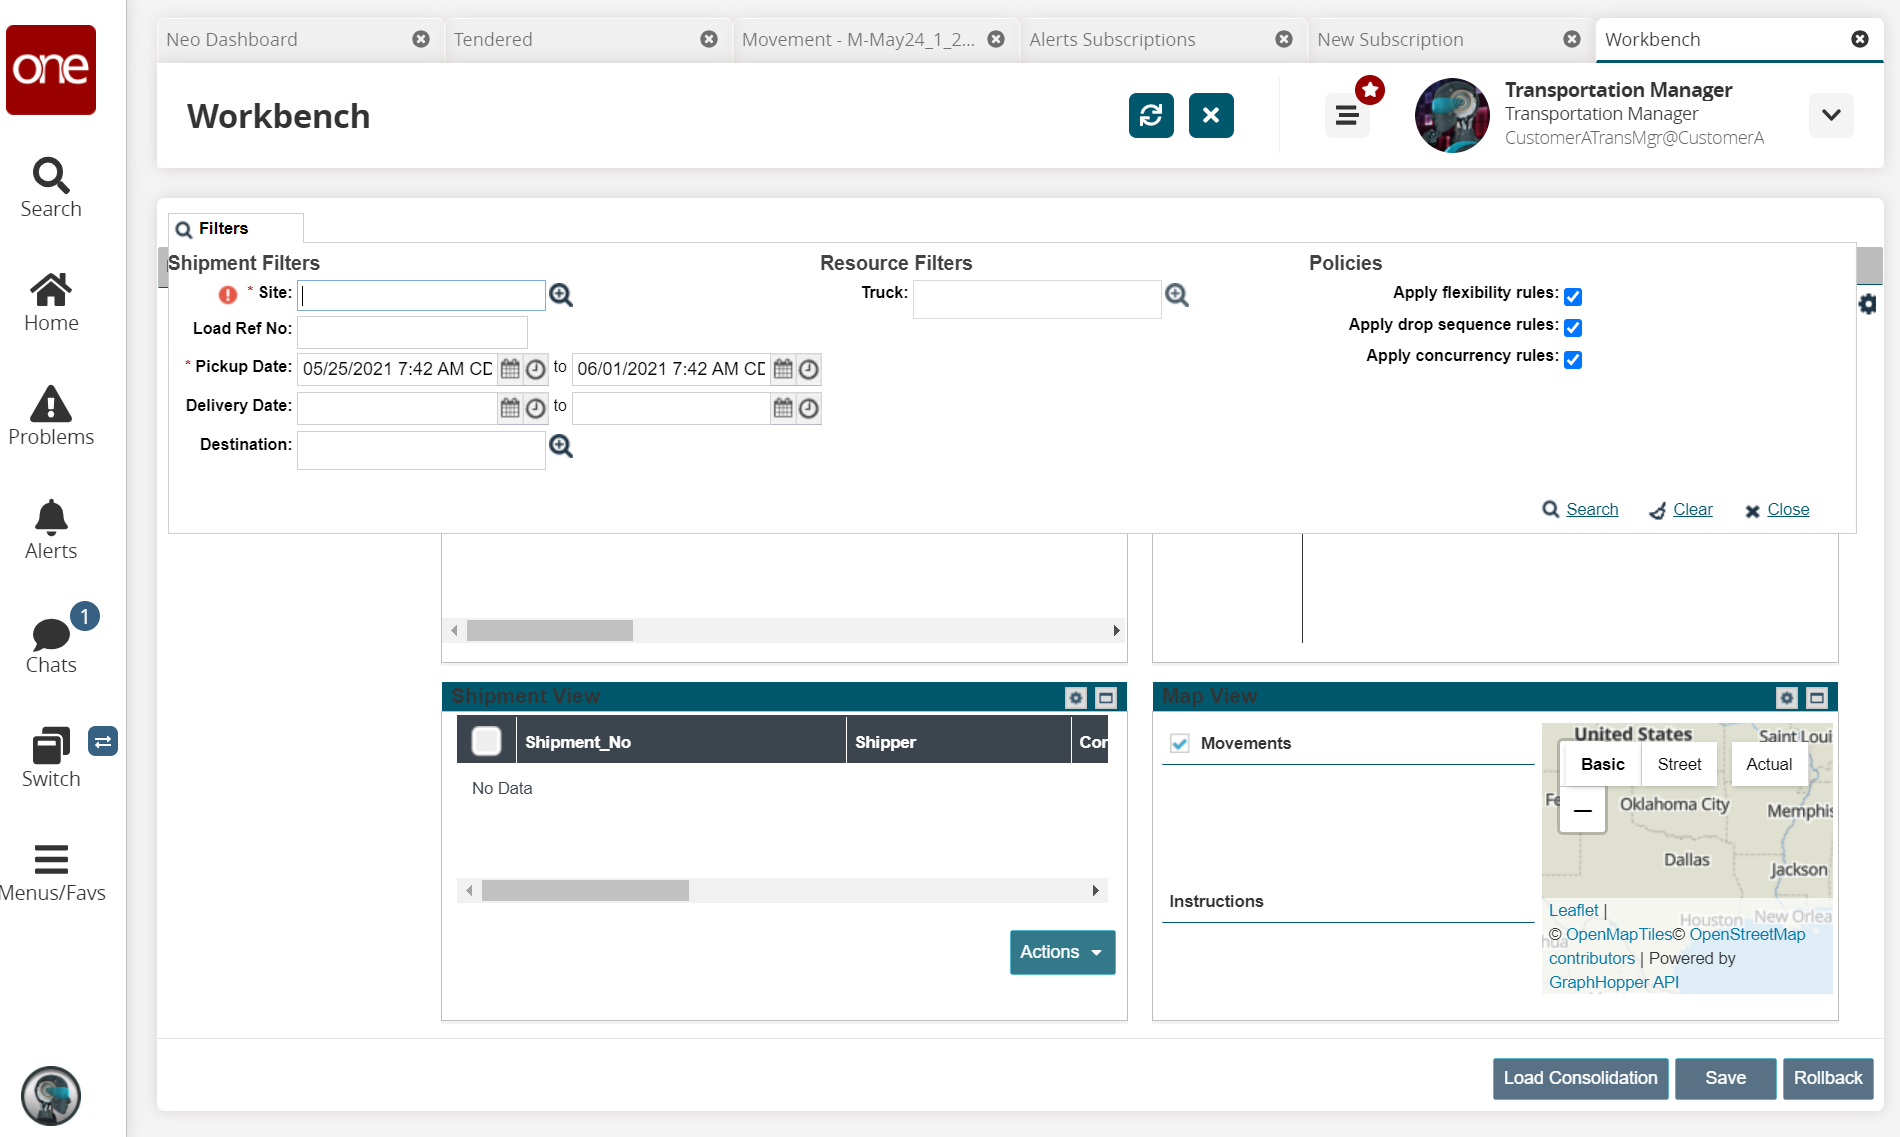
Enter values for fields described in the table below. Fields with an asterisk ( * ) are required.
Section
Field
Description
Shipment Filters
* Site
Use the picker tool to select the origination site for filtering shipments.
Load Ref No
Enter in the load reference number.
* Pickup Date
Use the calendar and clock tools to enter beginning and end dates for the pickup window.
Delivery Date
Use the calendar and clock tools to enter beginning and end dates for the delivery window.
Destination
Use the picker tool to select the destination for the shipment.
Resource Filters
Truck
Use the picker tool to select a resource (truck) type.
Policies
Apply flexibility rules
Check the box to filter for shipments with applied flexibility rules.
Apply drop sequence rules
Check the box to filter for shipments with applied drop sequence rules.
Apply concurrency rules
Check the box to filter for shipments with applied concurrency rules.
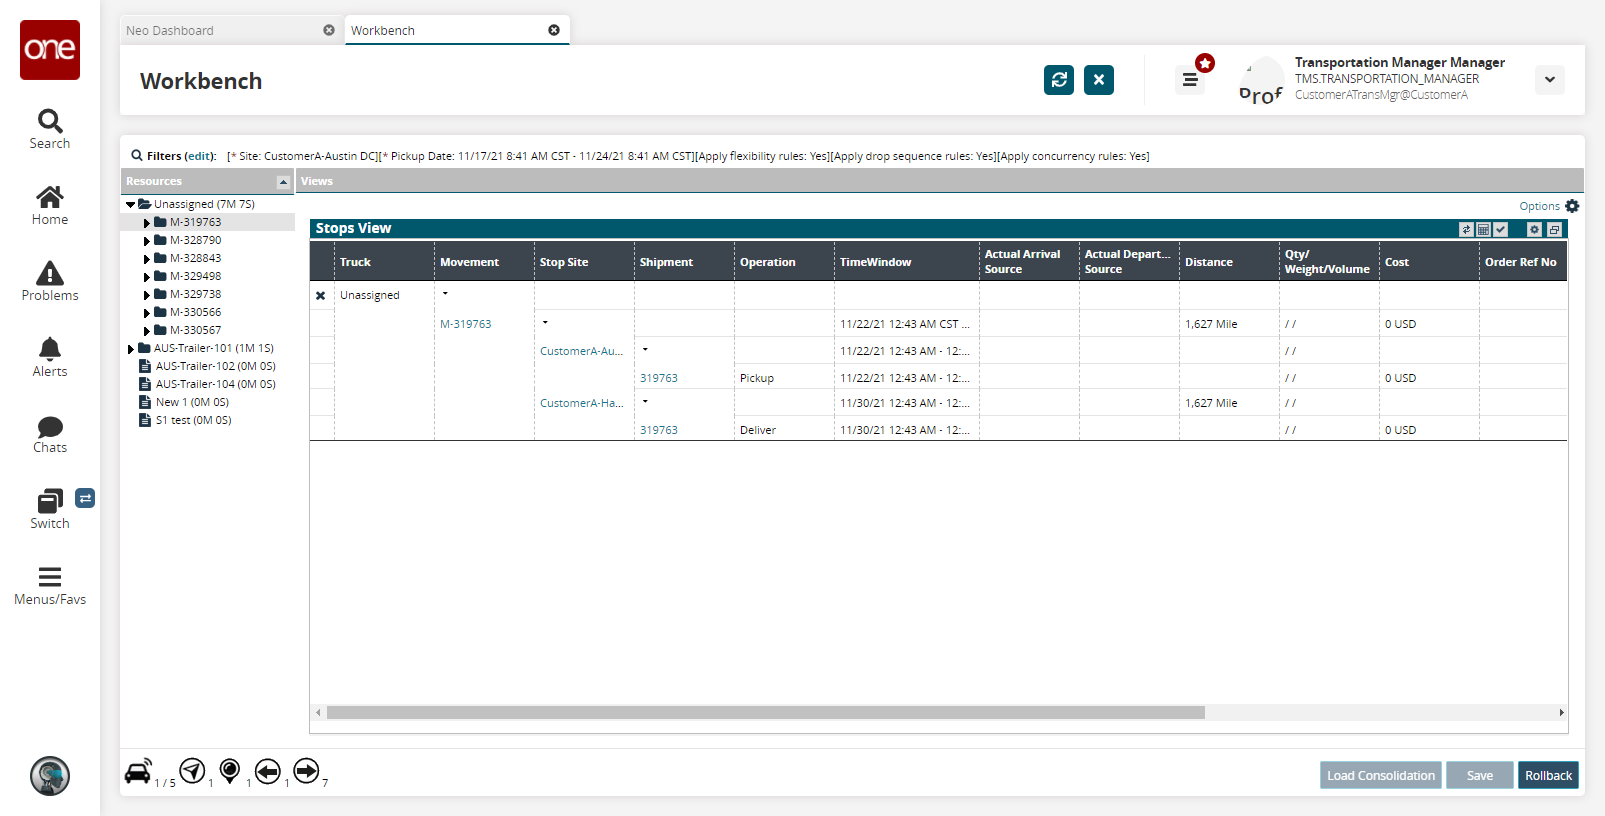
Click the Search link.
The workbench screen appears. The navigation pane on the left, Resources, displays unassigned shipments and resources (trucks and trailers), and the Views pane is divided into four sections: Stops View, Gantt View, Shipment View, and Map View.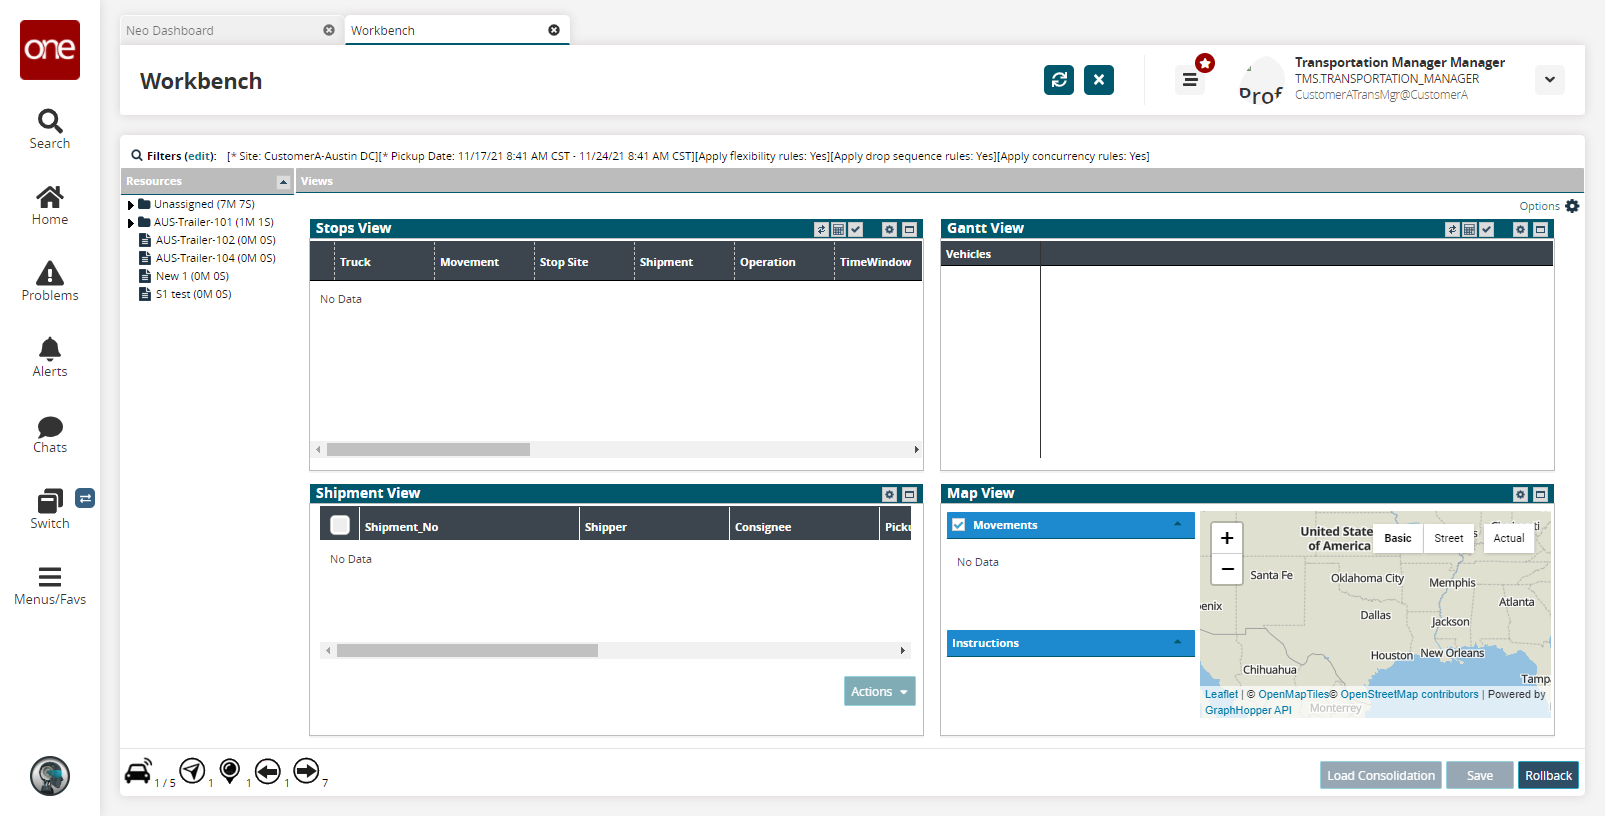
Common Features
There are similar functionalities common to the various views.
In the Stops and Gantt Views, select the Reset icon
 to undo any configurations, such as assigned movements to vehicles.
In the Stops and Gantt Views, select the Calculate icon
 to calculate any new configurations, such as assigned movements to vehicles.
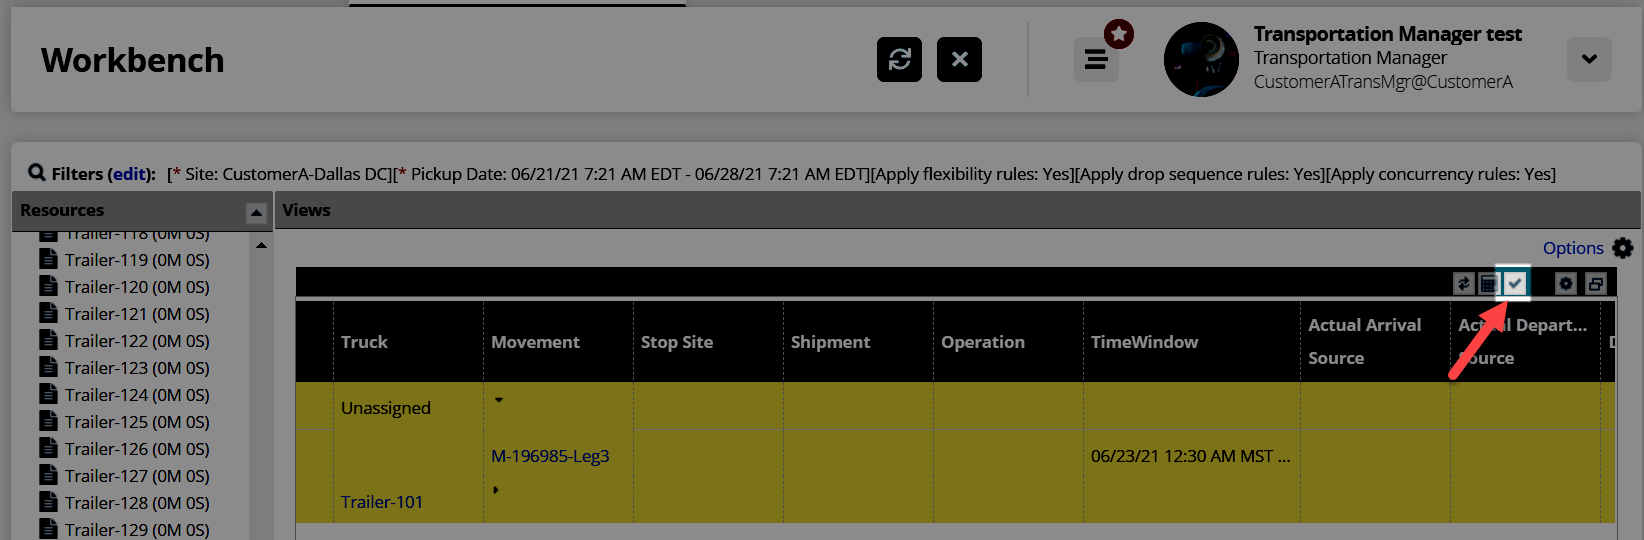
In the Stops and Gantt Views, select the Apply icon
 to apply and save any calculations.
In all views, select the Options icon
 to rename or delete a view.
In all views, select the Maximize icon to maximize the view to the entire screen.
At any time, click the Options menu to add a view, reset the layout, or customize the layout.
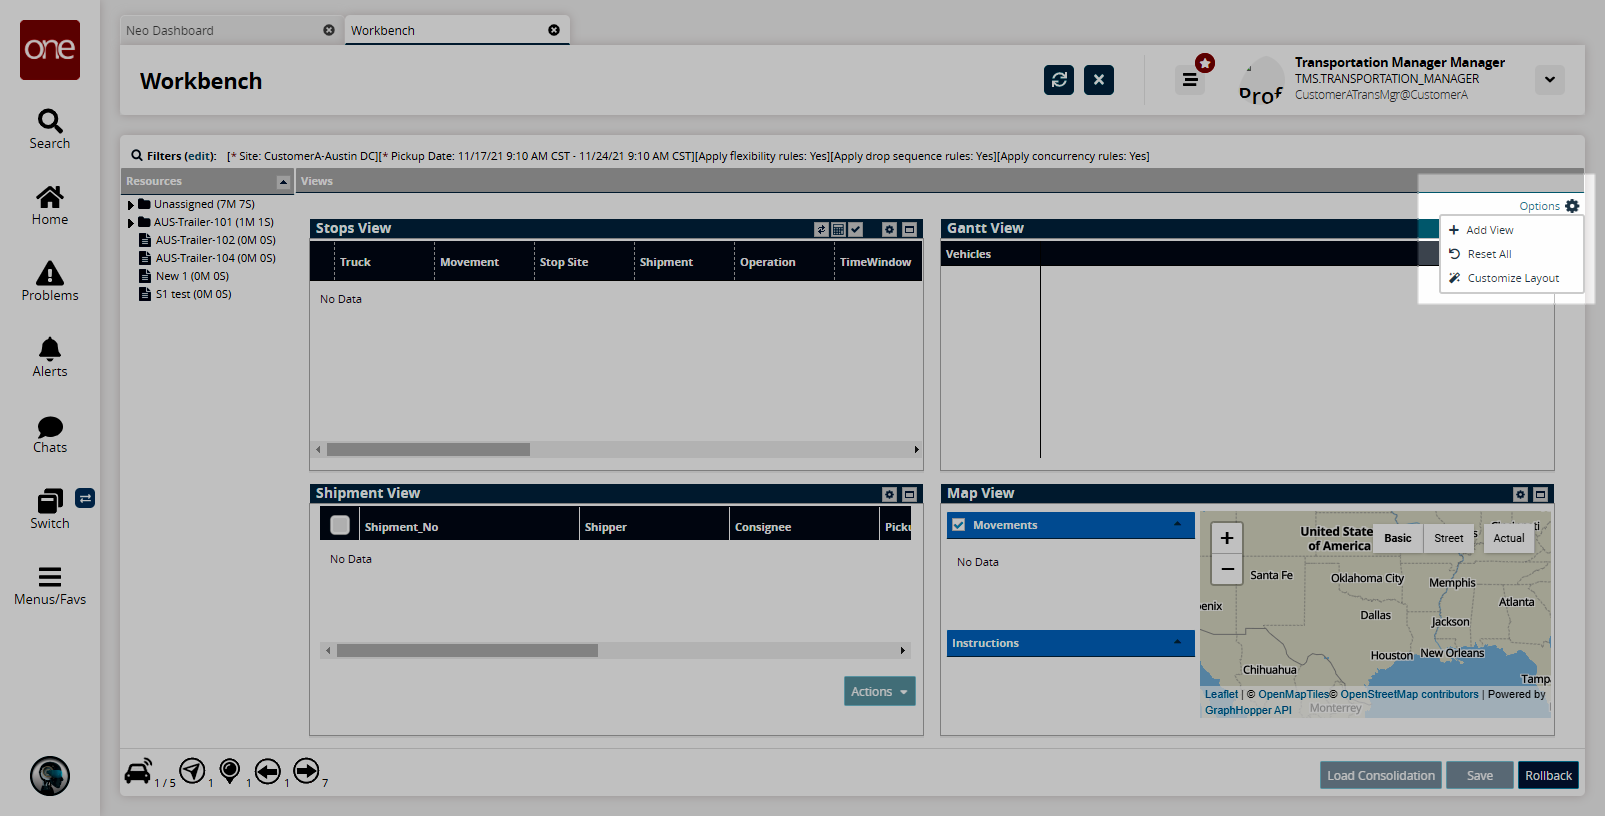
Select Customize Layout.
The Customize Layout popup appears.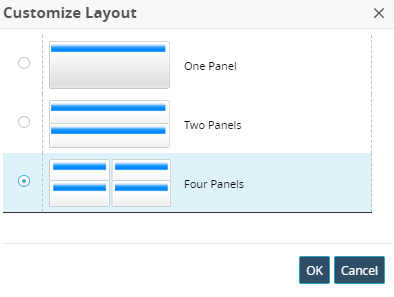
Select either one, two, or four panels. If you select fewer panels than are currently visible, the system requires you to delete them first.
Click OK.
From the Options menu, select Reset All to reset back to the default view.
From the Options menu, select Add View to add back a view that was previously deleted.
Click the Load Consolidation button to consolidate loads into a single shipment.
Click the Rollback button to rest all parameters back to their original settings.
Stops View
The Stops View can be used to assign movements to vehicles and also to build movements from shipments. Users can drag multiple unassigned shipments into the Stops View and use them to build a single movement. Users can also add the movement to a vehicle if desired. The following information can be displayed for each shipment in Stops View.
Truck
Movement
Stop Site
Shipment
Operation
Time Window
Actual Arrival Source
Actual Departure Source
Distance
Quantity/Weight/Volume
Order Reference Number
Special Instructions
Deadhead Time
Deadhead Route
Complete the following steps to assign a movement/shipment to a resource:
Click the Maximize icon in the right corner of the Stops View section to maximize the view screen.
In the Resources pane on the left, expand the Unassigned list to show unassigned movements.
Drag an unassigned movement into the Stops View pane.
The movement/shipment is added as a new row.In that movement, click the arrows for Movement, Stop Site, and Shipment to expand and view details as shown in the screenshot below.
Drag an unassigned trailer or vehicle from the Resources pane to the Stops View.
The resource is added as a new row.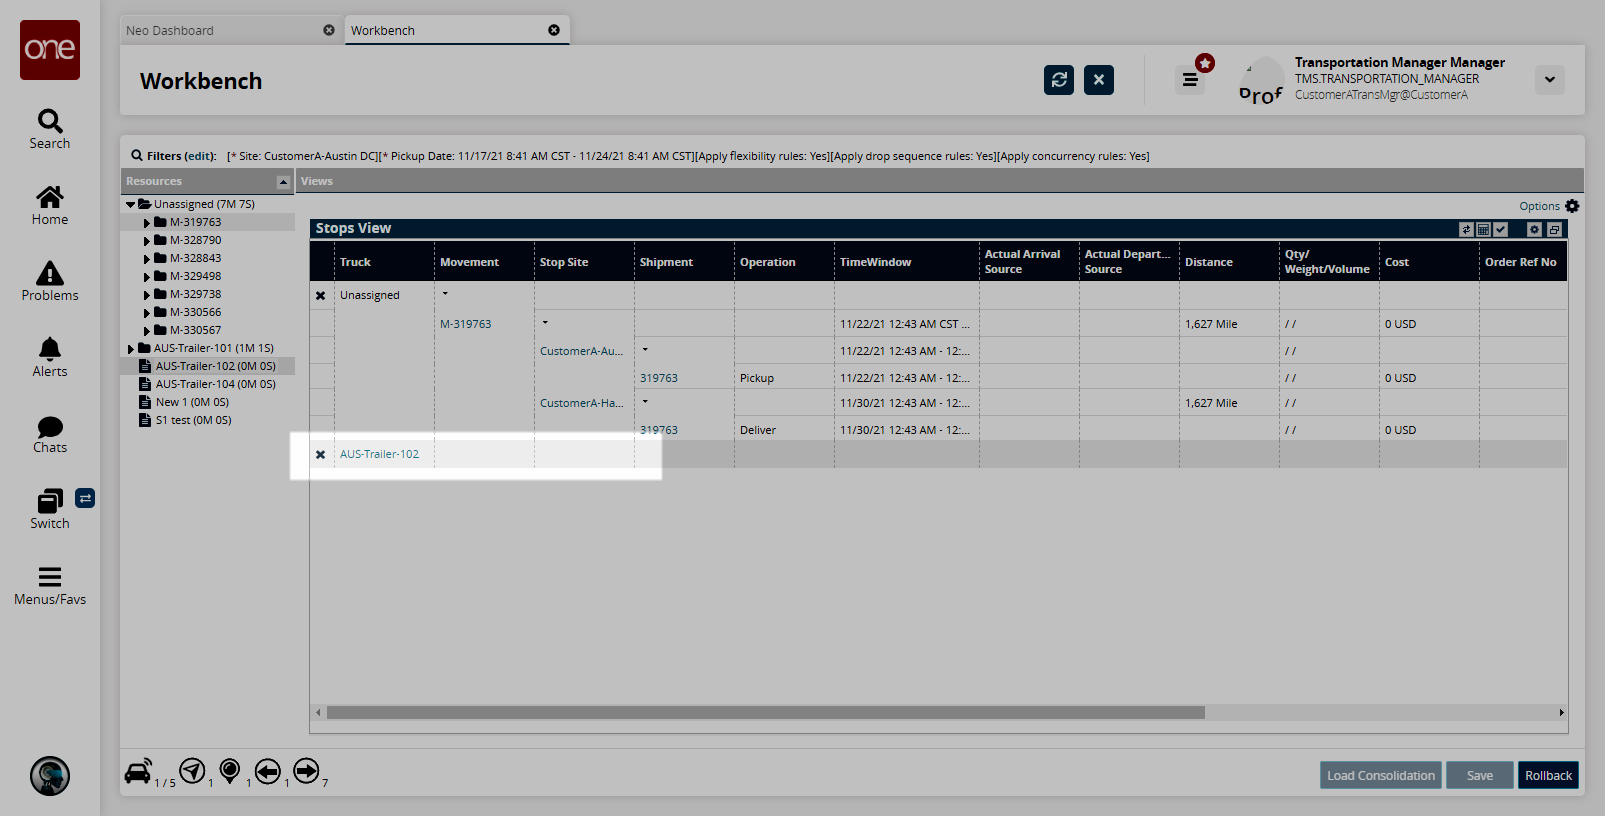
Click and drag a row header cell for the movement/shipment time window into the trailer or vehicle row.
A valid assignment shows a green and white checkmark as a tooltip when dragged to the resource. An invalid assignment or dragging to an invalid location shows a red circle with a slash.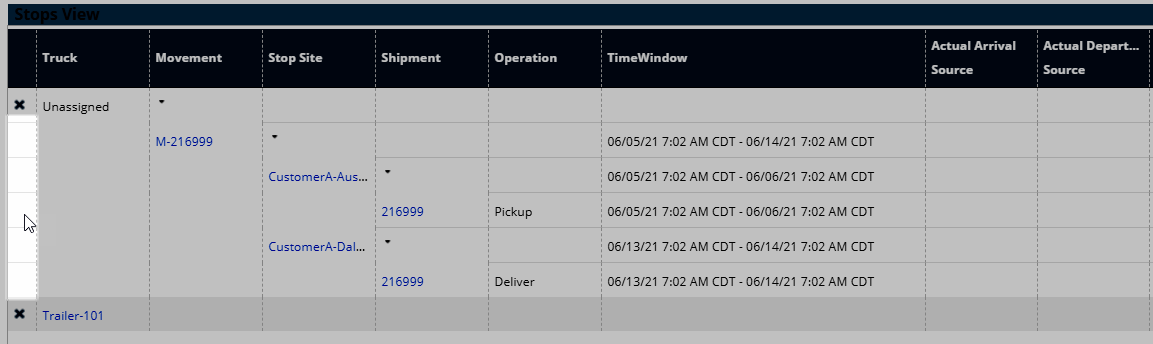
The movement/shipment is assigned to the resource, and the combination is highlighted in yellow with a temporary movement number.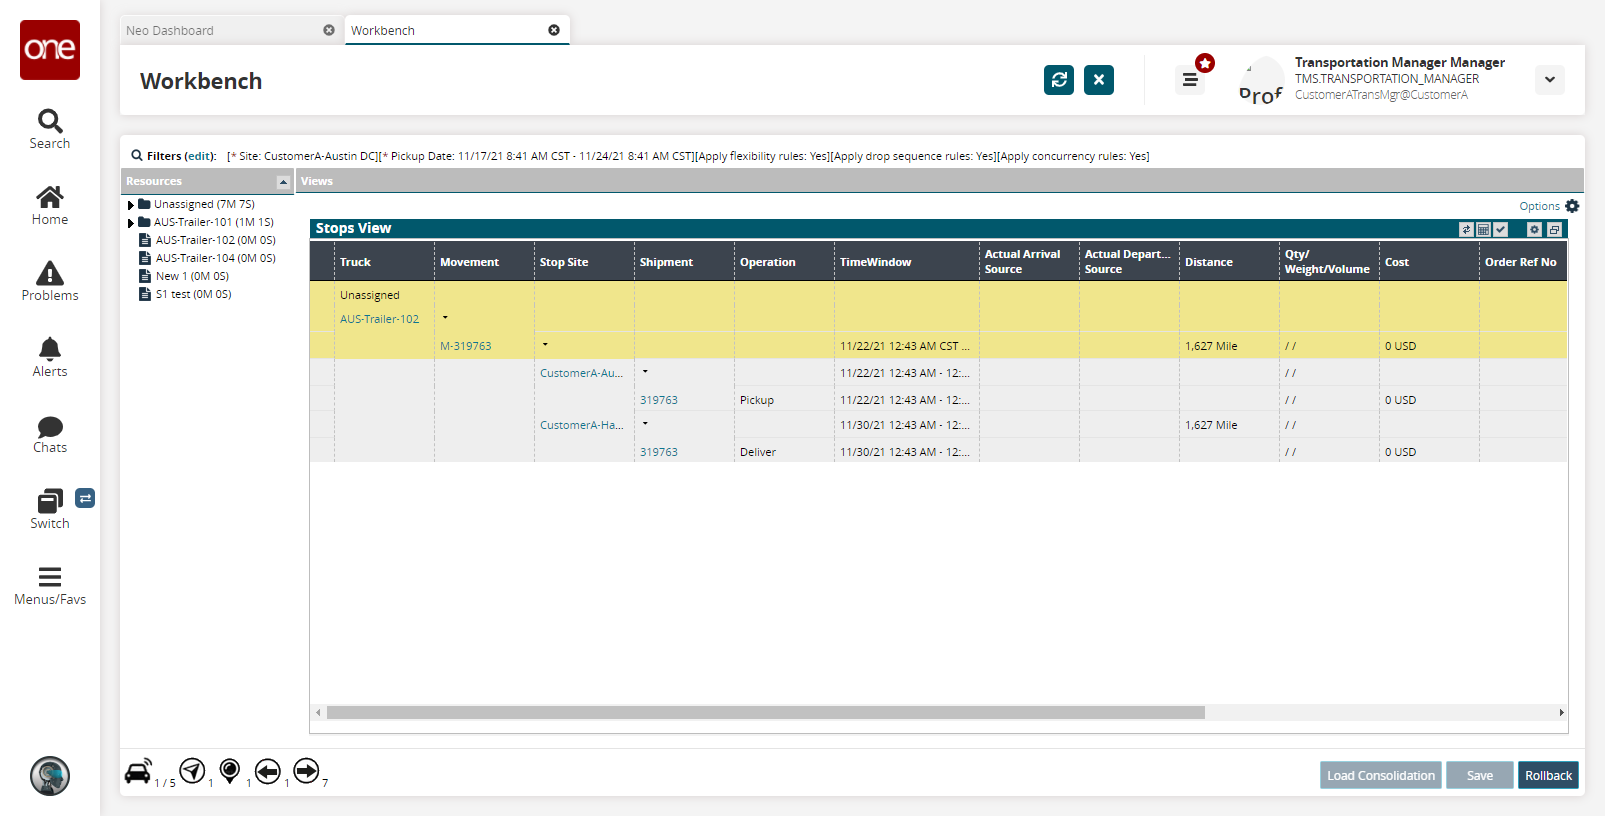
Click the Calculate button to calculate the shipment details.
The Calculate function determines if the movement meets the planning constraints.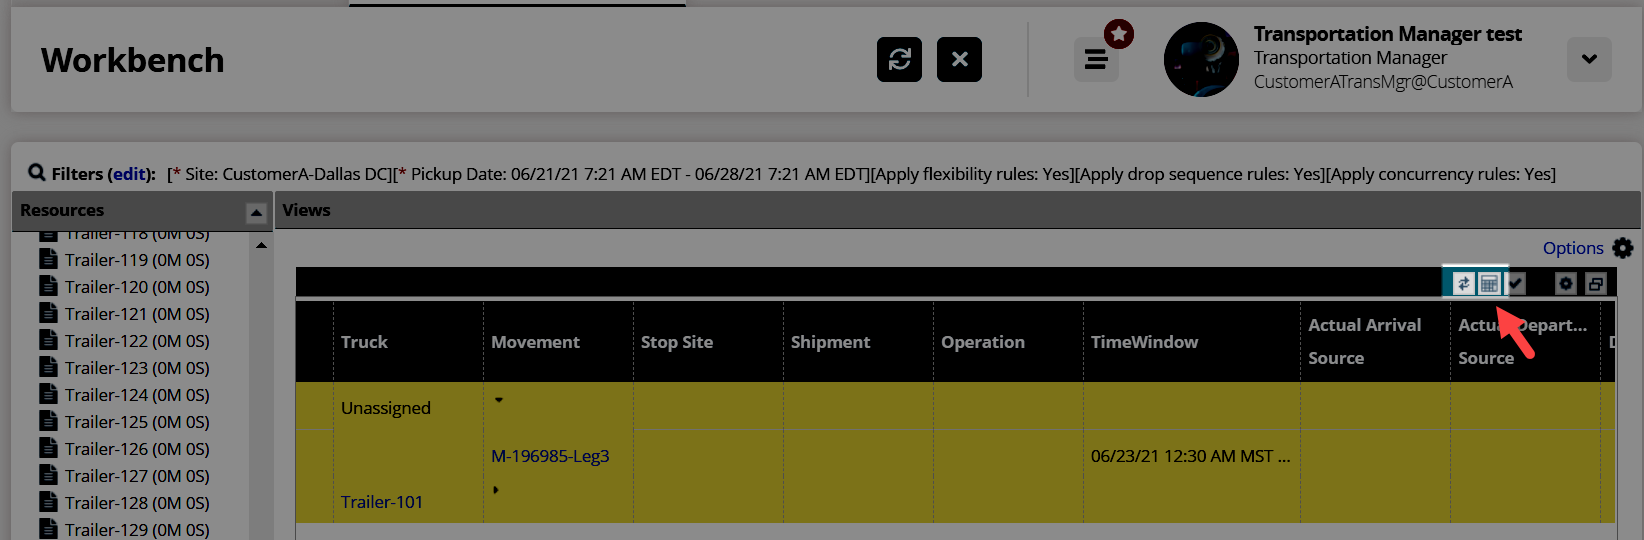
If this calculation results in a soft constraint violation, the system will still save the calculation but will display a warning. If this calculation results in a hard constraint violation, such as occurring outside of the site's work hours, the system will display an error and will not save the calculation.
If you need to undo changes, you can click the Reset button (to the left of the Calculate button) for this pane or click the Rollback button to undo all changes in all 4 panes.
Click the Apply button. This button applies the changes to when the shipment is viewed in the other panes (such as the Stops View).
Click Save to save the shipment details.
Gantt View
This feature enables you to view resources under the Vehicles pane in a Gantt View that can provide detailed information about the movement or the shipment by 15-minute increments within the hourly segments (01-24 hours); e.g., Pickup, In-transit, Deliver, and so on.
Complete the following steps to view vehicle information in the Gantt View:
Click the Maximize icon in the Gantt View pane.
Drag a vehicle resource to the Vehicles pane of the Gantt View pane.
The vehicle is added as a row with dates and hours.Drag a movement directly onto a vehicle.
The row updates with colored bars indicating the whole movement and the pickup/delivery windows. Hover the mouse over a bar to see a tooltip with details.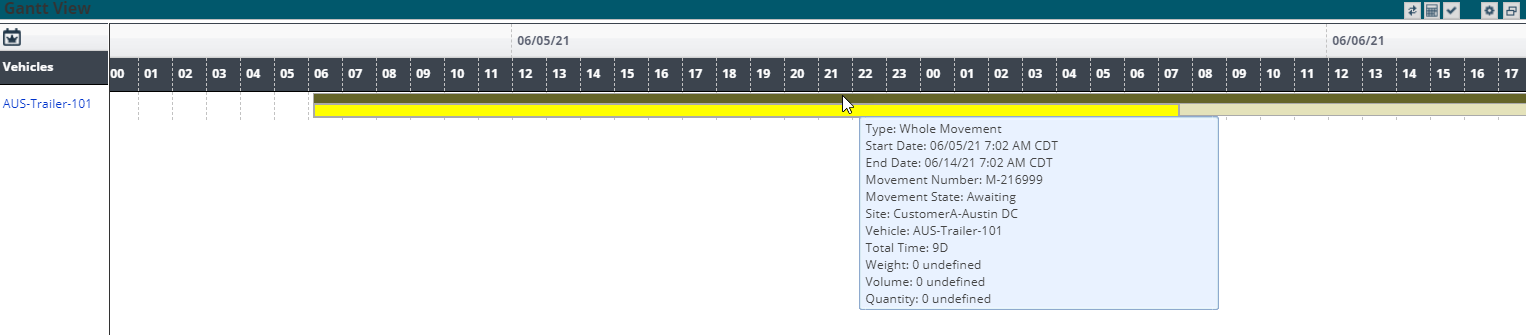
Shipment View
This view allows you to view shipment details as listed below and to perform actions.
Shipment Number
Shipper
Consignee
Pickup
Delivery
Quantity
Weight
Volume
Complete the following steps to work with shipments in the Shipment View:
Click the Maximize button for the Shipment View pane.
Drag movements/shipments from the Resources pane to the Shipment View pane.
The shipment details appear in the right pane.Select the checkbox of the desired shipment and click the Actions button and perform various actions.
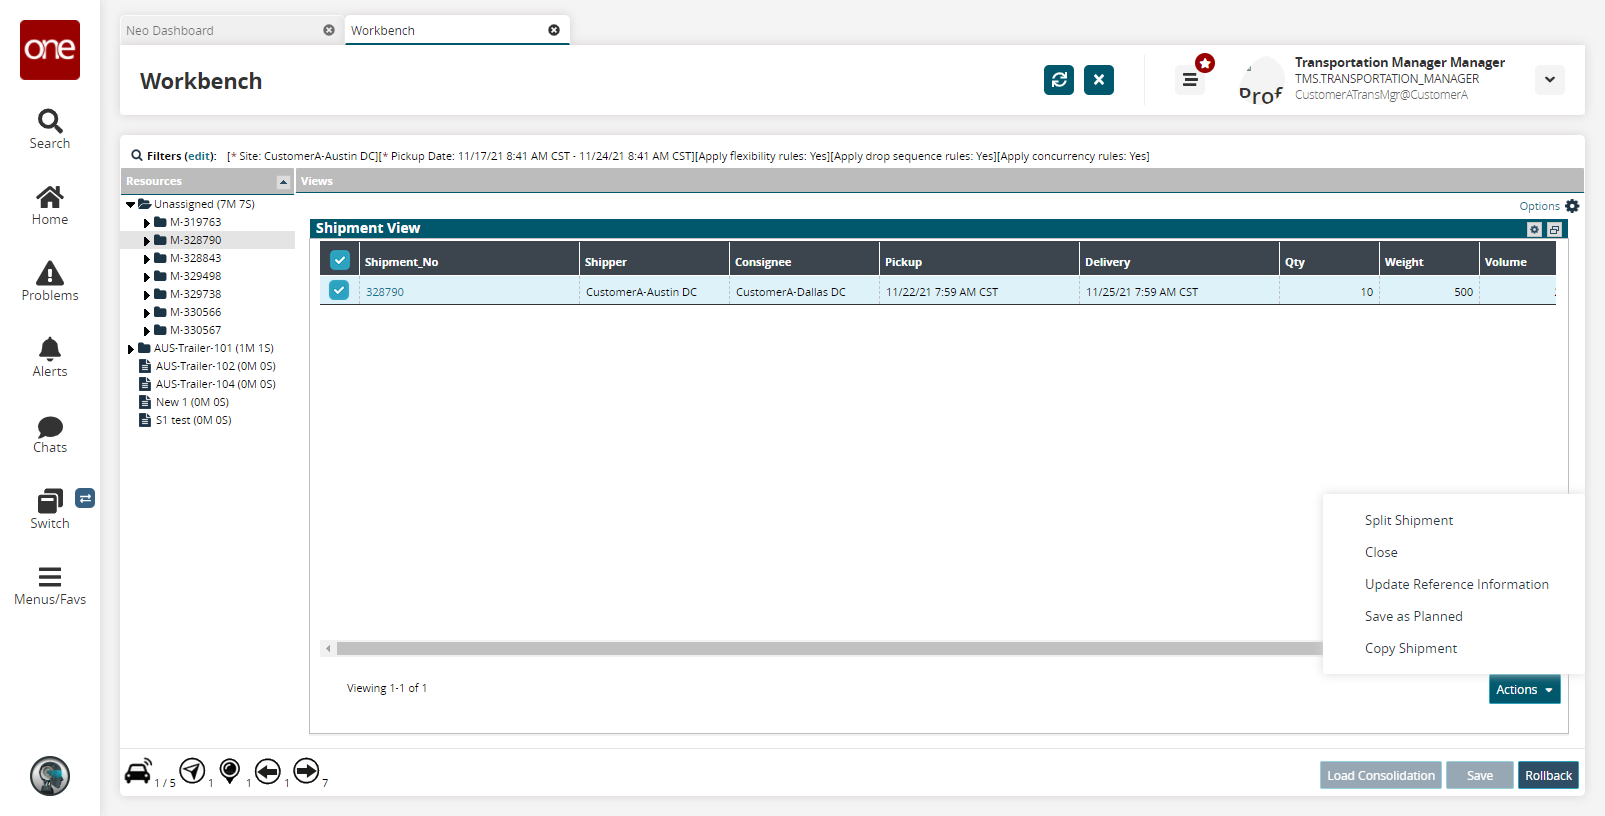
Select the Split Shipment action to split the contents of the selected shipment into another shipment.
The Split Shipment popup displays.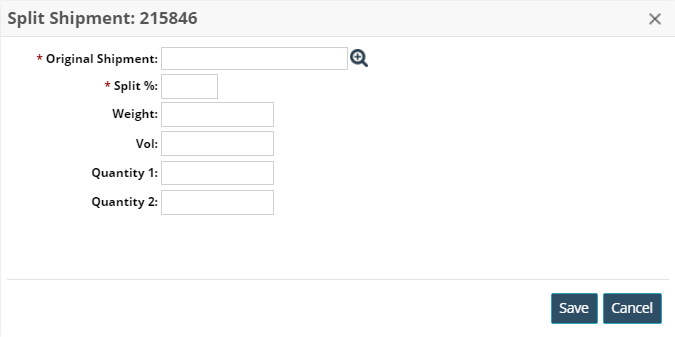
Enter values for fields described in the table below. Fields with an asterisk ( * ) are required.
Field
Description
*Original Shipment
Use the picker tool to select the original shipment.
*Split %
Enter the percentage for a split shipment.
Weight
Enter the weight.
Vol
Enter the volume.
Quantity 1
Enter a value for Quantity 1.
Quantity 2
Enter a value for Quantity 2.
Click Save.
To close the selected shipment, select Close from the Actions menu.
To update the shipment information, select Update Reference Information.
To save the shipment, select Save As Planned from the Actions menu.
To copy the shipment, select Copy Shipment from the Actions menu.
The Copy Shipment popup displays.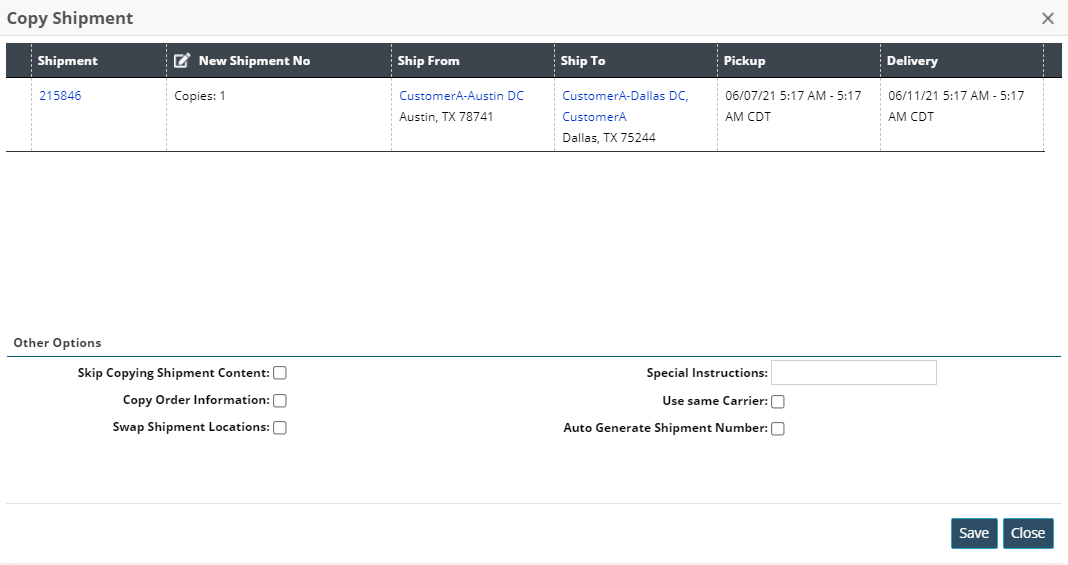
Enter values for the fields described in the table below.
Field
Description
Skip Copying Shipment Content
Check this box if you do not want to copy shipment content.
Copy Order Information
Check this box if you want to copy over the order details.
Swap Shipment Locations
Check this box if you want to swap shipment locations.
Special Instructions
Type in any instructions for the copied shipment.
Use same Carrier
Check this box if you want to use the same carrier as the original shipment.
Auto Generate Shipment Number
Check this box if you want the system to generate a shipment number.
Click the Save button.
Map View
This view allows you to view your shipment in a map view.
Complete the following steps to view shipments in the Map View:
Click the Maximize icon in the Map View pane.
Drag the shipment(s) beneath the Movements section of Map View.
Select the checkbox of the shipment.
The shipment displays on the map with start and end stops with a direct route.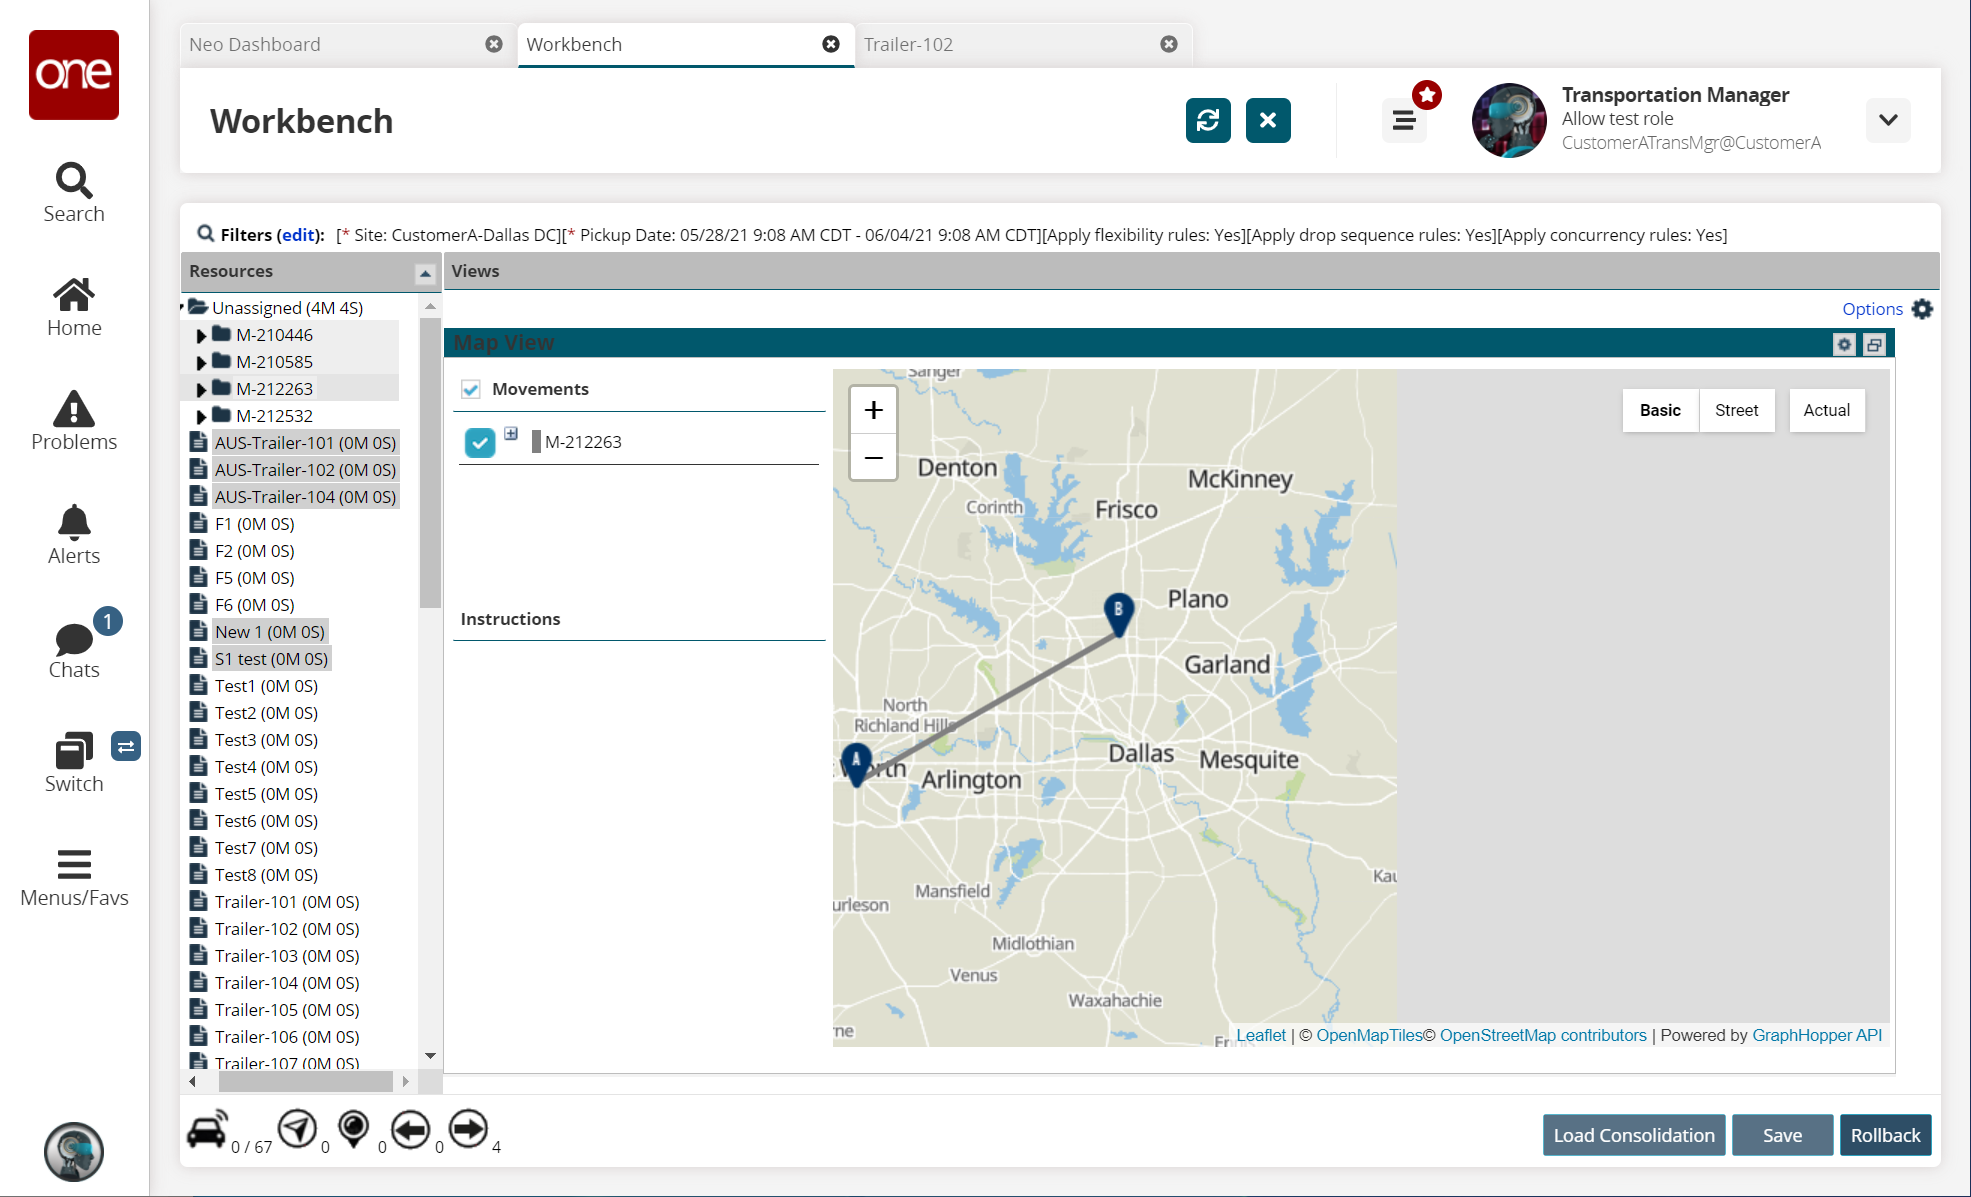
Click the plus sign to show the distance and the first and last stop information.
Click a pin (A or B shown in the example) for more information about the stop and the movement.
Click the Save button.