Viewing Planning Regions
Planning regions offer the ability to construct a regional group based on sites in a certain area.
Complete the following steps to view planning regions:
L og in to the ONE system.
Select Menu/Favs > Planning > Policies > Planning Regions.
In the NEO UI, users can click on the Menus/Favs icon on the left sidebar and type in the name of the screen in the menu search bar. For more information, see "Using the Menu Search Bar."
The Planning Region screen appears.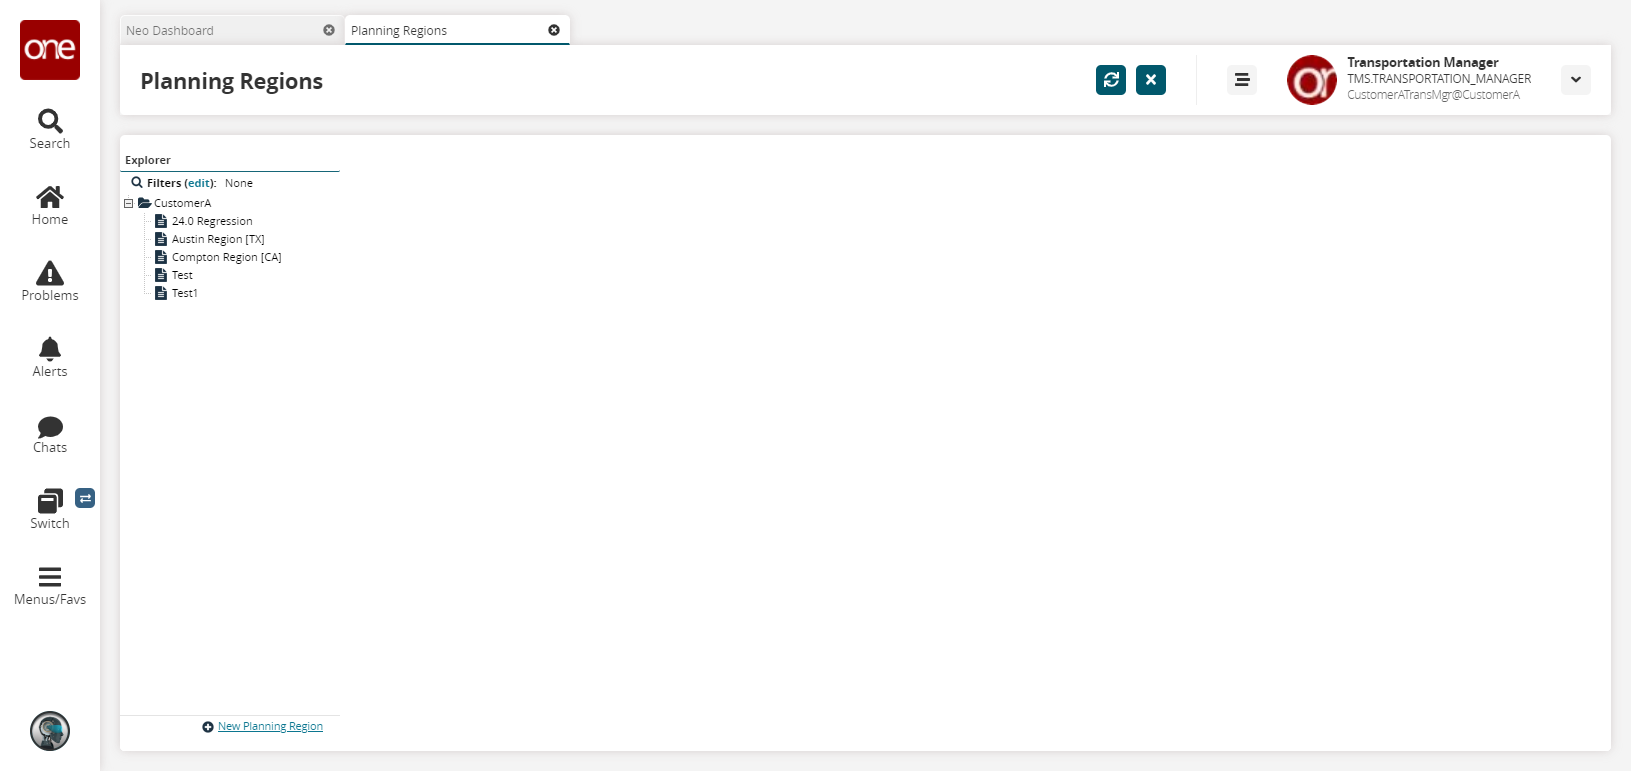
To view the details for a particular region, click on the name of a region in the explorer pane.
The page updates.
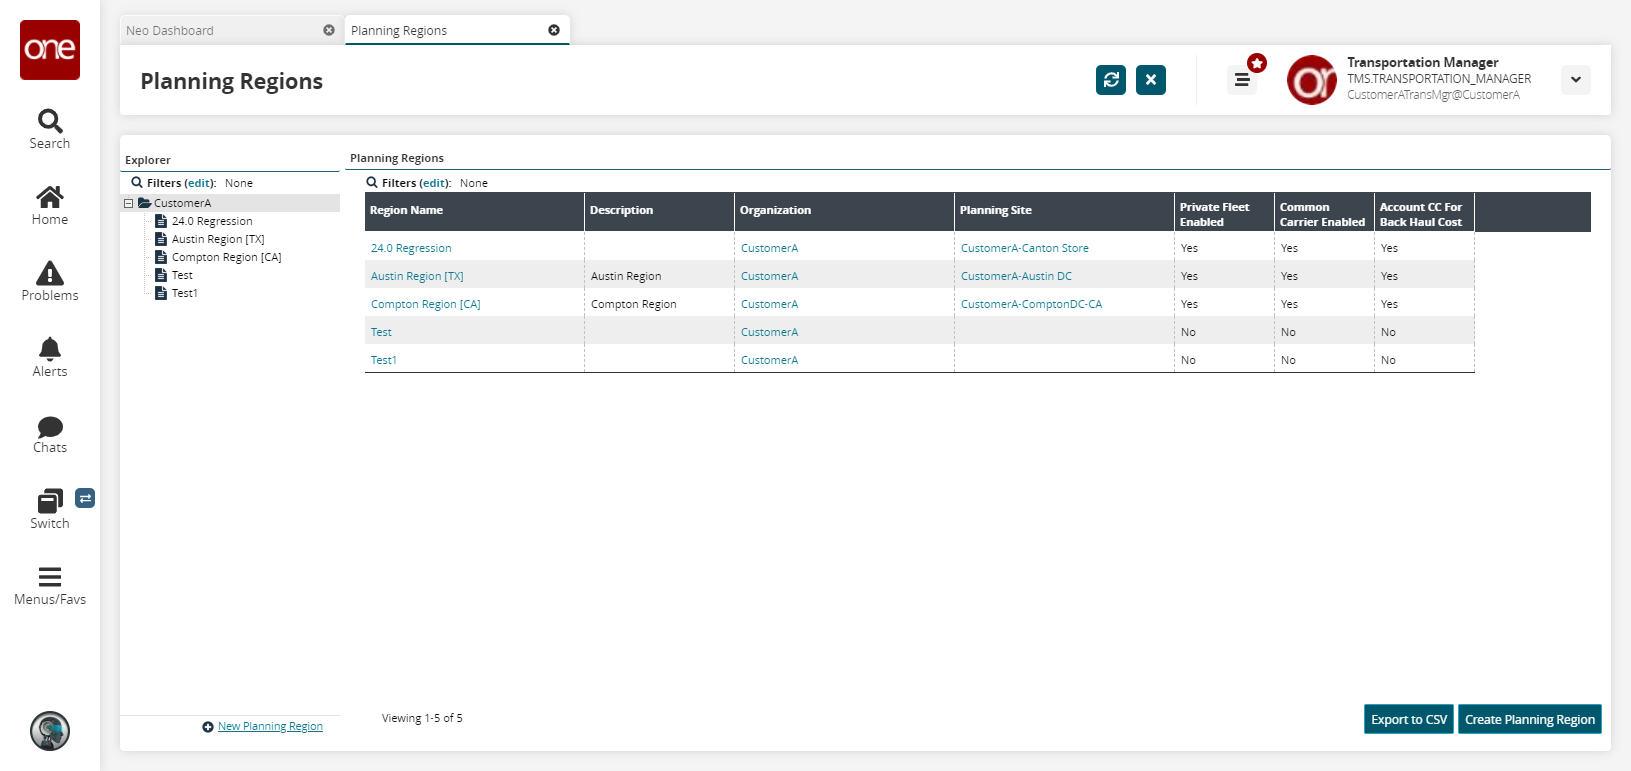
To add a new region, click the Create Planning Region link at the bottom of the explorer pane.
The New Planning Region screen appears.
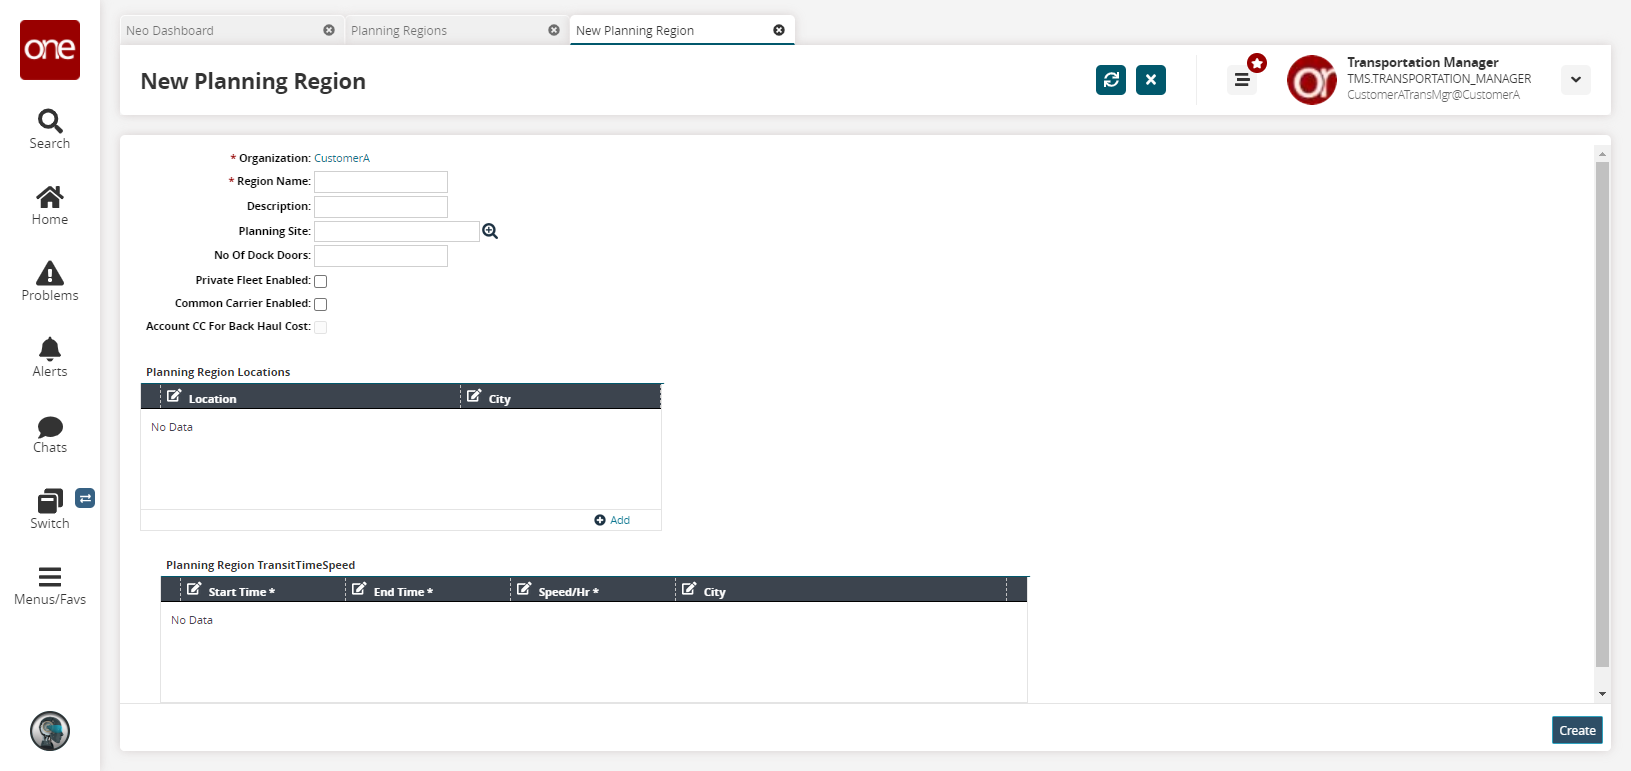
Fill out the following fields. Fields with an asterisk ( * ) are required.
Field
Description
* Organization
This field is populated by the system.
* Region Name
Enter a region name.
Description
Enter a description.
Planning Site
Select a planning site using the picker tool.
No Of Dock Doors
Enter the number of dock doors.
Private Fleet Enabled
Select this checkbox to enable private fleets.
Common Carrier Enabled
Select this checkbox to enable common carriers.
Account CC For Back Haul Cost
This checkbox becomes available when the Common Carrier Enabled checkbox is selected.
In the Planning Region Locations table, click the Add link.
A new row appears.Select a Location using the picker tool and enter a City.
Planning Region Transit Time Speed
This policy defines settings for transit time. You can configure different transit speeds for your private fleet vehicles throughout the day so that these will be used in transportation planning.
To select a time range, click inside the Start Time cell to display the Time button and then select the time. Repeat this step for the End Time.
To select a speed, click inside the Speed/Hr cell to display the Speed box and the Distance UOM list, and type a speed value and select either the Mile or Kilometer option.
Under the City column, e nter values for the Country, State, and City fields.
To save all changes, click the Create button.
A success message appears.