Resource Allocation Policies
Users can define allocation policies for resource allocation.
Complete the following steps to define allocation policies for resource allocation:
L og in to the ONE system.
Click Menus/Favs > Fleet Mgmt > Resource Allocation Policies. In the NEO UI, users can click on the Menus/Favs icon on the left sidebar and type in the name of the screen in the menu search bar. For more information, see "Using the Menu Search Bar."
The Resource Allocation Policies screen displays.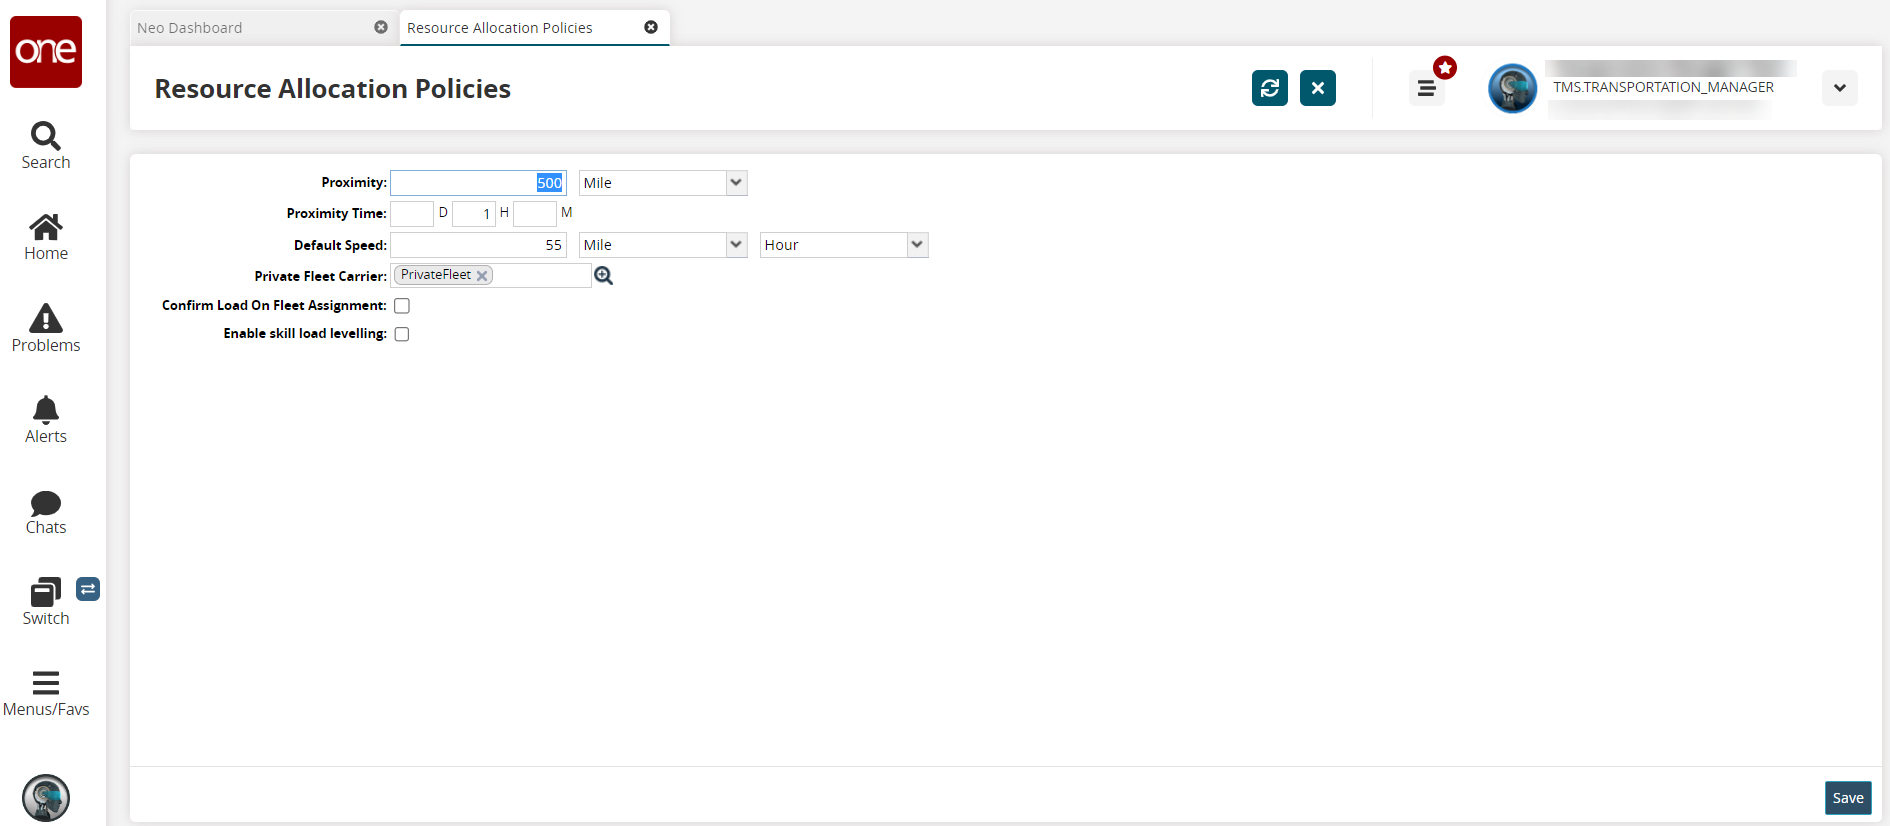
Fill out the following fields. Fields with an asterisk ( * ) are required.
Field
Description
Proximity
Enter a value for the distance in the proximity, and then select a distance UOM option from the UOM list. The maximum continuous move distance is used to identify feasible movements that can be linked together for execution by a given resource.
Proximity Time
Enter duration values for days, hours, and minutes. The maximum continuous move time range is used to identify feasible movements that can be linked together for execution by a given resource.
Default Speed
Enter a value for the default speed, select a distance UOM option from the UOM list, and then select a time UOM option from the UOM list. The default vehicle speed is used for travel back (deadhead) time calculation.
Private Fleet Carrier
Use the picker tool to select a private fleet carrier.
Confirm Load On Fleet Assignment
Select the checkbox to automatically confirm the movement to the carrier.
Enable Skill Load Leveling
Select the checkbox to enable skill load leveling.
Note
If there is no carrier configured at the fleet level, and there is a default carrier configured as a part of the fleet management policies, the movement should be auto-confirmed to that carrier.
Click the Save button.
A success message displays.