Scheduling Appointments for Dock Door Groups
Users can view and reschedule appointments for Dock Door Groups (DDGs) through the NEO Site Calendar.
Complete the following steps to use the NEO Site Calendar:
Viewing the NEO Site Calendar
L og in to the ONE system.
Click Menus/Favs > Scheduling > Dock Door Groups. In the NEO UI, users can click on the Menus/Favs icon on the left sidebar and type in the name of the screen in the menu search bar. For more information, see "Using the Menu Search Bar."
The Dock Door Groups screen displays.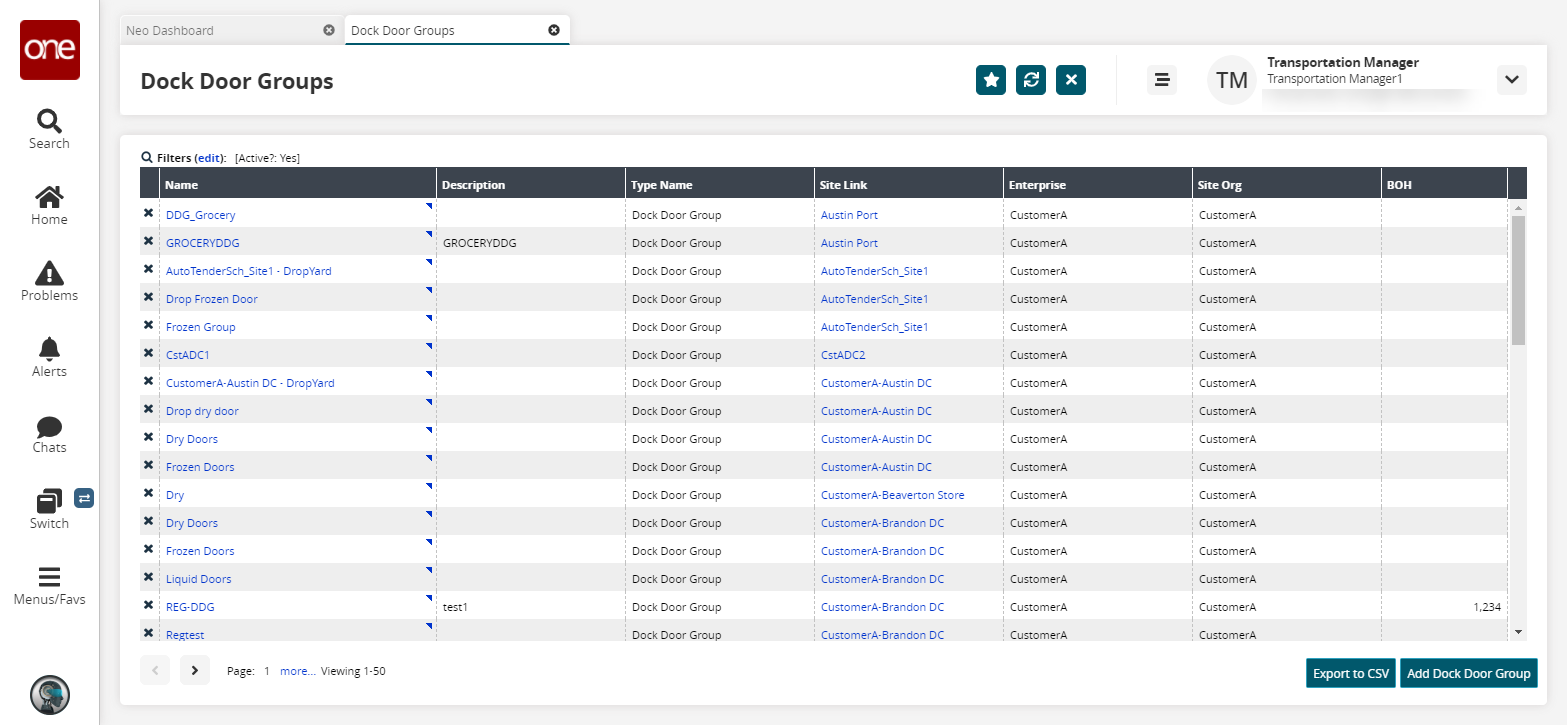
Click the triangle icon in the upper right-hand corner of a Name cell, and then click Show Calendar to view the calendar for a dock door group.
The Site Calendar screen displays appointments and blocks if they have been created already.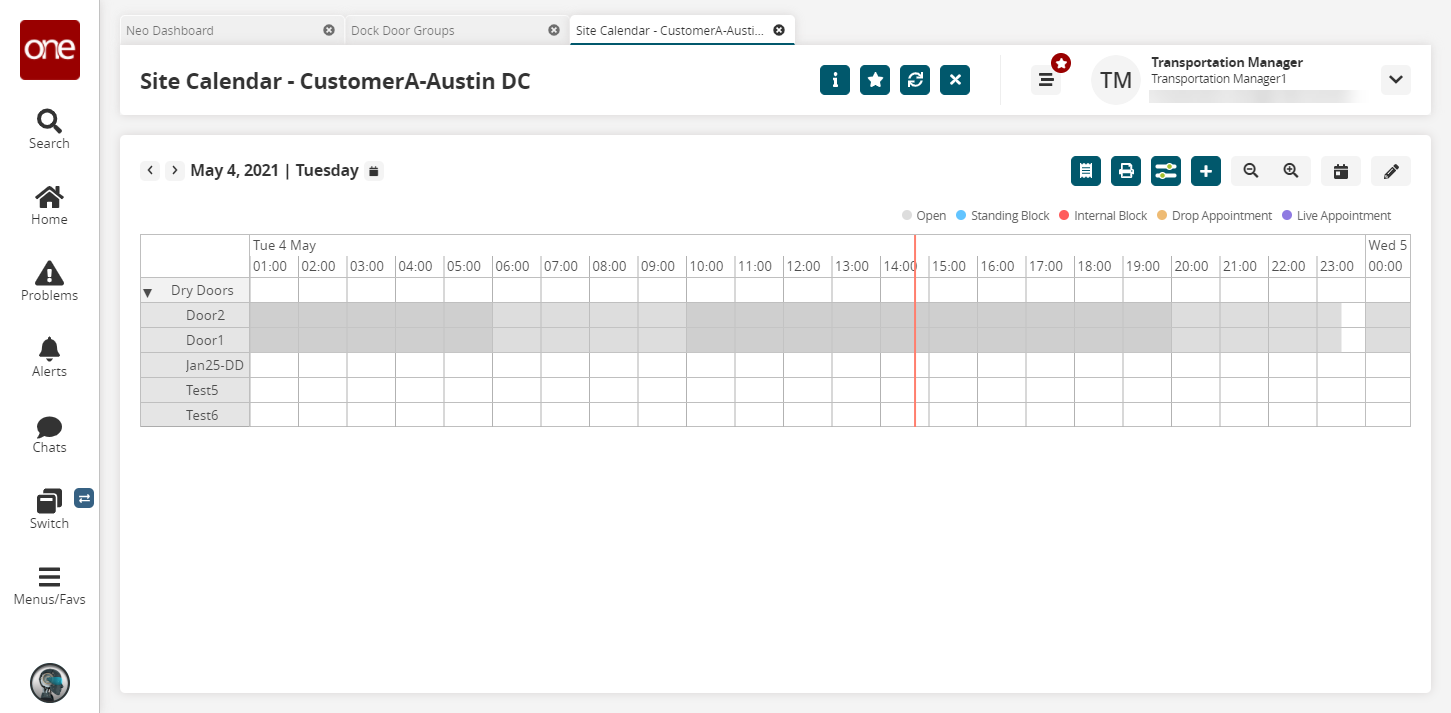
Click the arrows next to the date in the upper left corner to move forward or backward in the calendar.
Click the Summaries button in the upper right corner to view the Summaries screen.
The Summaries screen displays.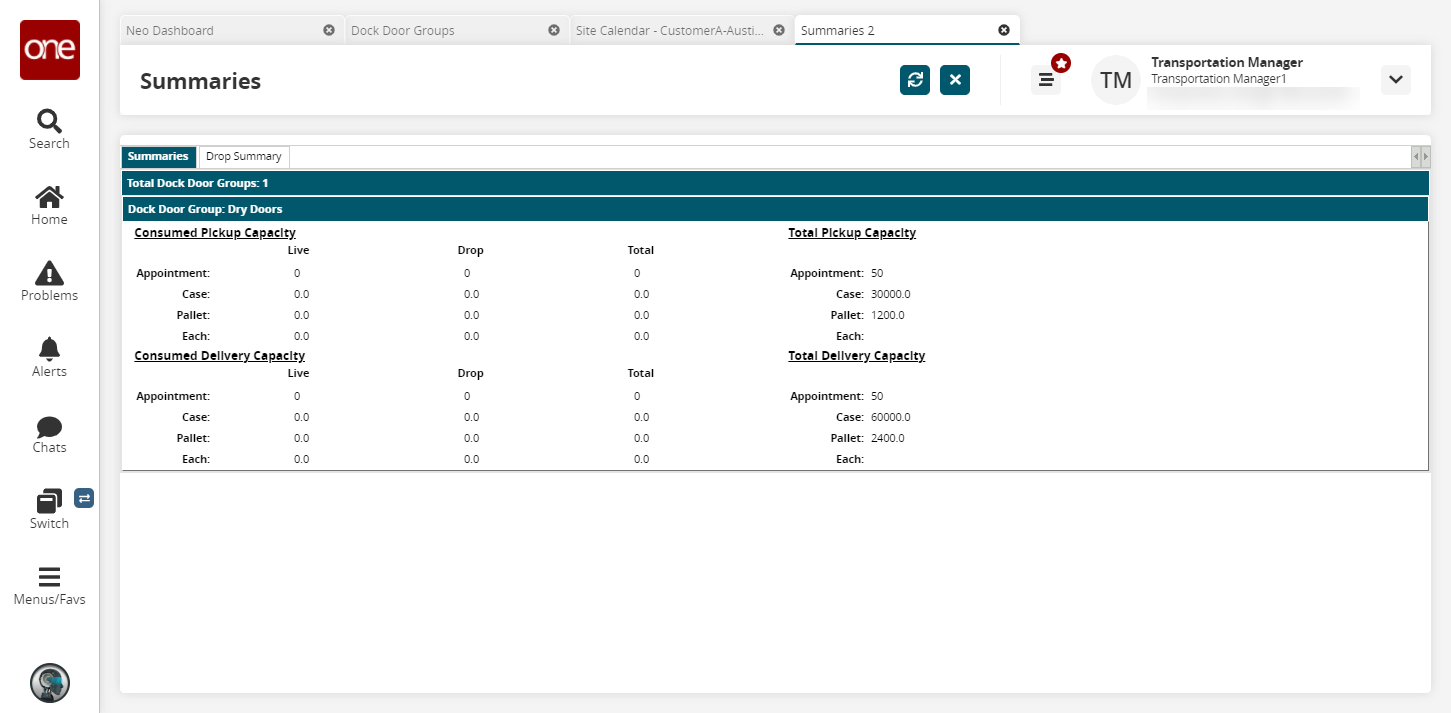
Click the Print button in the upper right corner of the screen to download a PDF file of the calendar to your computer.
Click the Filter Options button to set filtering parameters for the calendar. (This is described in detail below.)
Click the 1 Day View button or the Edit Mode button to toggle between the view and edit modes of the screen.
Users can use the touchpad of their computer or hold the Ctrl key and use the mouse to adjust the time slots ranging from five-minute to four-hour blocks.
Click an appointment candidate to view the popup details.

Click the View Appointment details button to open the appointment details screen.
Click a block to view the popup details.
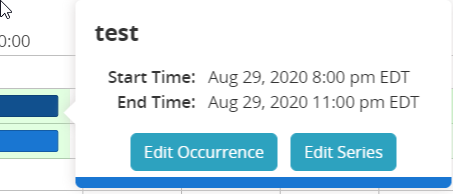
Click the Edit Occurrence button to edit this occurrence of the block.
The Edit Occurrence popup window displays. The popup may look different depending on the type of block.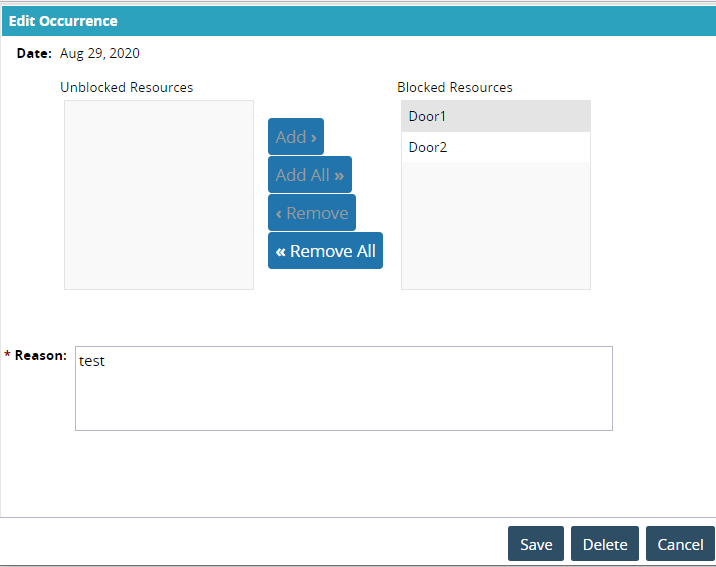
Click the Add, Add All, Remove, and/or Remove All buttons for Unblocked Resources and Blocked Resources.
Click the Save or the Delete button.
The occurrence updates or is deleted from the calendar.Click the Edit Series button.
The Edit Internal Block popup window displays. The popup may look different based on the type of block.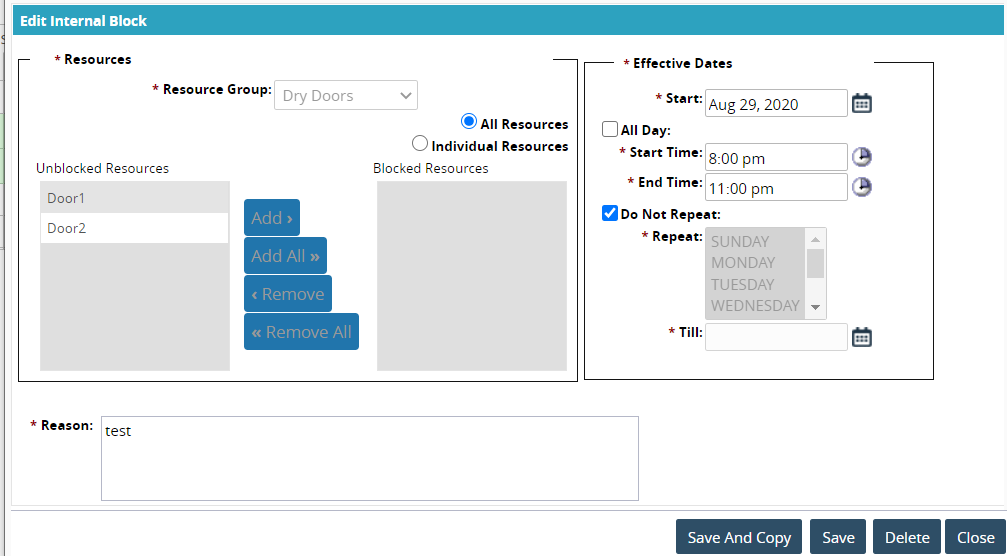
Edit fields as necessary. (See further instructions below in the "Adding Blocks and Appointments" section.)
Click the Save or Delete button.
The block refreshes or is deleted from the calendar.
Using the Filter Options in the Site Calendar
From the calendar screen, click the Filters button on the top right of the screen.
The Filter Options popup window displays.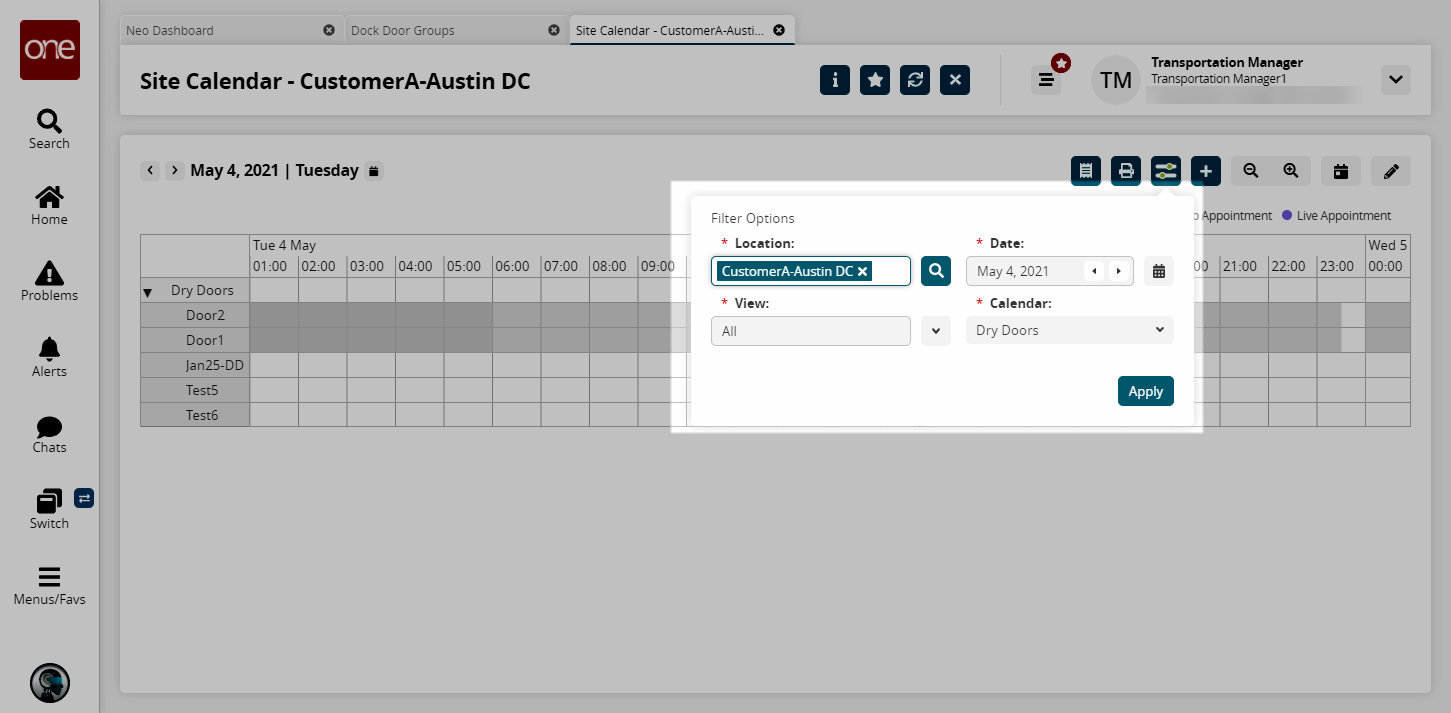
Complete the following fields. Fields with an asterisk ( * ) are required.Use the picker tool to select a site in the * Location field.
Use the calendar tool to select a date for the * Date field.
Use the dropdown menu to select a value for the * View menu.
Use the dropdown menu to select a DDG for the * Calendar menu. Multiple DDGs can be selected in this dropdown menu.
Click the Apply button.
The Site Calendar for the selected values displays.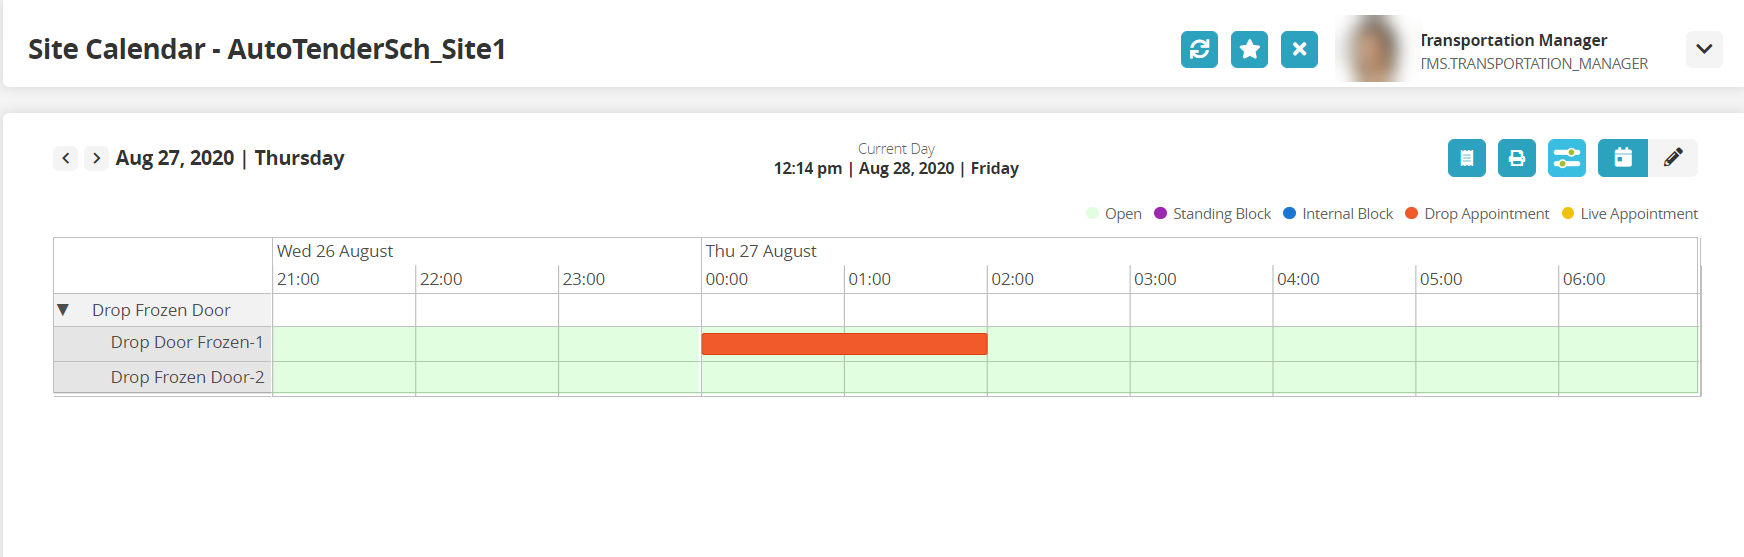
Adding Blocks and Appointments
Click the Edit button in the upper right corner to work in edit mode on the computer.
Double-click a date/time block to add a block or appointment directly to the calendar.
A plus sign displays.Click the plus sign.
A menu for adding blocks or appointments displays.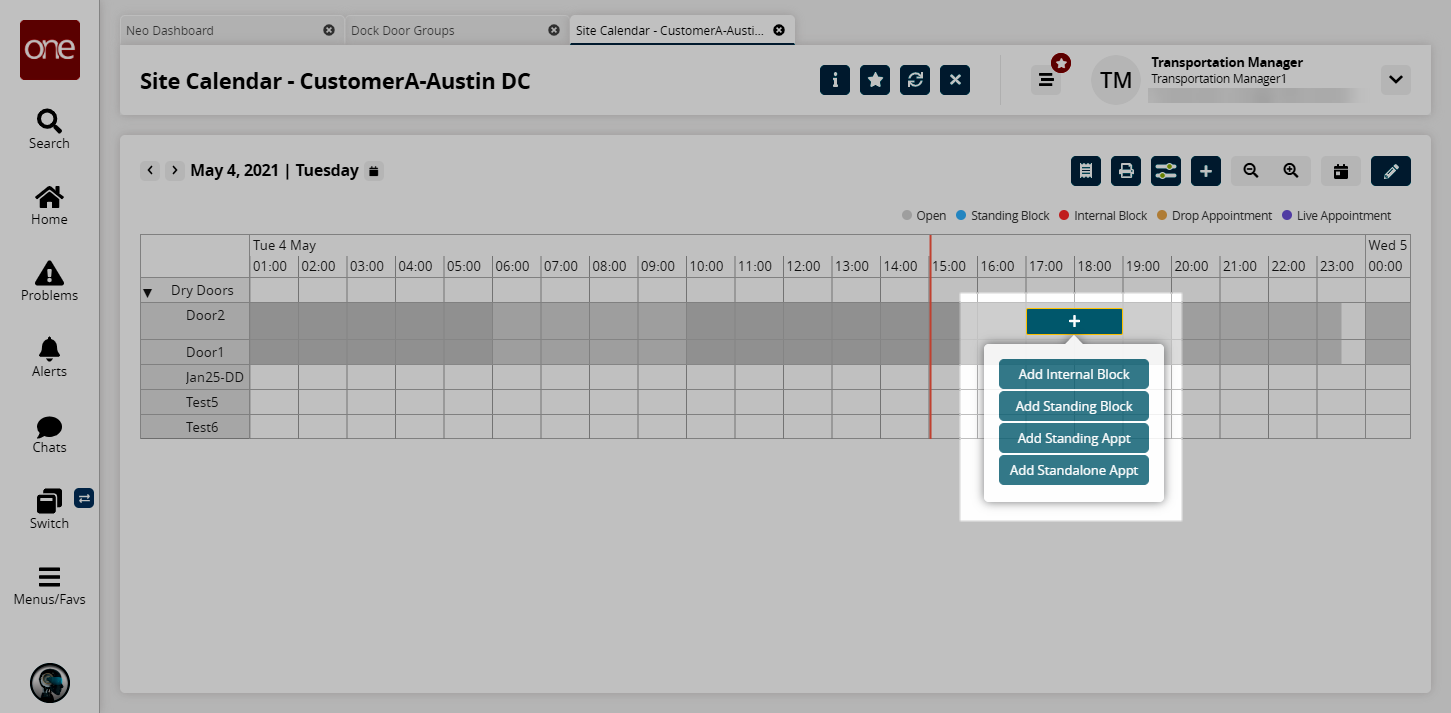
You can select either Add Internal Block, Add Standing Block, Add Standing Appt, or Add Standalone Appt.
Adding an Internal Block
Click the Add Internal Block button.
The Add Internal Block popup window displays.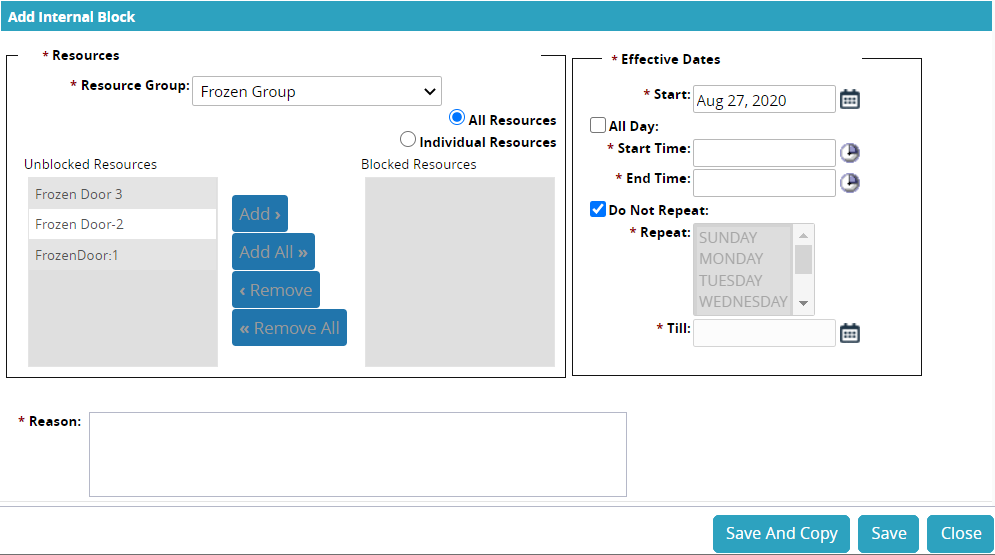
In the Resources section, users can select the resource group and the resources.
Use the dropdown menu to select a value from the * Resources Group field.
Click the radio button for All Resources or for Individual Resources.
If the user chooses Individual Resources, then the buttons become active.Click the resource name and then the appropriate button to move resources between the Unblocked Resources box to the Blocked Resources box.
In the Effective Dates section, users can select different time elements for the block.
Use the calendar tool to select the date for the * Start Date field.
Check the box for All Day, or use the clock tool to choose the * Start Time and * End Time.
Check the box for Do Not Repeat or select a day from the list of days. Hold the Shift key and click the days of the week to select multiple days.
Use the calendar tool to select the ending date for the * Till field.
Type in a description of the reason for the block in the * Reason field.
Click the Save button.
A green success bar displays.Click the Close and Refresh button.
The new internal block displays on the calendar in the color from the legend (blue).
Adding a Standing Block
Click the Add Standing Block button.
The Add Standing Block popup window displays.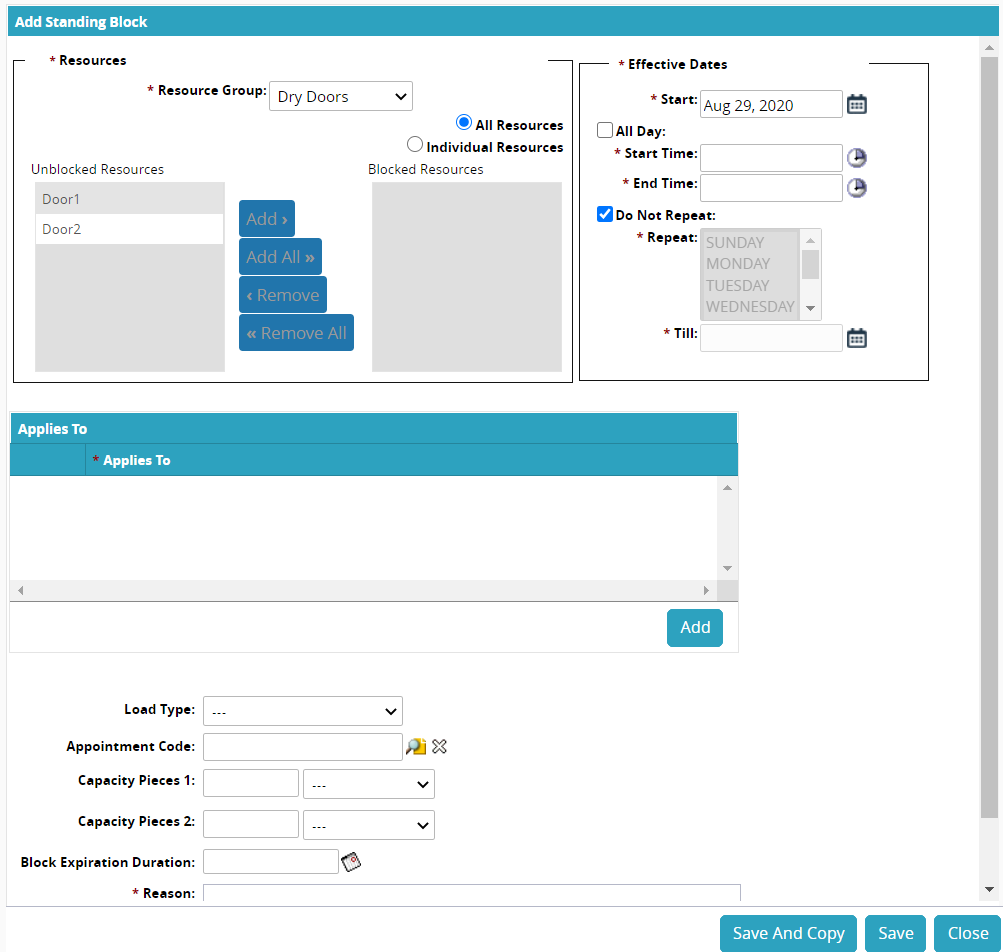
In the Resources section, users can select the resource group and the resources.
Use the dropdown menu to select a value from the * Resources Group field.
Click on the radio button for All Resources or for Individual Resources.
If the user chooses Individual Resources, then the buttons become active.Click on the resource and then the appropriate button to move resources between the Unblocked Resources box to the Blocked Resources box.
In the Effective Dates section, users can select different time elements for the block.
Use the calendar tool to select the date for the * Start Date field.
Check the box for All Day, or use the clock tool to choose the * Start Time and * End Time.
Check the box for Do Not Repeat, or select a day from the list of days. Hold the Shift key and click the days of the week to select multiple days.
Use the calendar tool to select the ending date for the * Till field.
Click the Add button to add a row in the * Applies To table.
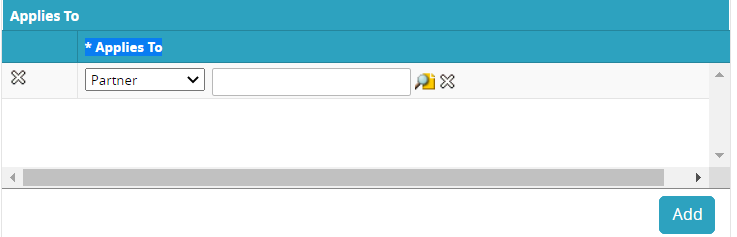
Use the dropdown menu to select the type of Partner or Partner Profile.
Use the picker tool to choose a value for one of the types.
Fill out the following fields. Fields with an asterisk ( * ) are required.
Field
Description
Load Type
Select a load type from the dropdown menu.
Appointment Code
Select an appointment code using the picker tool.
Capacity Pieces 1 and 2
Enter a value and select a unit of measure for capacity pieces.
Block Expiration Duration
Use the calendar icon to select a block expiration duration.
The Edit Duration popup window displays.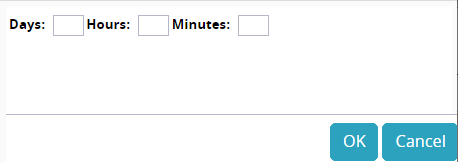
Fill in the Days, Hours, and Minutes fields for the duration time.
Click the OK button.
* Reason
Enter a description of the reason for the block.
Click on the Save button.
A green success bar displays.Click the Close and Refresh button.
The new block displays on the calendar with the color from the legend (purple).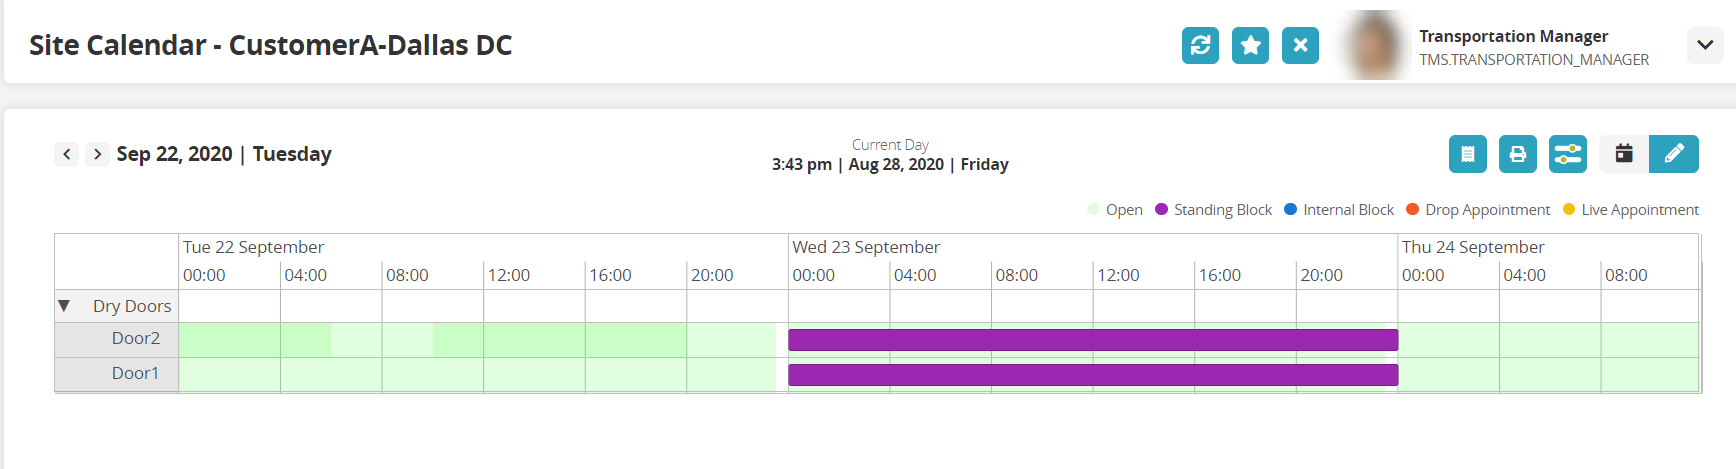
Adding a Standing Appointment
Click the Add Standing Appt button.
The Add Standing Appt popup window displays.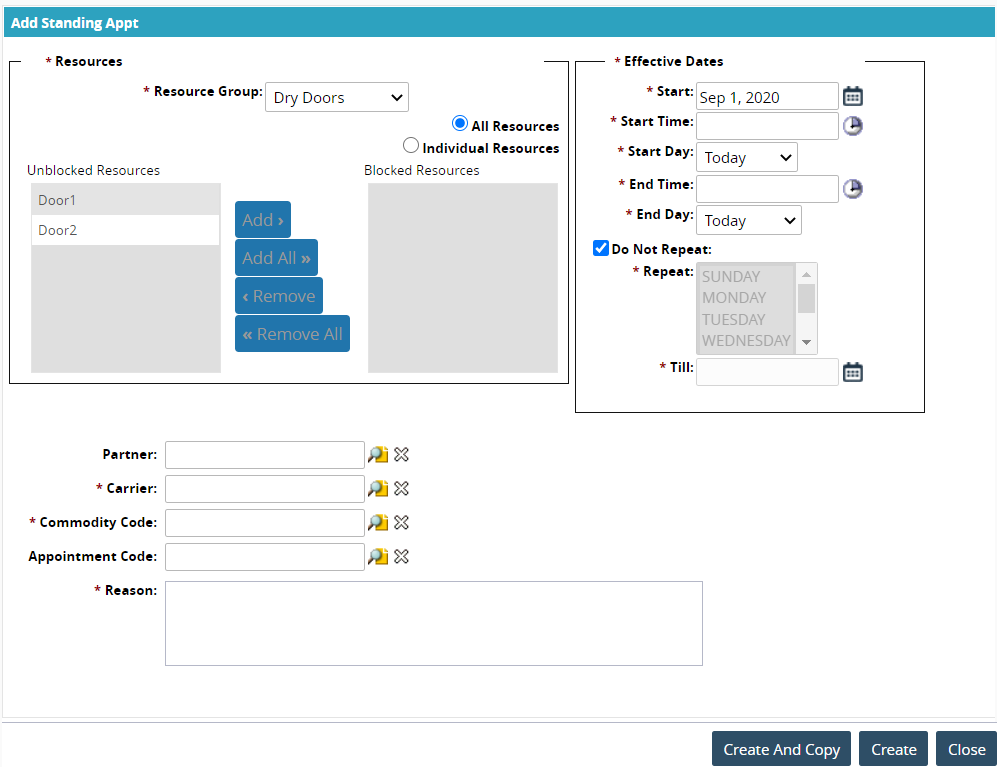
In the Resources section, users can select the resource group and the resources.
Use the dropdown menu to select a value from the * Resources Group field.
Click the radio button for All Resources or for Individual Resources.
If the user chooses Individual Resources, then the buttons become active.Click the resource and then the appropriate button to move resources between the Unblocked Resources box to the Blocked Resources box.
In the Effective Dates section, users can select different time elements for the block.
Use the calendar tool to select the date for the * Start field.
Use the clock tool to select the time for the * Start Time field.
Use the dropdown menu to select the day for the * Start Day field.
Use the clock tool to select the time for the * End Time field.
Use the dropdown menu to select the day for the * End Day field.
Check the box for Do Not Repeat or select a day from the list of days. Hold the Shift key and click the days of the week to select multiple days.
Use the calendar tool to select the ending date for the * Till field.
Use the picker tool to select a value for the Partner field.
Use the picker tool to select a value for the * Carrier field.
Use the picker tool to select a value for the * Commodity Code field.
Use the picker tool to select a value for the Appointment Code field.
Type in a description in the * Reason field.
Click the Save button.
A green success bar displays.Click the Close and Refresh button.
The new standing appointment displays on the calendar in the color from the legend (orange).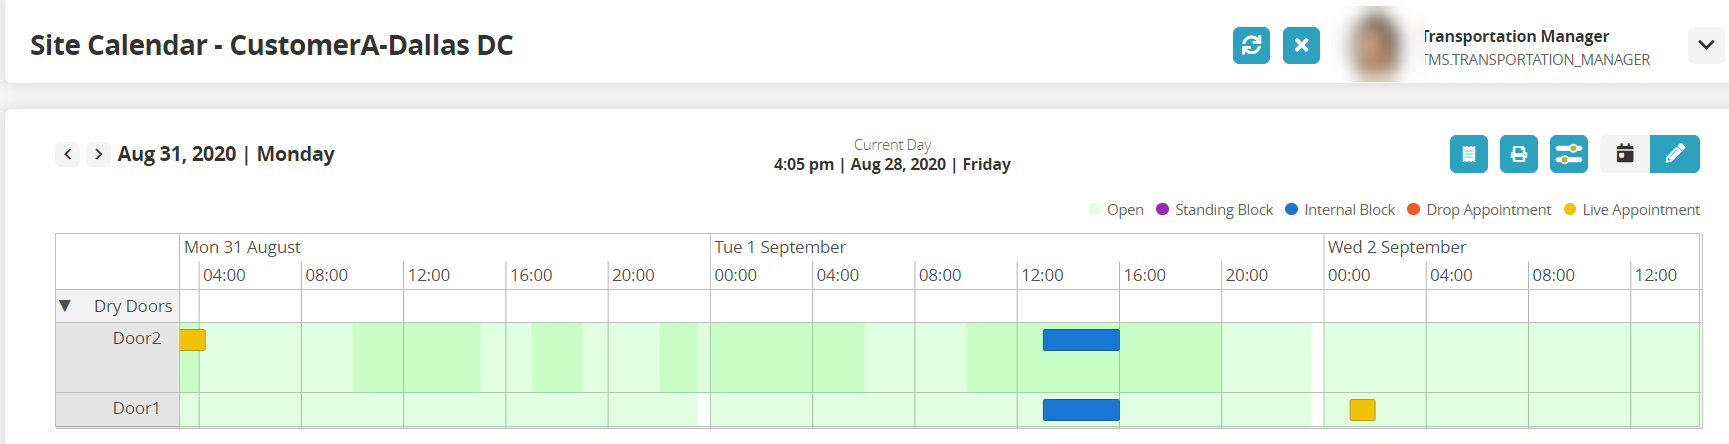
Adding a Standalone Appointment
Click the Add Standalone Appt button.
The Create Delivery Standalone Appointment screen window displays.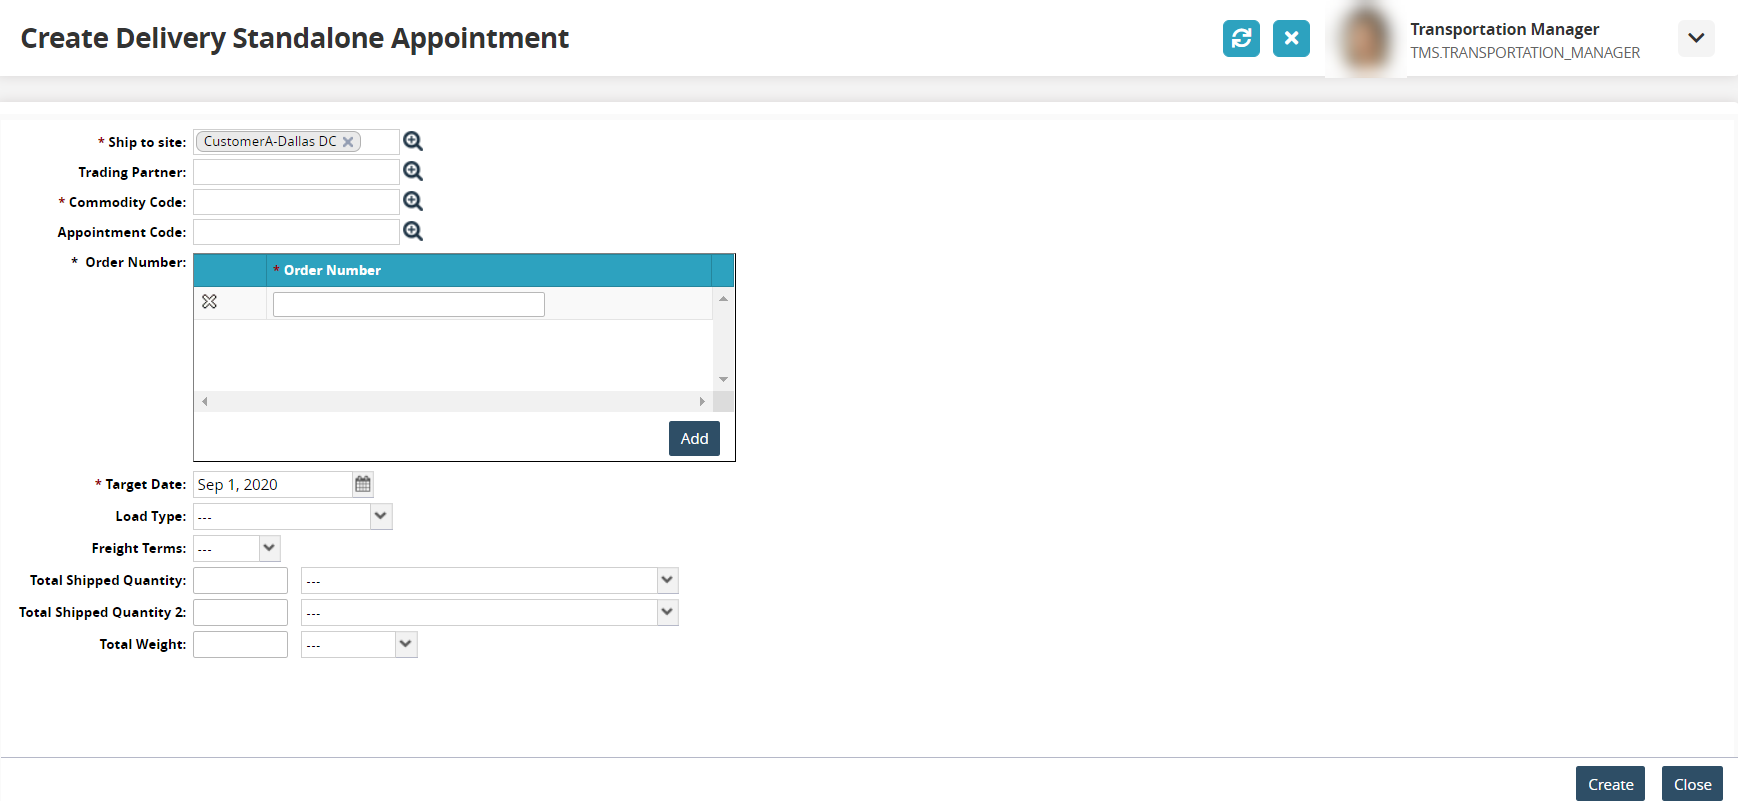
Fill out the following fields. Fields with an asterisk ( * ) are required.
Field
Description
* Ship To Site
Select a Ship To site using the picker tool.
Trading Partner
Select a trading partner using the picker tool.
* Commodity Code
Select a commodity code using the picker tool.
Appointment Code
Select an appointment code using the picker tool.
* Order Number
Enter an order number in the table field.
Click the Add button to add rows for more order numbers.
Target Date
Select a target date using the calendar icon.
Load Type
Select a load type from the drop-down menu.
Freight Terms
Select the freight terms from the drop-down menu.
Total Shipping Quantity
Enter a total shipping quantity and a unit of measure.
Total Weight
Enter a total weight and a unit of measure.
Click the Create button.
The Create Live Delivery Appointment screen displays.
Edit or fill in any of the fields as necessary.
Select one of the Reservation Candidates at the bottom of the screen. A new candidate can be added inline by clicking the Inline link or selecting a time by clicking the Calendar link.
The action buttons at the bottom of the screen are now available.Click the Shipments tab to edit any of the shipment information fields.
To create a soft appointment, click the Schedule Soft Appointment button.
The Save As Soft popup window displays.
Type in values for days, hours, and minutes in the D, H, and M fields.
Click the Save As Soft button.
Click the Schedule Confirmed Appointment button to create a confirmed appointment.
A green success bar displays.Switch to the Site Calendar screen.
Click the Refresh button.
The appointment displays in the calendar in the color based on the legend (orange).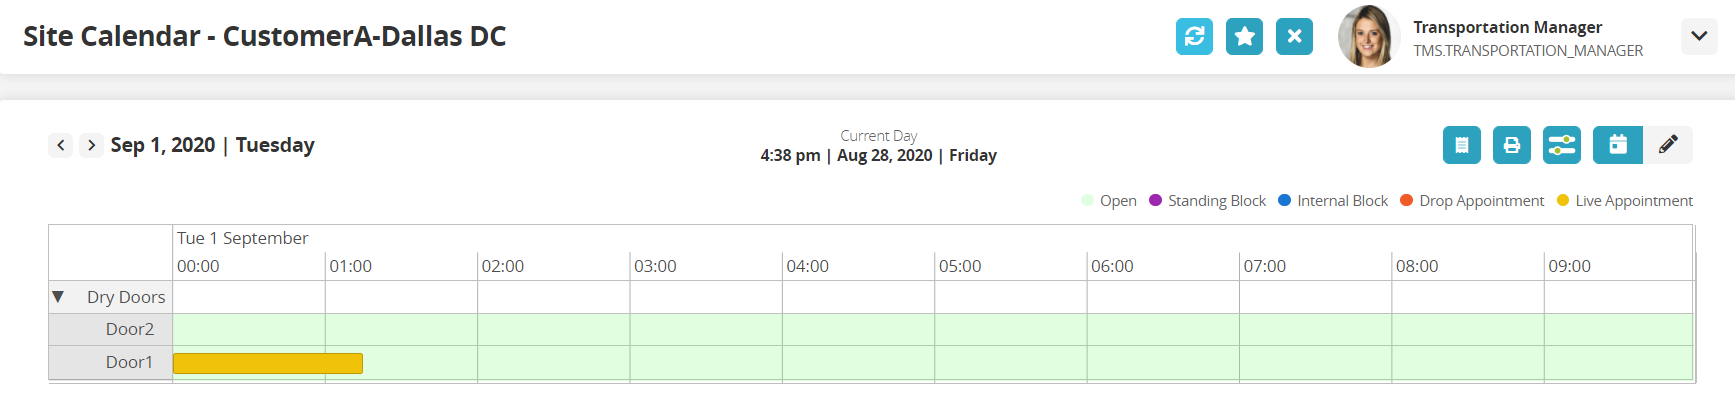
Rescheduling Appointments
Use the Filter Options to view the site and DDGs calendar. (See instructions above.)
The Site Calendar displays.Click the Edit button in the top right corner of the screen.
Double-click a Live Appointment (shown in orange).
The appointment darkens, and green time slots display for possible new appointment options.
Click the darkened appointment and drag it onto one of the green time slots.
The calendar refreshes with the appointment moved to the new time slot.