Scheduling Cycle Counts
Complete the following steps to schedule a cycle count:
Log in to the ONE system.
Click Menu/Favs > Warehouse Mgmt > Inventory Audit > Cycle Count.
The Cycle Count screen appears.Click the Filters (edit) link.
The filter fields display.Enter the search criteria in the filter fields and click the Search link.
The list of the cycle counts appears according to search criteria .Select a location from the explorer pane on the left.
The Cycle Count Report pane populates on the right.Click the New Cycle Count button.
The New Cycle Count screen appears. A Cycle Count No is automatically generated.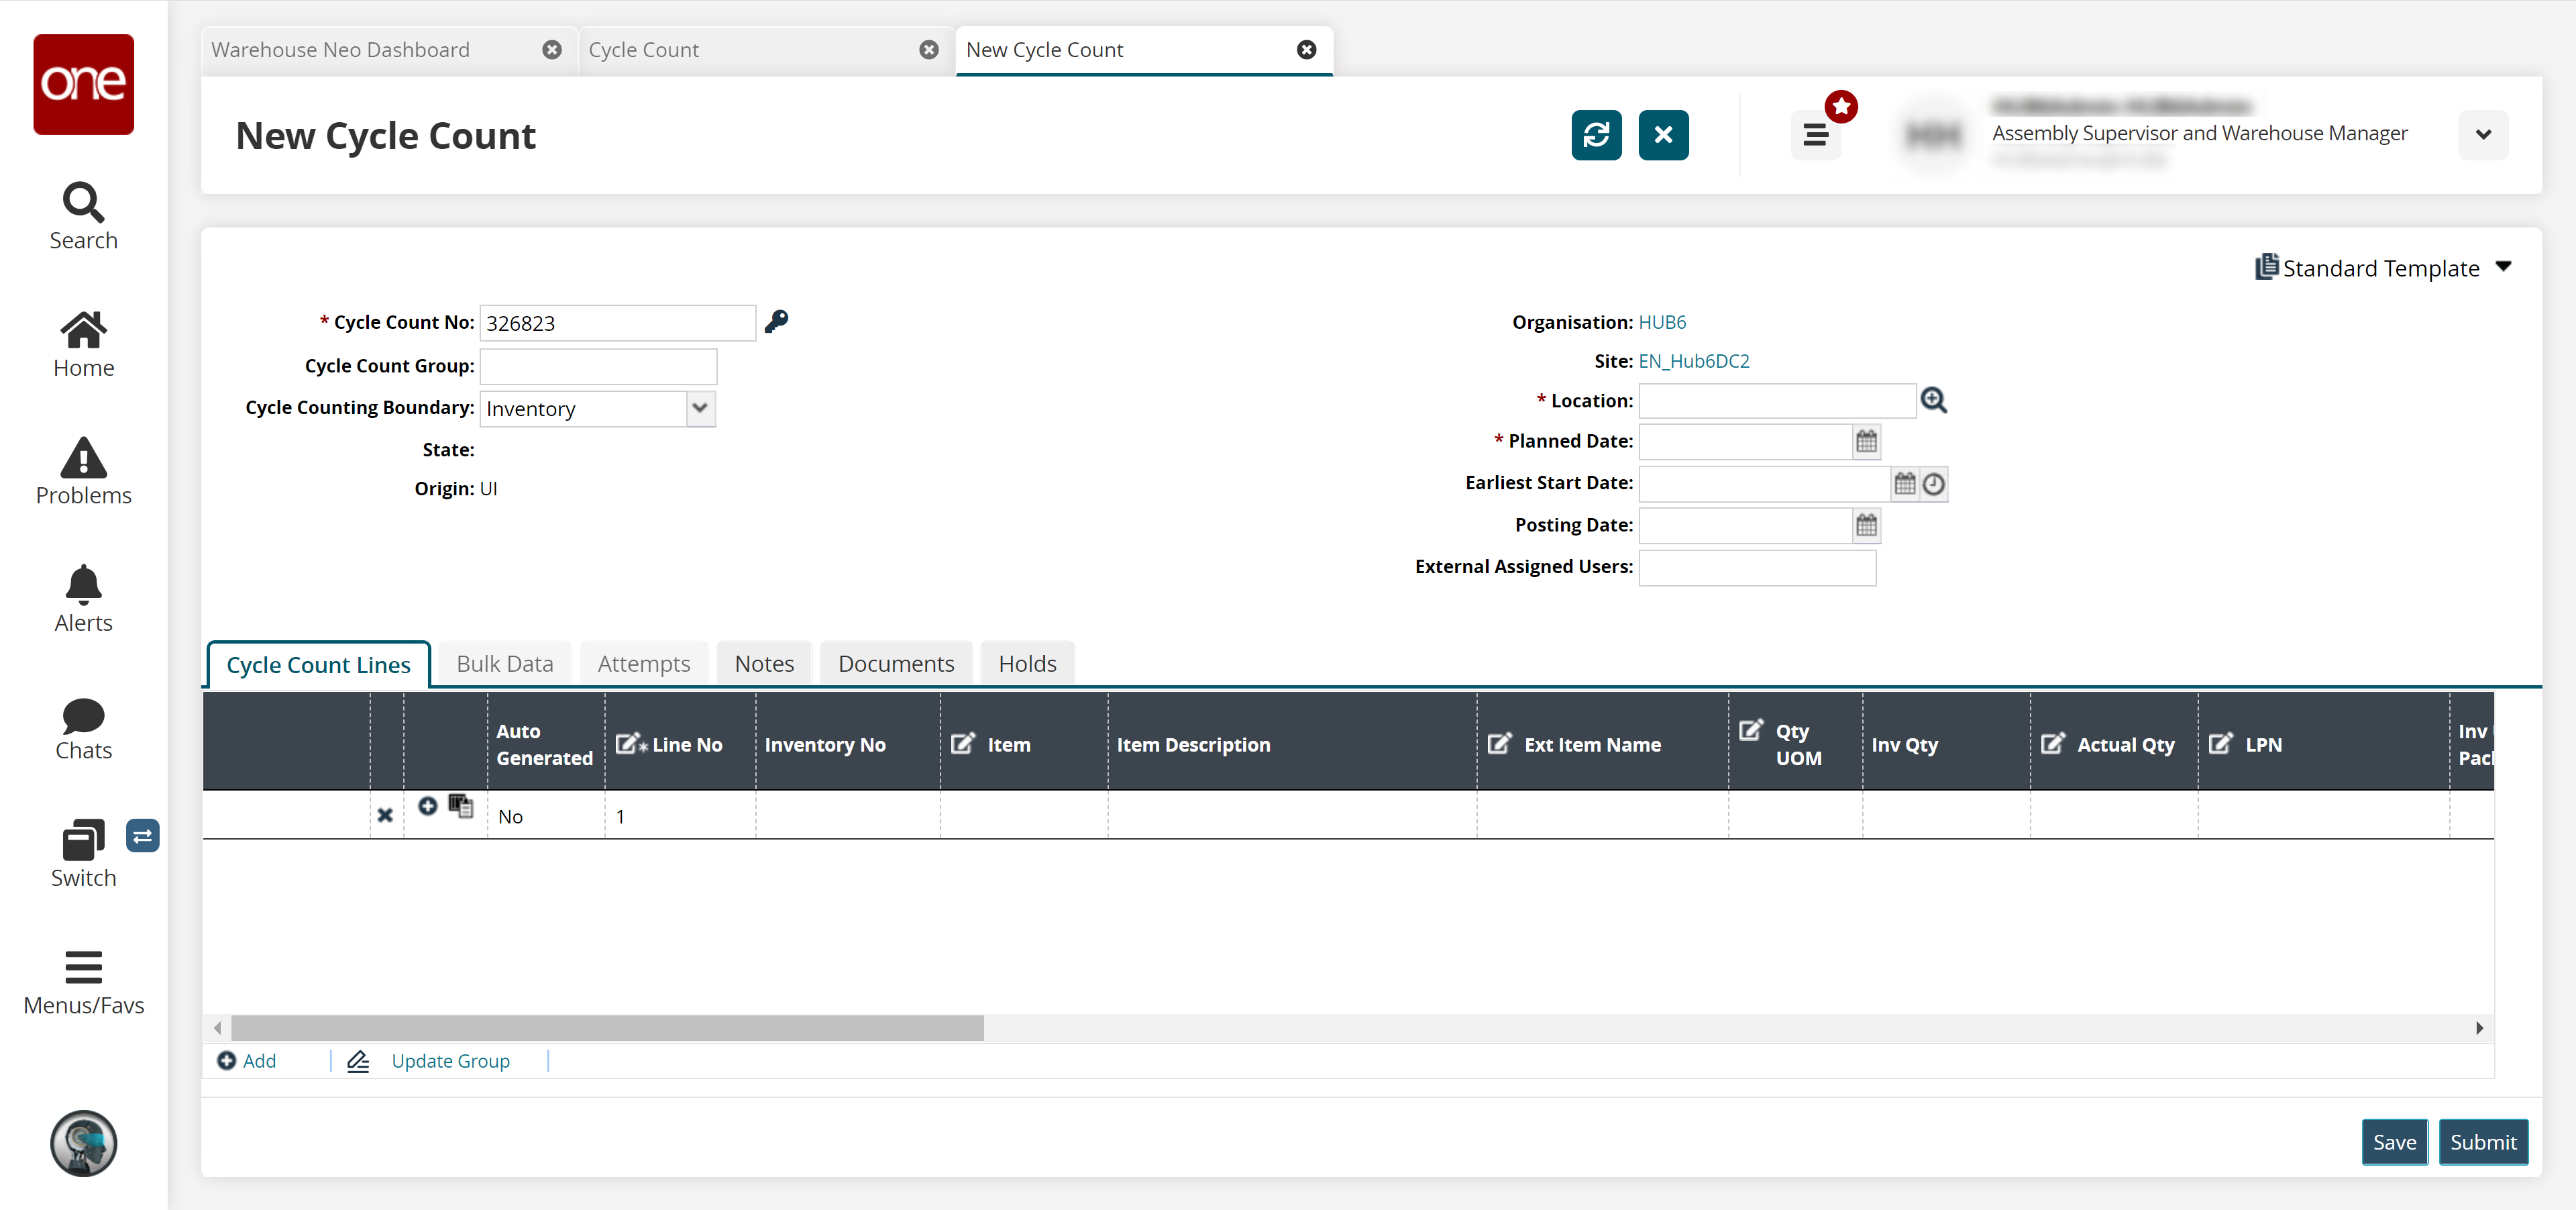
Refer to the following field description table to enter values on the screen. Fields marked with an asterisk ( * ) are mandatory.
Field Name
User Action
* Cycle Count No
Click the key icon to auto-generate the cycle count number.
Cycle Count Group
Enter the cycle count group.
Cycle Count Boundary
Select the desired value from the dropdown list. The available options are Inventory, Item, and Sub-Inventory
* Location
Enter or select the location using the picker tool.
* Planned Date
Select or enter the planned date value.
Earliest Start Date
Select or enter the earliest start date value.
Posting Date
Select or enter the posting date value.
External Assigned Users
Enter the external assigned users.
In the Cycle Count Lines tab, enter values in the fields for items to be counted.
Click the Add link to add more lines to the count.
To save your work, click the Save button.
To submit the count for approval, click the Submit button.
A success message appears.