Searching Requisition Lines
You can search the individual lines of requisition orders, filter the results, and export the results to a spreadsheet.
Complete the following steps to search requisition lines:
L og in to the ONE system.
Click Menus/Favs > Order Mgmt > Requisition > Search Requisition Lines.
In the NEO UI, users can click on the Menus/Favs icon on the left sidebar and type in the name of the screen in the menu search bar. For more information, see "Using the Menu Search Bar."
The Search Requisition Lines screen displays with the filters menu opened.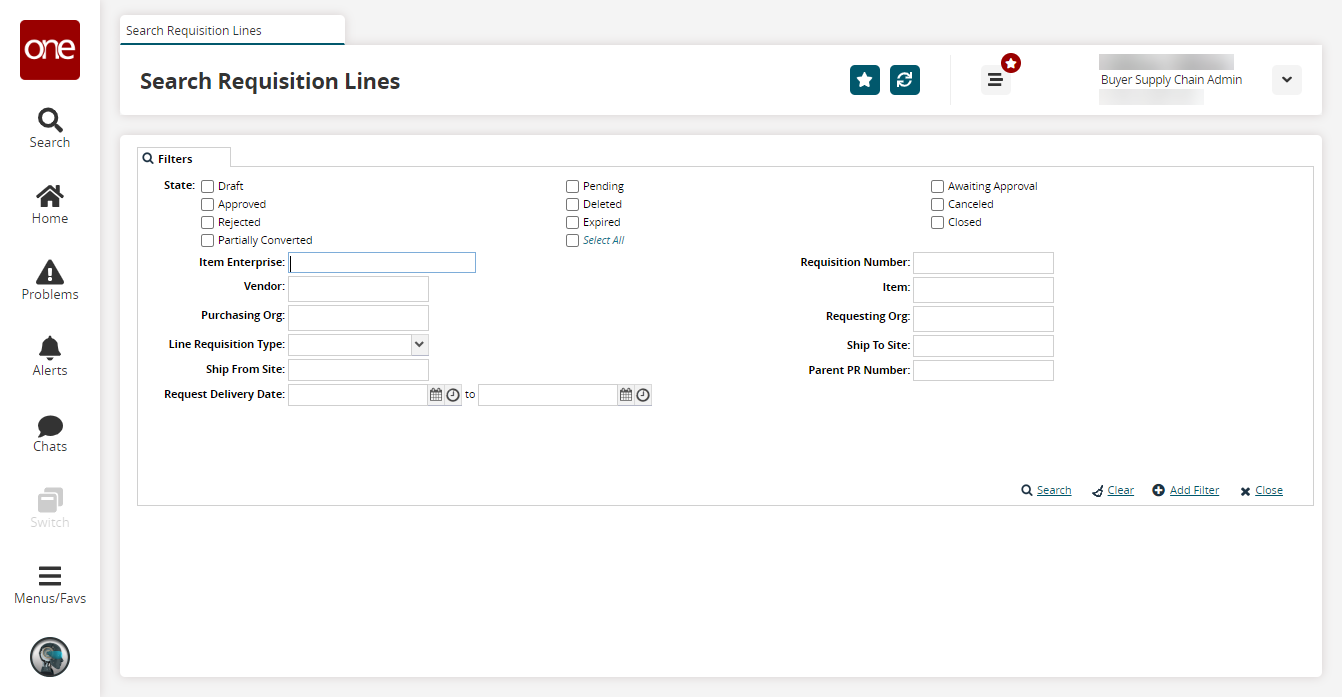
Fill out the following fields. Fields with an asterisk ( * ) are required.
Field
Description
State
Filter orders by current order state. Choose one or more of the available options.
Item Enterprise
Filter orders to show only orders for a certain item enterprise.
Vendor
Filter orders to show only orders sent to a specific vendor.
Purchasing Org
Enter a purchasing organization to display orders linked to the specified Purchasing Org.
Line Requisition Type
Select a line requisition type from the dropdown menu.
Ship From Site
Enter a Ship From site.
Requisition Number
Filter requisitions to show only requisitions with the defined requisition number. You can search for partial numbers using an asterisk as a wild card. For example, if you want to search for all requisitions that start with 444, enter 444* into the Requisition Number field.
Item
Filter orders to show only orders for a certain item.
Requesting Org
Enter a requesting organization to display orders linked to the specified Requesting Org.
Ship To Site
Enter a Ship To site to display orders linked to the specified Ship To Site.
Request Delivery Date
Enter a date range to filter the orders to display only orders within the defined date range.
Parent PR Number
Enter a parent requisition number to search for parent/child requisitions.
To add more search filters, click the Add Filter link, and then click one or more filter options from the Add Filter list.
Fill out the filters as desired, and click the Search link.
The search results display.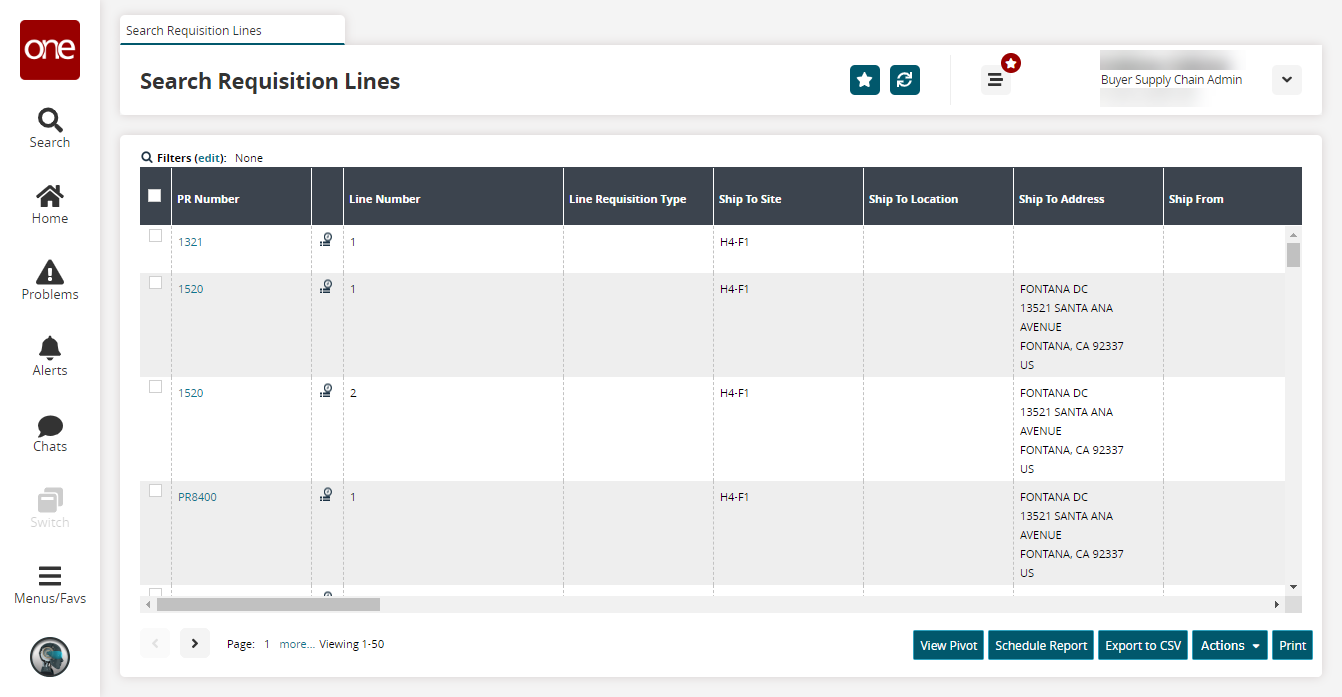
Click the View Pivot button to view the data as a pivot table.
Click the Schedule Report button to schedule a report.
The Existing Subscription Details popup appears.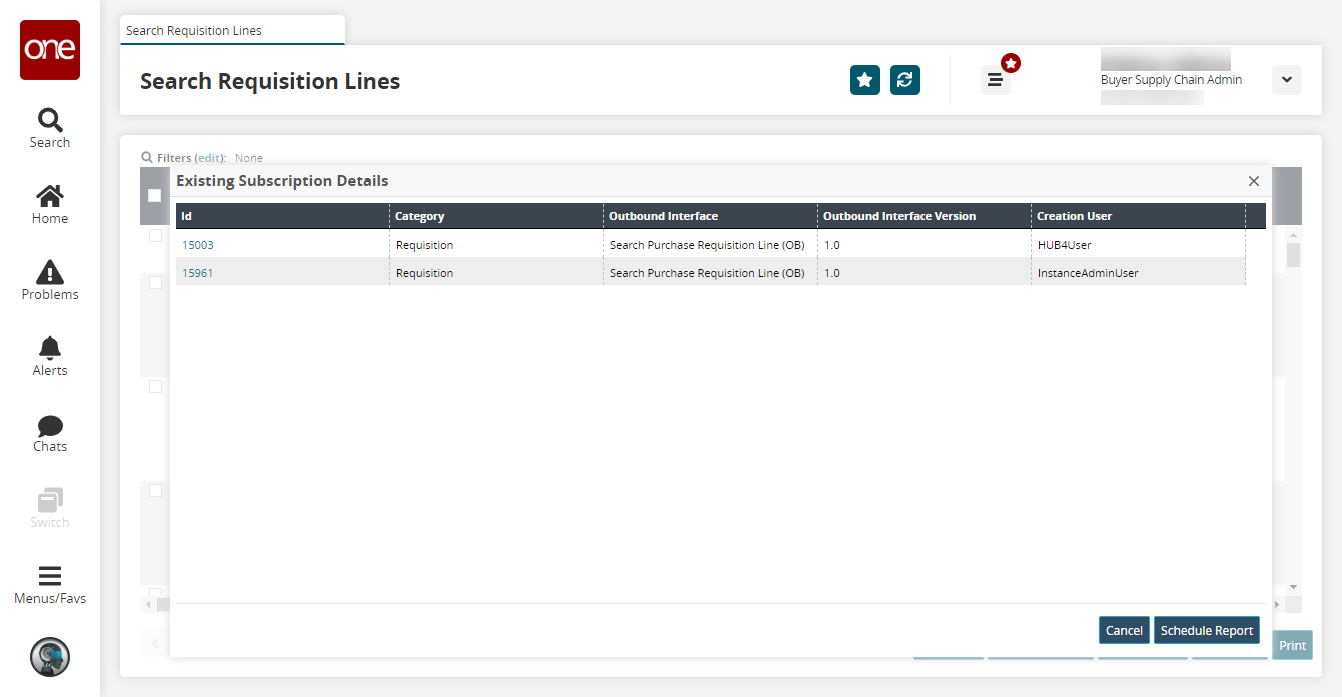
Click the Export to CSV button to export the report to a CSV file.
Click the Print button to print the report to a PDF file.
Complete the following steps to perform actions on requisition lines:
Select one or more lines and click Actions > Bulk Update to bulk update lines.
The Bulk Update popup window opens.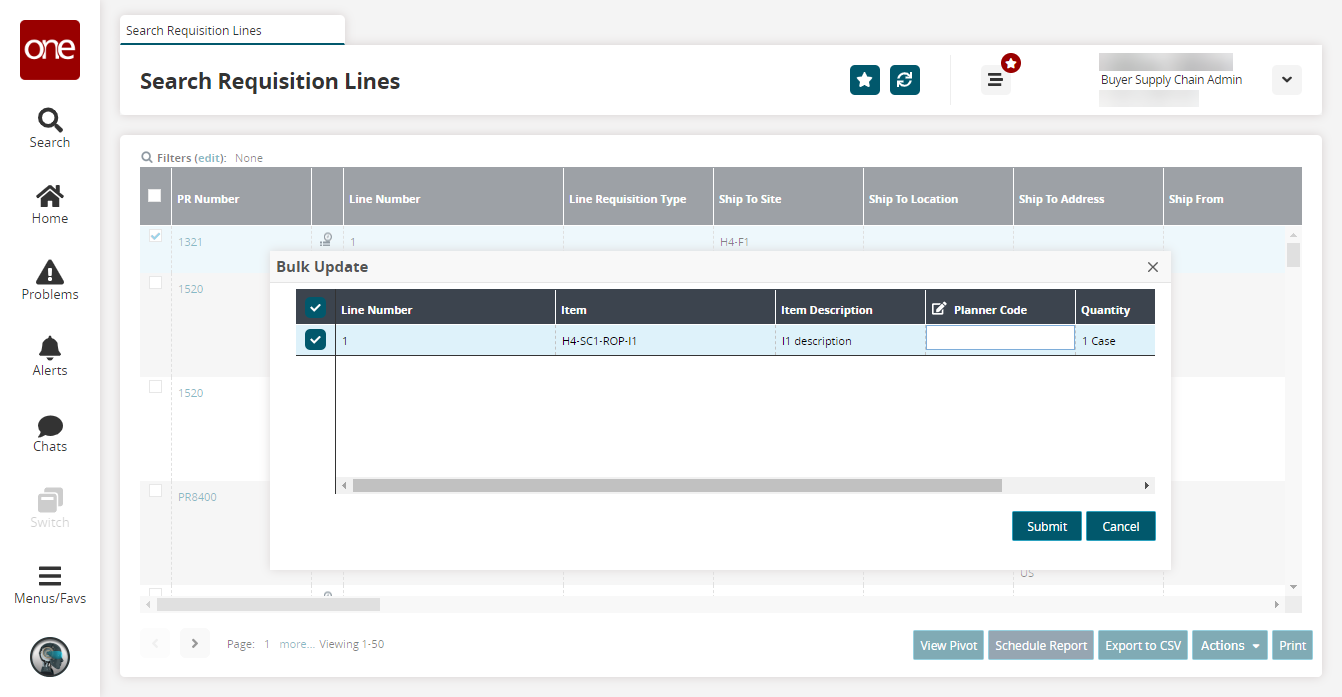
Update the Planner Code fields as desired and click Submit.
A success message appears.Select one or more lines and click Actions > Split Requisition to split a requisition. Note this is only available for Pending state requisitions.
A confirmation popup window opens.Click Yes.
A success message appears.