Searching and Updating Invoices
Users with role-based access to financials can search and update invoices, as described below. Not all users and roles have access to this particular feature.
Complete the following steps to view the Search Invoices report:
Log in to the ONE system.
Click Menus/Favs > Financials > Search Invoices.
In the NEO UI, users can click on the Menus/Favs icon on the left sidebar and type in the name of the screen in the menu search bar. For more information, see "Using the Menu Search Bar."
The Search Invoices screen displays.Enter values for the desired filters.
Click the Search link.
The Search Invoices screen displays with the desired results.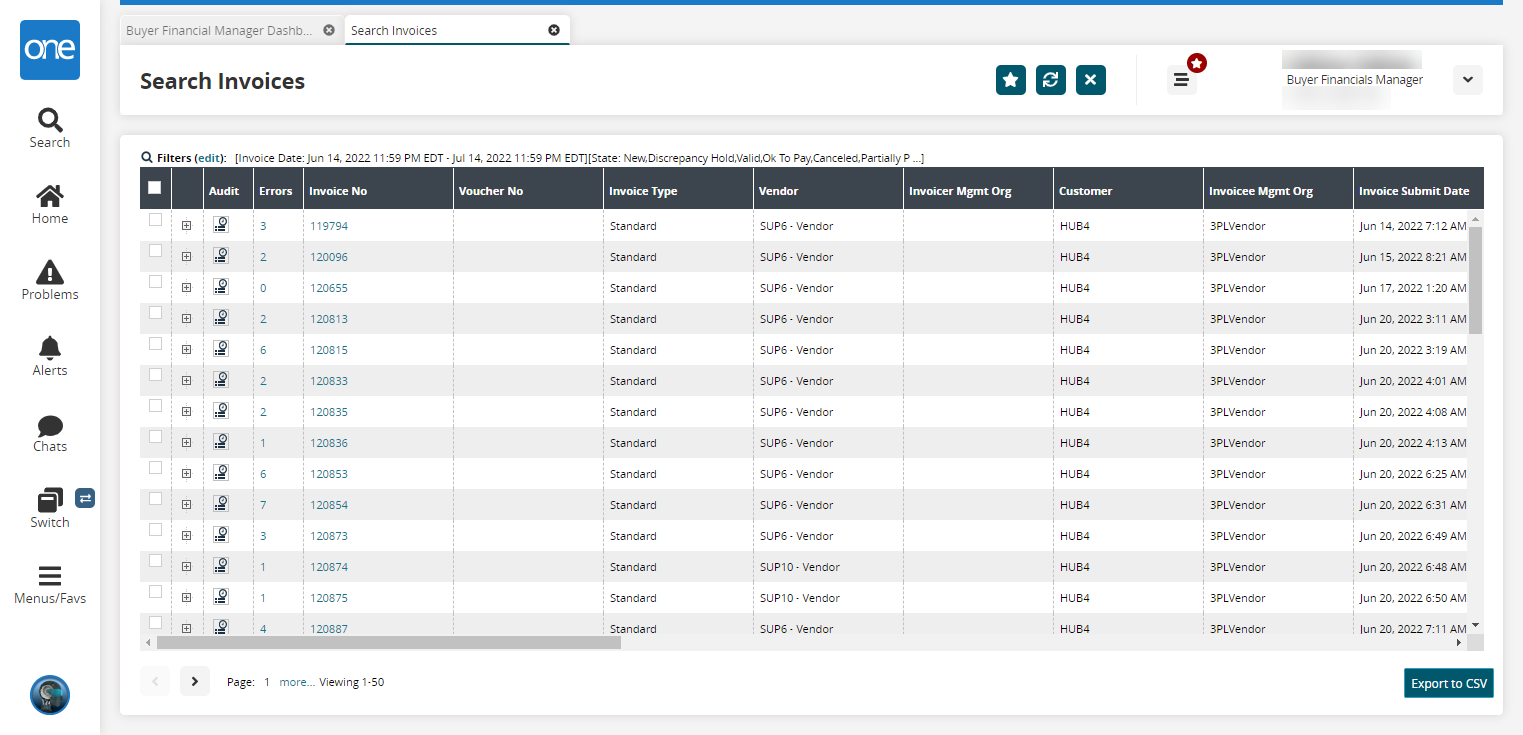
Click the Export to CSV button to export the report to a CSV file.
Click the + icon for a row to expand the invoice with more details.
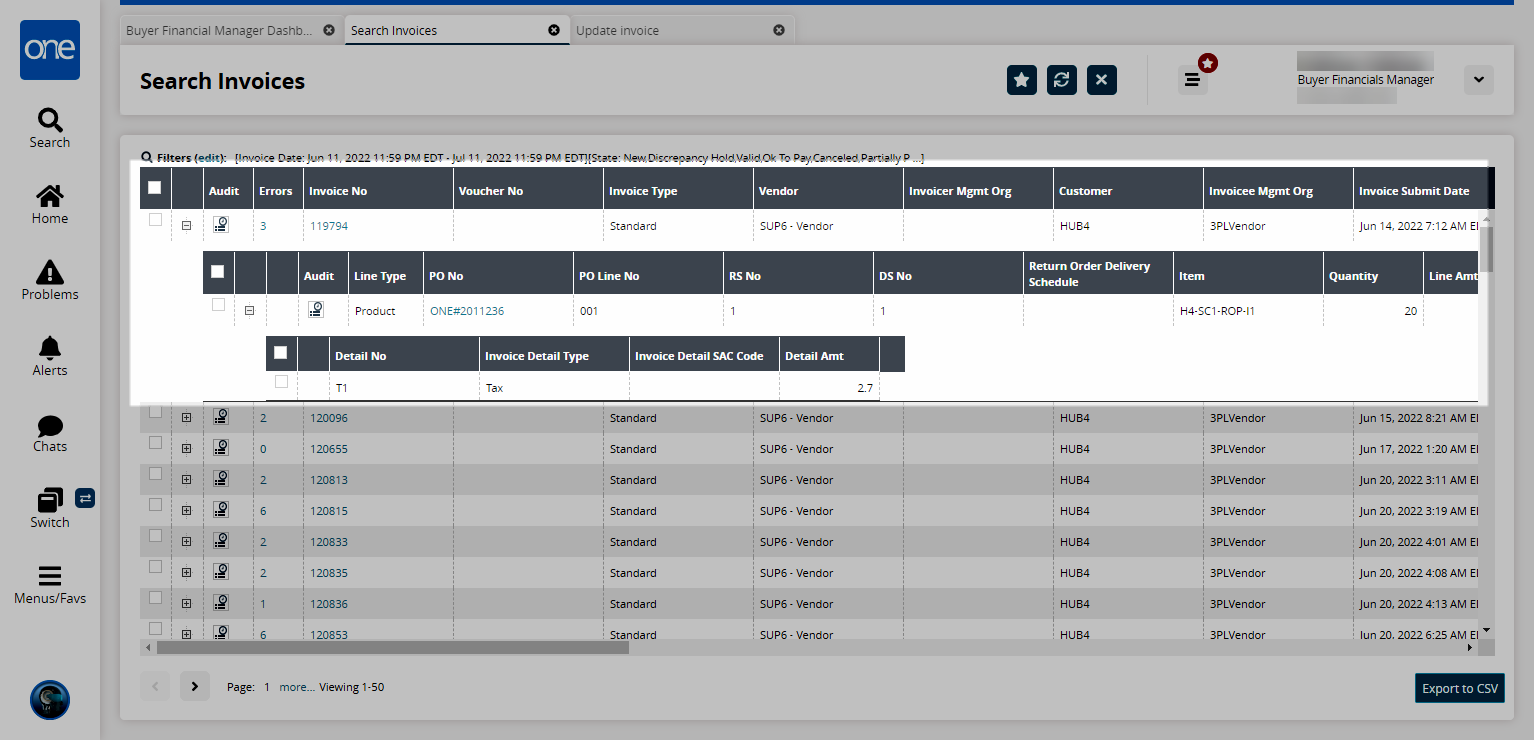
In the Audit column, click an audit icon (
 ) to view audit information.
The Audit Trail View screen displays detailing the audit trail of the given invoice.In the Errors column, click a link.
The Invoice Holds screen displays with all holds applied to the given invoice.In the Invoice No column, click an invoice number link.
The invoice details screen displays. For more information about fields and tabs for invoices, see the "Creating New Invoices" section of the Online Help.
Additional Actions
Various actions are available at the bottom of the page.
Click the Print button (
 ) to print the current page to a PDF file.
Click the Difference with Previous Version button (
 ) to open the Audit Trail View.
Click the Add Orders button to add additional orders to the invoice.
The Add Orders popup displays.
Fill out the following fields. Fields with an asterisk ( * ) are required.
Field
Description
State
Select the specific state(s) to filter the order by state.
* Order Type
Select an order type from the dropdown menu.
Order Number
Enter an order number.
Delivery Date
Enter a delivery date range.
Item
Select an item.
Ship To Site
Select a ship to site.
Vendor
Enter a vendor.
Single-Schedule PO
Select this checkbox if the order is a single-schedule purchase order.
Line Number
Enter a line number.
Delivery Schedule No
Enter a delivery schedule number.
Click the Search link.
Search results appear.Select the desired orders and then click OK.
Click the Add Line button to add lines.
The Add Line popup displays.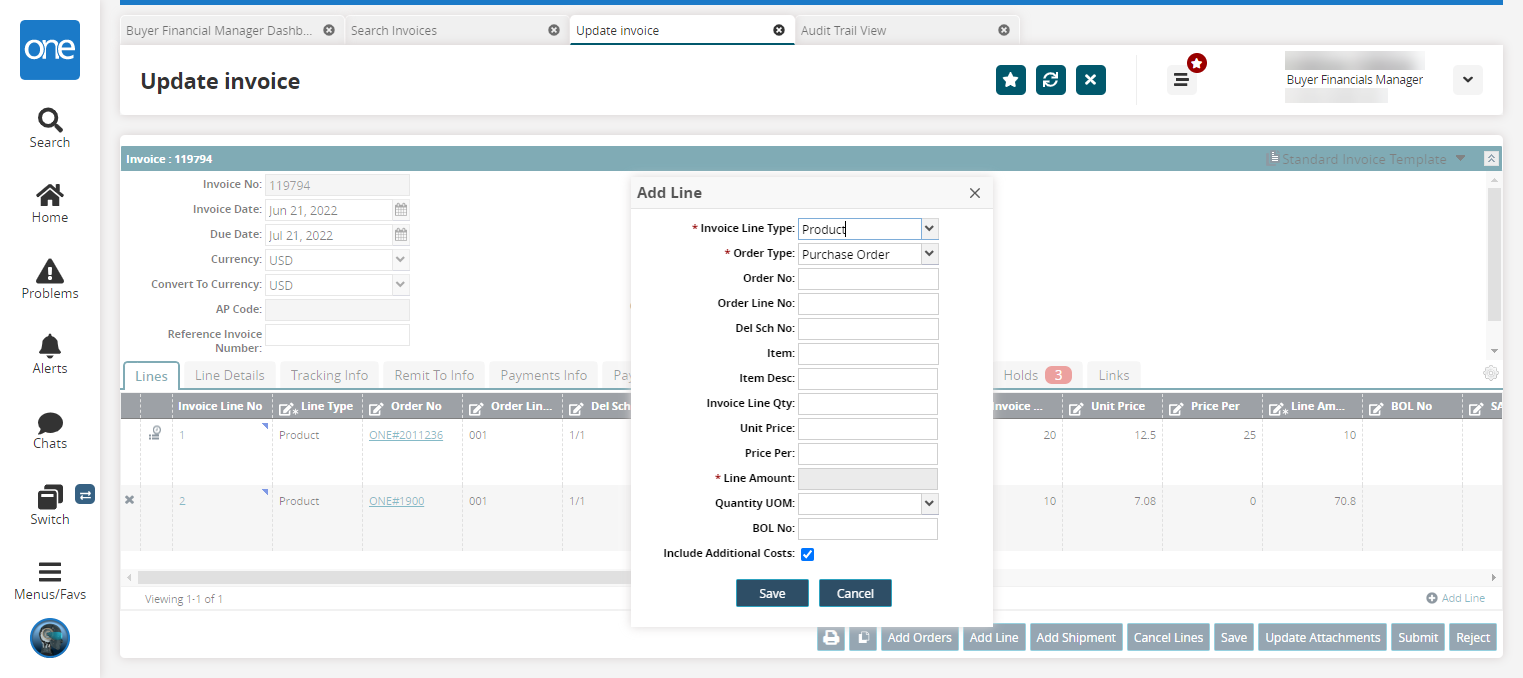
Fill out the following fields. Fields with an asterisk ( * ) are required.
Field
Description
Invoice Line Type
Select an invoice line type from the dropdown menu.
* Order Type
Select an order type from the dropdown menu.
Order No
Enter an order number.
Order Line No
Enter an order line number.
Del Sch No
Enter a delivery schedule number.
Item
Enter an item.
Item Desc
Enter an item description.
Invoice Line Qty
Enter an invoice line quantity.
Unit Price
Enter a unit price.
Price Per
Enter a price per unit.
* Line Amount
This field is calculated by the system based on the Invoice Line Qty and Unit Price.
Quantity UOM
Select a quantity unit of measure from the dropdown menu.
BOL No
Enter a BOL number.
Include Additional Costs
Select this checkbox to include additional costs.
Click Save.
A new line is added.Click the Add Shipment button.
The Add Shipment Lines popup displays.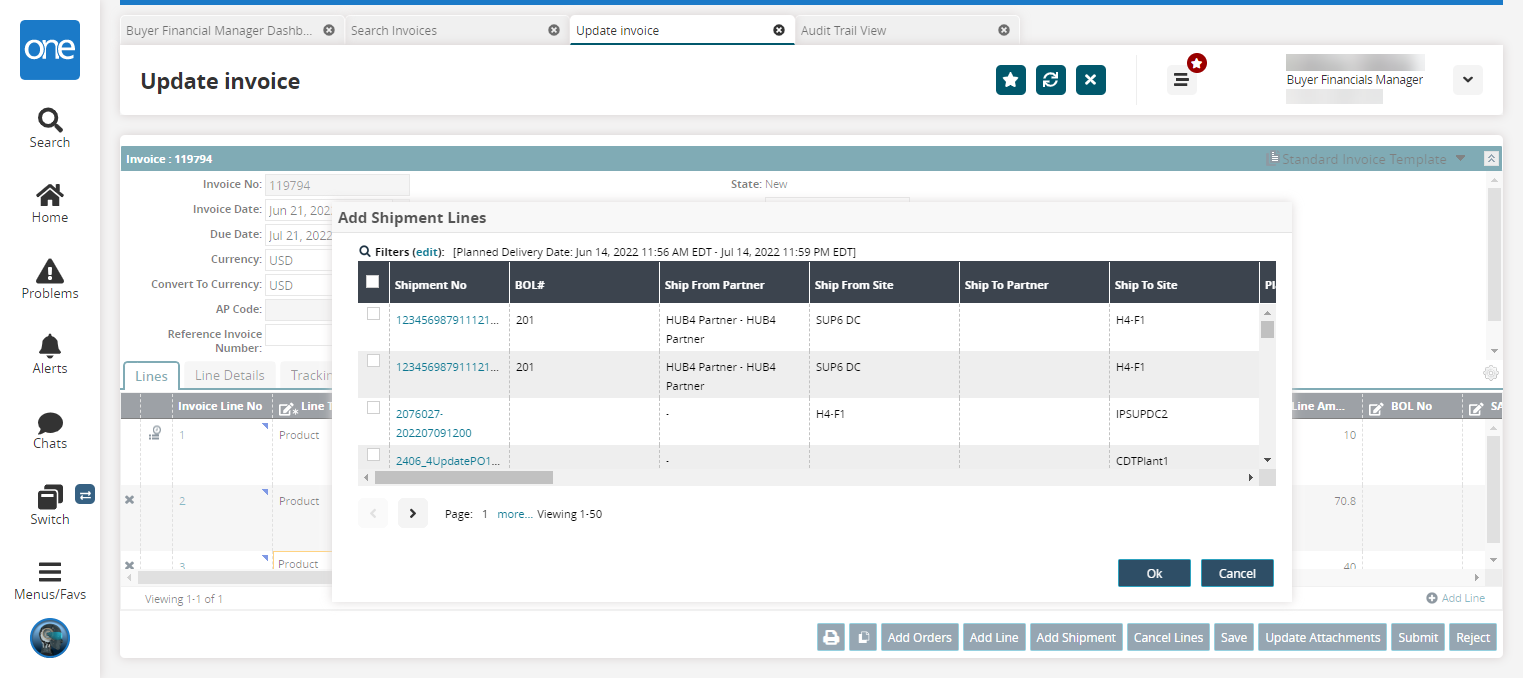
Select the desired shipment lines and click the OK button.
The shipment lines are added to the invoice.Click the Cancel Lines button.
The Cancel Lines popup displays.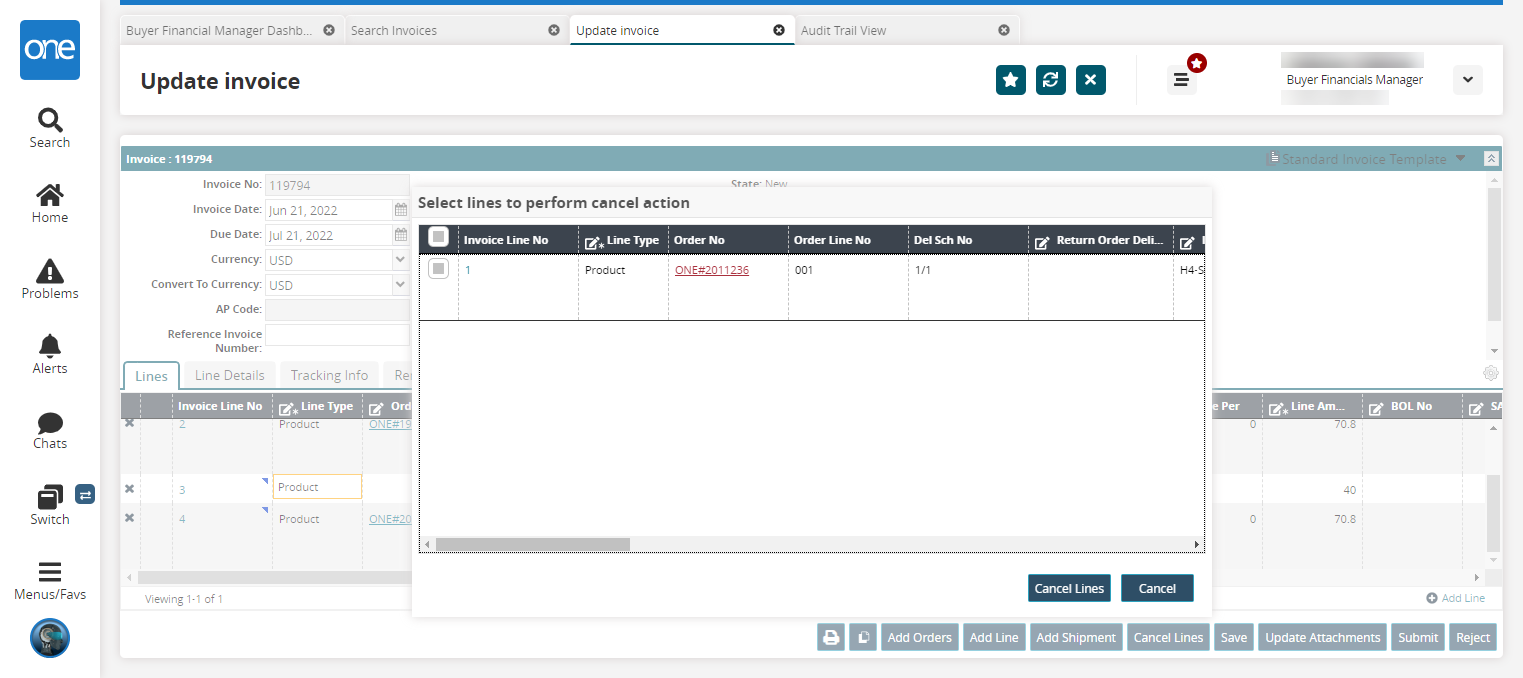
Select the desired lines and click the Cancel Lines button.
Click the Save button to save any recent changes.
Click the Update Attachments button to save updates.
Click the Submit button to submit New state invoices.
The state changes.Click the Reject button to reject the invoice and transition it to the Canceled state.