Searching and Updating Organizations
You can search for organizations in the system. Afterward, you can edit the details of an organization, export the search results to a spreadsheet, or deactivate an organization. Users with different permissions and roles may see different fields.
Complete the following steps to search and update organizations as a Buyer Supply Chain Admin user:
L og in to the ONE system.
Click Menus/Favs > Administration > Organization > Search Organization.
In the NEO UI, users can click on the Menus/Favs icon on the left sidebar and type in the name of the screen in the menu search bar. For more information, see "Using the Menu Search Bar."
The Search Organization screen appears.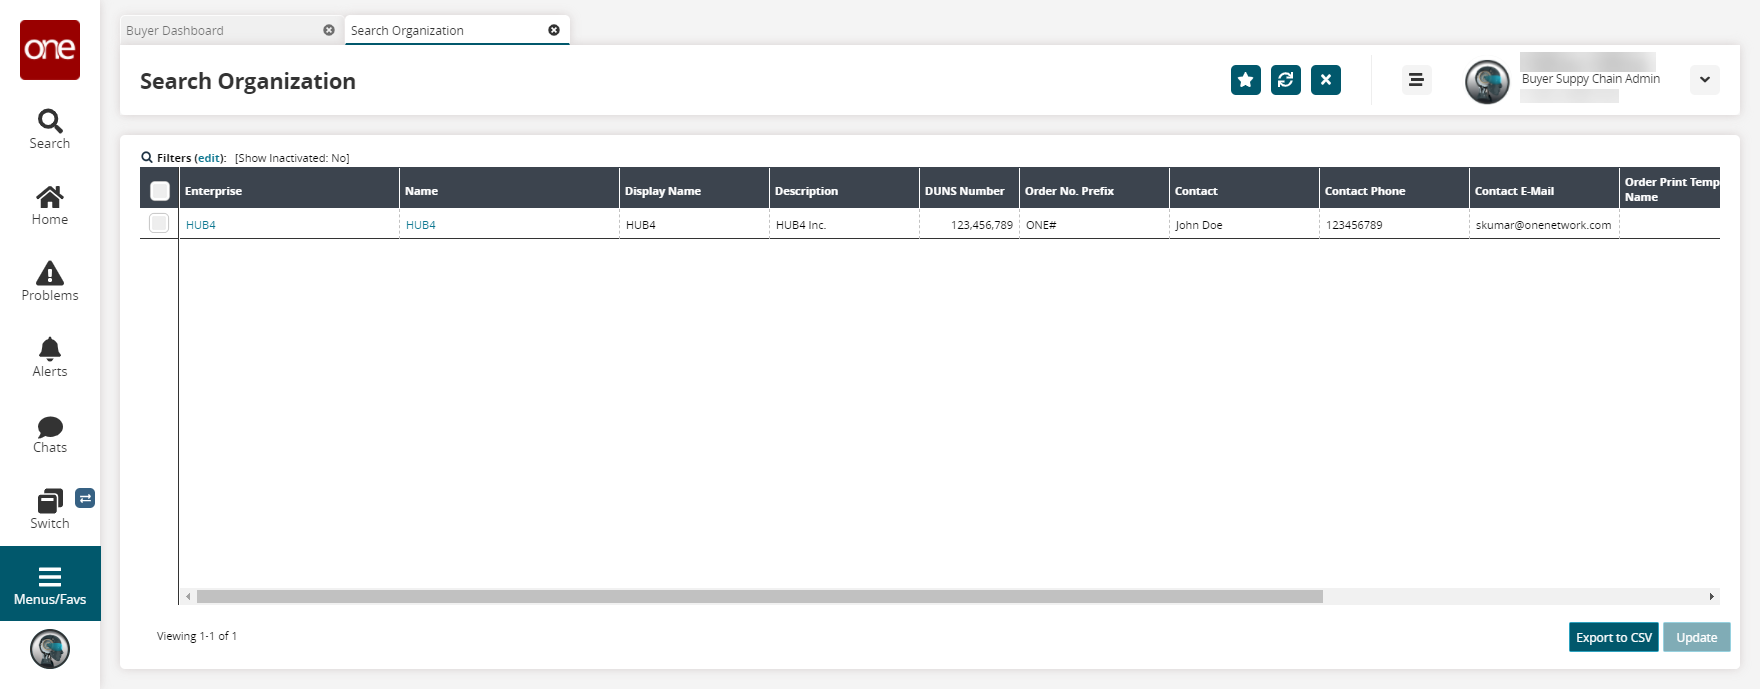
Click the organization link under the Name column.
The Organization details screen appears.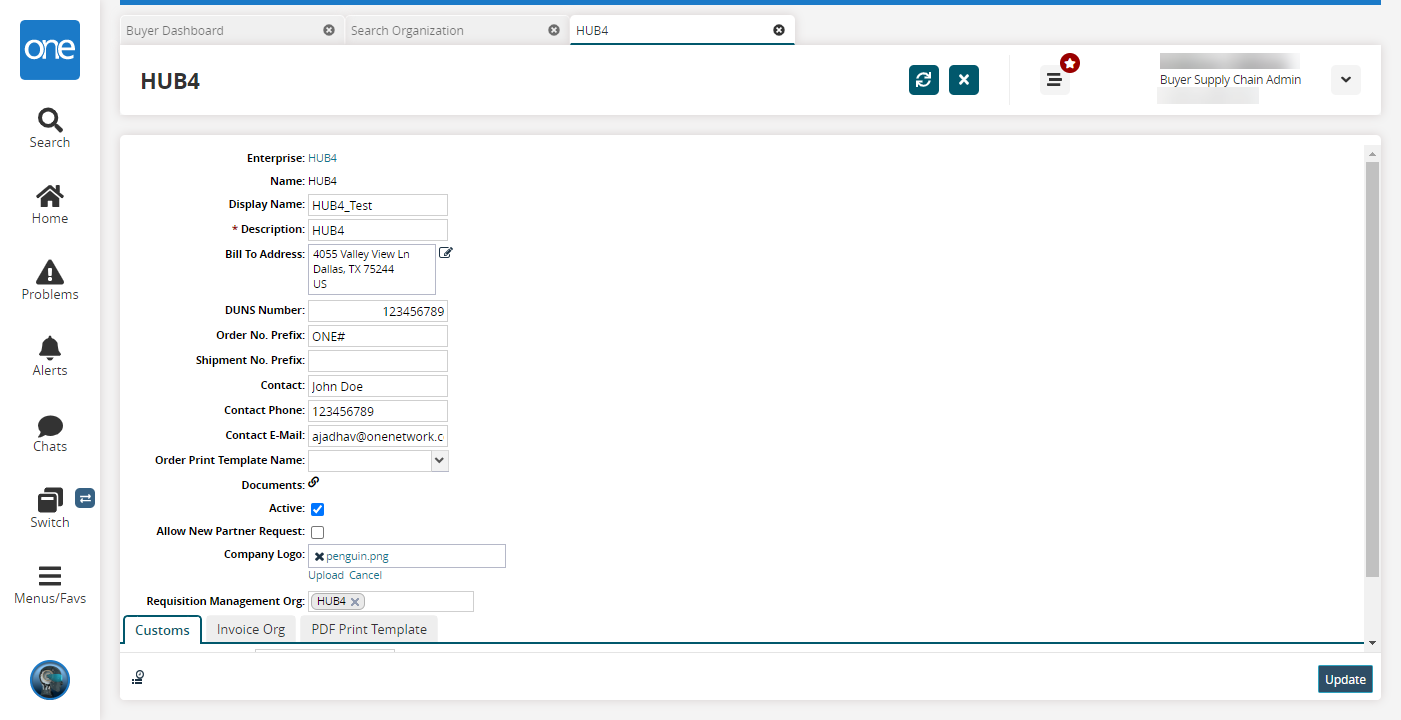
As required, edit values for the fields. See the "Adding Organizations" section of the Online Help for more information.
To upload documents, click the link icon (
 ) in the Documents field.
The Documents popup window appears.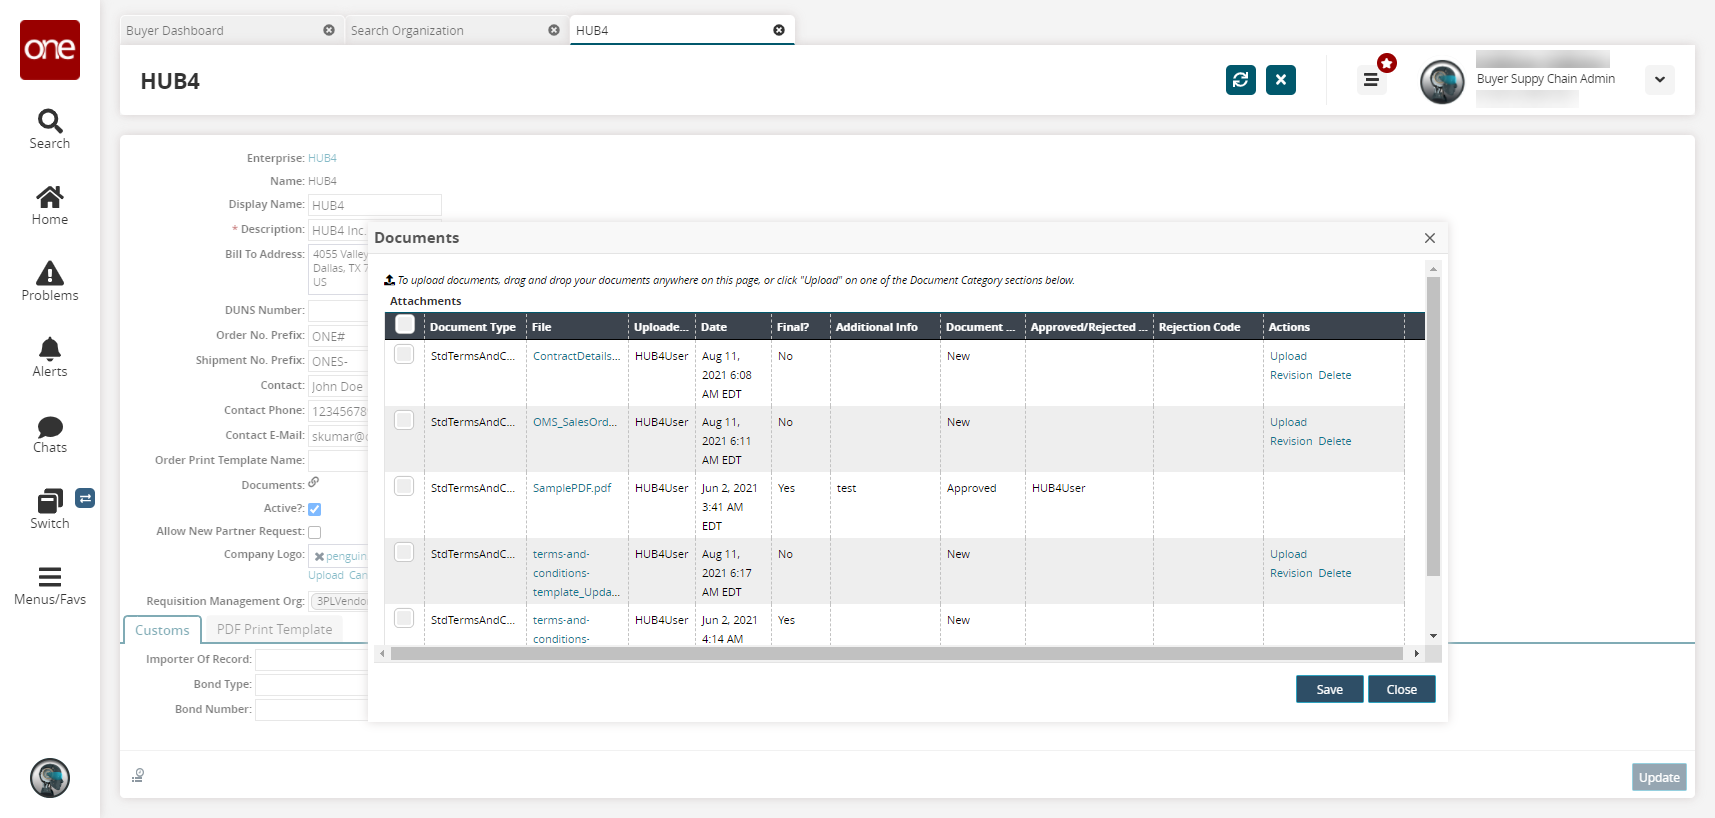
In the Actions column, click the relevant Upload link.
Click Save.
Click the Invoice Org tab.
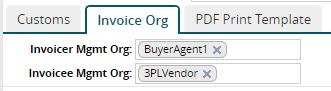
Enter values in the Invoicer Mgmt Org and Invoicee Mgmt Org fields.
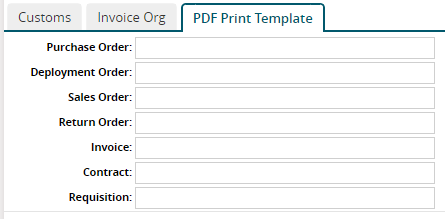
Click the PDF Print Template tab.
Enter values for PDF Print Template for the desired order type.
Click Update.
A success message appears.
Complete the following steps to search and update organizations as a Value Chain Admin user:
L og in to the ONE system.
Click Menus/Favs > Administration > Search Organization.
In the NEO UI, users can click on the Menus/Favs icon on the left sidebar and type in the name of the screen in the menu search bar. For more information, see "Using the Menu Search Bar."
The Search Organization screen appears.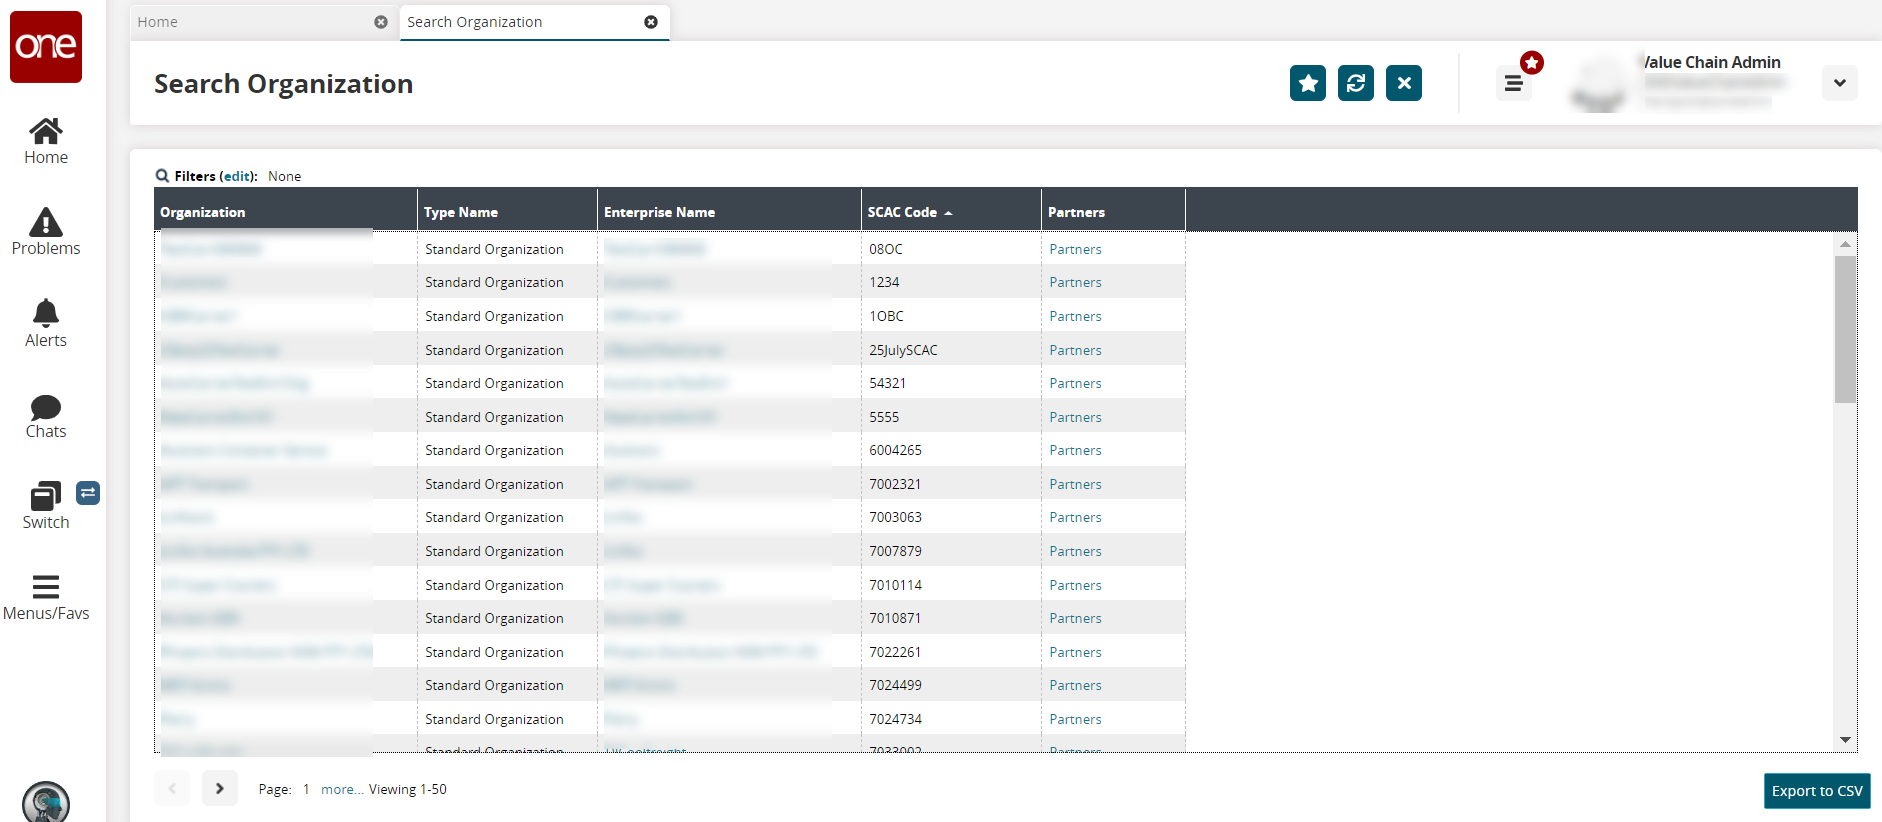
Click the organization link under the Name column.
The Organization details screen displays the General tab by default, and the customer's name is displayed in the Description field by default.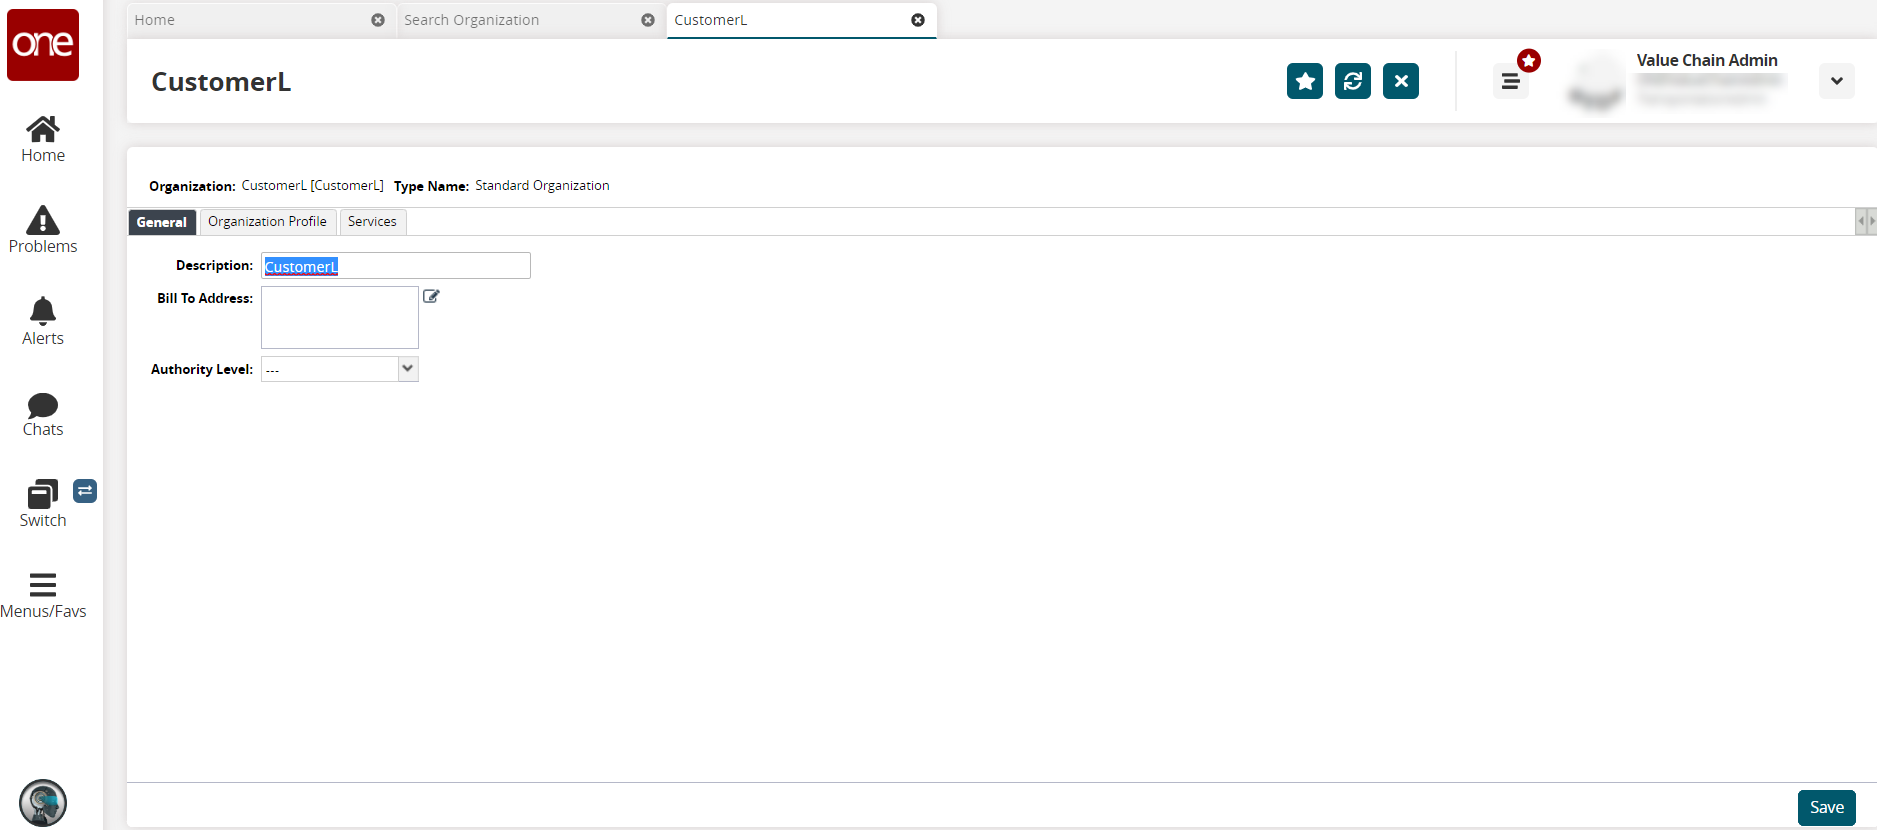
Update the customer's name in the Description field if required.
Click the pencil icon to enter address information for the Bill To Address field.
The address popup displays with the Country field populated with US by default. Please note that the fields may change based on the country code selected.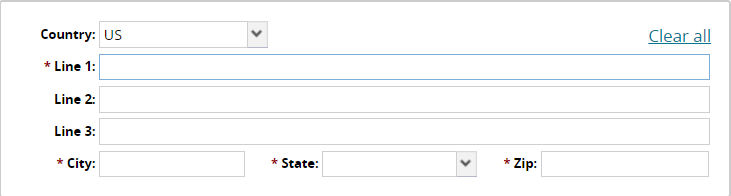
Enter values for fields described in the table below. Fields with an asterisk ( * ) are required.
Field
Description
Country
Select the country code from the dropdown list.
* Line 1
Enter address information.
Line 2
Enter address information if required.
Line 3
Enter address information if required
* City
Enter the city for the billing organization.
* State
Select the state from the dropdown list. This field may differ based on the country code.
* Zip
Enter the postal or ZIP code for the billing organization's address.
Click the Clear All link to clear the fields if necessary.
Click on a blank area of the screen to close the popup.
The address information populates the text box.Select an Authority Level from the dropdown list.
Click the Save button.
Click the Organizational Profile tab.
The Organizational Profile tab displays.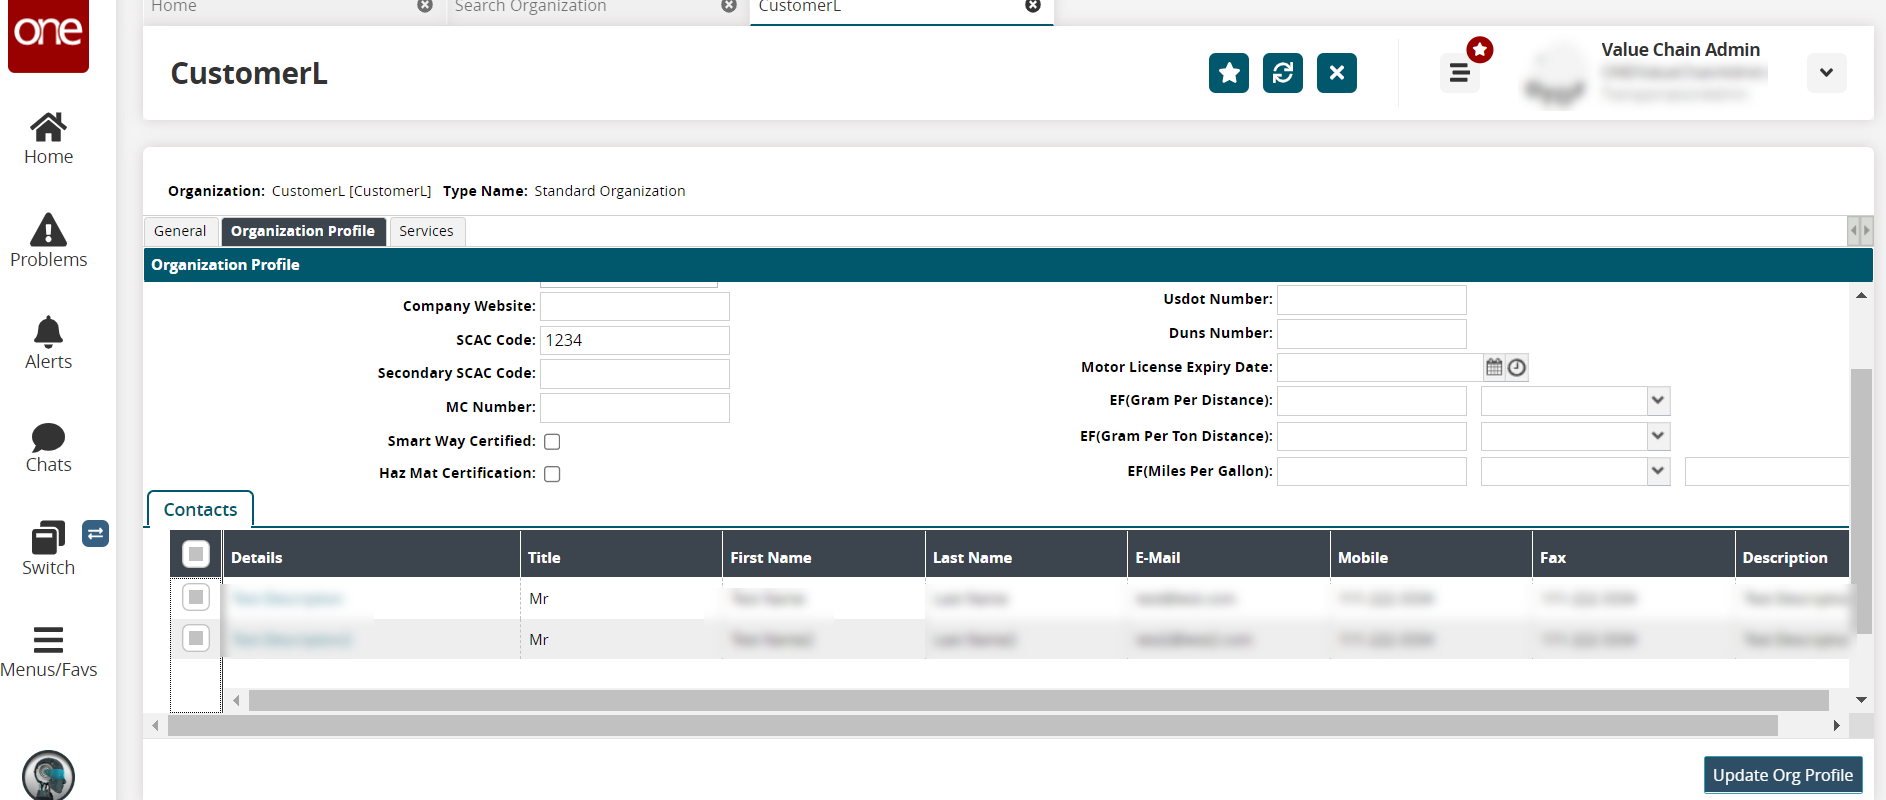
Enter values for fields described in the table below. Fields with an asterisk ( * ) are required.
Field
Description
Organization
This field auto-populates.
Company Address
Enter or update the company address. Instructions are the same as provided above.
Company Website
Enter the company's website URL.
SCAC Code
Enter the Standard Carrier Alpha Code (SCAC).
Secondary SCAC Code
Enter a secondary SCAC if necessary.
MC Number
Enter the Motor Carrier (MC) number.
Smart Way Certified
Check the box if this organization is Smart Way certified.
Haz Mat Certification
Check the box if this organization has a hazmat certification.
Inter-State Status
Select the organization's interstate status from the dropdown list.
Intra State Status
Select the organization's intrastate status from the dropdown list.
Intra State Number
Enter the intrastate number.
Usdot Number
Enter the United States Department of Transportation (USDOT) number.
Duns Number
Enter the Data Universal Numbering System (DUNS) number, which is a unique nine-digit identifier for a business created by credit bureau Dun & Bradstreet.
Motor License Expiry Date
Use the calendar and clock tools to select the date and time for the motor license expiration date.
EF(Gram Per Distance)
Enter a numerical value and select the gram per distance measurement from the dropdown list for the emissions factor (EF).
EF(Gram Per Ton Distance)
Enter a numerical value and select the gram per tonne distance measurement from the dropdown list for the emissions factor (EF).
EF(Miles Per Gallon)
Enter a numerical value and select the miles per gallon distance measurement from the first dropdown list and the cubic measurement from the second dropdown list for the emissions factor (EF).
Click the Export to Excel button to export a copy of the organization profile information to an Excel file on your computer.
Click the Add Contact button to add a contact.
The Add Contact tab opens.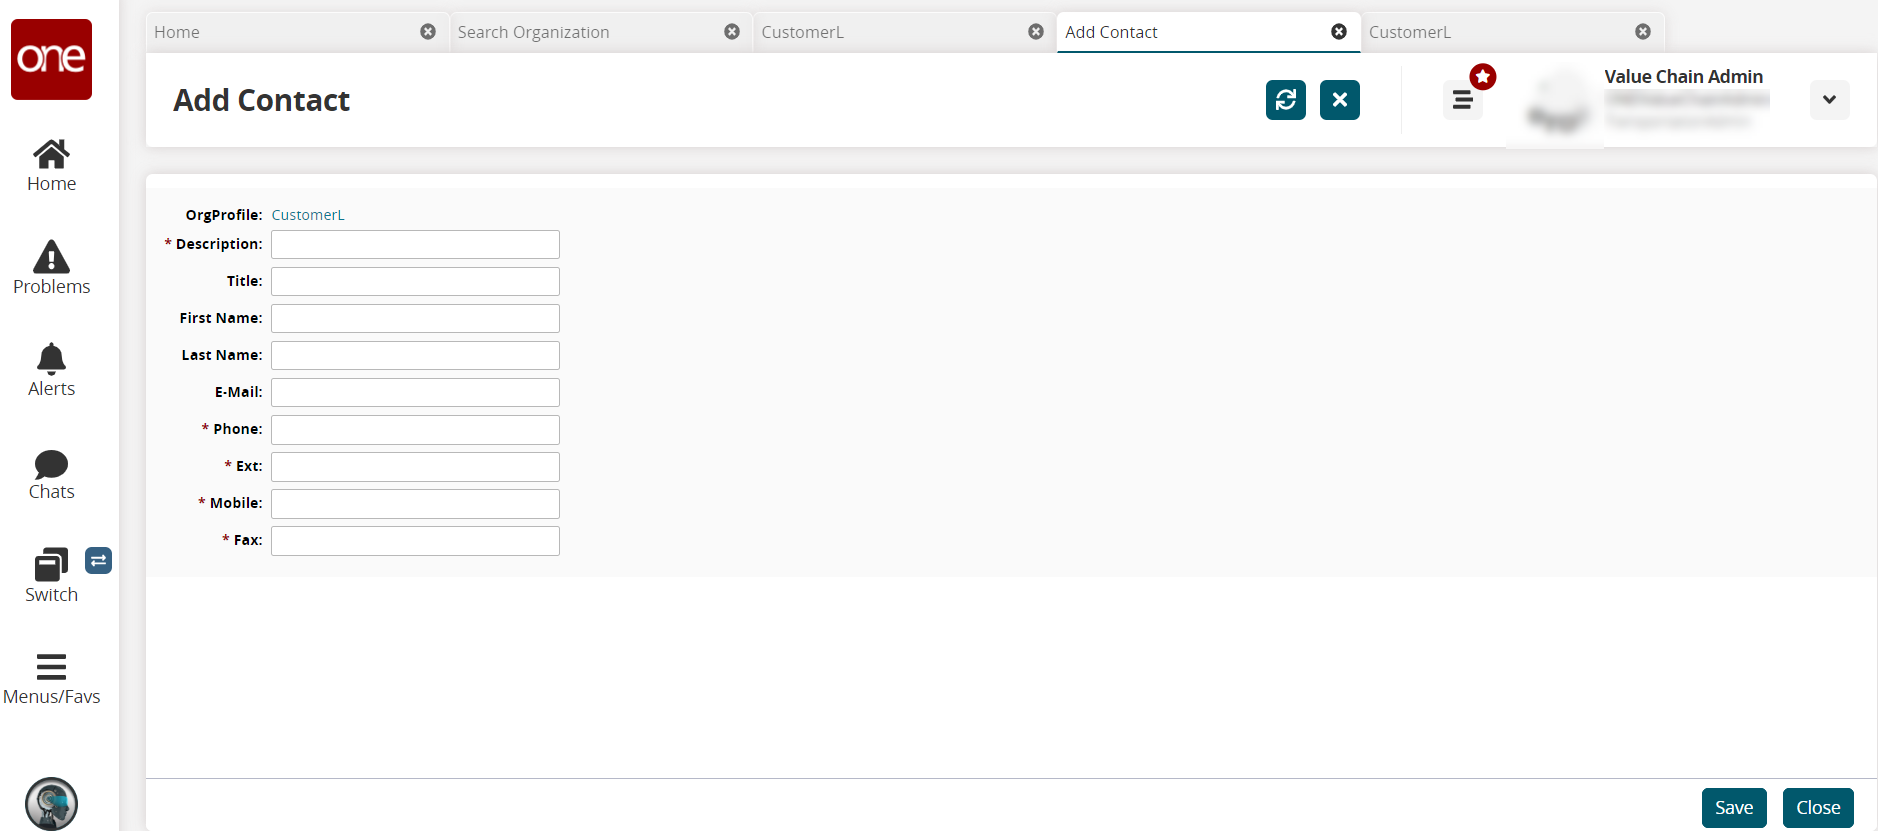
Enter values for fields described in the table below. Fields with an asterisk ( * ) are required.
Field
Description
OrgProfile
This field auto-populates.
* Description
Enter a description for the contact.
Title
Enter the contact's title.
First Name
Enter the contact's first name.
Last Name
Enter the contact's last name.
E-Mail
Enter the contact's email address.
* Phone
Enter the contact's phone number.
* Ext
Enter the contact's extension number.
* Mobile
Enter the contact's mobile/cell number.
* Fax
Enter the contact's fax number.
Click the Save button.
The contact information is saved.Click the customer details tab.
Click the ONE system refresh button. (Not your browser's refresh button.)
The contact is added to the Contact table on the Organization Profile tab.Click the box next to a contact to select it.
The Actions button is active.Click the Delete Contact option to delete the contact.
The Delete Contact popup displays with the selected contact.Click the Submit button.
A green success button displays in the Contacts table.Click the Update Org Profile button.
A green success message displays.Click the Services tab.
The existing services associated with the organization display.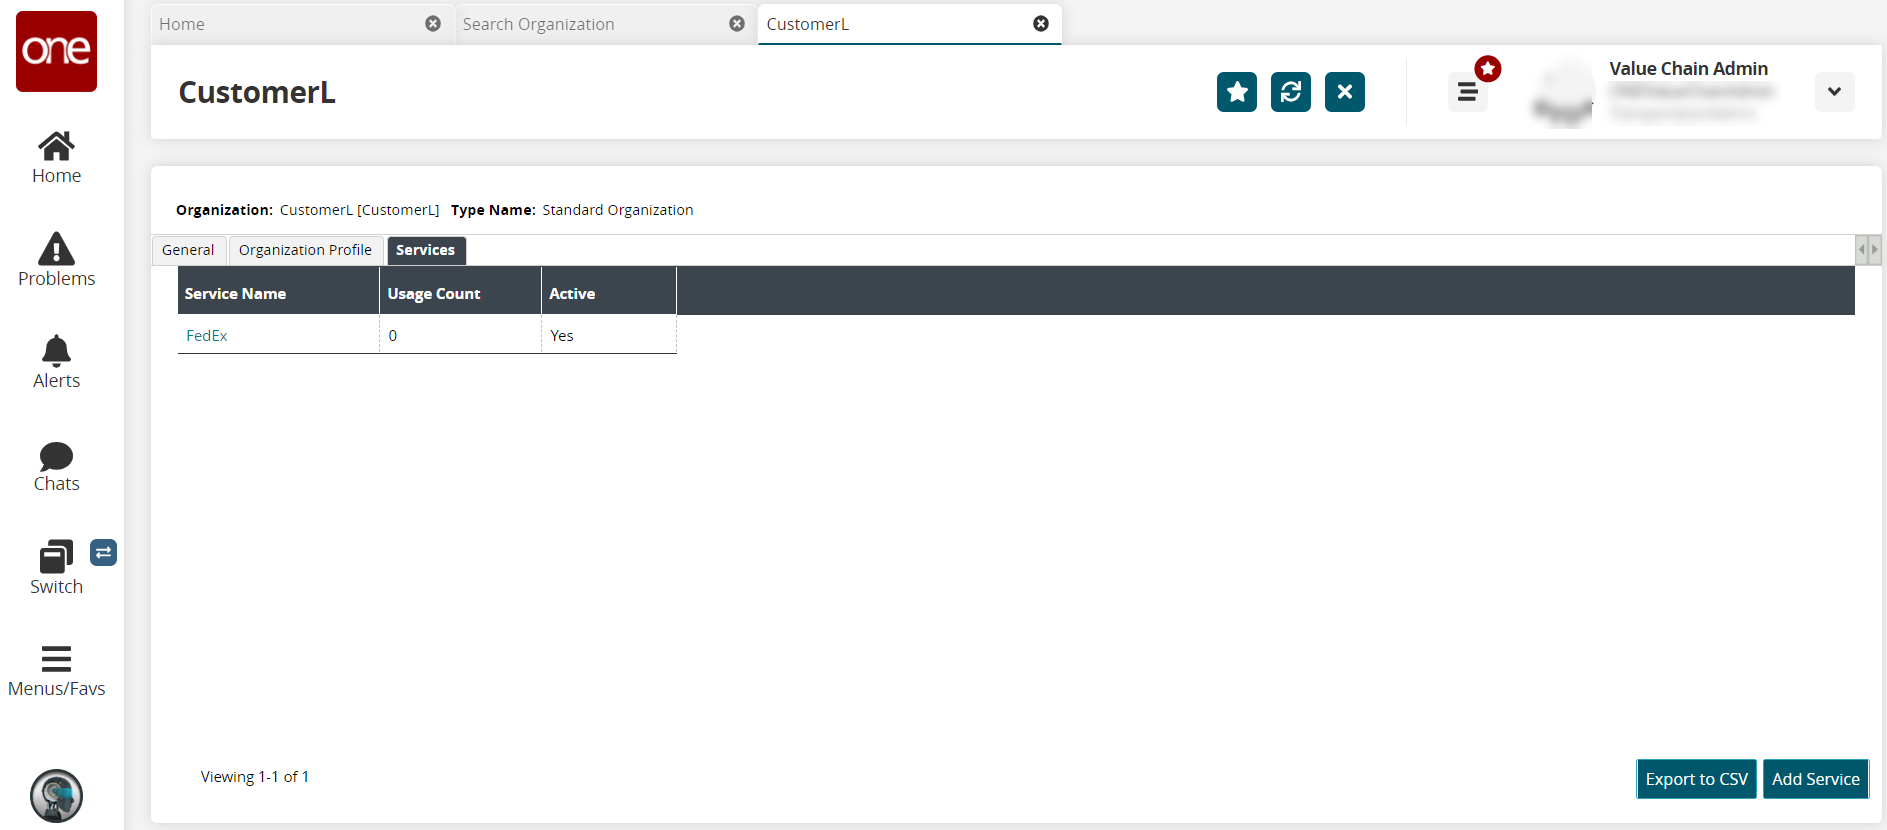
Click the Export to CSV button to export the report to a CSV file.
Click the Add Service button to add a new service.
The Add Service tab displays.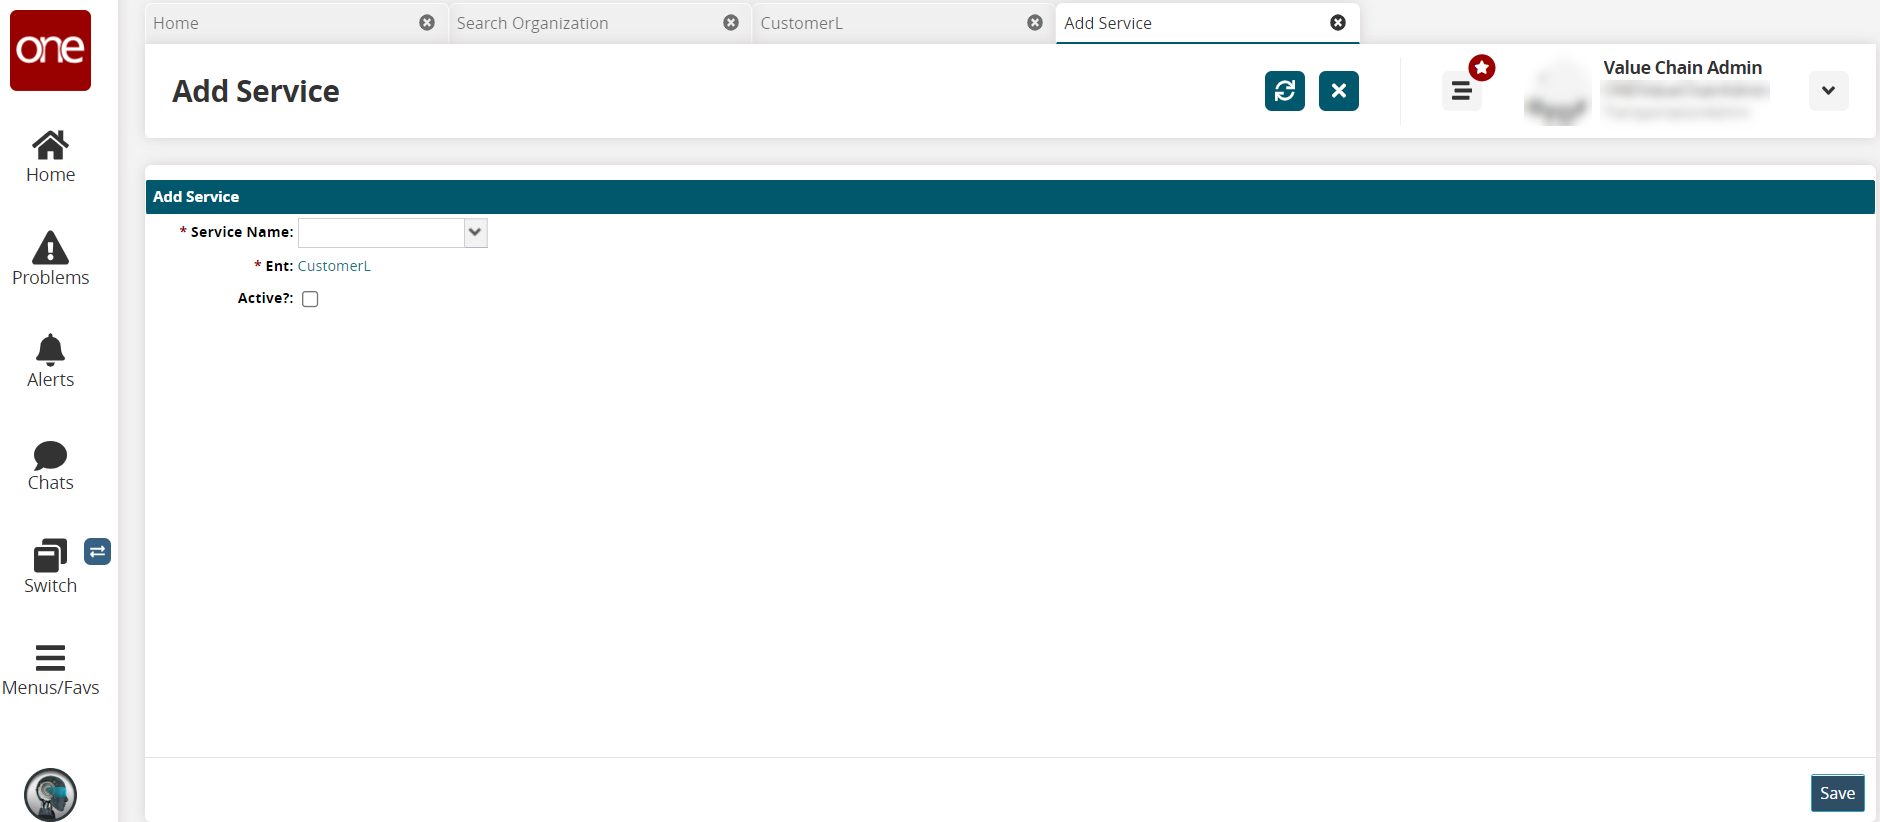
Select a carrier service from the * Service Name dropdown list. Fields with an asterisk ( * ) are required.
The * Ent field (for enterprise) auto-populates.
Check the Active? box if this carrier service is an active service.
Click the Save button.
The screen refreshes to allow tariffs for the carrier service.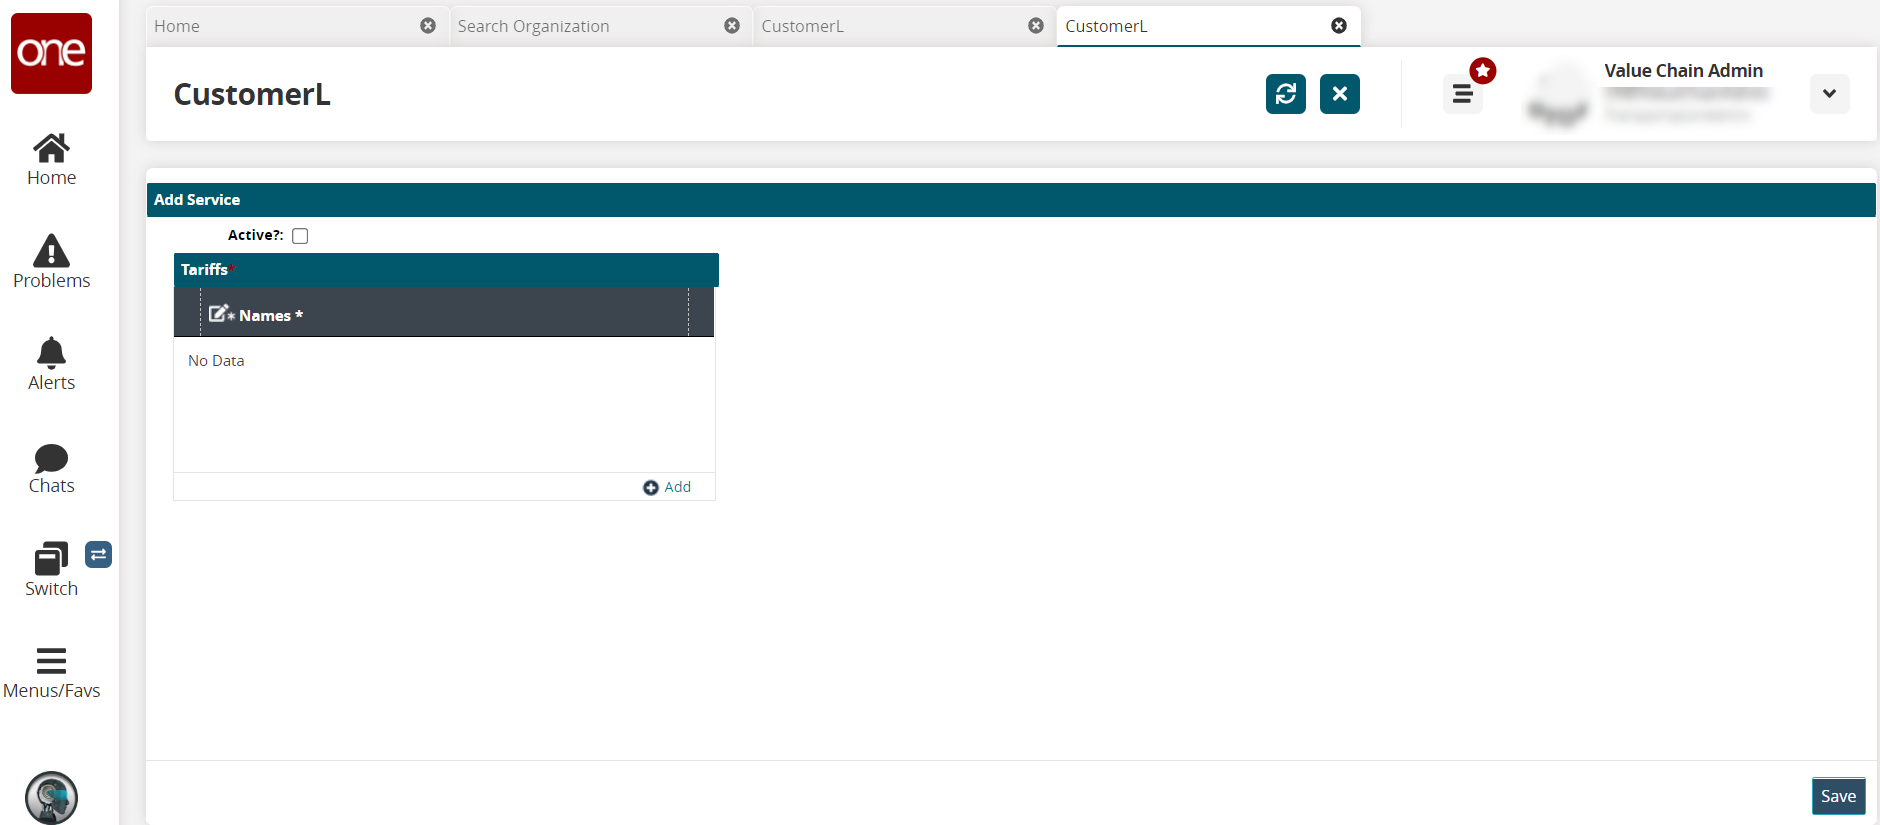
Click the Active? checkbox to activate this tariff.
Click the Add link to add a tariff.
Add a tariff name in the Names* cell.
Click the Save button.
A green success message displays, and a tariff is associated with the service for this organization.