Splitting Sales Order into Fulfillment Orders
Supply chain users can manually split sales orders (SOs) into fulfillment orders (FOs) by enabling the Allow Fulfillment Order to Create New DS (delivery schedule) policy. This policy allows the delivery schedule of an FO to be split into multiple delivery schedules to better align with FO schedules. When performing a split, users specify the quantity (either absolute or percentage), vendor, and order type(s).
This workflow is valid for sales orders in the New state and begins where the ".Creating Sales Orders vNEO_3.4" section ends.
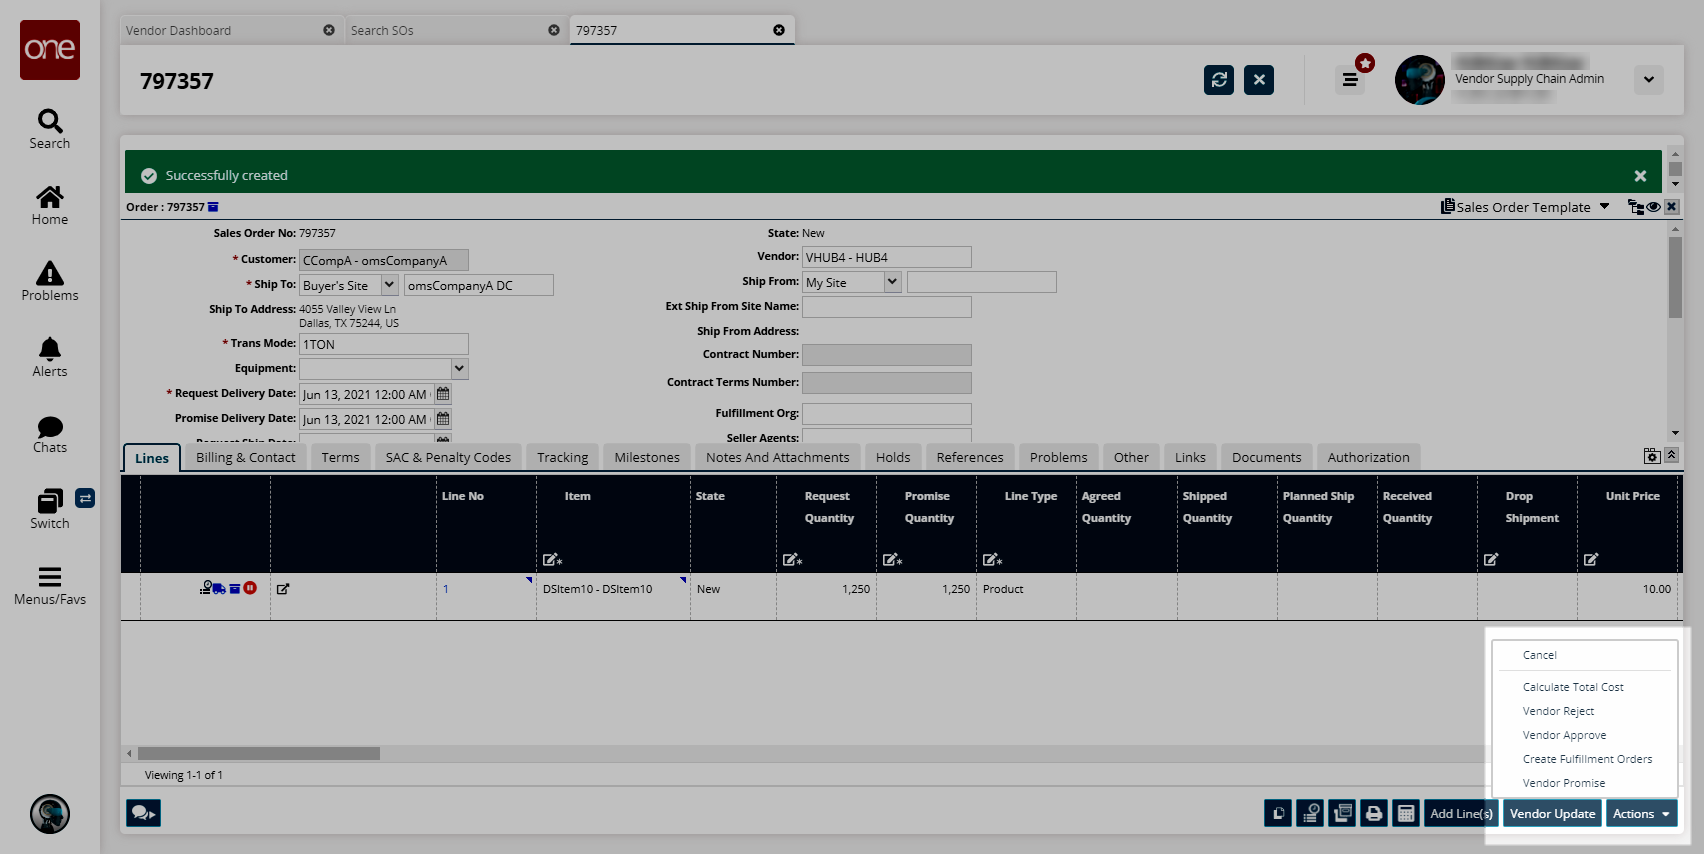
Complete the following steps to split a sales order into fulfillment orders:
Click Actions > Create Fulfillment Orders.
The Create Fulfillment Orders popup appears.Click the branching symbol on the first field for the row as shown in the screenshot below.
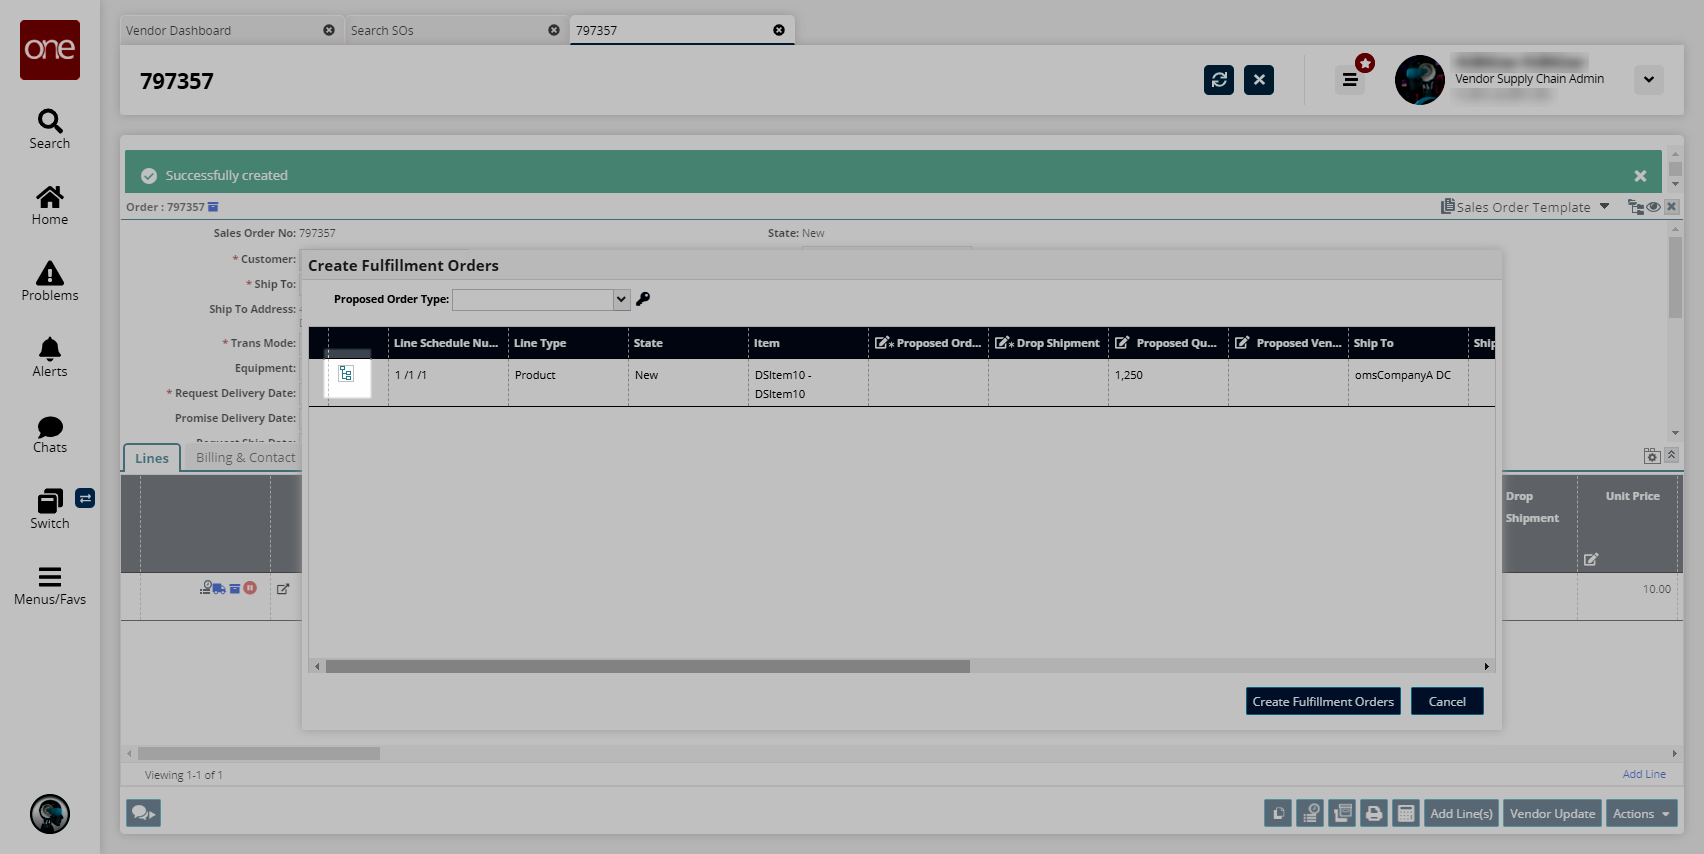
A popup appears.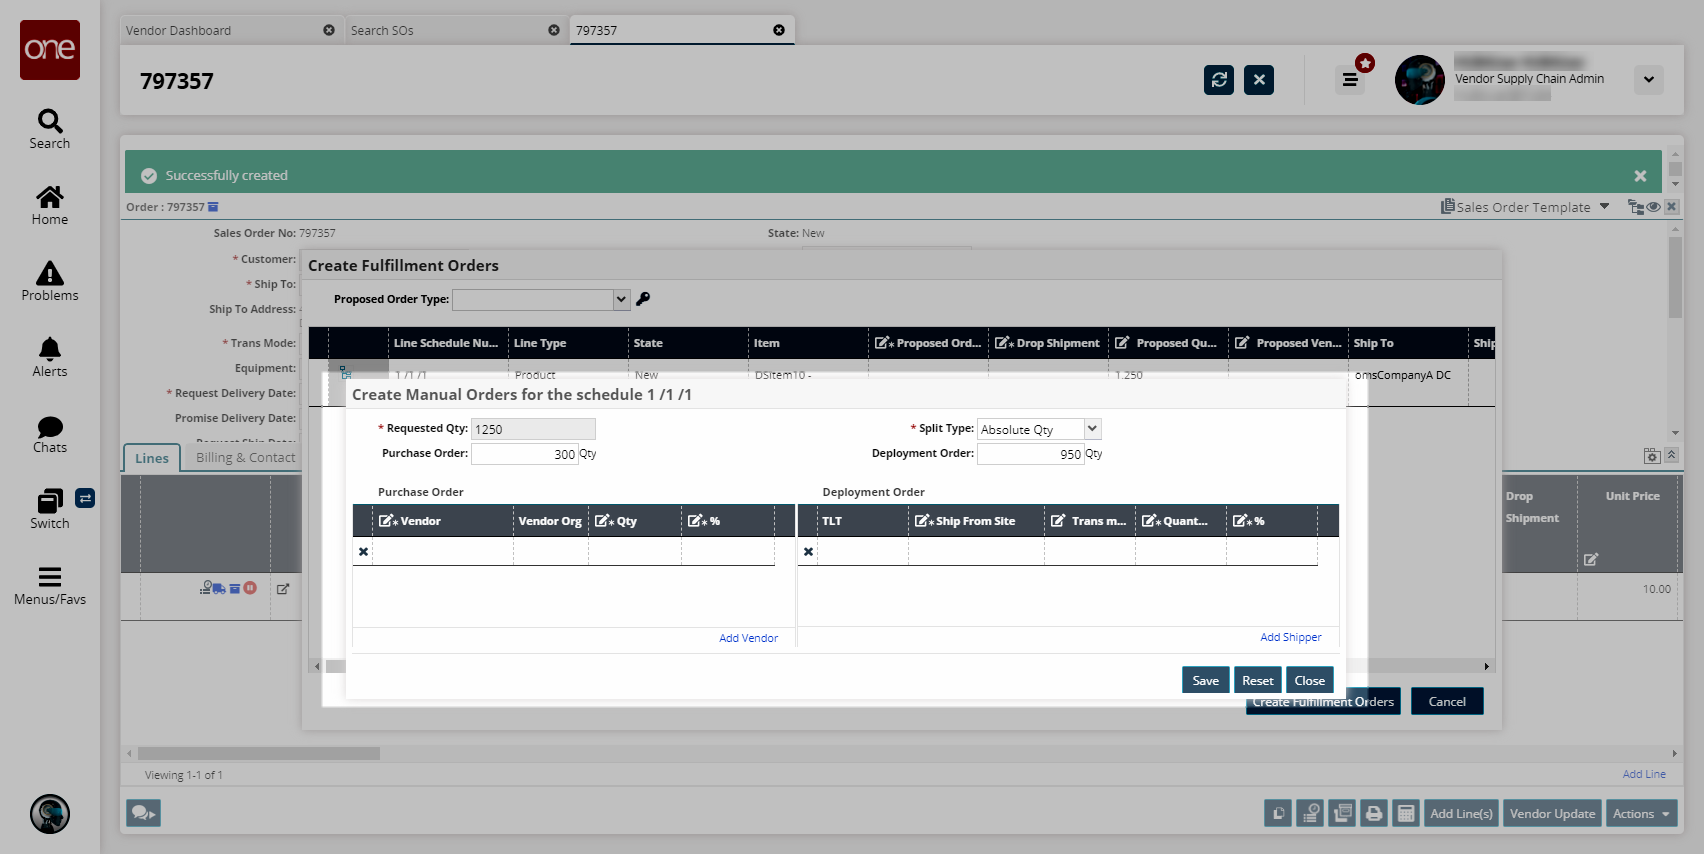
Fill out the following fields. Fields with an asterisk ( * ) are required.
Section
Field
Description
Upper
* Requested Qty
This is the total quantity available to split. This field is not user-editable.
* Split Type
Select either Absolute or Percentage.
PO Qty
Enter the quantity allotted for purchase orders. With the Split Type specified, any value entered in this field will cause the remaining quantity to appear in the DO Qty field. For example, with a Requested Quantity of 1250 and a Split Type of Absolute, if 300 is entered in the PO Qty field, the DO Qty field will auto-populate with 950.
If the field value is greater than zero, a table appears allowing the user to specify various fields.
DO Qty
Enter the quantity allotted for deployment orders. With the Split Type specified, any value entered in this field will cause the remaining quantity to appear in the PO Qty field. For example, with a Requested Quantity of 1250 and a Split Type of Absolute, if 300 is entered in the DO Qty field, the PO Qty field will auto-populate with 950.
If the field value is greater than zero, a table appears allowing the user to specify various fields.
Purchase Order
* Vendor
Begin entering a vendor and select an option from the list. Only vendors defined in the AVL for the item appear.
Vendor Org
This field will auto-populate when the Vendor field is populated.
* Qty
When the Split Type is Absolute, enter a quantity.
When the Split Type is Percentage, this field will auto-populate when the % field is populated.
* %
When the Split Type is Absolute, this field will auto-populate when the Qty field is populated.
When the Split Type is Percentage, enter a percentage value.
Deployment Order
TLT
If both the Ship From Site and Trans Mode fields are populated, this field will auto-populate.
* Ship From Site
Begin entering a ship from site and select an option from the list.
Trans Mode
When the Ship From Site field is populated, this field will auto-populate.
* Qty
When the Split Type is Absolute, enter a quantity.
When the Split Type is Percentage, this field will auto-populate when the % field is populated.
* %
When the Split Type is Absolute, this field will auto-populate when the Qty field is populated.
When the Split Type is Percentage, enter a percentage value.
Use the Add Vendor and Add Shipper button links to add additional rows.
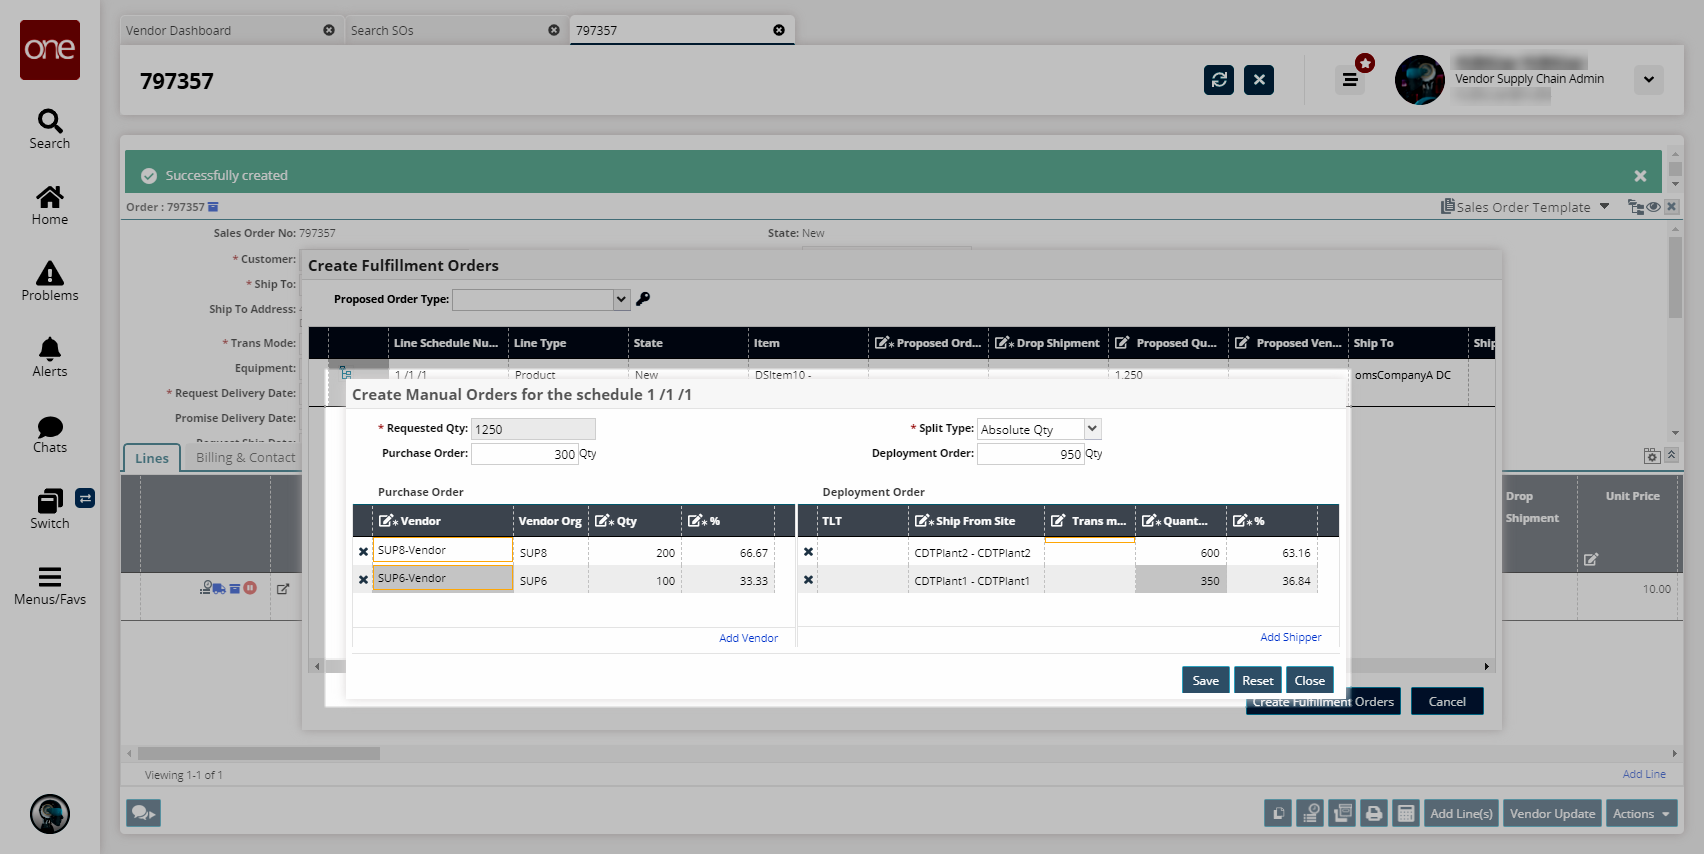
Click Save.
An exclamation point appears next to the branching symbol in the row, indicating success.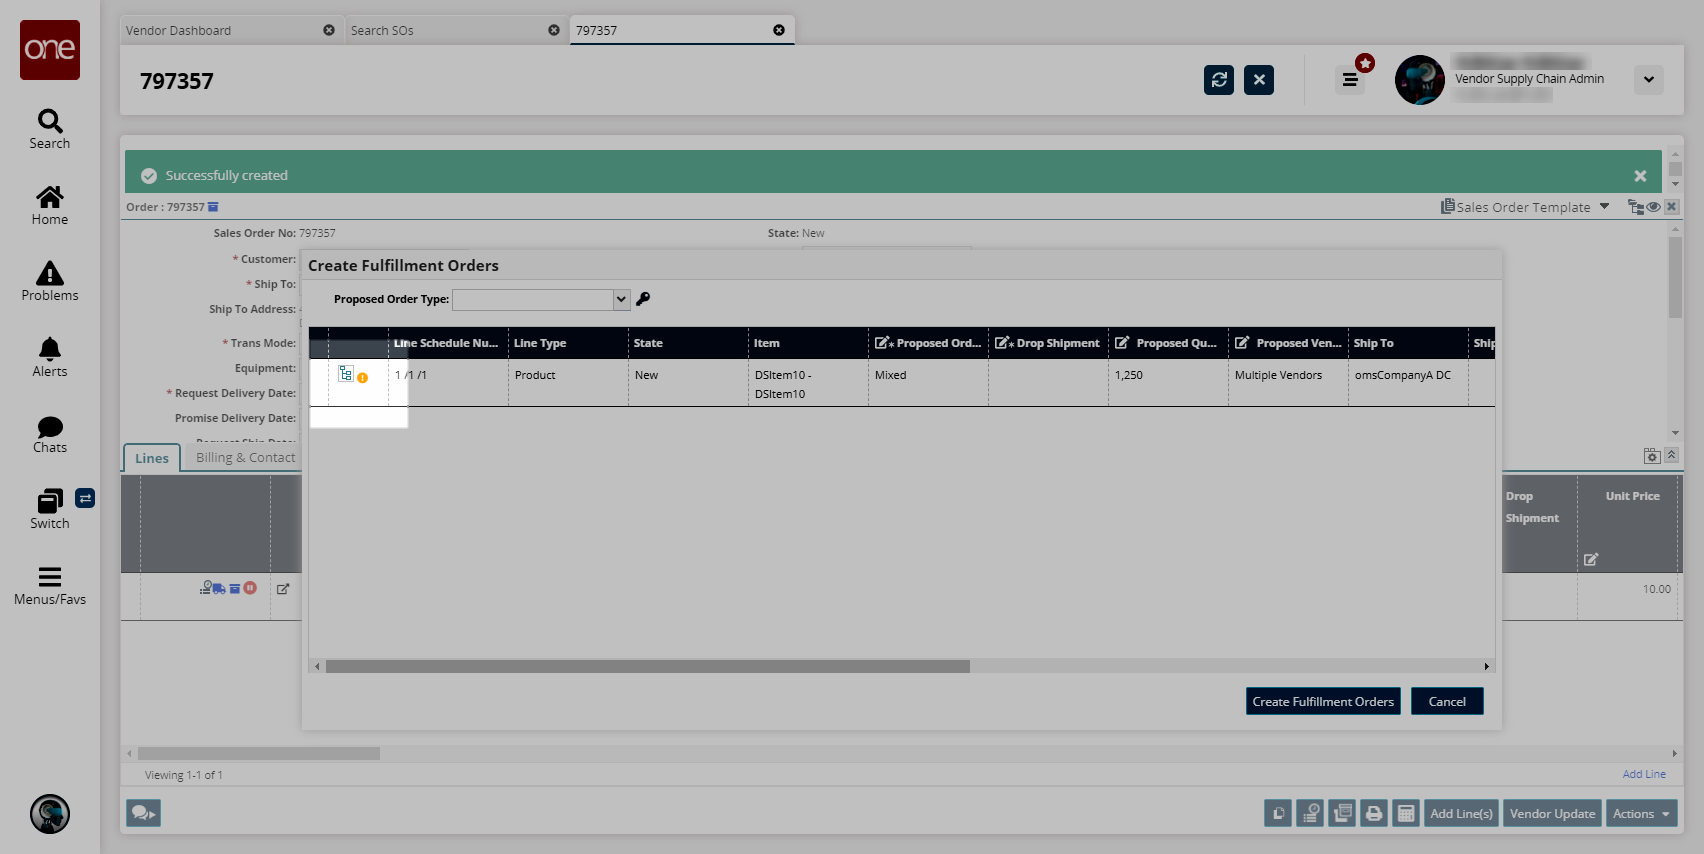
Click Create Fulfillment Orders.
A success message appears.