Submitting VGM (Verified Gross Mass) Information for Containers
This topic describes how to submit VGM (Verified Gross Mass) information for containers:
Complete the following steps to submit VMG for containers:
Log in to the ONE system.
Click Menus/Favs > Transportation > VGM.
The VGM screen appears.
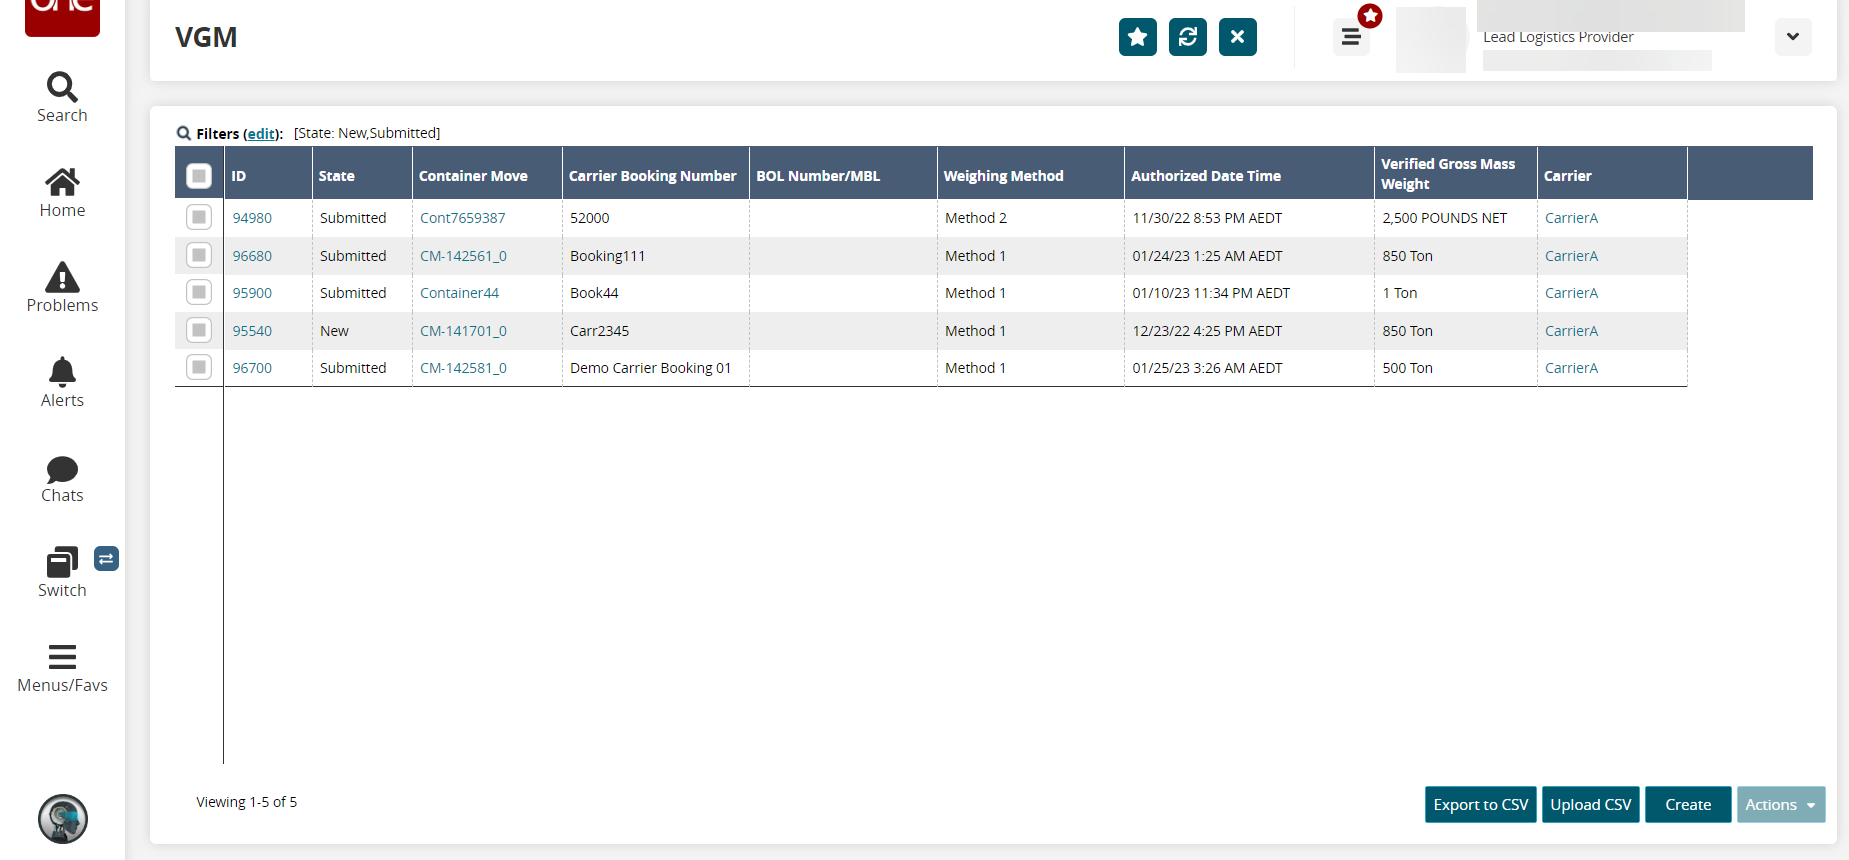
Click the Export to CSV button to export the VGM report into a spreadsheet.
Click the Upload CSV button to upload VGM data via a CSV file.
Click the checkbox to select an ID, then click the Actions button and select desired action.
Click Create to create a new record.
The Create screen appears.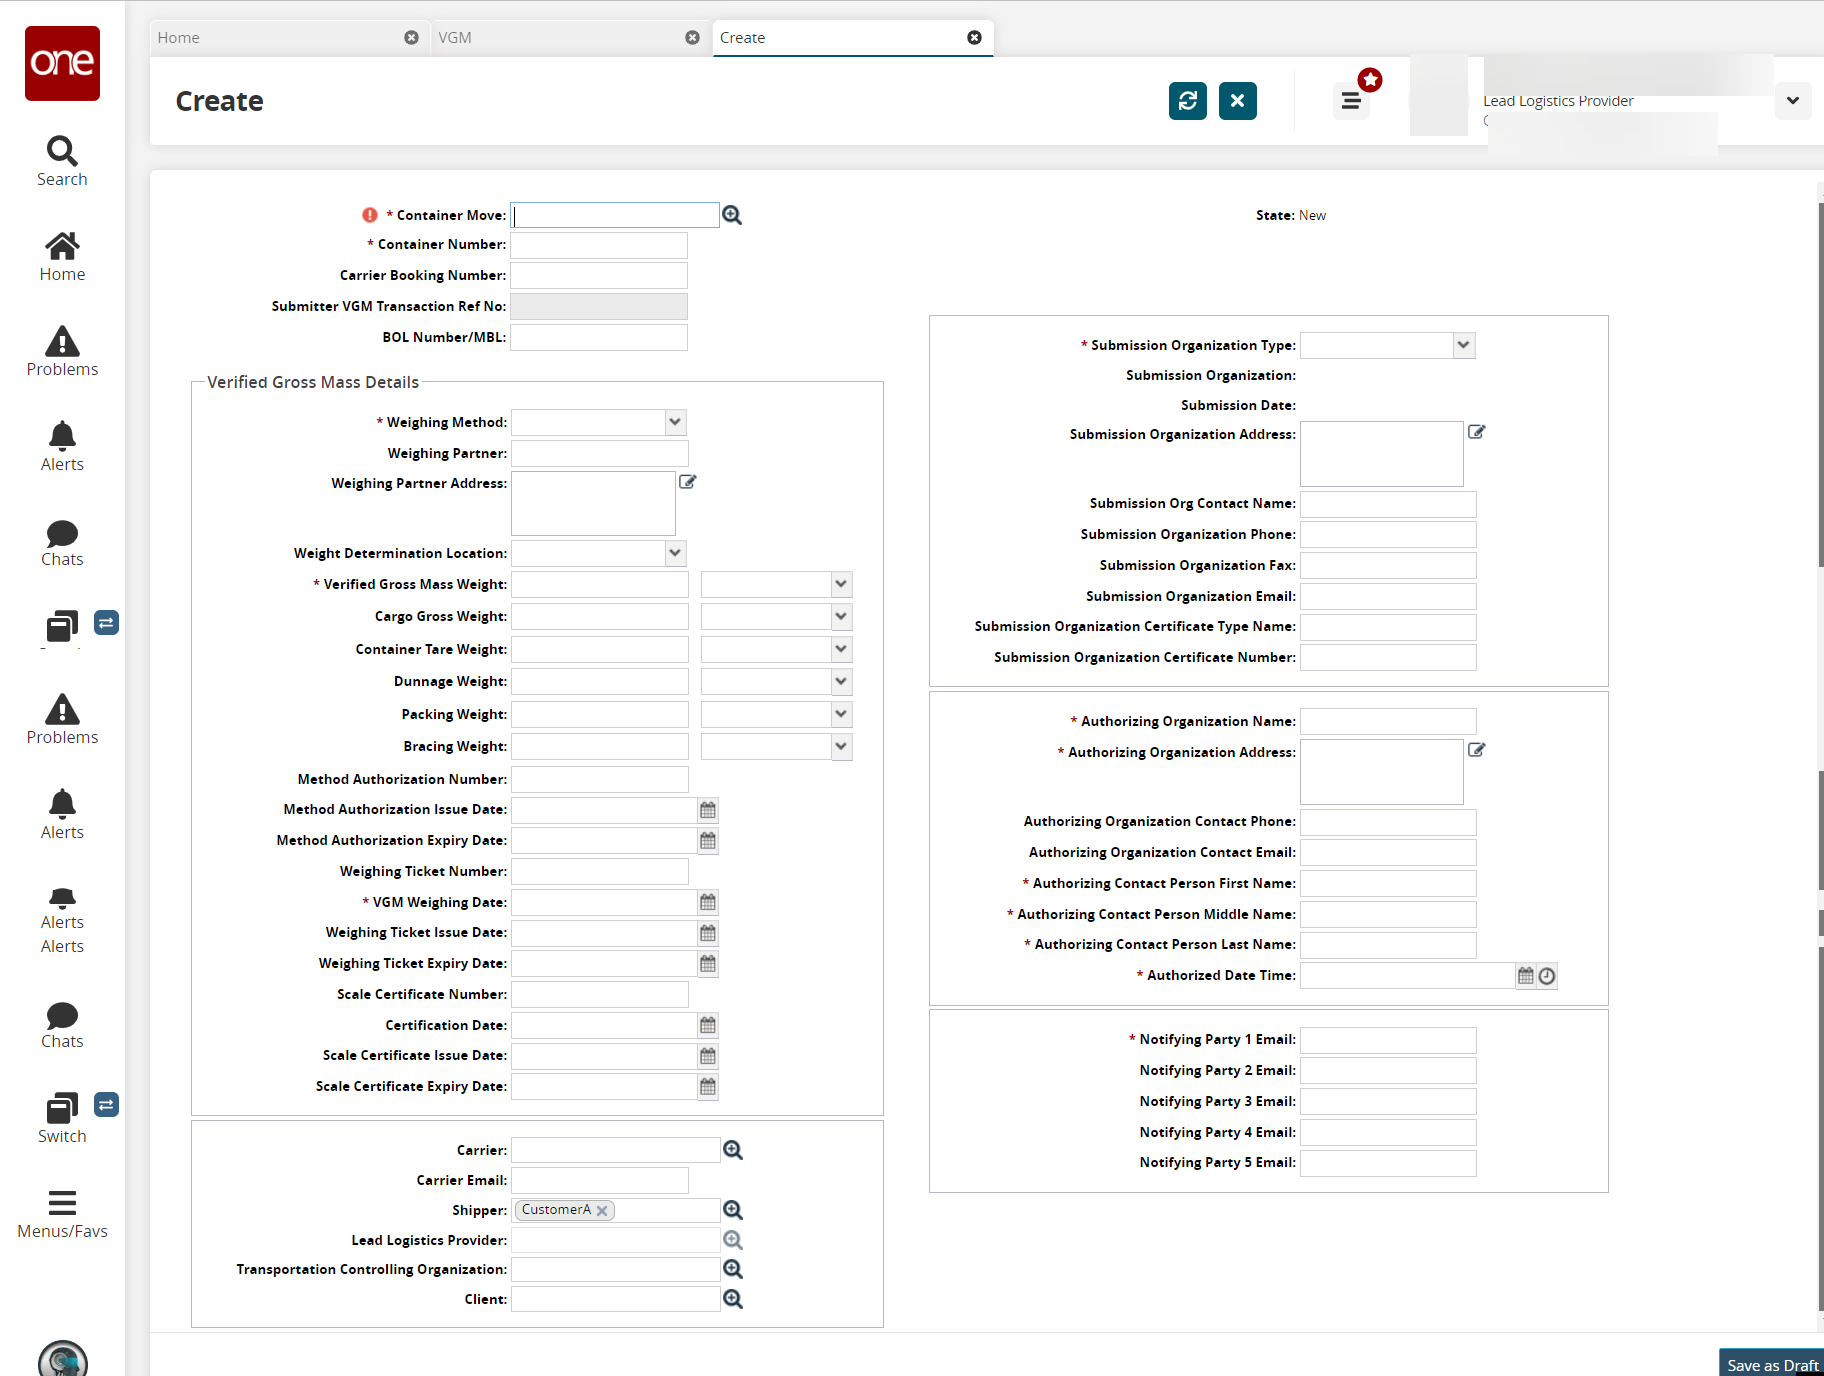
Fill out the following fields. Fields with an asterisk ( * ) are required.
Field Name
Description
* Container Move
Enter or select the container move.
* Container Number
The container number is displayed automatically based on the container move value.
Enter the container number if not displayed automatically.* Weighing Method
Select the weighing method from the drop-down list.
The available options are Method 1 and Method 2.* Verified Gross Mass Weight
Enter the verified gross mass weight of the container.
Select the unit of measurement from the drop-down list.* Submission Organization Type
Select the submission organization type from the drop-down list.
The available options are Authorized and Responsible.* Authorizing Organization Name
Enter the authorizing organization name.
* Authorizing Organization Address
Enter the authorizing organization address.
* Authorizing Contact Person First Name
Enter the authorizing contact person's first name.
* Authorizing Contact Person Middle Name
Enter the authorizing contact person's middle name.
* Authorizing Contact Person Last Name
Enter the authorizing contact person's last name.
* Authorized Date Time
Select the date and time values.
* Notifying Party 1 Email
Enter the email address of the notifying party.
Enter values in the optional fields if applicable.
Click Save as Draft.
A success message appears.Click Review to review the information.
Click Submit.
A success message appears.