Tendering Policies
Complete the following steps to create tendering policies:
L og in to the ONE system.
Select Menus/Favs > Contract Mgmt > Tendering Policies.
The Tendering Policies screen appears.
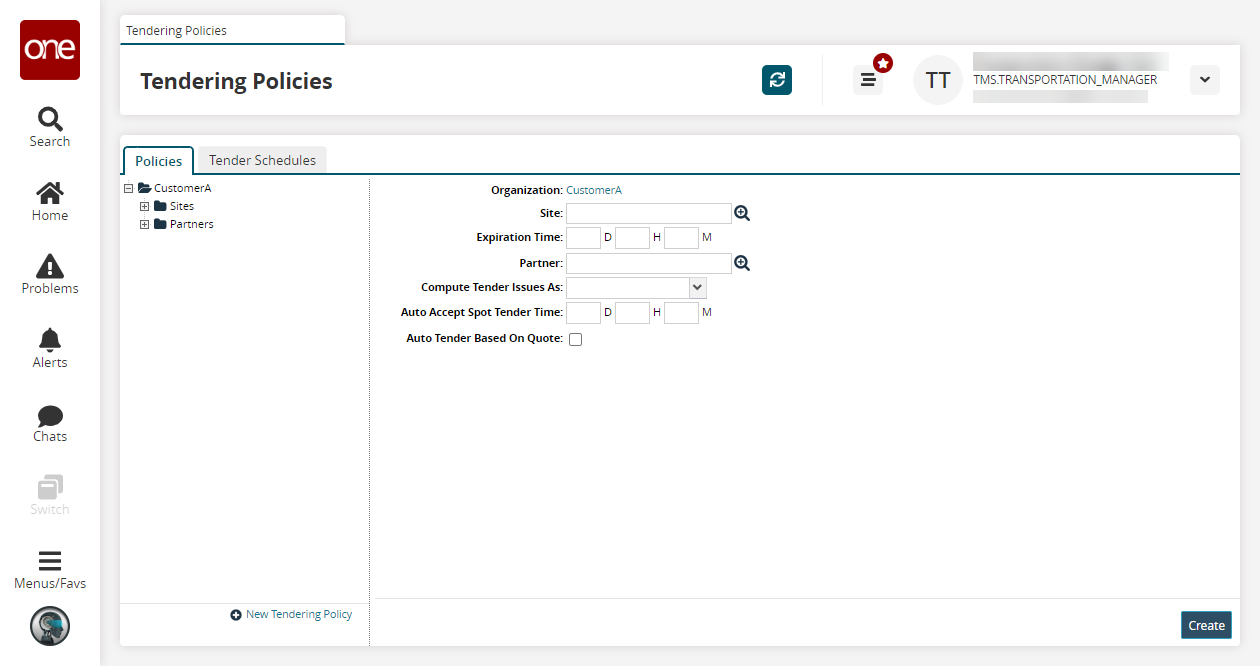
Select the Organization Name in the left pane or c lick the New Tendering Policy link.
Fill out the following fields. Fields with an asterisk ( * ) are required.
Field
Description
Site
Use the picker tool to select a site.
Expiration Time
Enter an expiration time in days, hours, and minutes.
Partner
Use the picker tool to select a partner.
Compute Tender Issues As
Select either ERROR or WARN from the dropdown list.
If ERROR is selected, the Compute Tender Errors As field appears. From the newly visible dropdown menu, select either Restrict Tendering for Review or Skip Tenders with Errors.
Auto-Accept Spot Tender Time
Enter the time deadline in days, hours, and minutes by which the shipper must respond, failing which, the spot bid with the least cost is auto-confirmed.
Auto-Tender Based on Quote
Select this checkbox to make it mandatory for the shipper to respond within the time limit set in the Auto Tendering Time field defined at the organization level.
Click Create button to create a tendering policy with the above-filled data.
A success message appears.
Complete the following steps to update tendering policies at the organization level:
Click an organization name in the left pane.
The details appear on the right.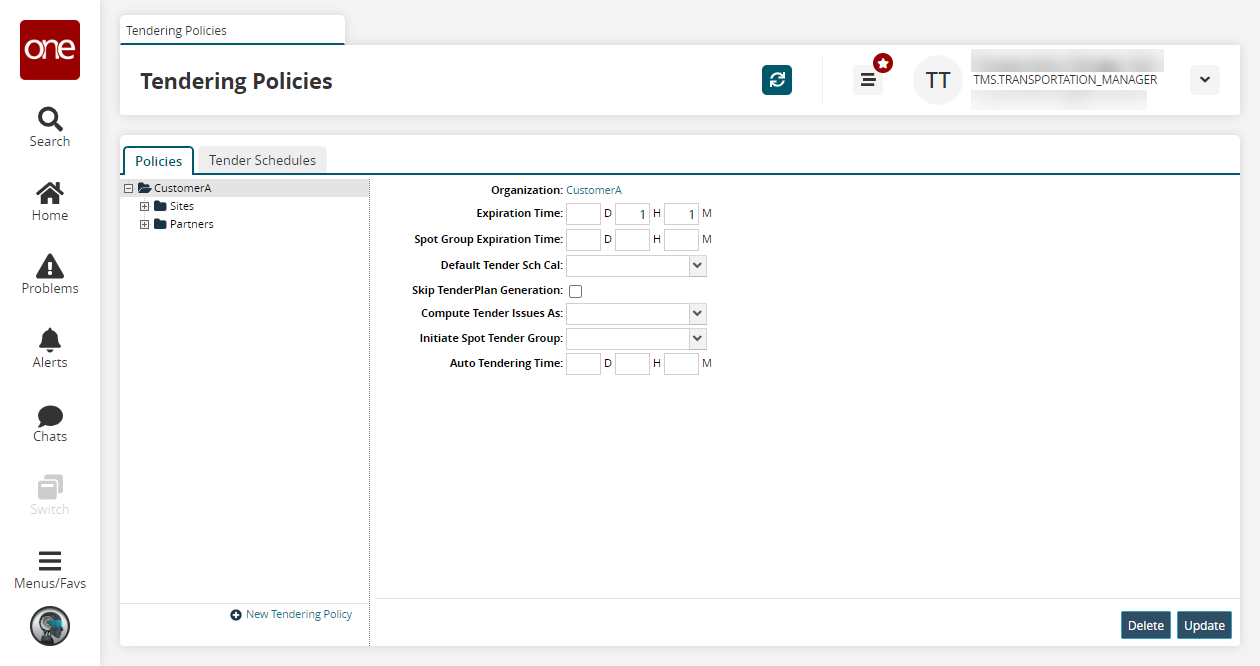
Fill out the following fields. Fields with an asterisk ( * ) are required.
Field
Description
Expiration Time
Enter an expiration time in days, hours, and minutes.
Spot Group Expiration Time
Enter a spot group expiration time days, hours, and minutes.
Default Tender Sch Cal
Select a default tender schedule. TBD from the dropdown menu.
Skip Tender Plan Generation
Select this checkbox to skip tender plan generation.
Compute Tender Issues As
Select either ERROR or WARN from the dropdown list.
If ERROR is selected, the Compute Tender Errors As field appears. From the newly visible dropdown menu, select either Restrict Tendering for Review or Skip Tenders with Errors.
Initiate Spot Tender Group
Select an option to indicate when to initiate a bid to a spot tender group. The available options are:
On Initiate Tendering: Movement is tendered to contract carriers and spot bidders at the same time.
On First Tender Reject/Expire: Movement is tendered to spot carriers after the first contracted carrier rejects the tender or the response time for the first contract carrier expires.
Auto-Tendering Time
Enter an auto-tendering time in days, hours, and minutes.
To update a policy, click the Update button.
To delete the policy, click the Delete button.
To view existing auto tender schedules, click the Tender Schedules tab.
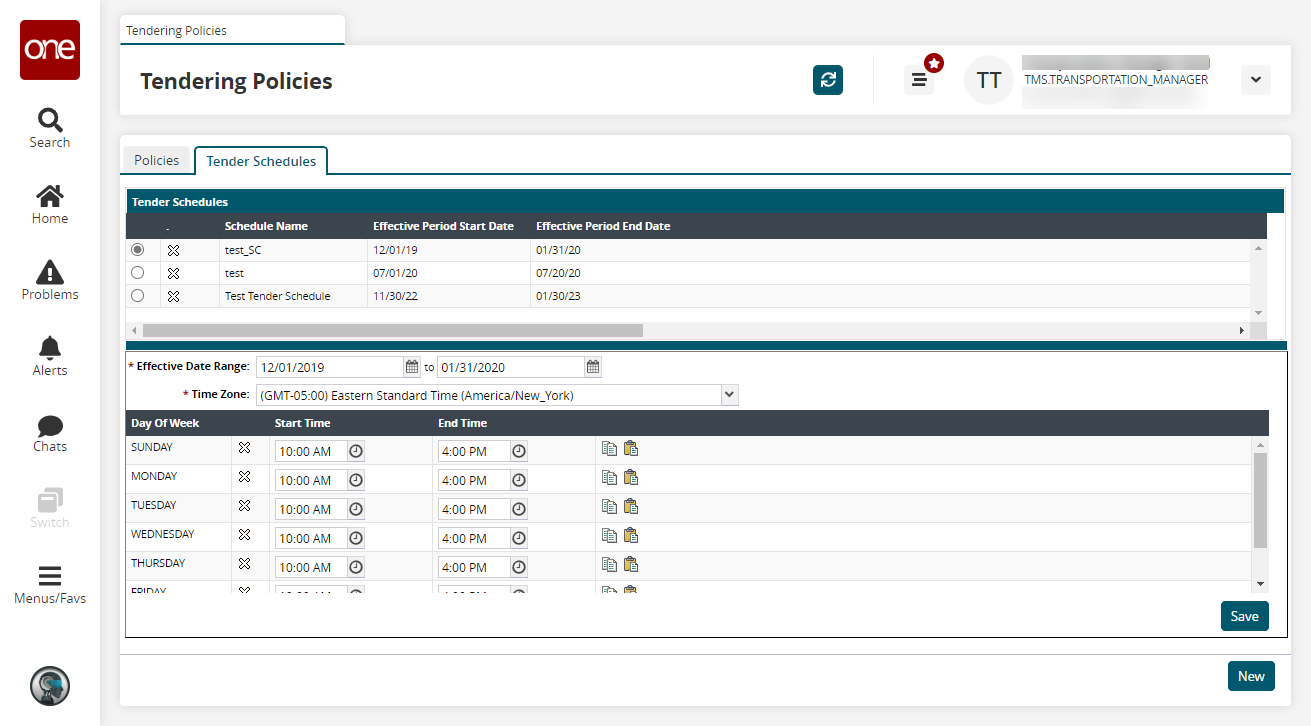
The bottom pane shows the Date Range, Time Zone, and daily Start Time and End Time.As required, edit the values, and then click Save.
A success message appears.
Adding a New Tender Schedule
To add a new tender schedule, click the New button.
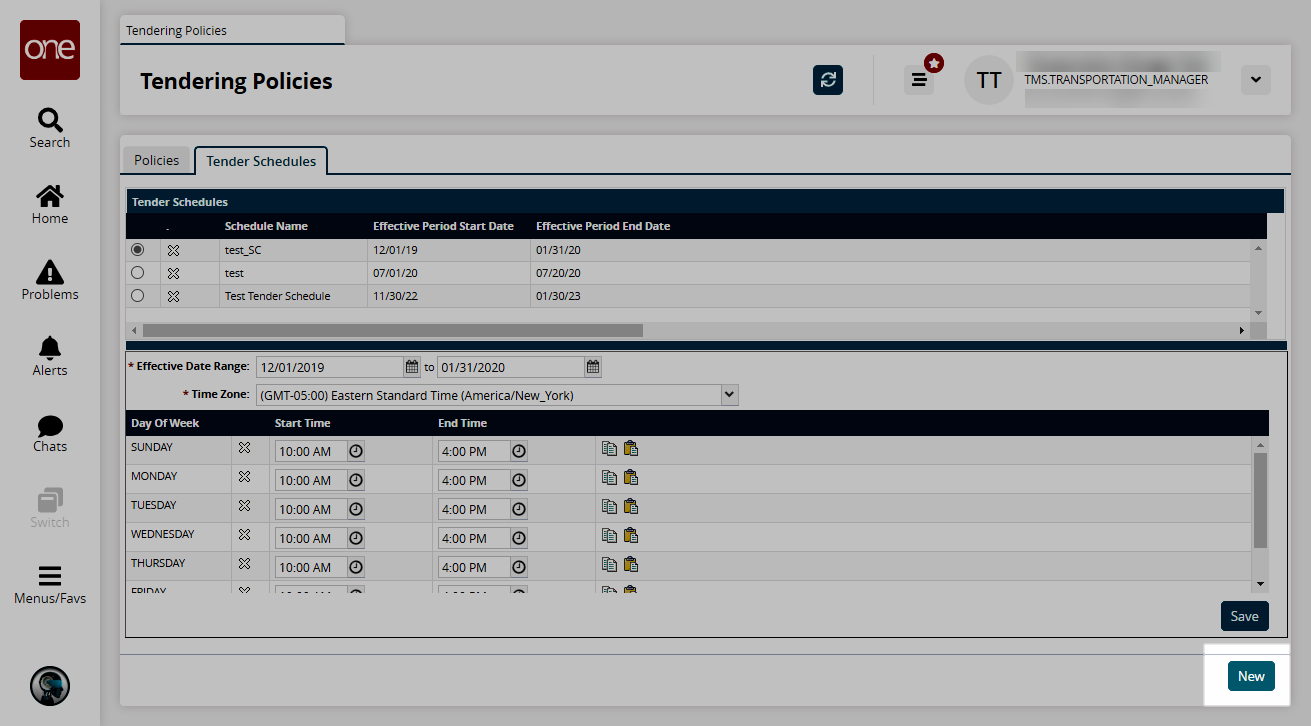
A tender schedule form appears in the bottom pane.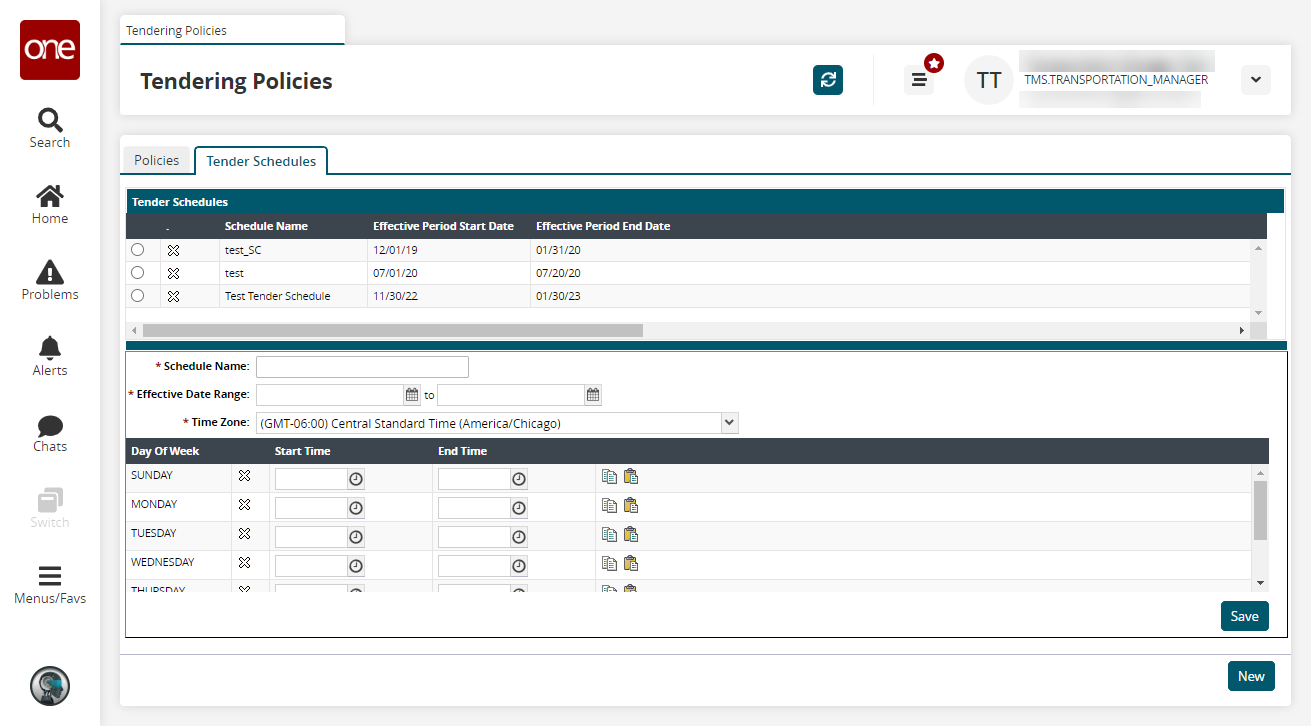
In the Schedule Name box, type the name of the new schedule.
Select the values for the Date Range field that the tender schedule will be in effect.
In the Time Zone list, click a time zone option.
For each date pattern under the Day of Week, click the Start Time Time button to display the Time list, and then click time from the list.
Repeat the previous step for End Time.
Tip
You can quickly copy and paste a date pattern to another row using the Copy and Paste buttons on the right side of each row.
To delete a date pattern, click the Delete Row button.
Click Save.
The new tender schedule name appears in the Tender Schedules table.