Transportation Planner Report
Transportation planner reports display the count of shipments between different cities and the aggregated weight, volume, and quantity for those shipments. Users can generate planner reports and then export the report results to an Excel spreadsheet.
Complete the following steps to generate and view planner reports:
L og in to the ONE system.
Select Menus/Favs > Transportation > Planner Report. In the NEO UI, users can click on the Menus/Favs icon on the left sidebar and type in the name of the screen in the menu search bar. For more information, see "Using the Menu Search Bar."
The Planner Report screen displays.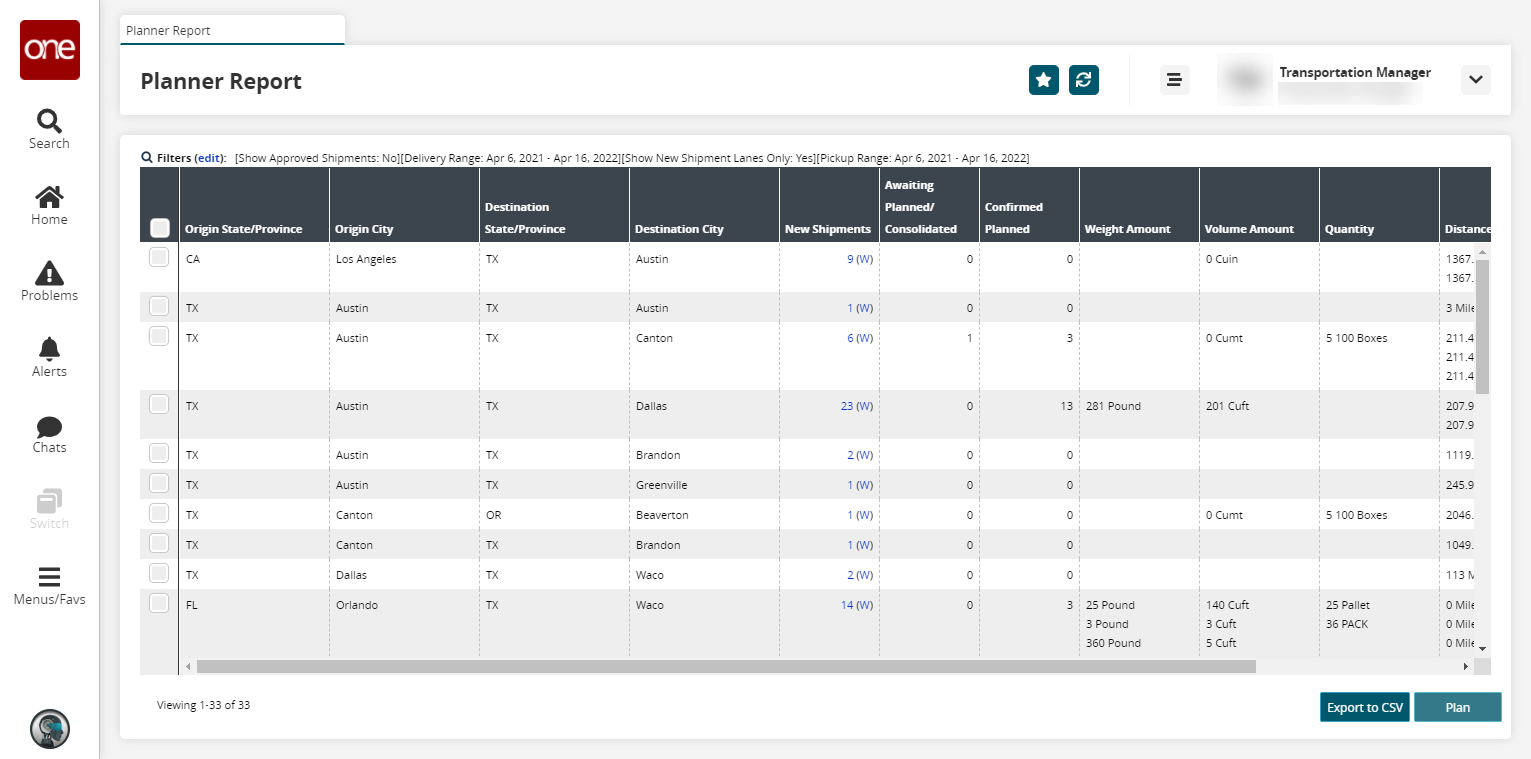
Click the Filters (edit) link to apply search criteria to reduce the number of entries shown.
The Filters menu displays.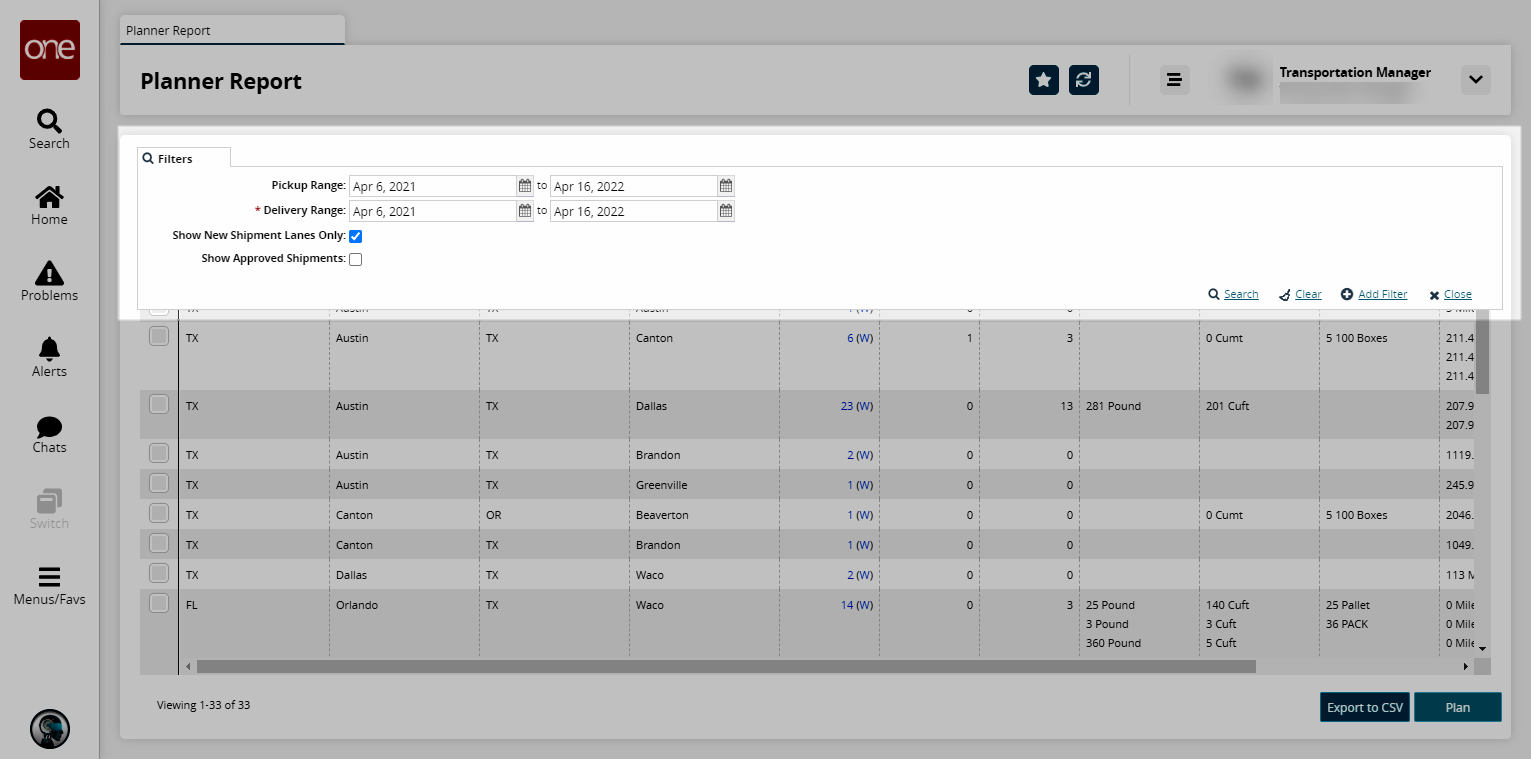
Enter values for fields described in the table below. Fields with an asterisk ( * ) are required.
Field
Description
Pickup Range
Use the clock and calendar tools to select the date and time for the pickup beginning and end range.
* Delivery Range
Use the clock and calendar tools to select the date and time for the pickup beginning and end range.
Show New Shipment Lanes Only
Check the box to display only new shipment lanes.
Show Approved Shipments
Check the box to display only approved shipments.
To add more search filters, click the Add Filter link, and then click one or more filter options from the Add Filter list.
Fill out the filters as desired, and click the Search link.
The search results display.
Click a shipment count link under the New Shipments column to view the shipments in the same shipping lanes.
The shipment lane details display.Click the (W) link under the New Shipments column to open the Planner Workspace.
The Planner Workspace screen opens in a new tab. See the "Planner Workspace" section in the Online Help for more information.Click one or more checkboxes for a shipping lane, and click the Plan button.
The Planner Workspace screen opens in a new tab. See the "Planner Workspace" section in the Online Help for more information.
Click the Export to CSV button to export the report to a CSV file.