Using the Demand Promotion and Demand Exclusion Feature
Users can make changes to demand promotion and demand exclusion information more quickly and efficiently. Demand promotion is the promotion of historical demand (orders) from a site to a parent site when a customer begins ordering from the parent site and uses customers, orders types, and warehouses to define which demand should be included. Demand exclusion stops reading historical demand (orders) when a customer stops ordering from a parent site and only uses the order type to determine which demand should be excluded.
The basic flow of this functionality consists of the following steps:
Create or select demand management metadata.
P lease note this step is skipped in this workflow. Currently, demand management rules (which require demand management metadata) can only be created through the upload process and not through the UI and is outside the scope of this section.
Create or select demand management rules, which require demand management metadata.
Run the Demand Management Processing engine, which can use demand management rules as input.
Confirm which orders were successfully processed by the Demand Management Processing engine from the Search Processed Orders report.
Enable the Apply Demand Management Rules flag on the appropriate Multi-Tier Stat Scenario.
Run the Multi-Tier Inventory Planning (MTIP) Stat engine with the previously configured Multi-Tier Stat Scenario.
Open the MTIP Stats Buffer Search Detail report to confirm the MTIP engine ran correctly and successfully promoted or excluded demand.
The following workflow is meant to describe how to walk through each step in sequence with example data:
Log in to the ONE system as an Inventory Planner or Buyer Supply Chain Admin role.
Click Menus/Favs > Inventory Planning > Configuration > Demand Management Data > New Demand Mgmt Metadata .
Create a demand management metadata object. See the "Creating and Searching Demand Management Metadata" section for detailed information.
P lease note this step is skipped in this workflow. Currently, demand management rules (which require demand management metadata) can only be created through the upload process and not through the UI and is outside the scope of this section.
Click Menus/Favs > Inventory Planning > Configuration > Demand Management Data > Search Demand Mgmt Rules .
The Search Demand Mgmt Rules screen displays. For this example, we use the existing KP_TestRule25Jan rule. For more information on demand management rules, see the "Searching Demand Management Rules" section.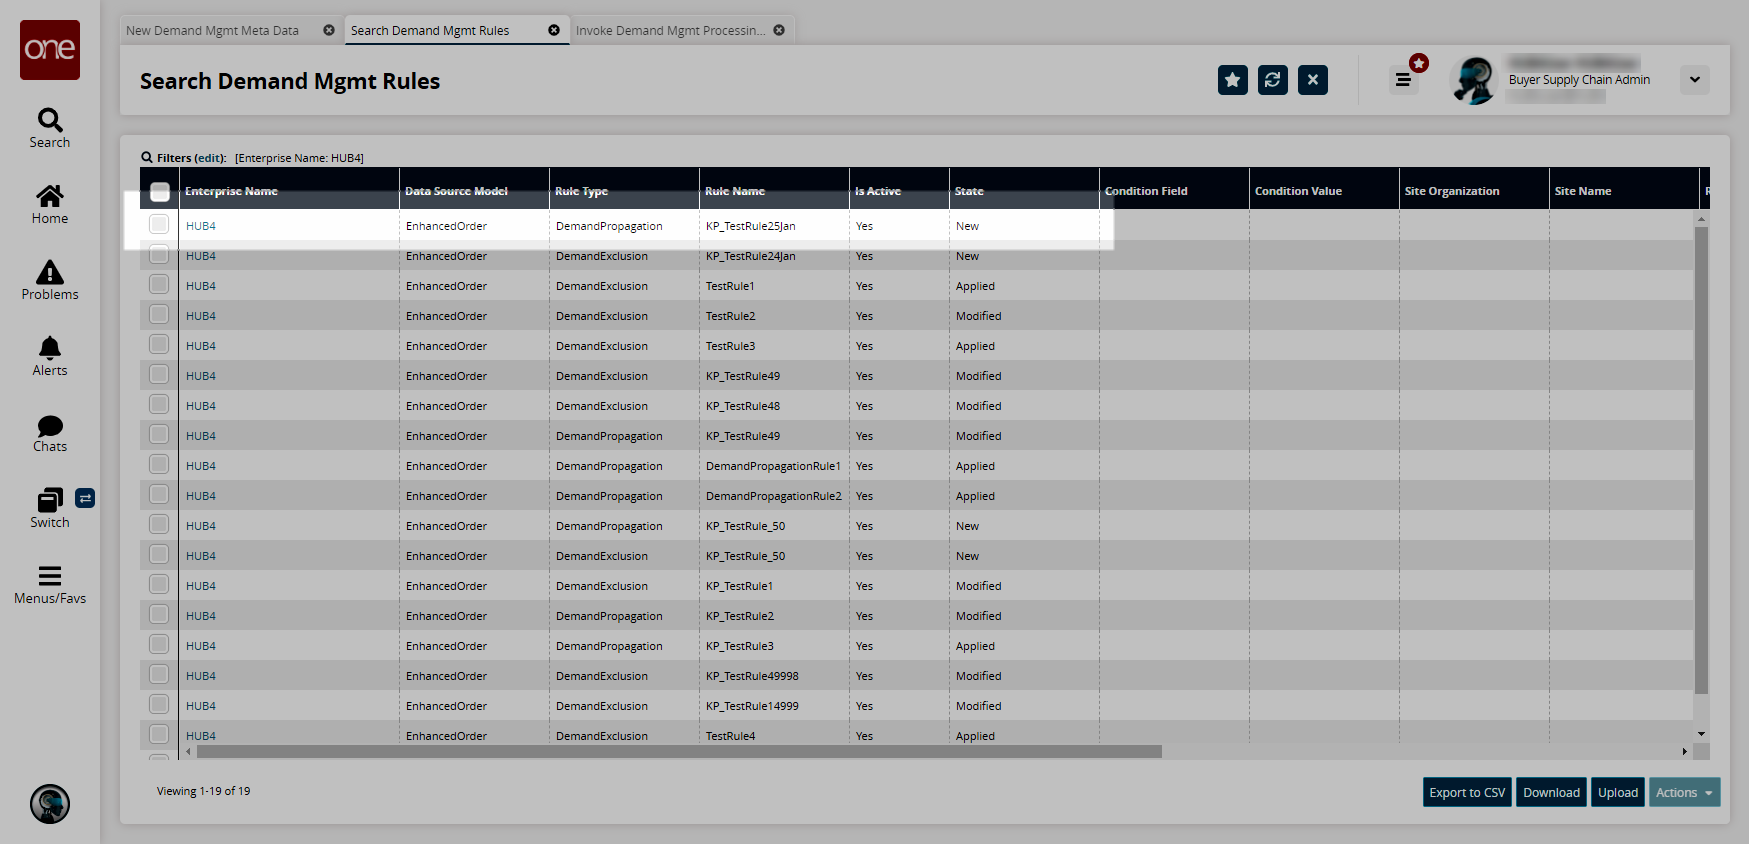
Click Inventory Planning > Demand Management Processing > Invoke Demand Mgmt Processing Engine.
The Invoke Demand Mgmt Processing Engine screen opens. For more information on the Demand Management Processing engine, see the "Invoking the Demand Management Processing Engine" section.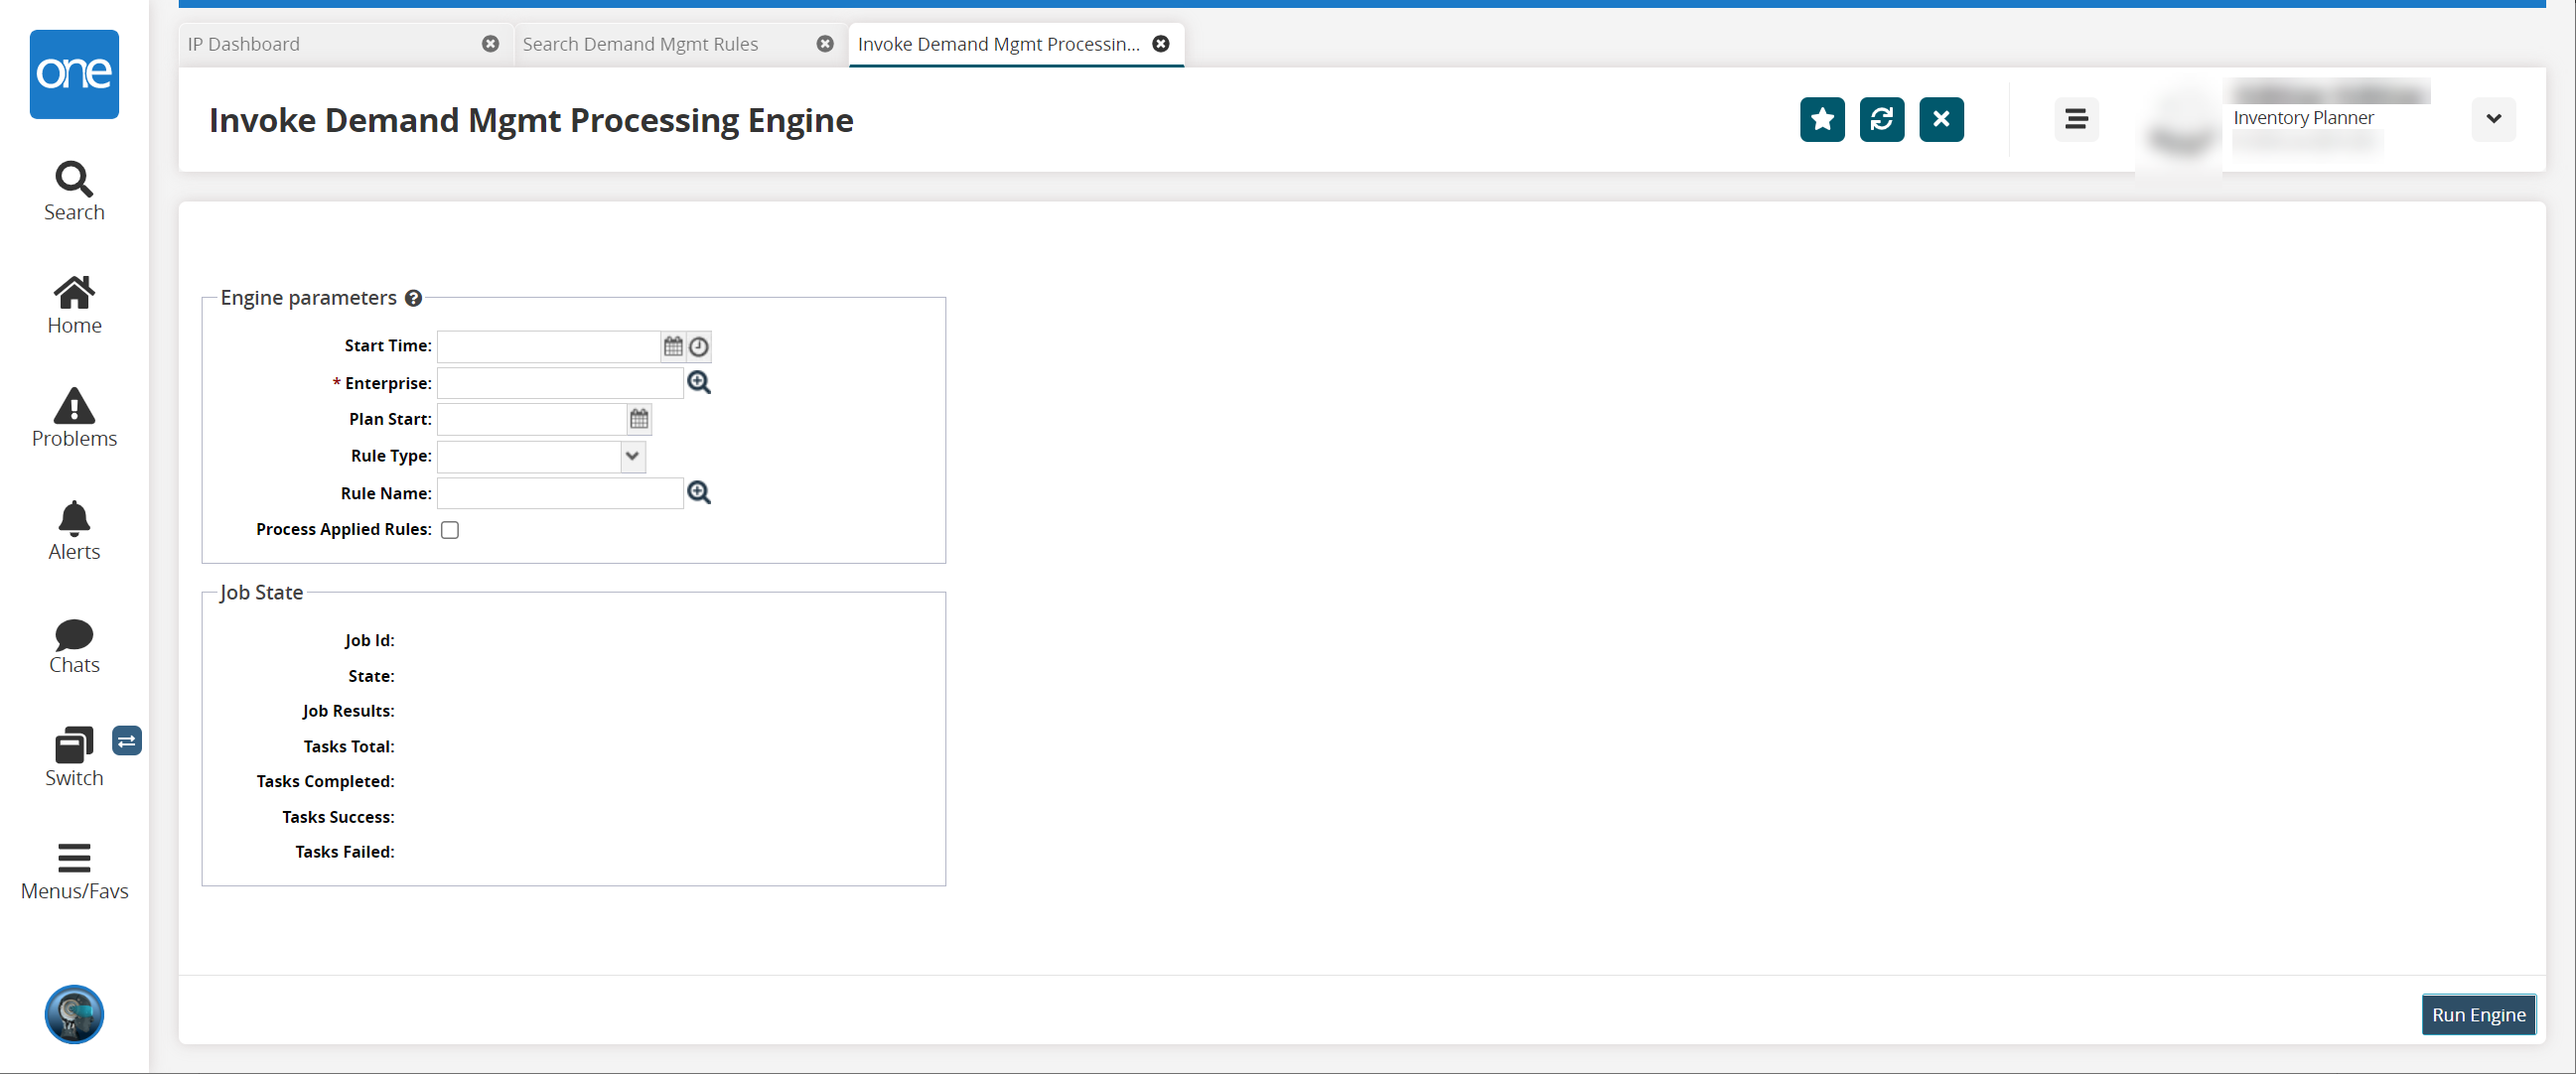
Fill out the following fields. Fields with an asterisk ( * ) are required.
Field
Description
Start Time
Select a start date and time using the calendar and clock icons.
* Enterprise Name
Select an enterprise name using the picker tool. For this example, select HUB4.
Plan Start
Select a plan start date and time using the calendar icon. By default, this field is considered the current date, but this field also allows users to sim ulate an engine run in the past.
Rule Type
Select a rule type from the dropdown menu. For this example, leave this field blank.
Rule Name
Select a demand management rule using the picker tool. For this example, select KP_TestRule25Jan .
Process Applied Rules
Click this checkbox to run the engine using the applied rules.
Click Run Engine.
The engine runs, and a success message appears.Click Menus/Favs > Inventory Planning > Demand Management Processing > Search Processed Orders .
The Search Processed Orders screen displays. For more information on the Search Processed Orders report, see the "Searching Processed Orders" section.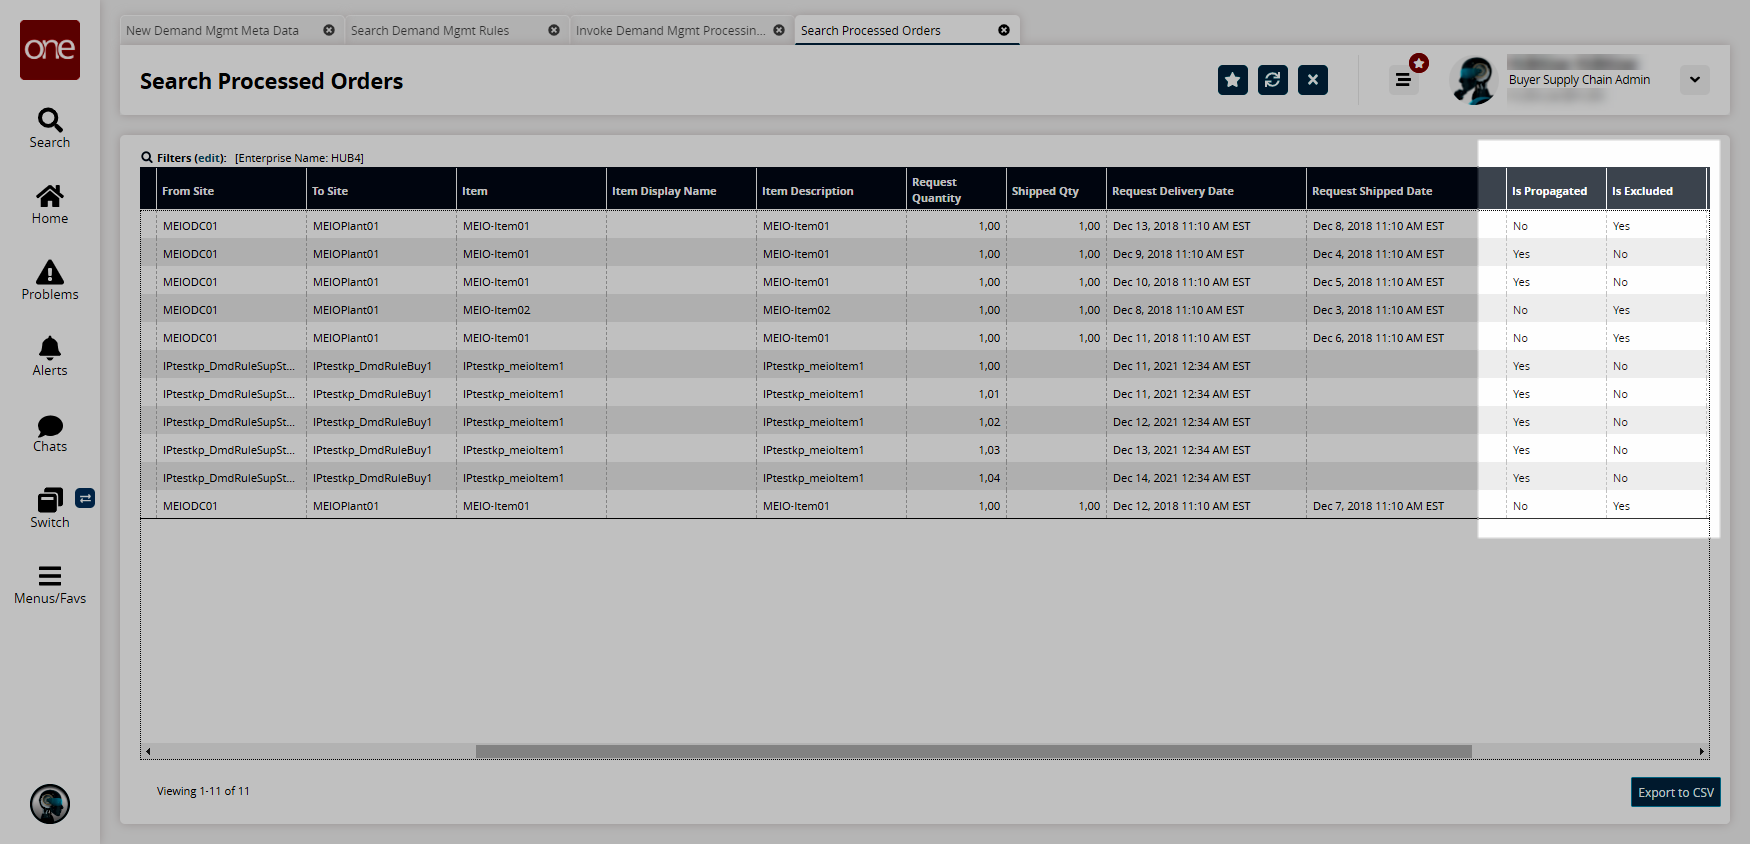
Note the IsPropagated and IsExcluded fields, which detail whether each order was propagated (promoted) or excluded.
Click Menus/Favs > Inventory Planning > Configuration > Multi-Tier Stat Scenario > New Multi-Tier Stat Scenario to create a new Multi-Tier Stat Scenario.
The New Multi-Tier Stat Scenario screen displays.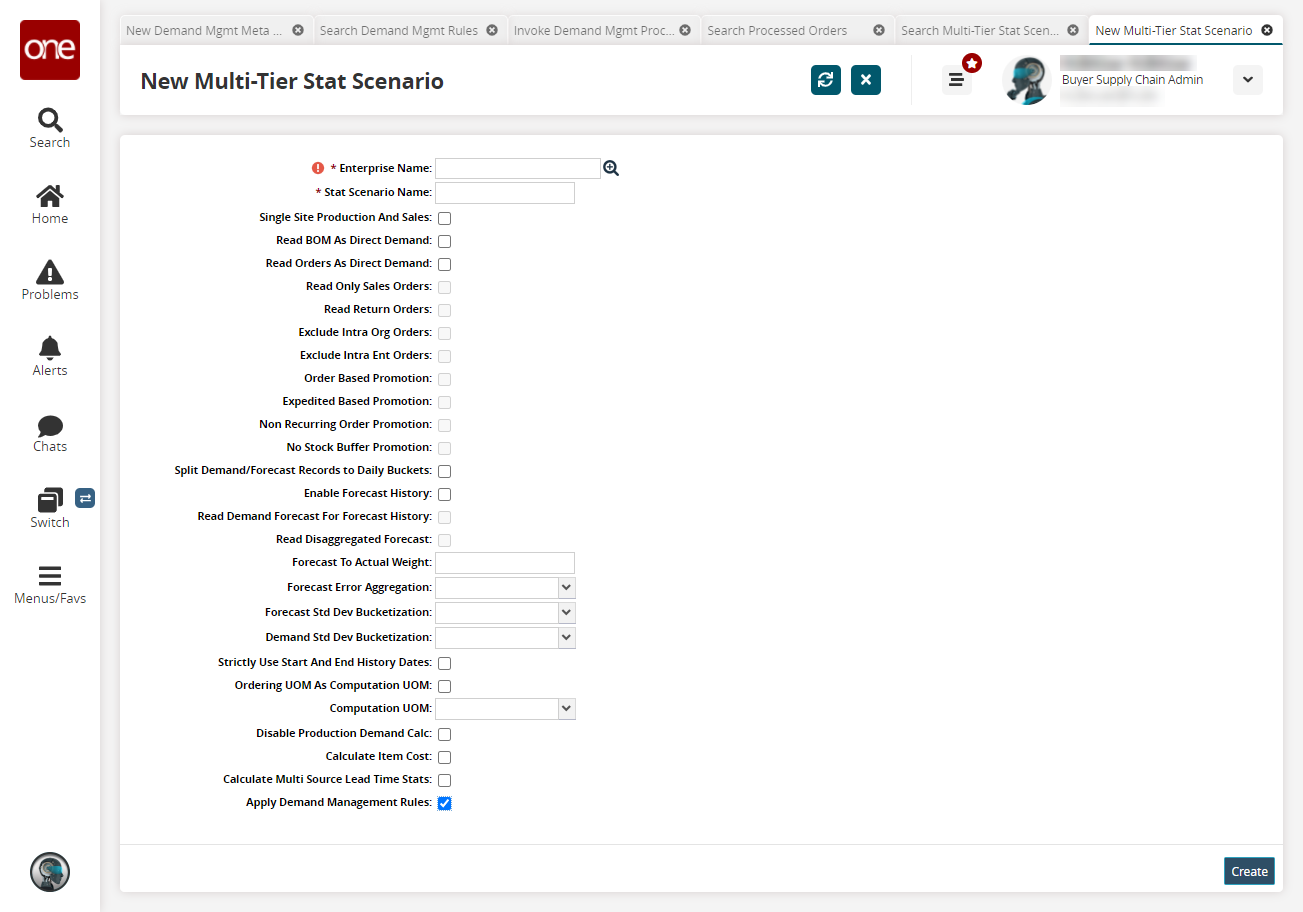
Fill out the fields as needed. For this example, ensure the Apply Demand Management Rules flag is enabled. For more information, see the "Creating and Working with MTIP Stats Engine Scenarios" section of the Online Help.
Click the Create button.
A success message appears.
Click Menus/Favs > Inventory Planning > Multi-Tier Inventory Planning Stats > Invoke Multi-Tier Inventory Planning Stat Engine .
The Invoke Multi-Tier Inventory Planning Stat Engine screen appears.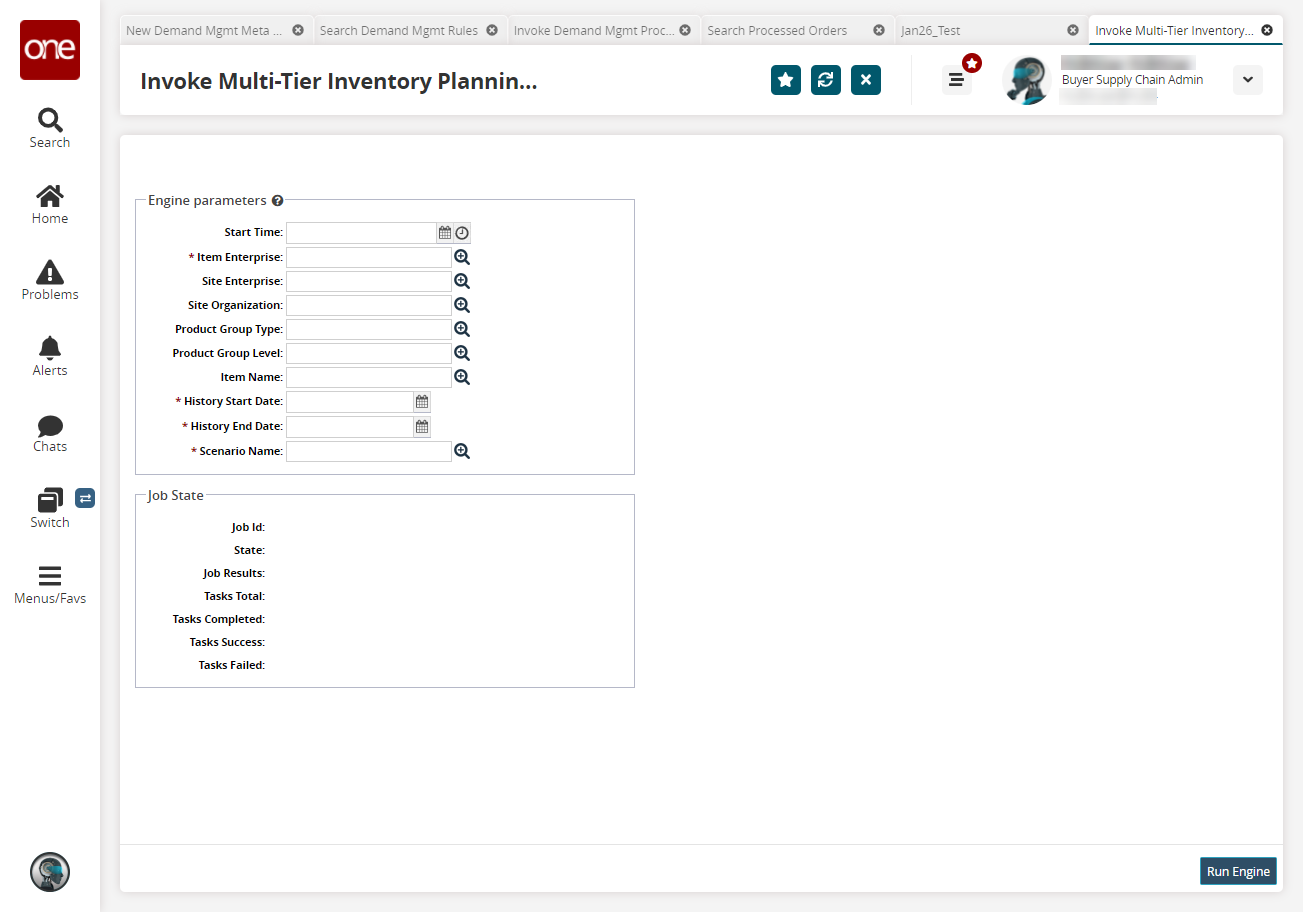
Fill out the fields as needed. For this example, ensure the Scenario Name is a scenario with the Apply Demand Management Rules flag enabled. For more information, see the " Running the MTIP Stats Engine" section of the Online Help.
Click Run Engine.
The engine runs, and a success message appears.
Click Menus/Favs > Inventory Planning > Multi-Tier Inventory Planning Stats > Multi-Tier IP Stats Buffer Search Detail Report.
The Multi-Tier IP Stats Buffer Search Detail Report screen appears.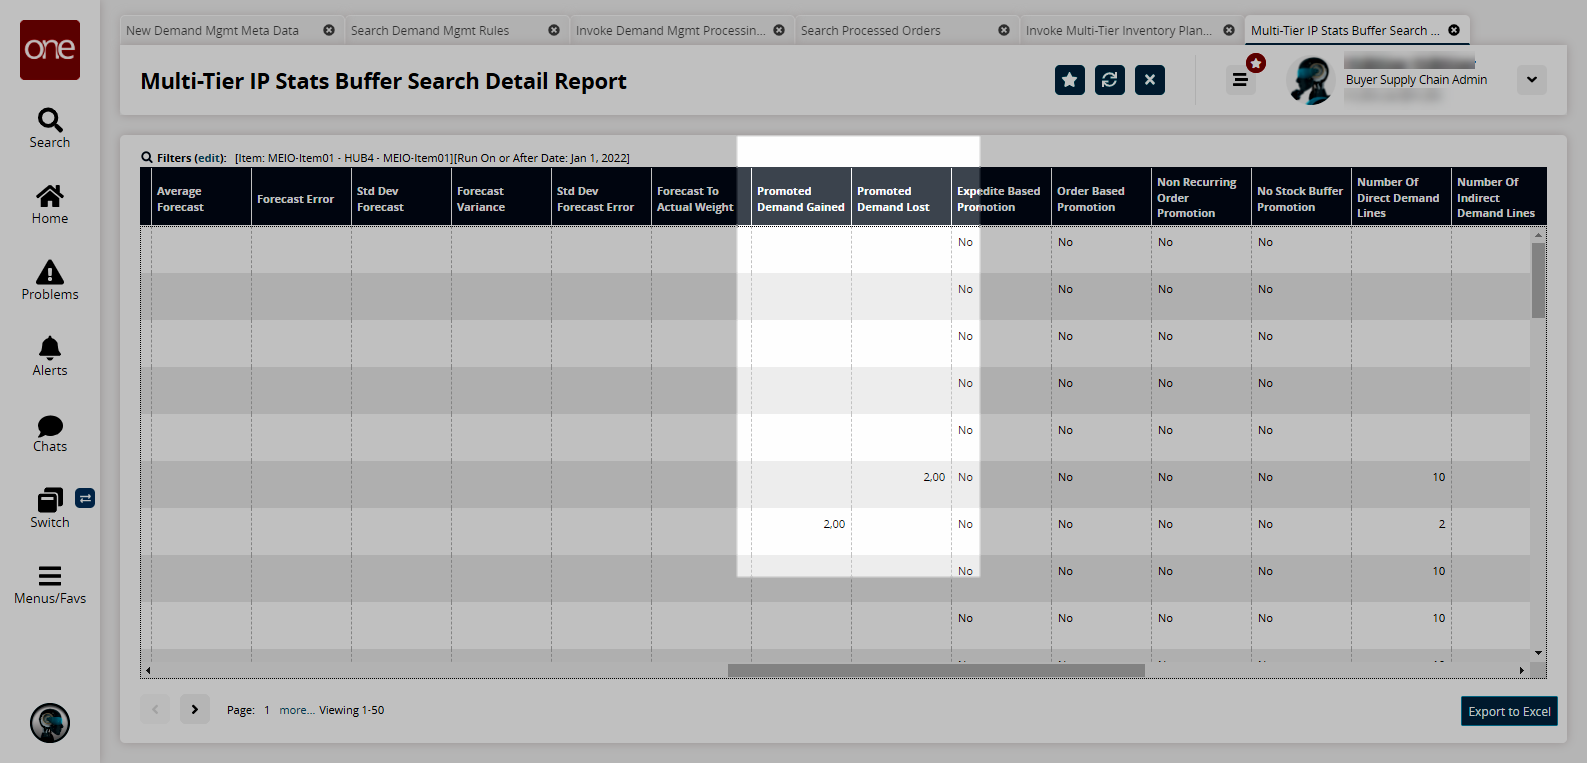
Note the Promoted Demand Gained and Promoted Demand Lost columns. This is where the results of the MTIP engine appear. In this example, one site lost two units of demand and one site gained two units. This is expected behavior.