Using the My Jobs Screen
The My Jobs screen provides users a single place to work with jobs such as uploads and batch jobs. The screen contains tabs for viewing or performing different tasks described below: All Jobs, Uploads, Exports, Batch Jobs, NEO Prescriptions, and NEO Invocations.
This section contains content on the following:
All Jobs
The All Jobs tab is the default tab on the My Jobs screen. The All Jobs tab shows all of the jobs run by a specific user, aggregating the jobs into daily buckets that can be collapsed or expanded as desired. The All Jobs page is searchable; users can use the Search bar to search for jobs of a specific job type such as Export or Upload. Each job's status displays in the first column. The green checkmark indicates a successful job operation, and the red exclamation indicates an issue with a job. When a job has an issue, an error file is generated; users can download the error file by clicking on the icon located in the Errors column. Additionally, each file listed in the File Name/ Action column is downloadable via the download icon.
Complete the following steps to view the My Jobs screen:
L og in to the ONE system.
Click Menus/Favs > Quick Links > My Jobs.
The My Jobs screen opens.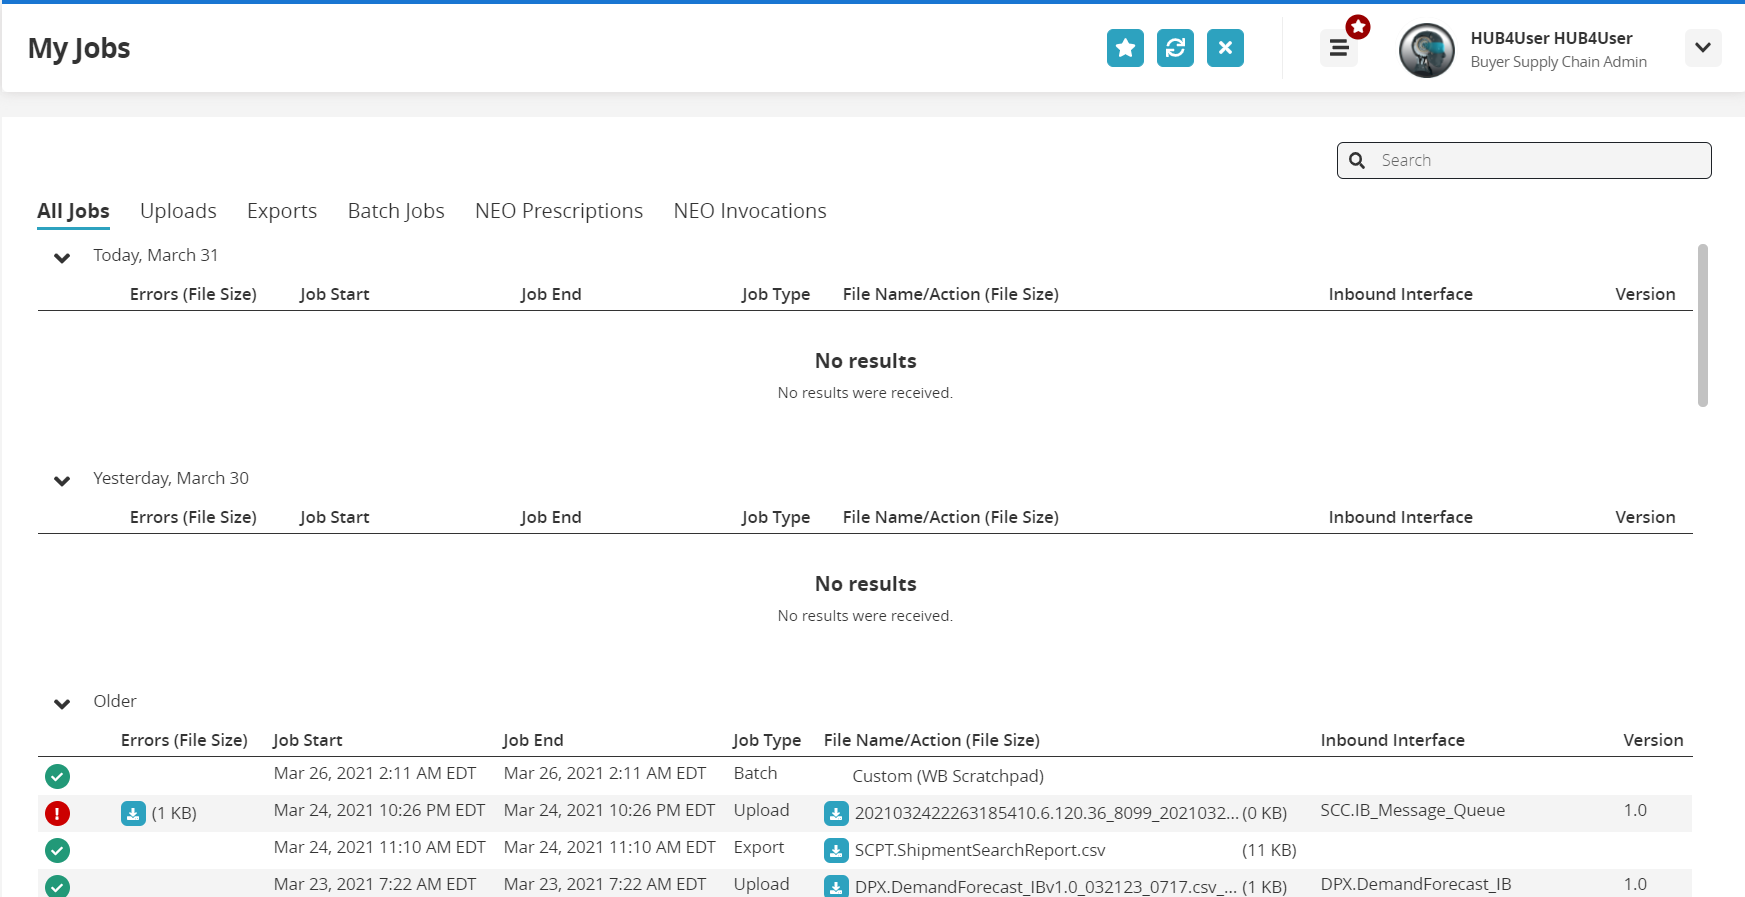
Uploads
From the Uploads tab of the My Jobs screen, users can upload data to the ONE system in bulk using CSV files.
Complete the following steps to upload data to ONE using CSV files from the Uploads tab of the My Jobs screen:
Click Menus/Favs > Quick Links > My Jobs.
The My Jobs screen appears with the All Jobs tab selected.Click the Uploads tab to view the uploaded jobs.
Click the New Upload button.
The Select File to Upload popup window displays.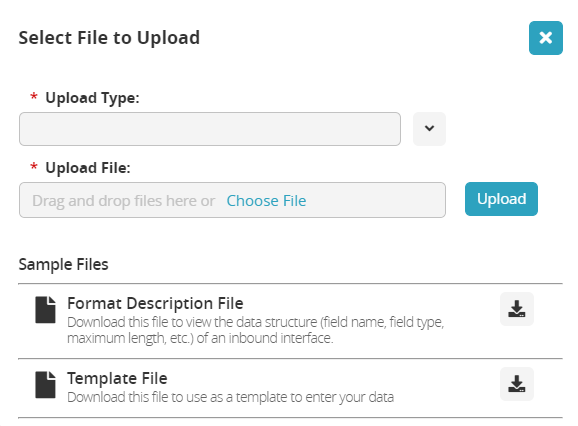
Use the dropdown menu to select the Upload Type.
Click the download icon next to Format Description File to download a file containing the formats to use for your upload data.
The file downloads to your default download location. Open the file and review the formatting information.Click the download icon next to Template File to download a template file to use for your upload data.
The file downloads to your default download location.Open the Template File file for editing.
Each column marked with an asterisk is required.
Columns can be rearranged as desired.
Enter the required data and any additional data you want in the template file.
Use the formatting recommendations in the Format Description File.
Save the file to your local system.
On the Select File to Upload popup window, click the Choose File link.
Select the modified template file from your computer.
Click the Upload button.
The job status is visible on the Uploads tab as well as the All Jobs tab.
Exports
Click Menus/Favs > Quick Links > My Jobs.
The My Jobs screen appears with the All Jobs tab selected.Click the Exports tab.
Exported files are displayed.
Batch Jobs, NEO Prescriptions, and NEO Invocations
The Batch Jobs, NEO Prescriptions, and NEO Invocations tabs show data with columns for Errors, Job Start (date, time, time zone), Job End (date, time, time zone), and Action.

Batch Jobs (Asynchronous Jobs)
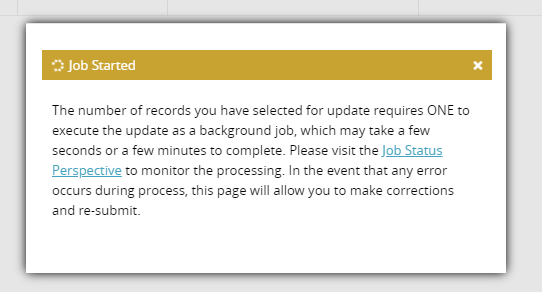
Users can request that One Network configure specific transactions to run in the background based on specified thresholds. For example, a shipment tender can be set up to run as a background process if ten or more shipments are selected, and it is displayed on the My Jobs page.
Batch jobs are initiated based on defined parameters that allow the system to determine what jobs should run as a batch or not. When a user starts an action that results in a batch job, they are shown the following pop-up screen, which is linked to the My Jobs screen.
Access the Batch Jobs tab in two ways:
Click Menus/Favs > Quick Links > My Jobs.
Click the Job Status link on the batch job popup screen that appears when you initiate a job that is configured to run as a batch job.
NEO Prescriptions
The tab displays prescriptions that were invoked by date in reverse chronological order. When users use NEO prescriptions, all of the transactions are conveniently archived on the My Jobs screen on the NEO Prescriptions tab.
NEO Invocations
The tab displays invocations that were run by date in reverse chronological order. When users utilize NEO invocations, all of the transactions are conveniently archived on the My Jobs screen on the NEO Invocations tab.