Using the Problems Workbench
The Problems Workbench slide-out in the NEO UI is located on the left navigation sidebar so that users have quick and immediate access to problems from the NEO UI.
Complete the following steps to use the Problems Workbench:
Click Problems in the left sidebar of the NEO UI.
The Problems Workbench tray displays.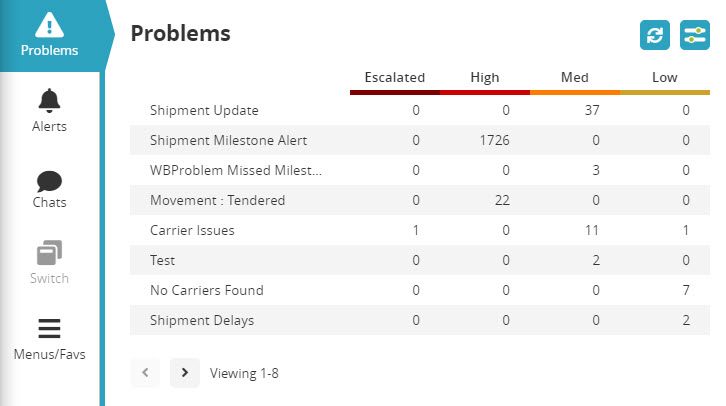
To configure filters for this slide-out, click the Filter Options button.

The Filter Options popup window displays.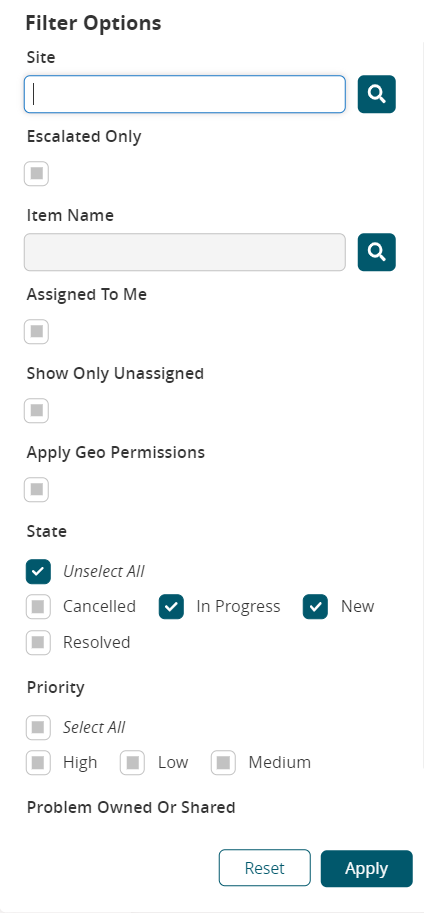
Enter the filter information into the available fields.
Click Apply to apply the new filter settings.
The Problem List refreshes using the new filter settings.Click any Problem Number link.
A list of problems displays.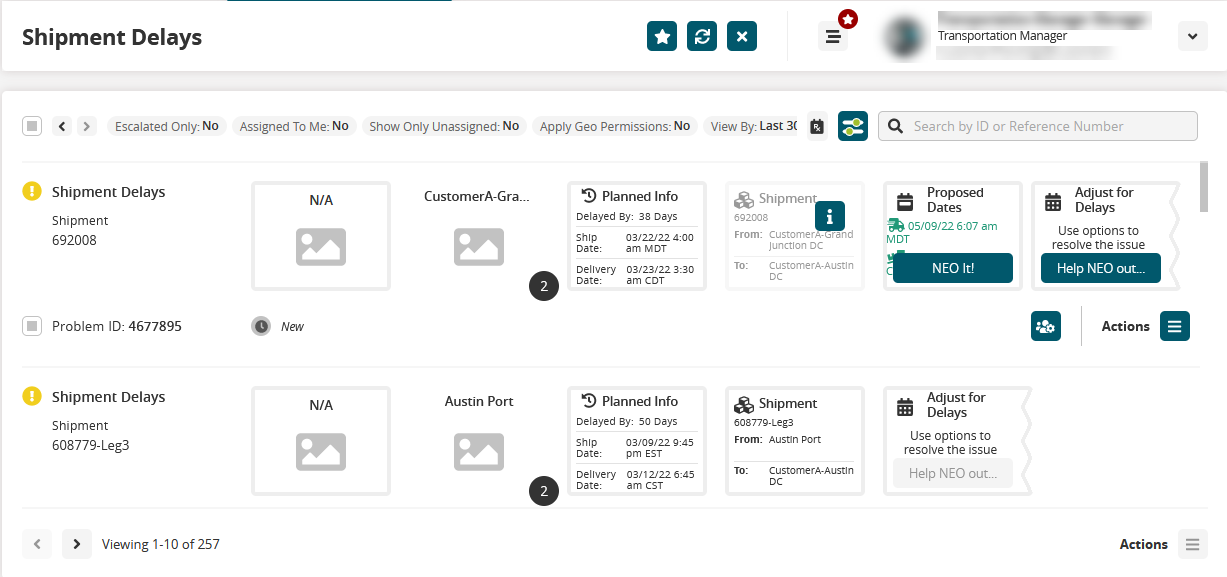
Click the Filter Options button
 to further filter the list of problems.
The Filter Options popup window displays.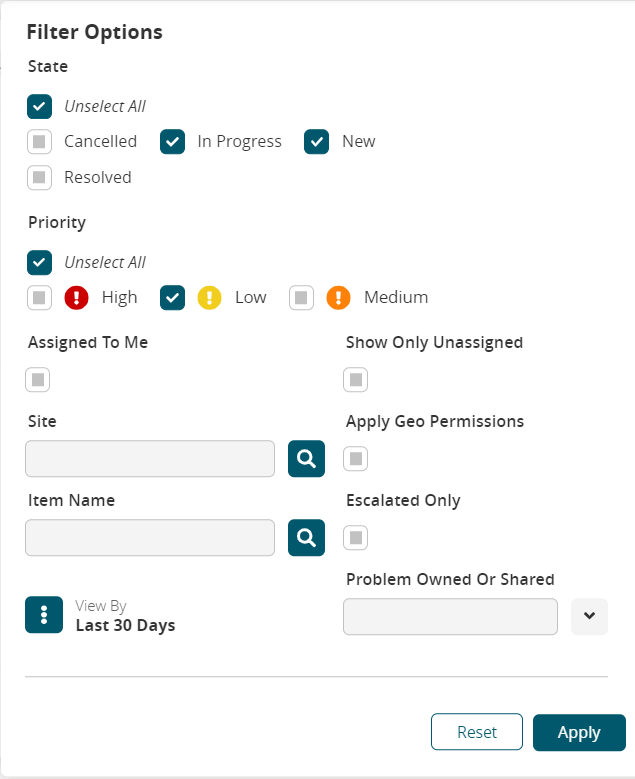
Enter the filter information into the available fields.
Click Apply to apply the new filter settings.
The Problem List refreshes using the new filter settings.Enter the Problem ID or Reference Number in the Search by ID or Reference Number search box to search the problems by problem ID or reference number.
Resolving a Problem
There are two ways to resolve a problem; both are described below.
Method 1
Click the Actions button at the end of each problem and select the Start Work option from the list.
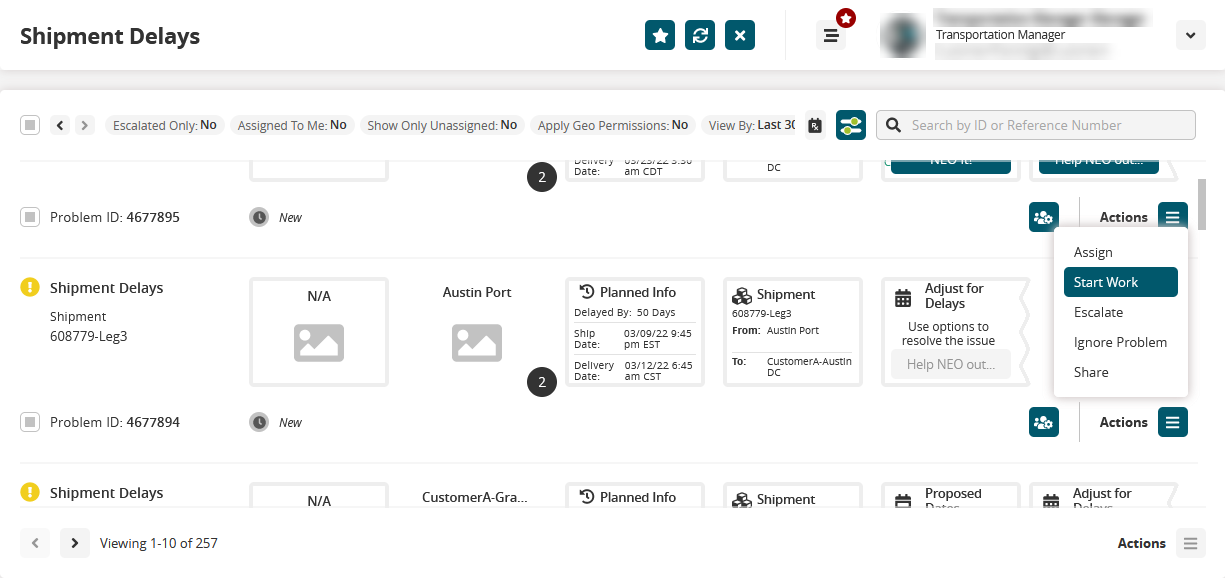
The problem goes from the New state to In Progress state.Again, click the same Actions button and select the Resolve option from the list.
The Resolve Problem window displays.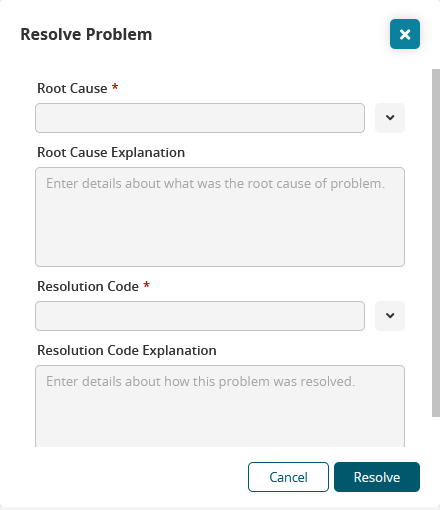
Input a Root Cause * , Root Cause Explanation, Resolution Code * , and a Resolution Code Explanation. Fields with an asterisk ( * ) are required.
Click Resolve.
The problem is resolved.
Method 2
Click the checkbox for each of the Problems and click the Actions button at the bottom of the screen to resolve multiple problems in the list.
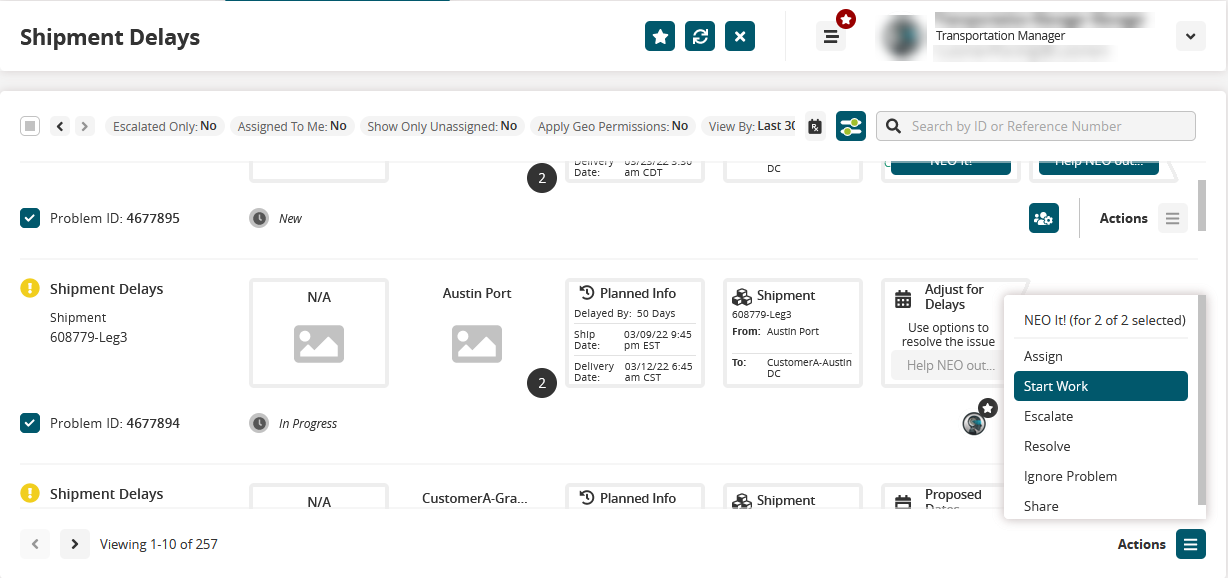
The problems go from the New state to the In Progress state.Again select the checkbox for multiple problems and click the Actions button at the bottom of the page and select Resolve from the list.
The Resolve Problem window displays.Input a Root Cause * , Root Cause Explanation, Resolution Code * , and a Resolution Code Explanation. Fields with an asterisk ( * ) are required.
Click Resolve.
The problems are now resolved.
Collaborating on a Problem
Click the Collaborations icon at the end of each problem.
The Collaboration panel displays.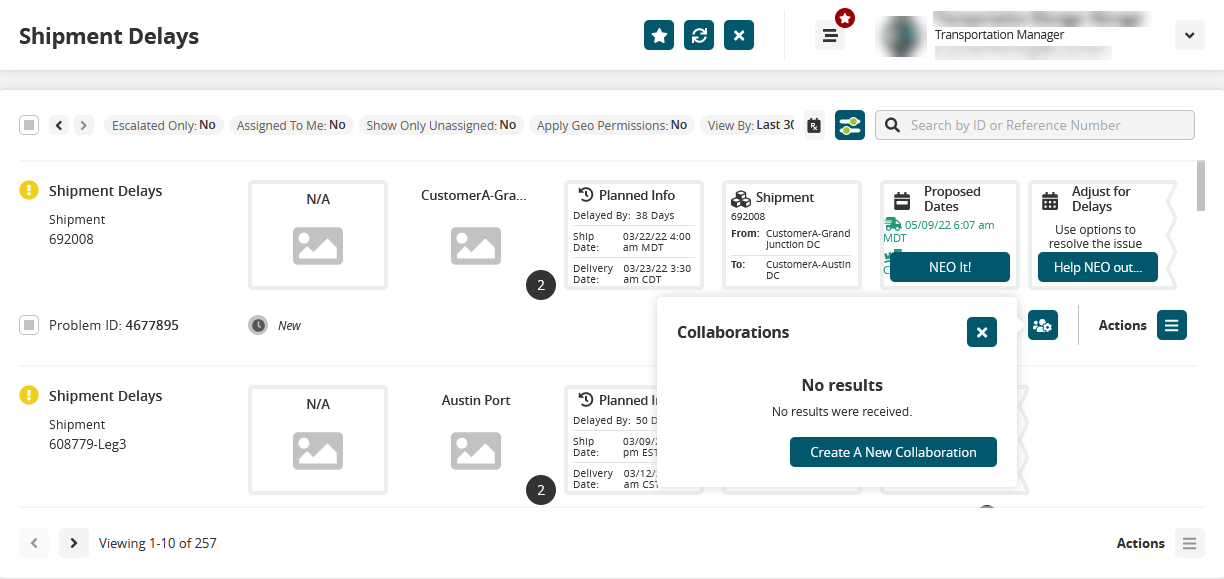
Select the existing collaboration from the list of collaborations or click Create A New Collaboration.
The Create A Group Chat screen displays.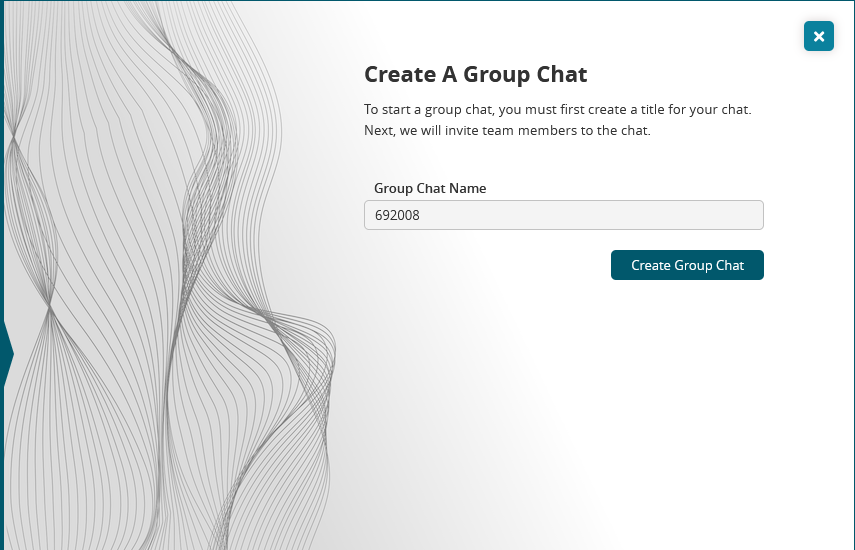
Click the Create Group Chat button to create a new collaboration. The Start A New Chat window displays.
For more information about collaborations, see the "Collaborating on a Problem" in the subsection of the Online Help
Viewing the Audit Trail of a Problem
Click the Problem name tile.
The problem details screen displays.
Click the Audit
 icon at the bottom of the screen.
The Audit Trail screen displays.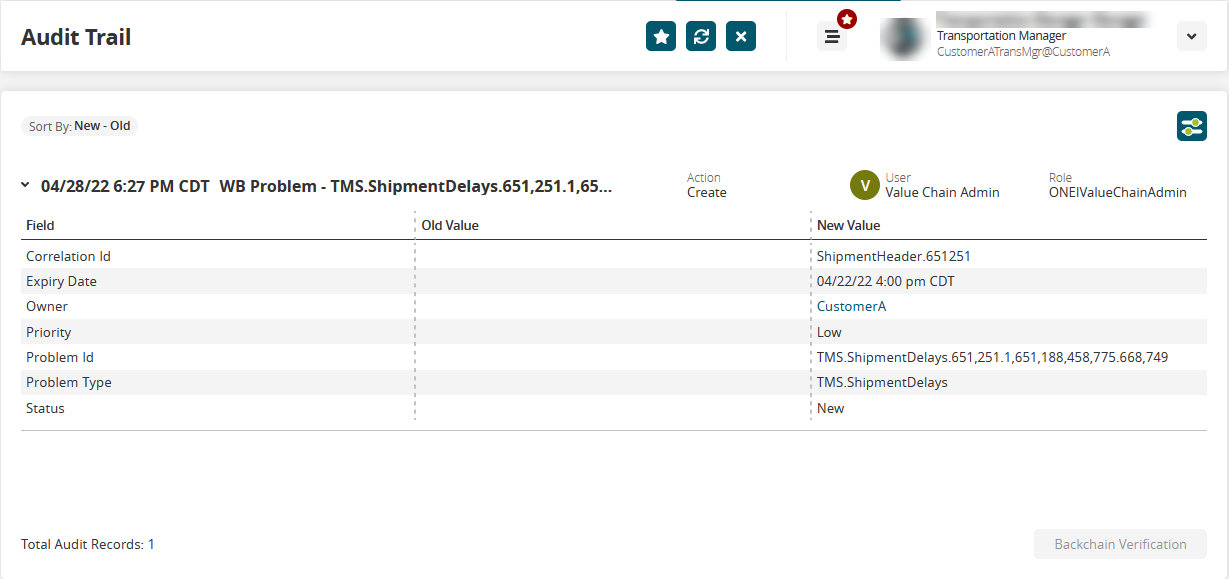
Closing a Problem
Click the Actions button at the end of each problem and select the Ignore Problem option from the list.
A confirmation window displays.Click Accept.
The problem is closed.
Escalating a Problem
Click the Actions button at the end of each problem and select the Escalate option from the list.
The Escalate Problem window displays.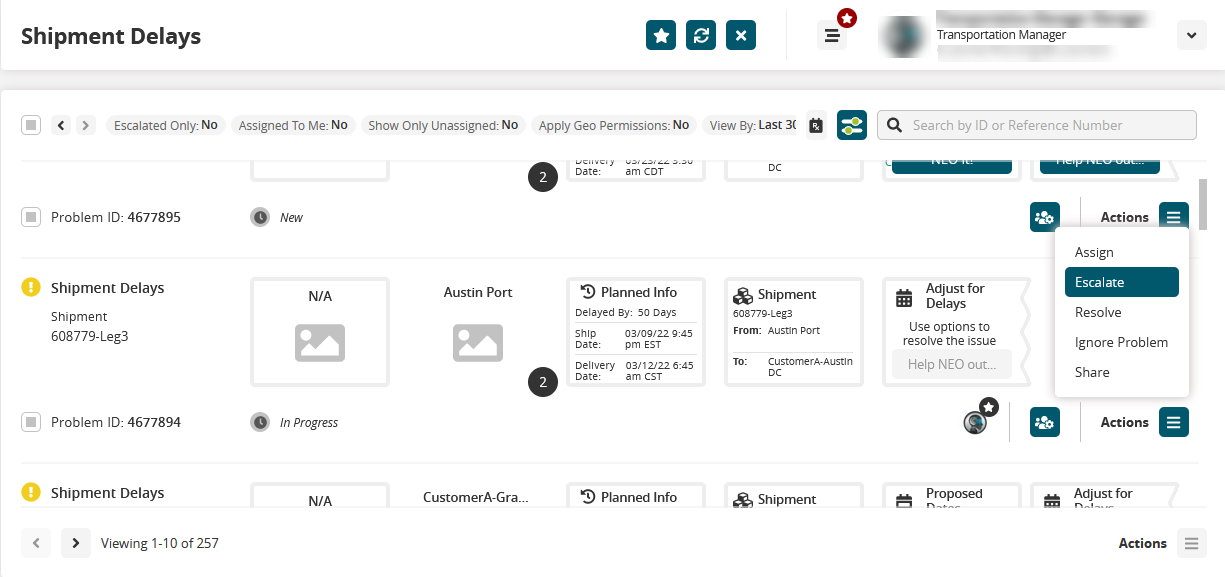
Select a person to escalate the problem to in the Re-assign To box.
Click Escalate.
The problem is escalated.
Assigning a Problem
Click the Actions button at the end of each problem and select the Assign option from the list.
The Assign Problem window displays.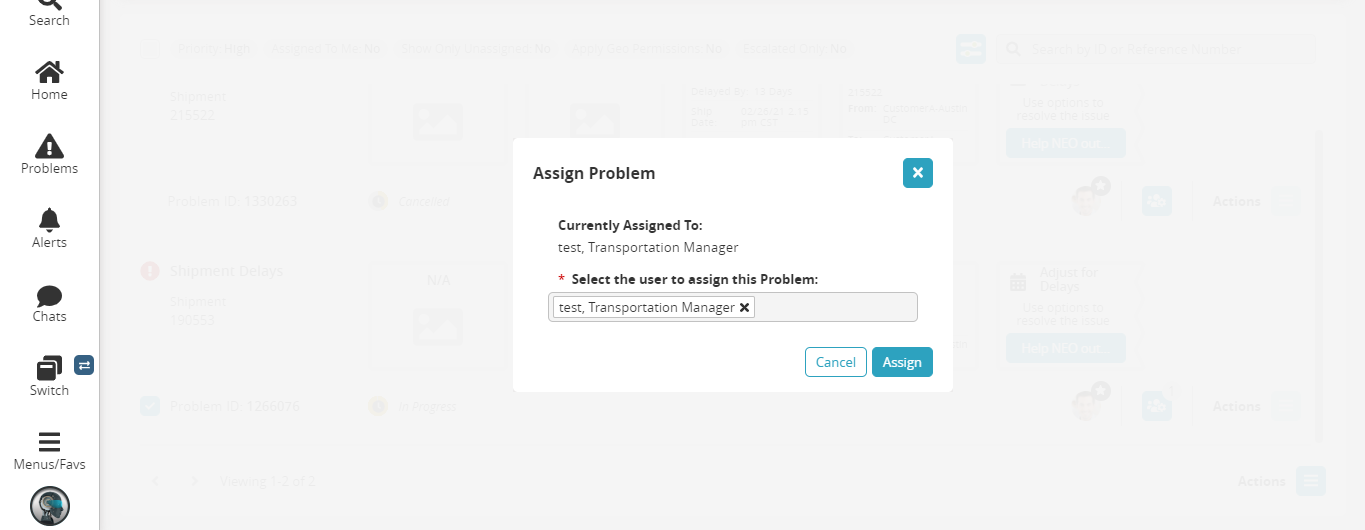
Select a person to assign the problem to in the * Select the user to assign this Problem field. This field is required.
Click Assign.
The problem is now assigned.
Adding Notes
Click the Problem name tile.
The problem details screen displays.
Click the Notes icon at the bottom of the screen.
The Notes sidebar displays.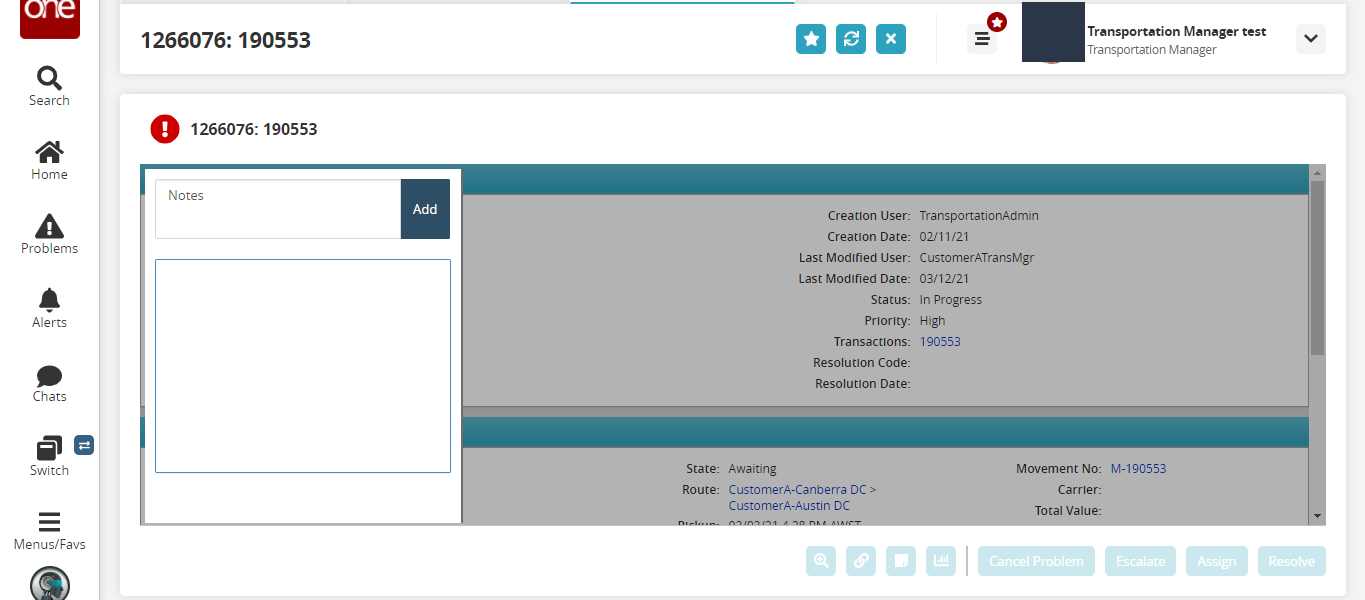
Type a note in the textbox and click Add.
Viewing Problem Correlations
Click the Problem name tile.
The problem details screen displays.
Click the Correlation icon at the bottom of the screen.
The Correlation sidebar displays.
Sharing a Problem
Click the Problem name tile.
The problem details screen displays.
Click Share at the bottom of the screen.
The Share Problem with Other Organization screen displays.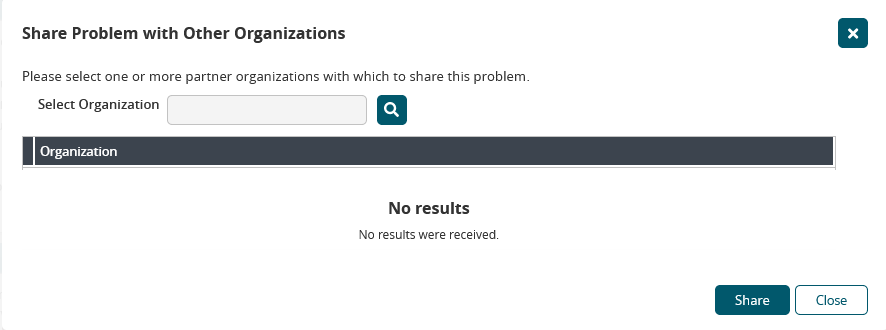
Click the picker tool icon to select the partner organization you wish to share problem details with and click Share.