Viewing Potential Lost Sales Report
Complete the following steps to view the Potential Lost Sales Report:
Log in to the ONE system.
Click Menus/Favs > Demand Planning > Lost Demand > Potential Lost Sales Report.
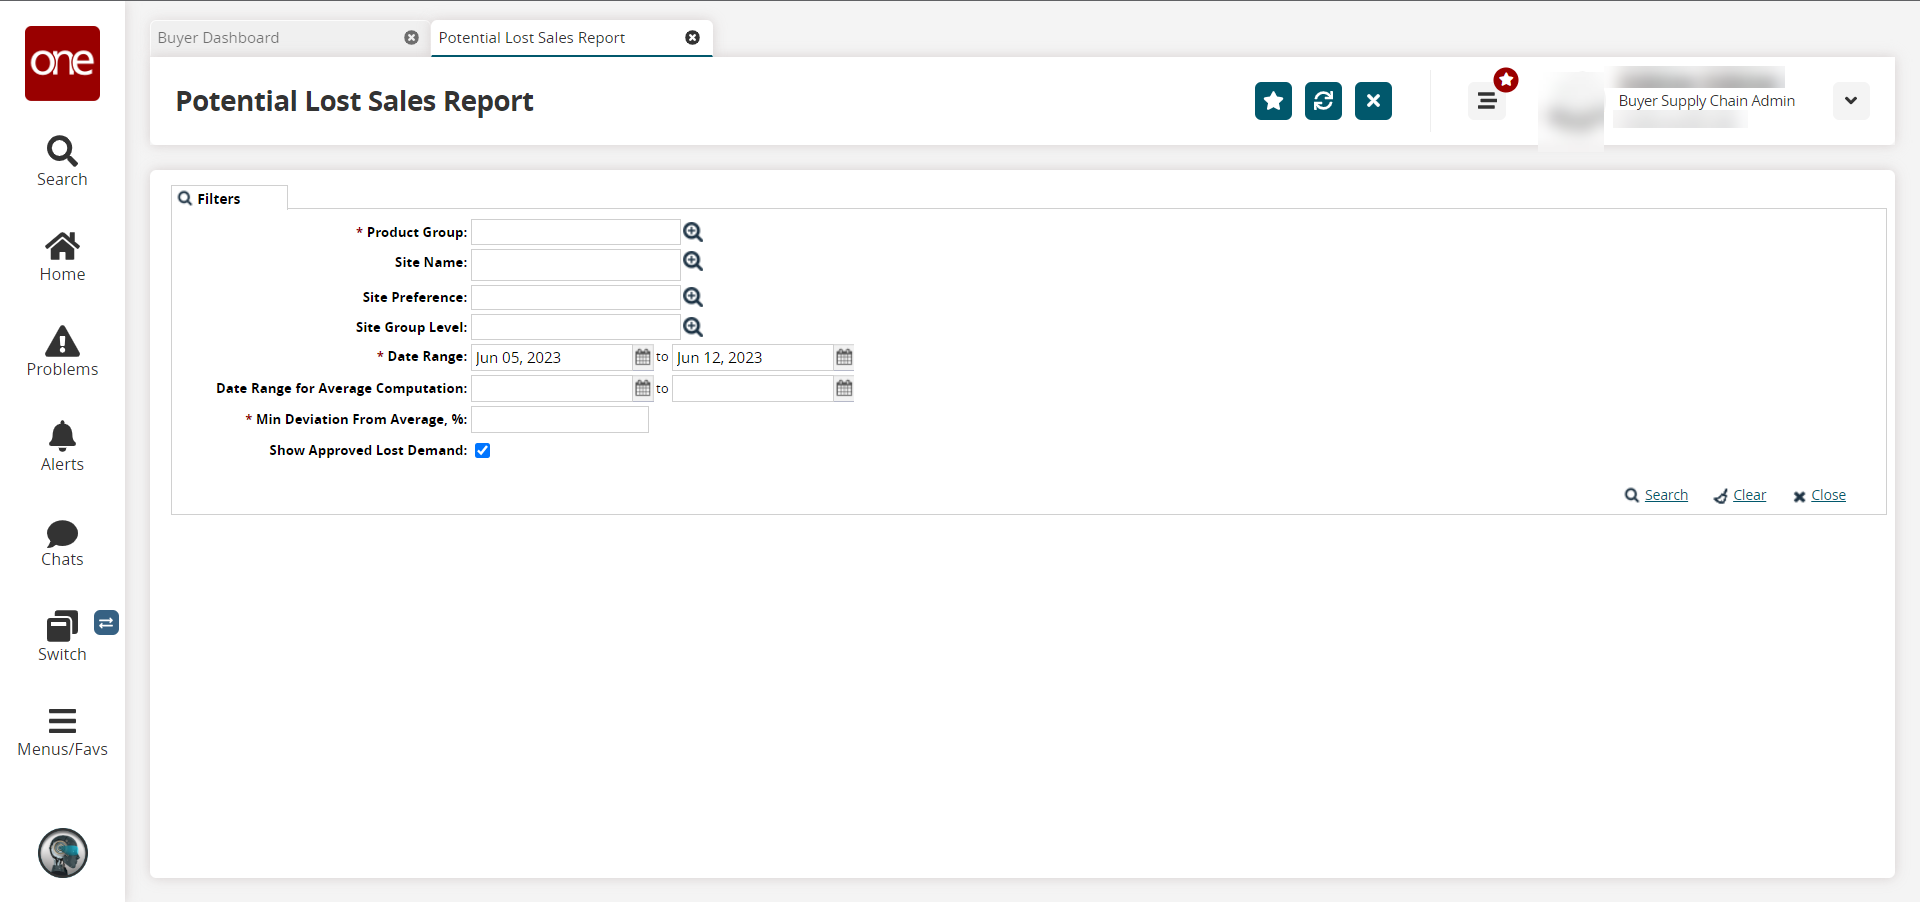
The Potential Lost Sales Report screen opens with the filters displayed.
Fill out the following fields. Fields with an asterisk ( * ) are required.
Field
Description
*Product Group
Click the picker tool icon to select the product group.
Site Name
Click the picker tool icon to select the site name.
Site Preference
Click the picker tool icon to select the site preference.
Site Group Level
Click the picker tool icon to select the site group level.
*Date Range
Click the calendar icons to select the date range.
Date Range for Average Computation
Click the calendar icons to select the date range for average computation.
*Min Deviation From Average, %
Enter a numerical value (in percent) for the minimum deviation from the average.
Show Approved Lost Demand
Select the checkbox to include approved lost demand in the report.
Click Search.
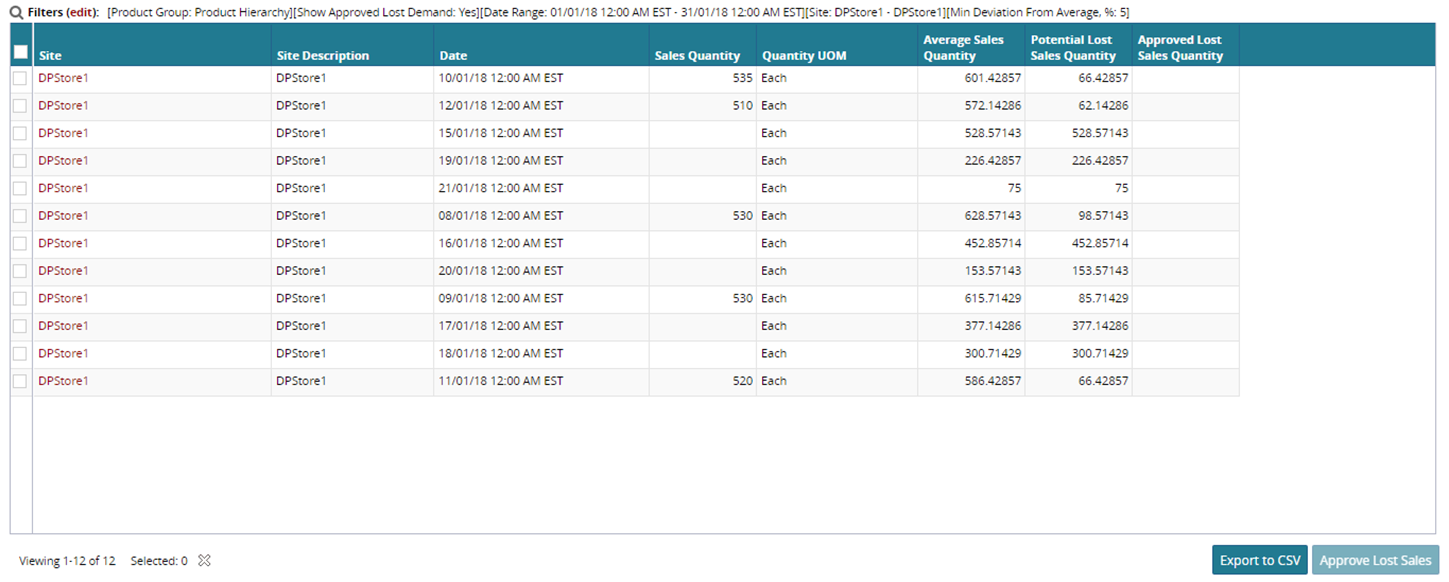
The Potential Lost Sales Report displays with the filter criteria applied.
To export the data into a spreadsheet, click Export CSV.
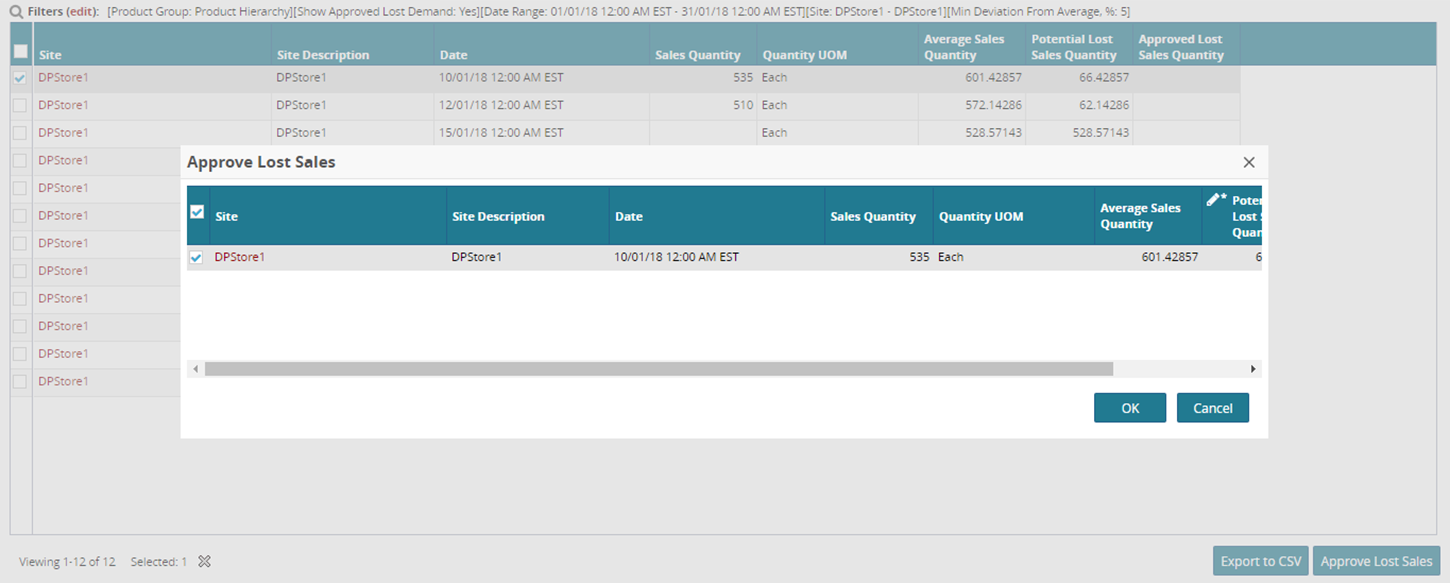
To approve lost sales, select the checkbox for the desired rows and click the Approve Lost Sales button. Click OK.

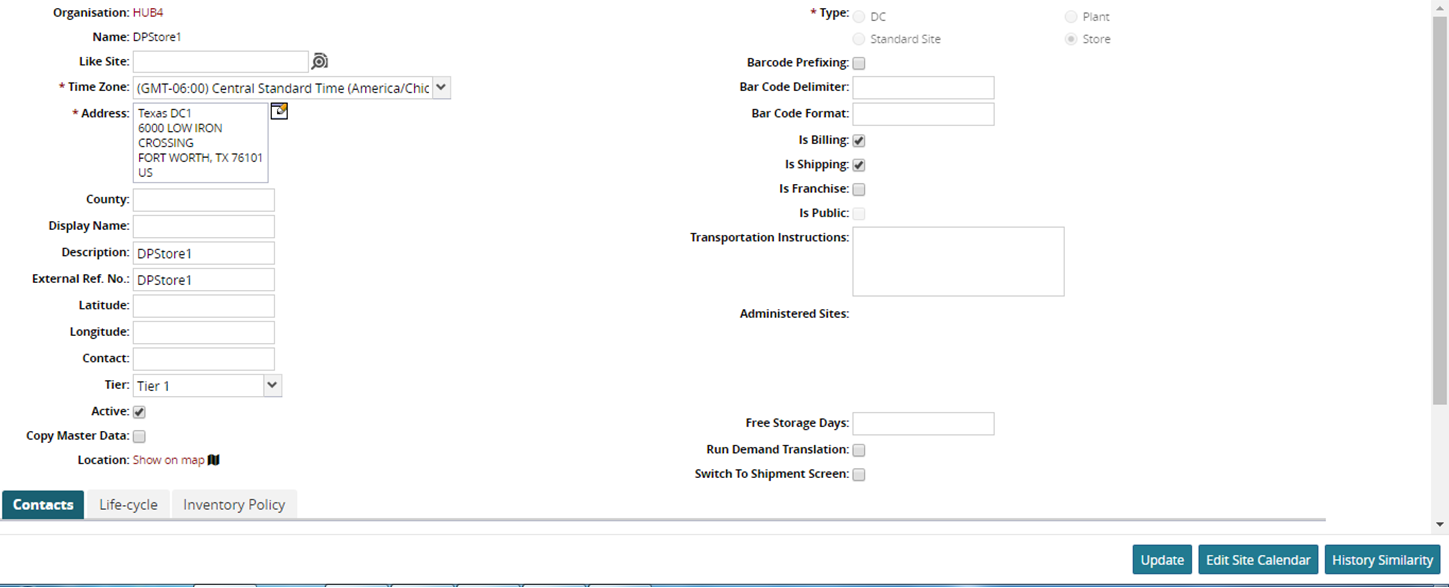
In the Site column, click the link for a site to view the detail screen.
The detail screen opens.
Update the fields as necessary and click the Update button.