Viewing and Creating Financial Accounts
You can view and add financial accounts for an organization in the One Network system.
Complete the following steps to view the accounts:
L og in to the ONE system.
Click Menus/Favs > Financials > Accounts. In the NEO UI, users can click on the Menus/Favs icon on the left sidebar and type in the name of the screen in the menu search bar. For more information, see "Using the Menu Search Bar."
The Accounts screen opens.
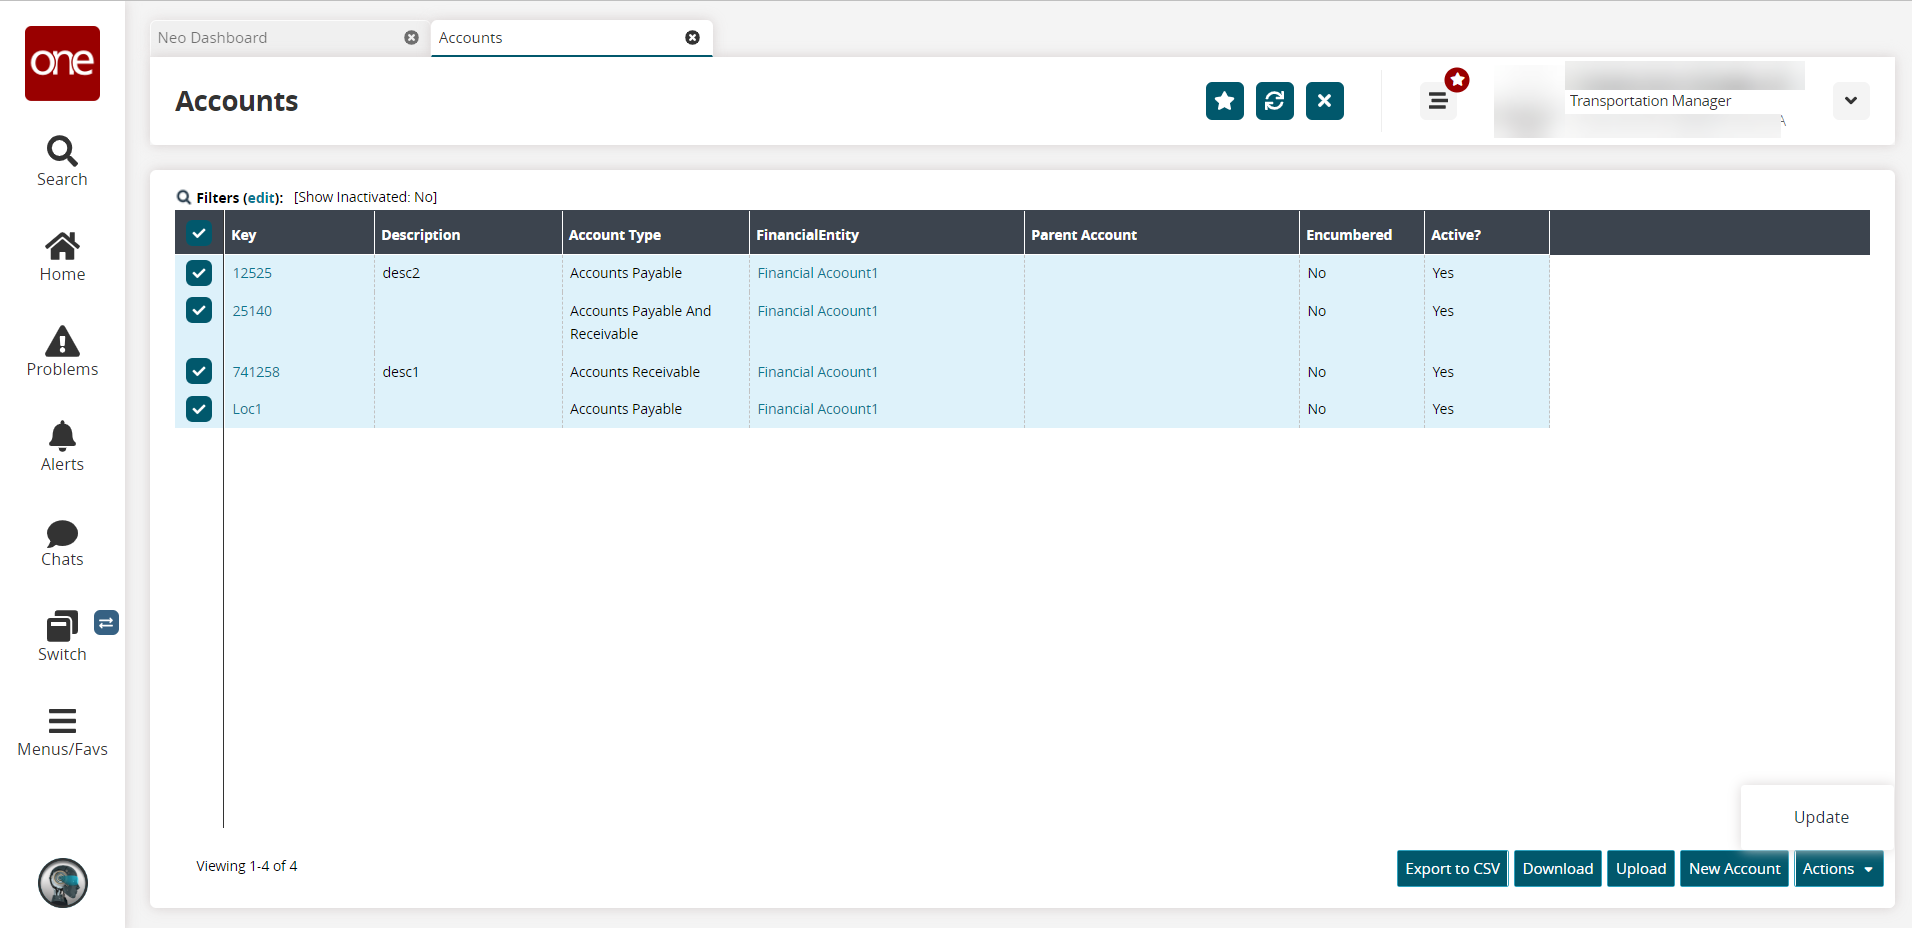
Click the Export to CSV button to export the report to a CSV file.
Click the Download button to download a file to your computer.
Click the Upload button to upload a file to the ONE system for batch uploads. Please see the "Uploading Files" section in the Online Help for more information.
Select the checkbox of the accounts row, and click the Actions button to perform the required action. The options available may differ based on the account details. See the "Updating Financial Accounts" section in the Online Help for more information.
Complete the following steps to add a new account:
Click the New Account button on the Accounts screen.
The New Account screen opens.
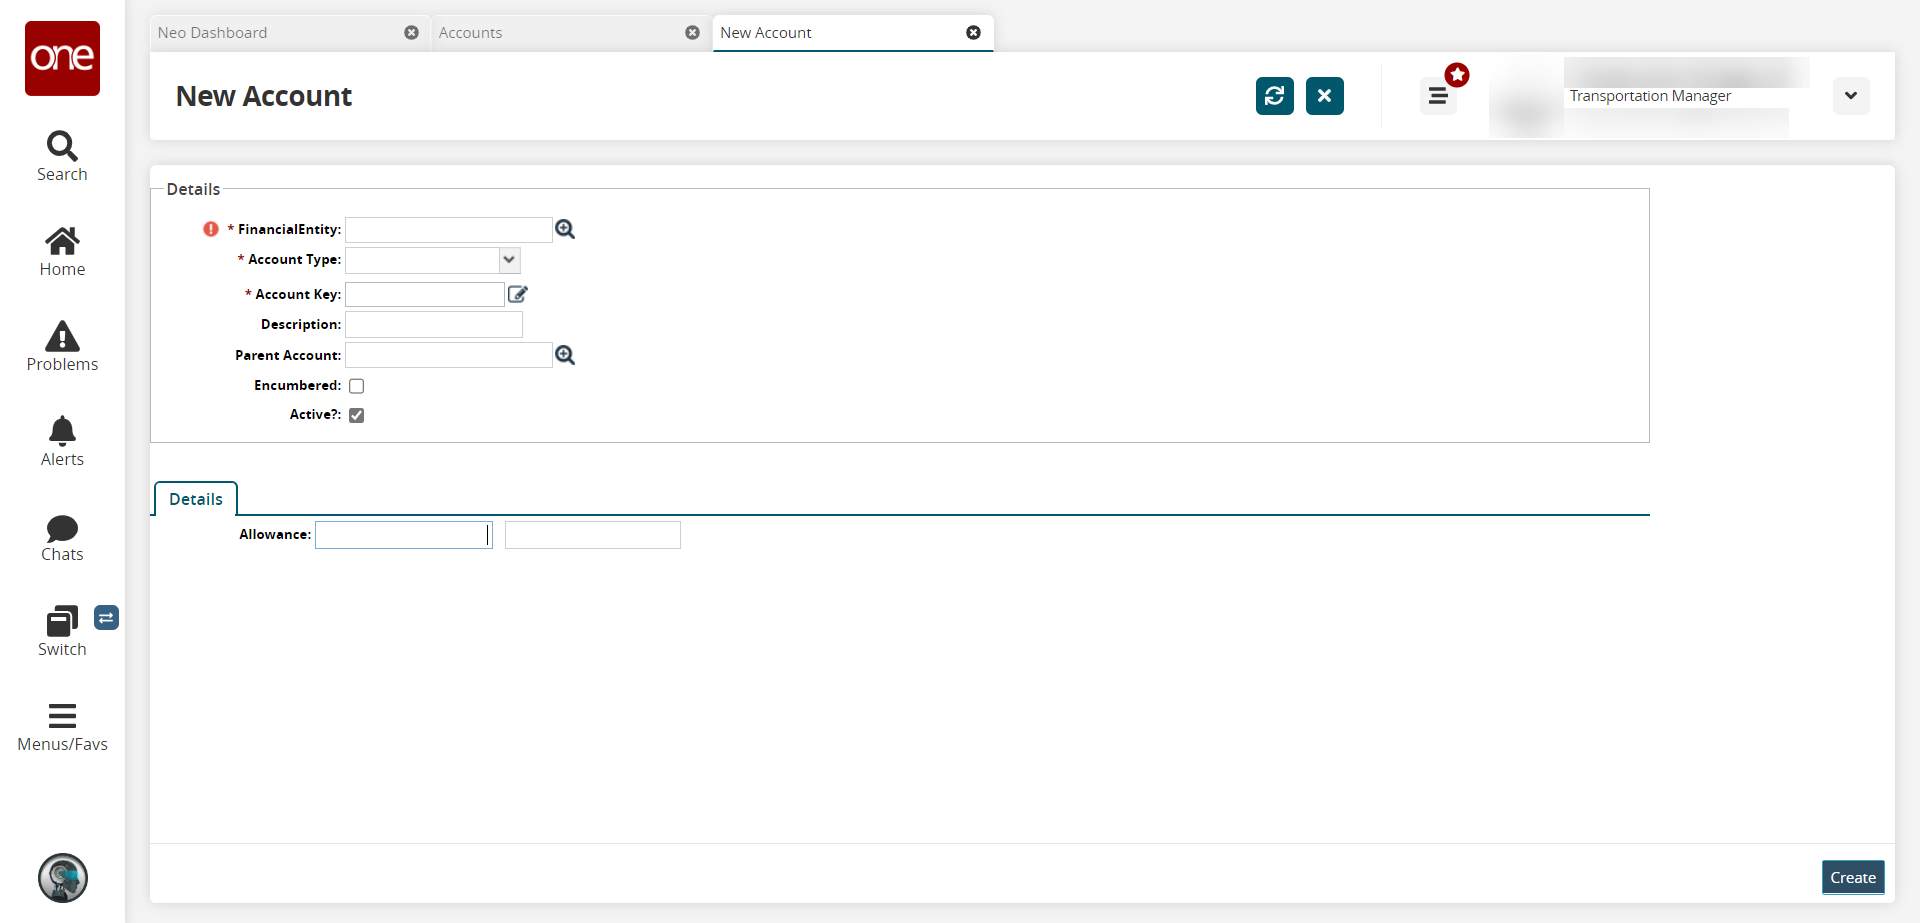
Enter values for fields described in the table below. Fields with an asterisk ( * ) are required.
Field
Description
* Financial Entity
Use the picker tool to select a financial entity, or enter a known financial entity.
* Account Type
Select a account type from the dropdown list, or enter a known account type.
* Account Key
Click the pencil icon.
A popup displays.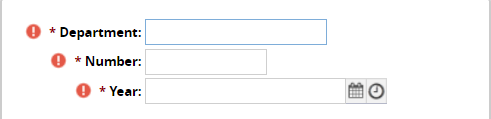
Enter a department name in the *Department field.
Enter a numerical value that will be a part of the new account key in the *Number field.
Use the calendar and clock tools to select a date and time for the *Year field.
Click outside the popup.
The information combines in the *Account Key field to form a unique account key.
Description
Enter a description for the account.
Parent Account
Use the picker tool to select a parent accoun,t or enter a known parent account.
Encumbered
Select the checkbox to make the account encumbered.
Active
Select the checkbox to make the account inactive. By default it is enabled.
Enter a numerical value in the first box in Allowance field located in the Details tab.
The second box auto-populates with the country currency code based on the financial entity selected above.Click the Create button.
A success message displays, and a new account is created.