Working with Additional Charge Limits
Carriers can now request additional charges to be added to the movement cost. Shippers can approve or reject the request, as well as modify the amount. Upon approval, the charge is added to the movement cost. Upon rejection, the carrier will not be able to submit the same request again.
Complete the following steps to add a carrier accessorial charge limit:
L og in to the ONE system.
Click Menus/Favs > Contract Mgmt > Additional Charge Limits. In the NEO UI, users can click on the Menus/Favs icon on the left sidebar and type in the name of the screen in the menu search bar. For more information, see "Using the Menu Search Bar."
The Additional Charge Limits screen displays.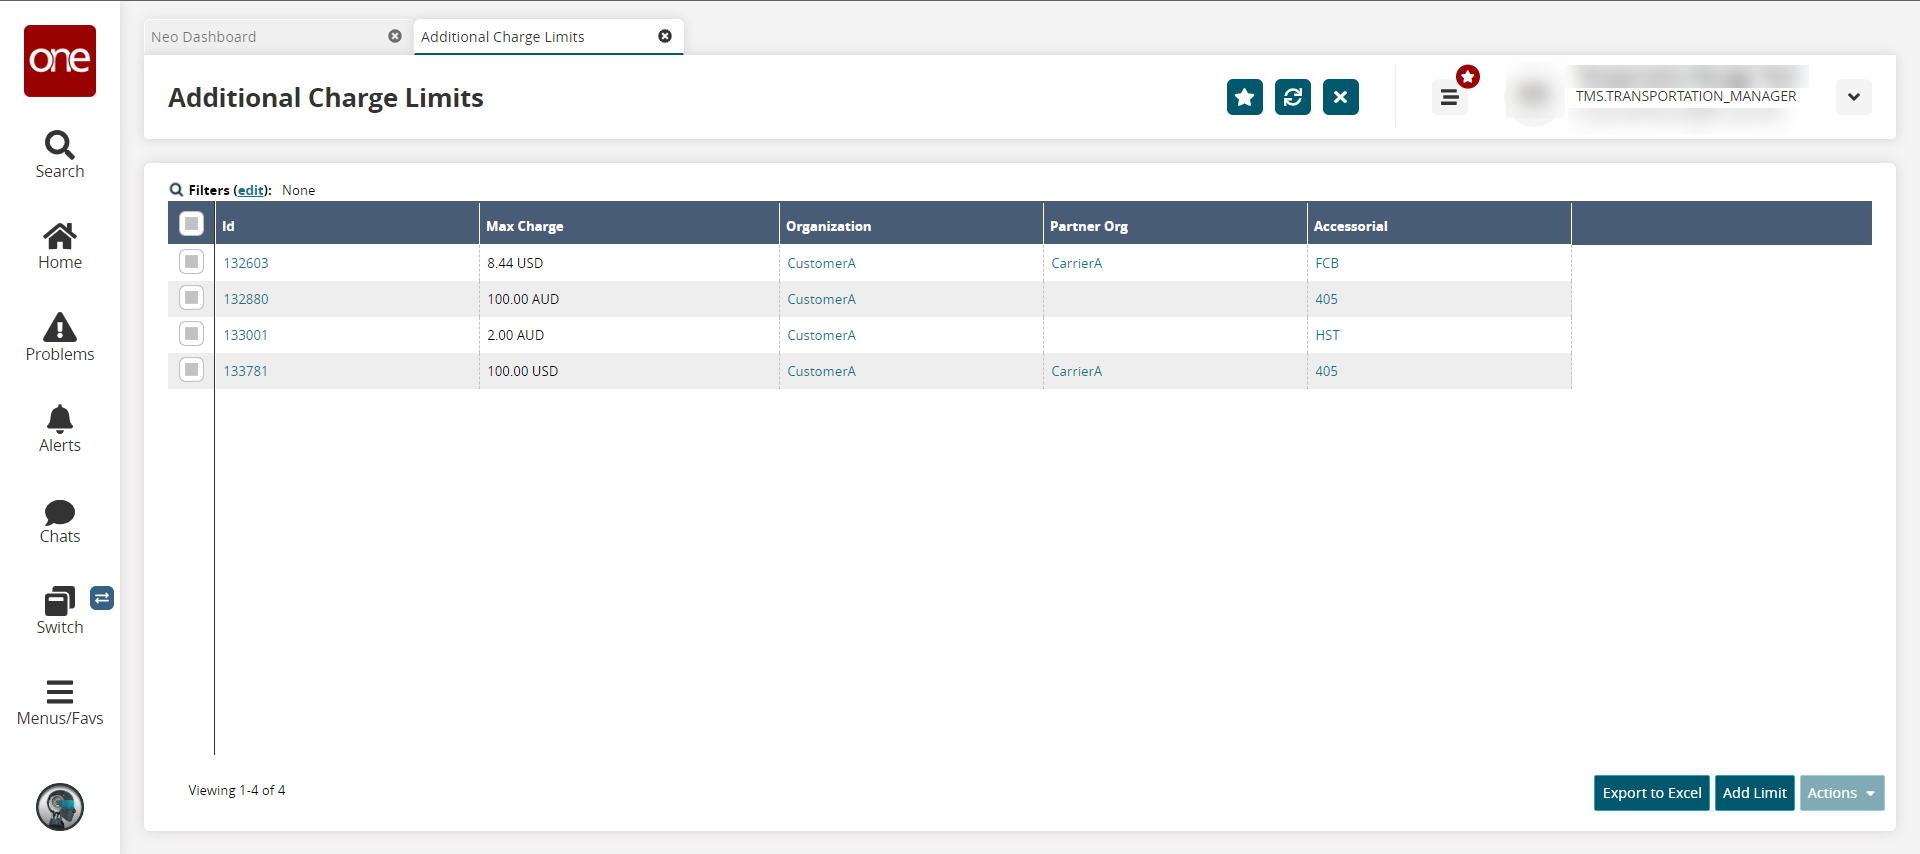
Click the Add Limit button.
The New Charge Limit screen displays.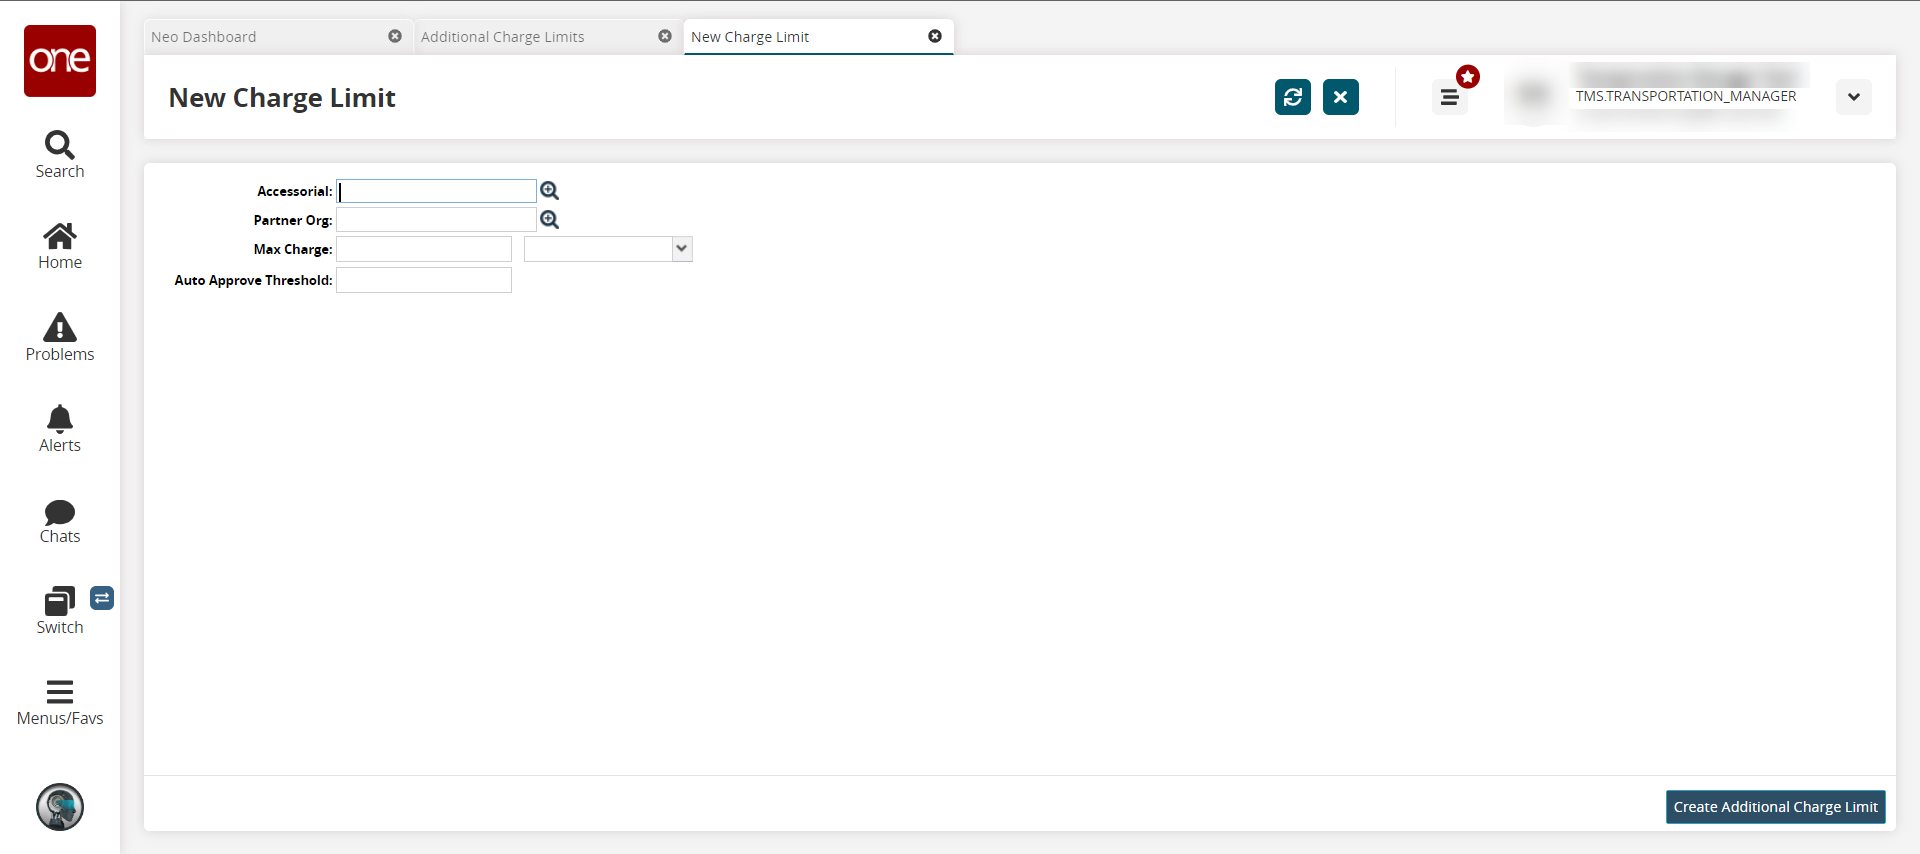
Enter values for fields described in the table below. Fields with an asterisk ( * ) are required.
Field
Description
Accessorial
Use the picker tool to select the accessorial.
Partner Org
Use the picker tool to select a partner organization.
Max Charge
Enter a numerical value in the first field, and select the country currency code from the dropdown list in the second field.
Auto Approve Threshold
Enter a numerical value for the threshold for auto-approval.
Click the Create Additional Charge Limit button.
A green success bar displays, and a new perspective/tab opens with the details.Click the Export to Excel button to export a file to your computer.
Users can update a single charge limit or update many at one time.
Complete the following steps to update a single charge limit:
L og in to the ONE system.
Click Menus/Favs > Contract Mgmt > Additional Charge Limits. In the NEO UI, users can click on the Menus/Favs icon on the left sidebar and type in the name of the screen in the menu search bar. For more information, see "Using the Menu Search Bar."
The Additional Charge Limits screen displays.
Click the link for a charge limit in the ID column.
The details screen displays.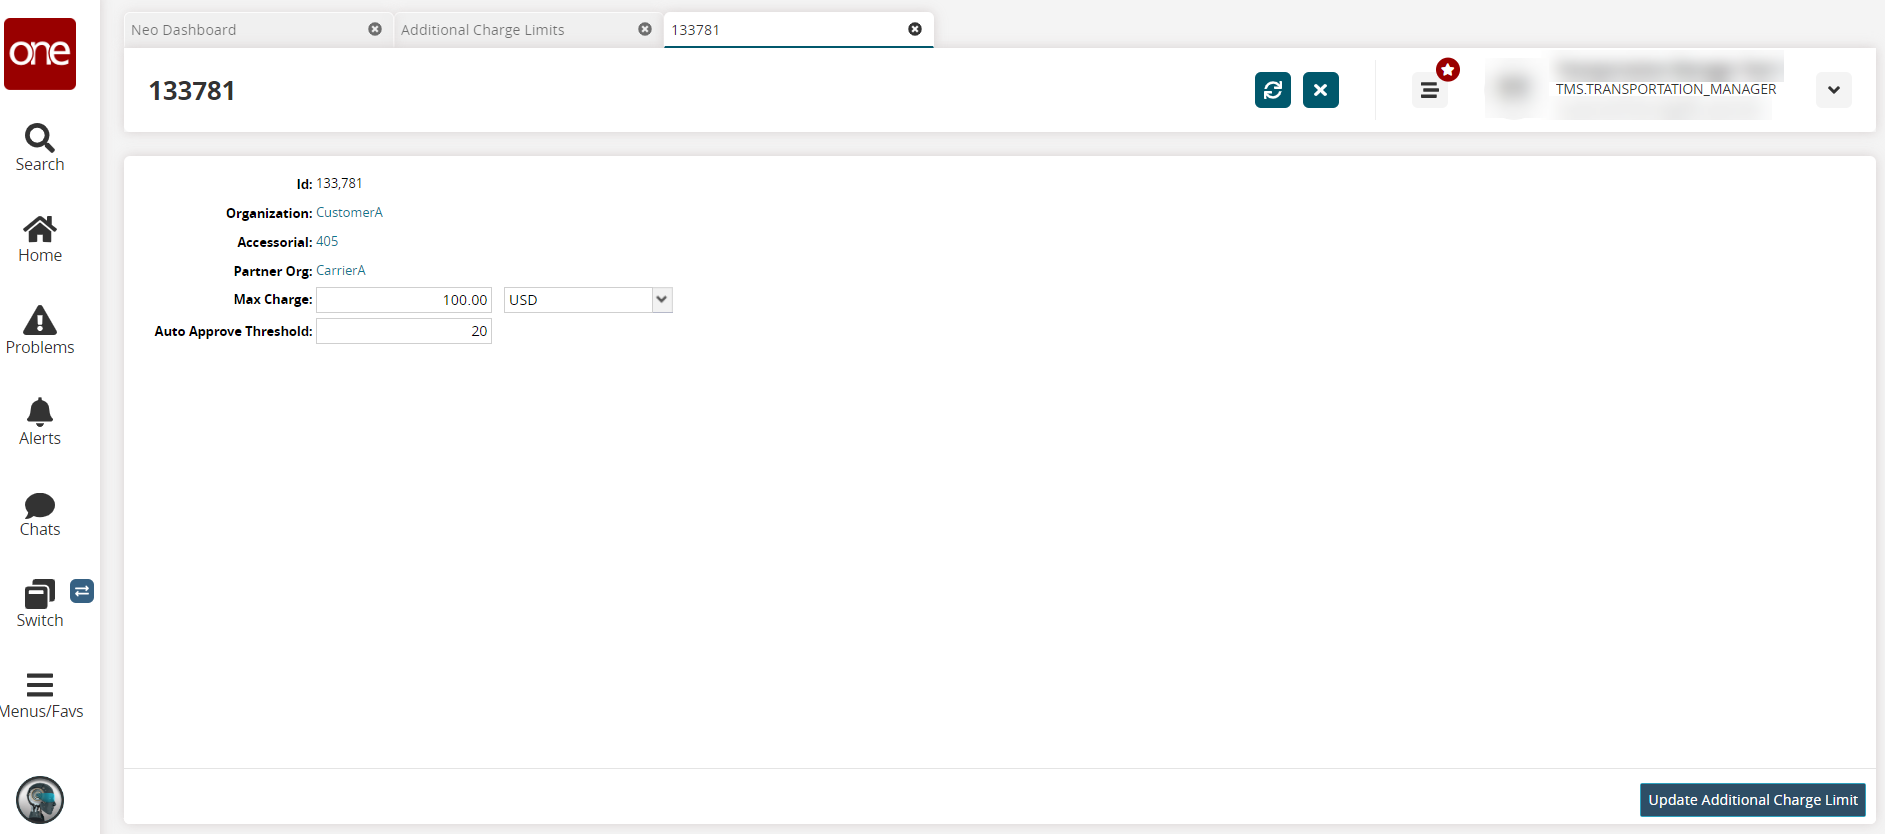
Update the numerical value and the country currency code in the Max Charge fields.
Update the numerical value in the Auto Approve Threshold field.
Click the Update Additional Charge Limit button.
Complete the following steps to update more than one additional charge limit:
L og in to the ONE system.
Click Menus/Favs > Contract Mgmt > Additional Charge Limits. In the NEO UI, users can click on the Menus/Favs icon on the left sidebar and type in the name of the screen in the menu search bar. For more information, see "Using the Menu Search Bar."
The Additional Charge Limits screen displays.
Click the checkboxes for the requests you want to update, and click Actions > Update.
The Update popup displays.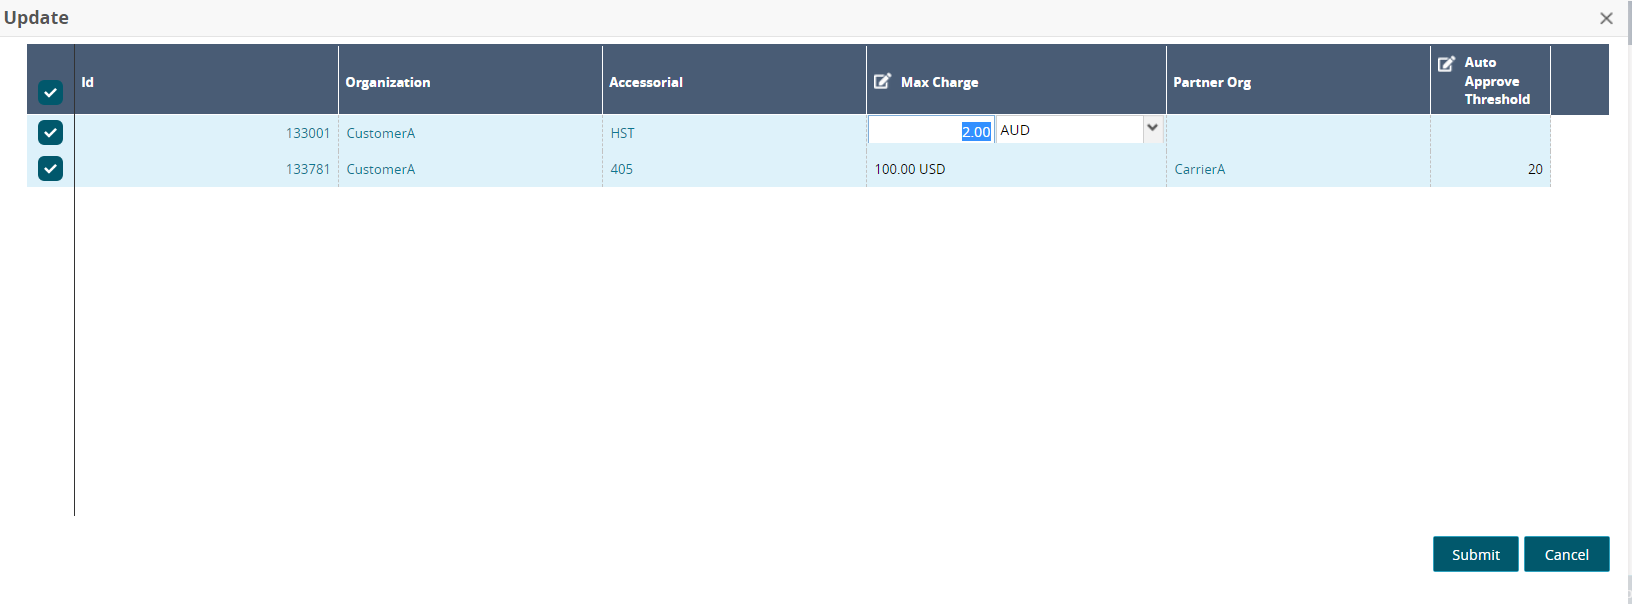
Update the numerical value and the country currency code in the Max Charge fields.
Update the numerical value in the Auto Approve Threshold field.
Click the Submit button.
A green success message displays.
Complete the following steps to delete an additional charge limit:
Log in to the ONE system.
Click Menus/Favs > Contract Mgmt > Additional Charge Limits.
The Additional Charge Limits screen opens.Click the box for one or more requests, and click Actions > Delete.
The Delete popup opens.Click the Submit button.
A green success message displays.