Working with Location Inventory
Location inventory is a warehouse layout model used to specify physical storage location. Users can adjust, change attributes for, consume, and transfer using the Location Inventory report.
Complete the following steps to use the Location Inventory report:
L og in to the ONE system.
Click Menu/Favs > Warehouse Mgmt > Location Inventory.
The Location Inventory screen appears displaying the Explorer pane on the left.In the Explorer pane on the left, select a location inventory site.
The Inventory Summary Report for the selected site appears in the right pane.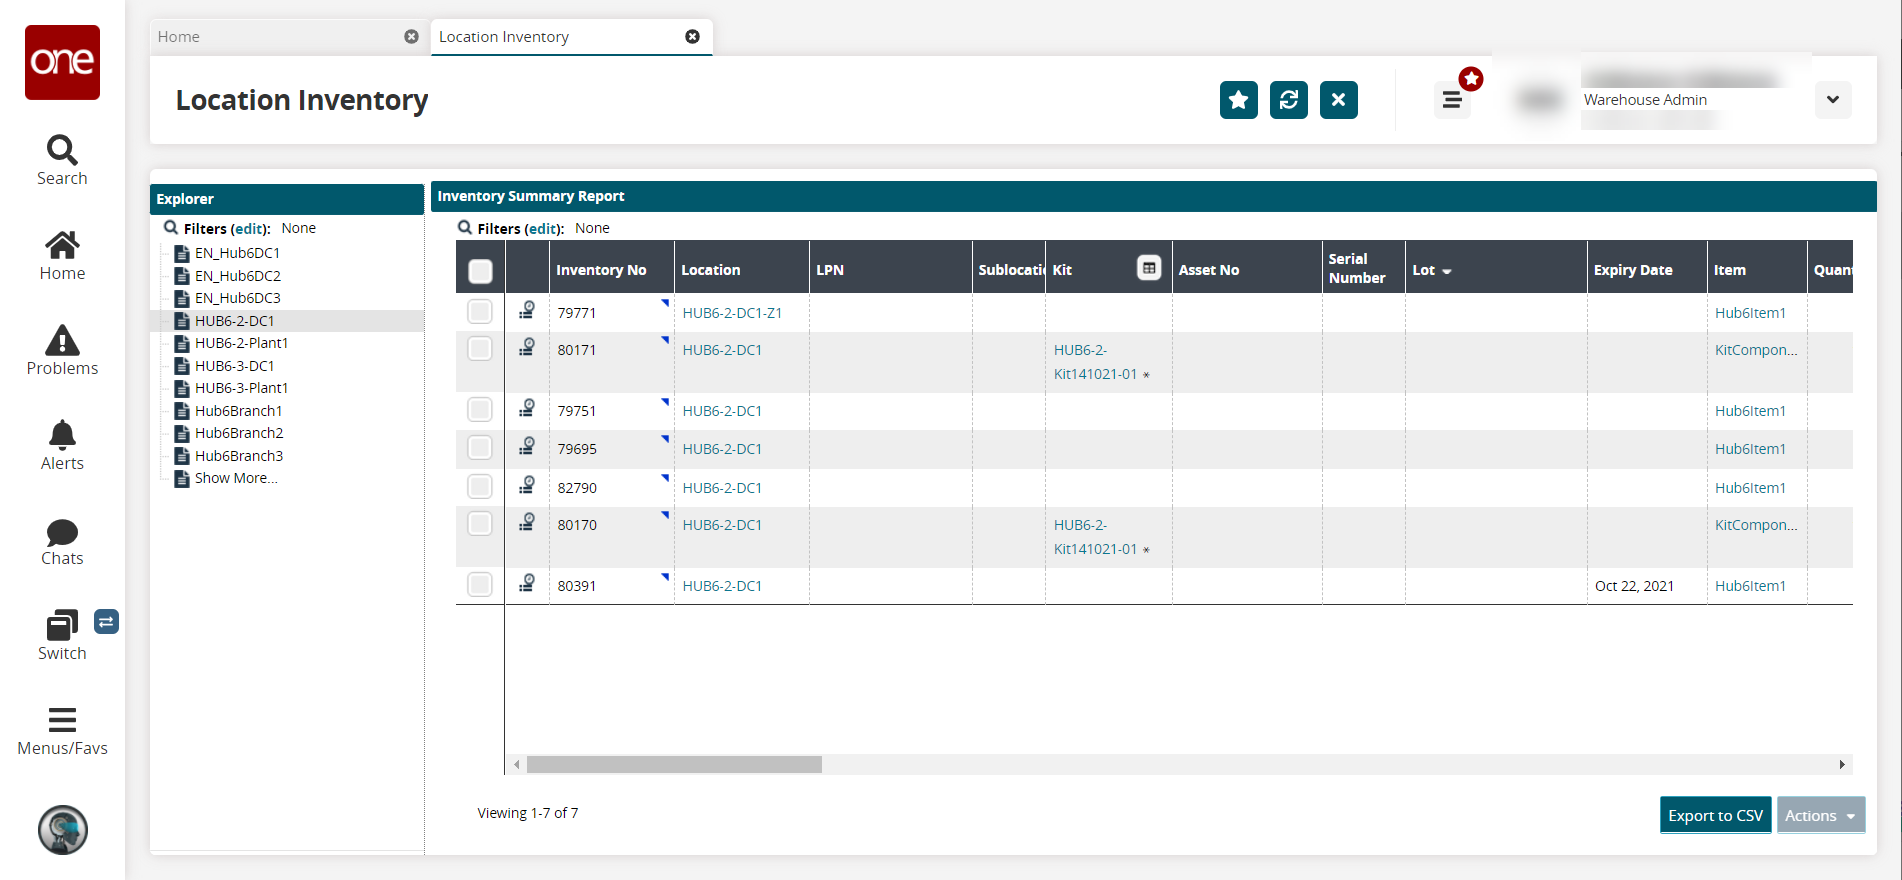
Click the checkbox to the left to select the Inventory No you want to work with.
Click the Actions button, then select the desired action. The available options are Adjust, Change Attribute, Consume, Pack Into LPN, Reconfigure, Replace, Snap-Off, Snap-On, Split Lot Instance, LotSplit, Move to Another Kit (available for kit components only), Transfer, and Unpack From LPN.
A popup window appears with certain fields editable. The fields that appear depend on the action selected. In the example below, Move to Another Kit was selected.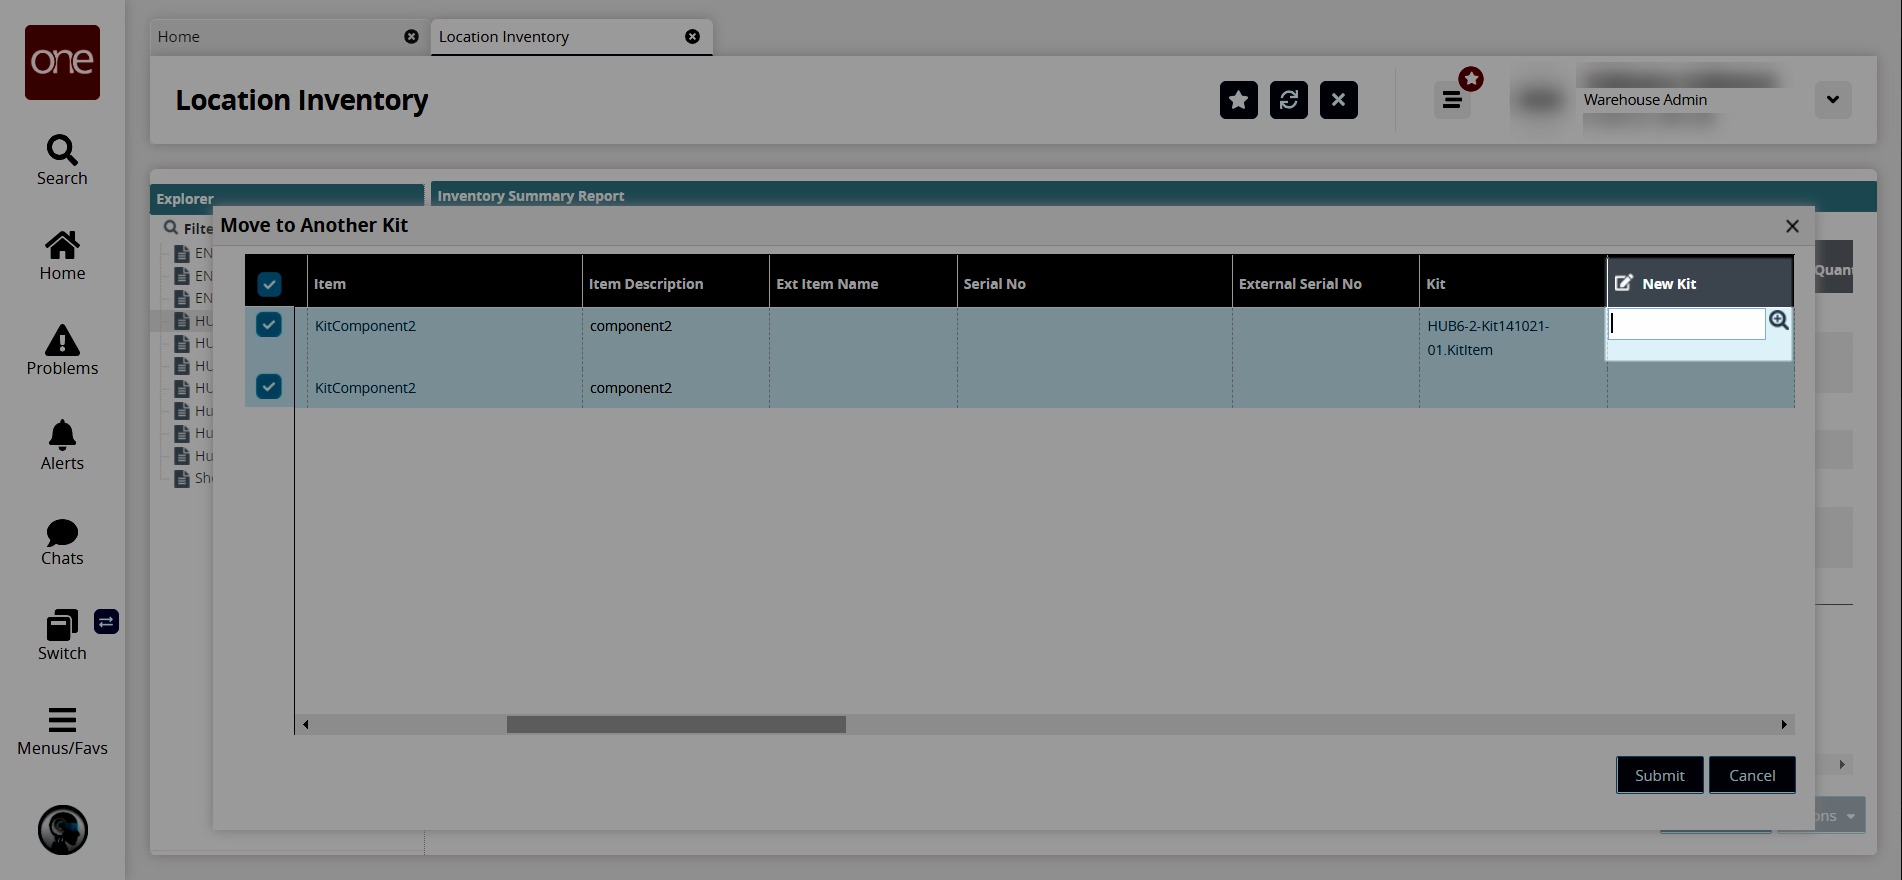
Enter a value in the appropriate column.
Click Submit.
A success message appears.Click the icon to the left of an Inventory No.
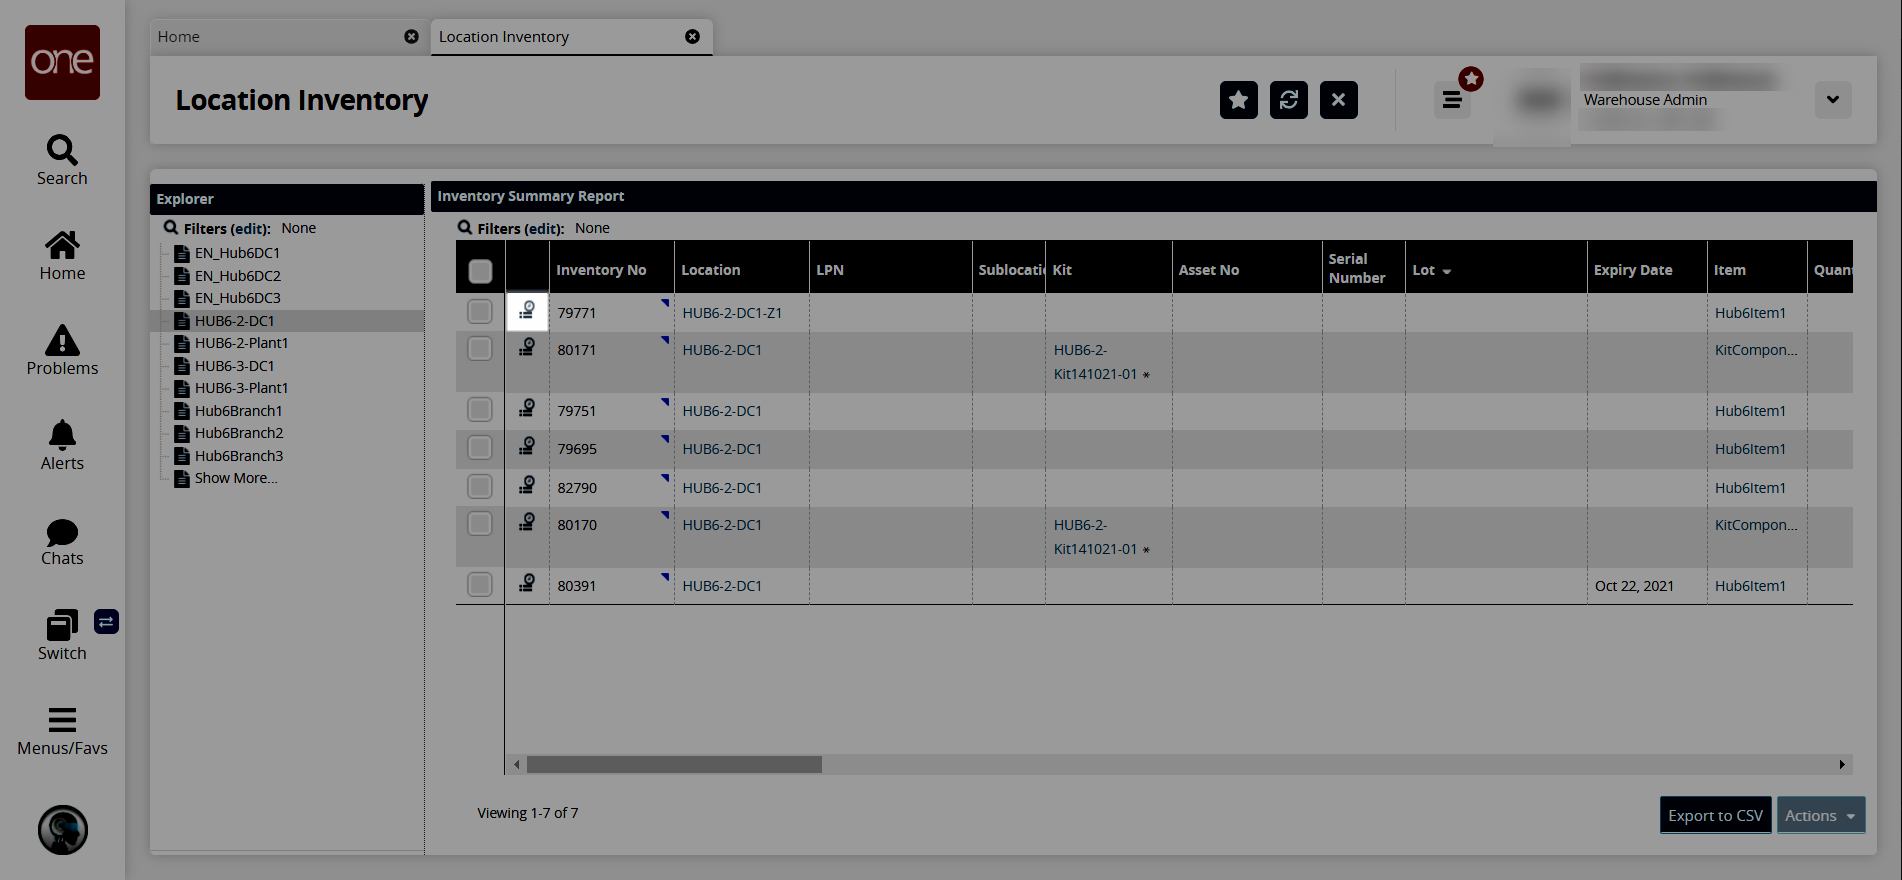
The Inventory Operations screen appears.Returning to the Location Inventory screen, click Export to CSV to export the Inventory Summary Report in CSV format.
In the Inventory No column, click the triangle icon in the corner of an inventory number cell and click Cycle Count History.
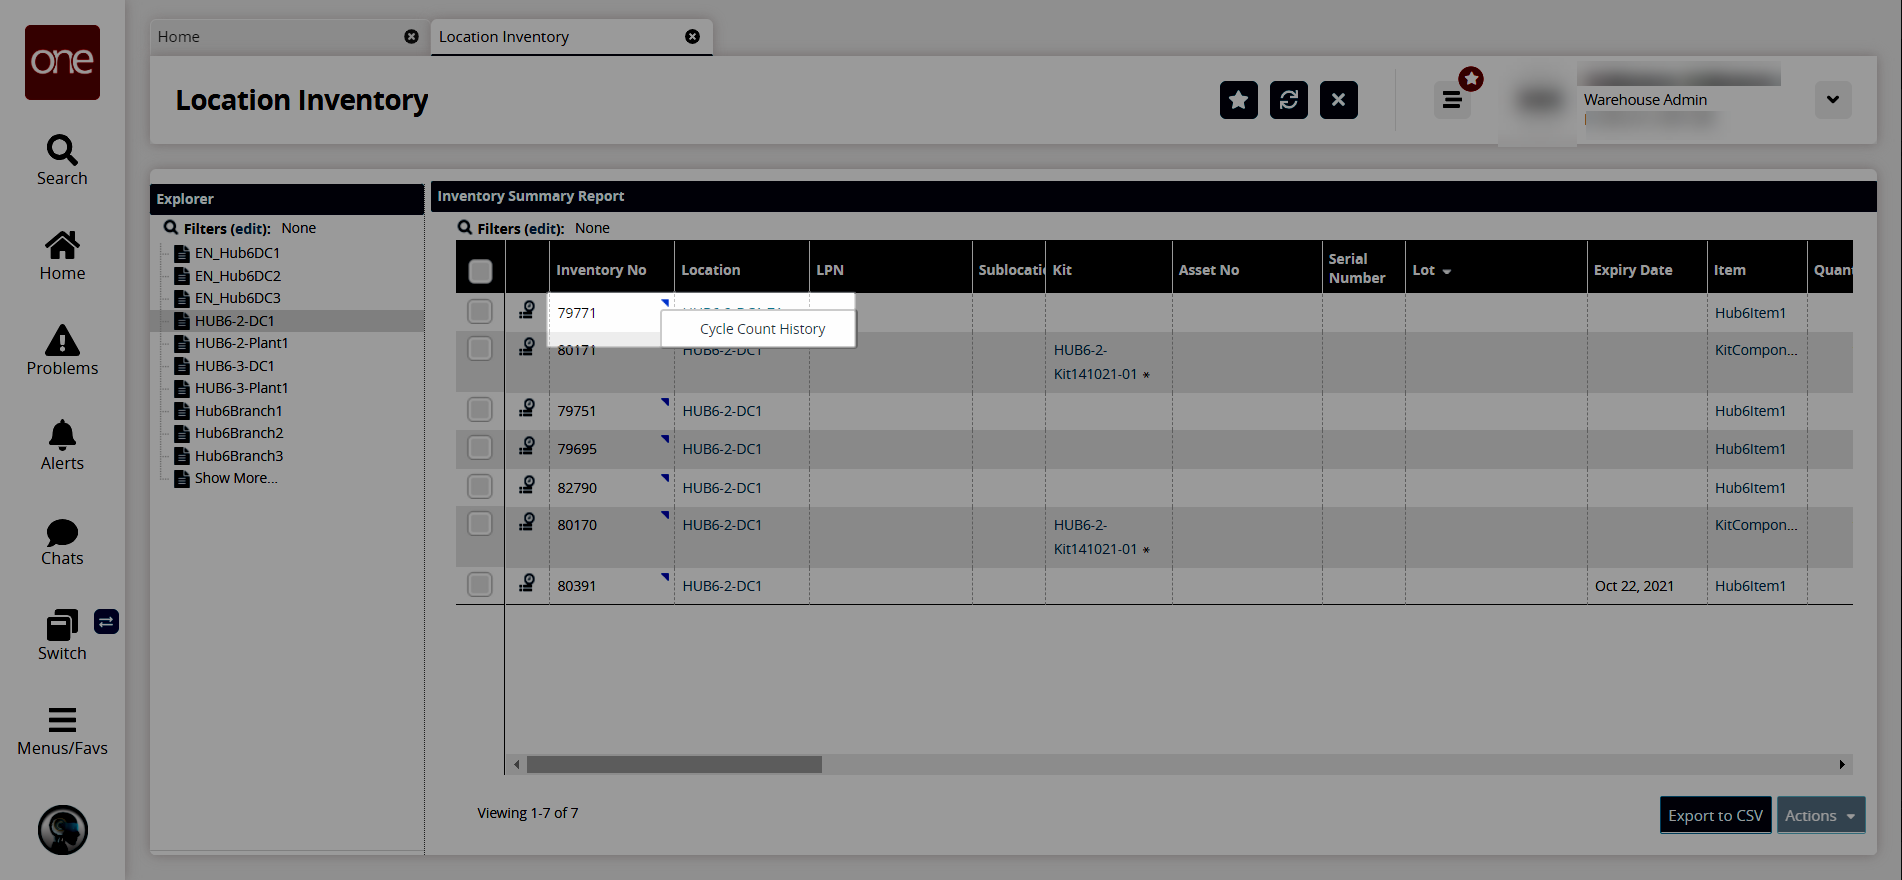
The Cycle Count History popup appears.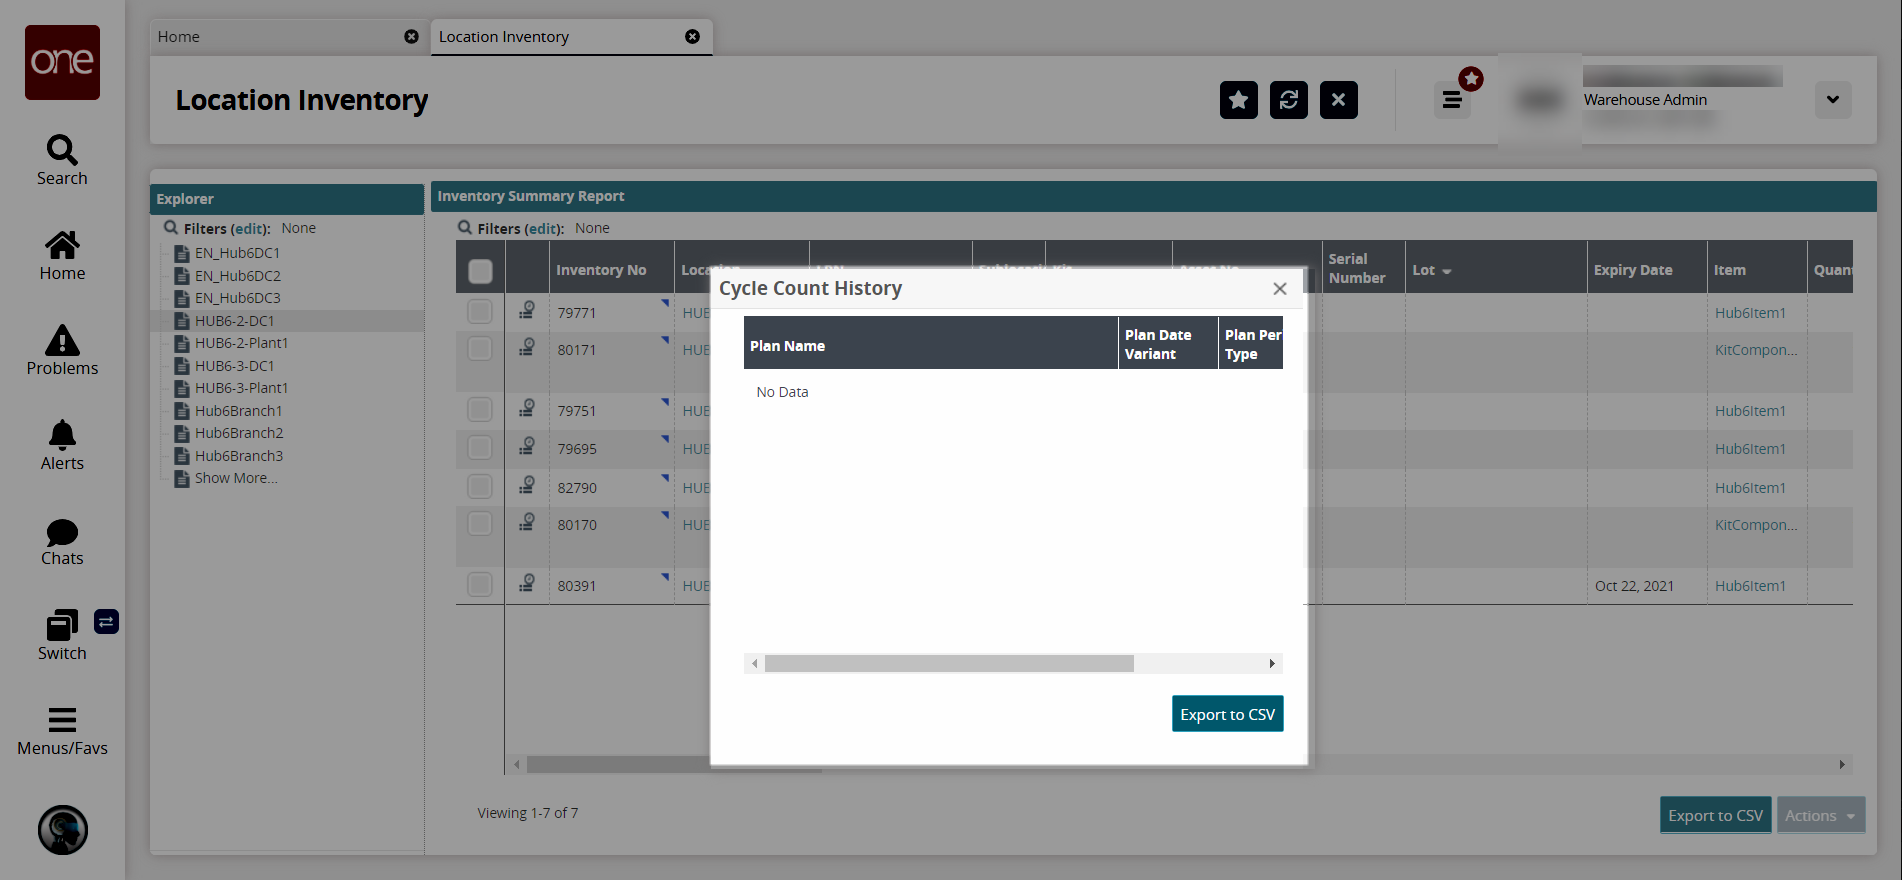
In the Plan Name column, click the plan name link.
The Cycle Count Plan report appears.
Complete the following steps to replace kit components:
Select the desired records to replace kit components, and click Actions > Replace.
The Replace dialog box appears.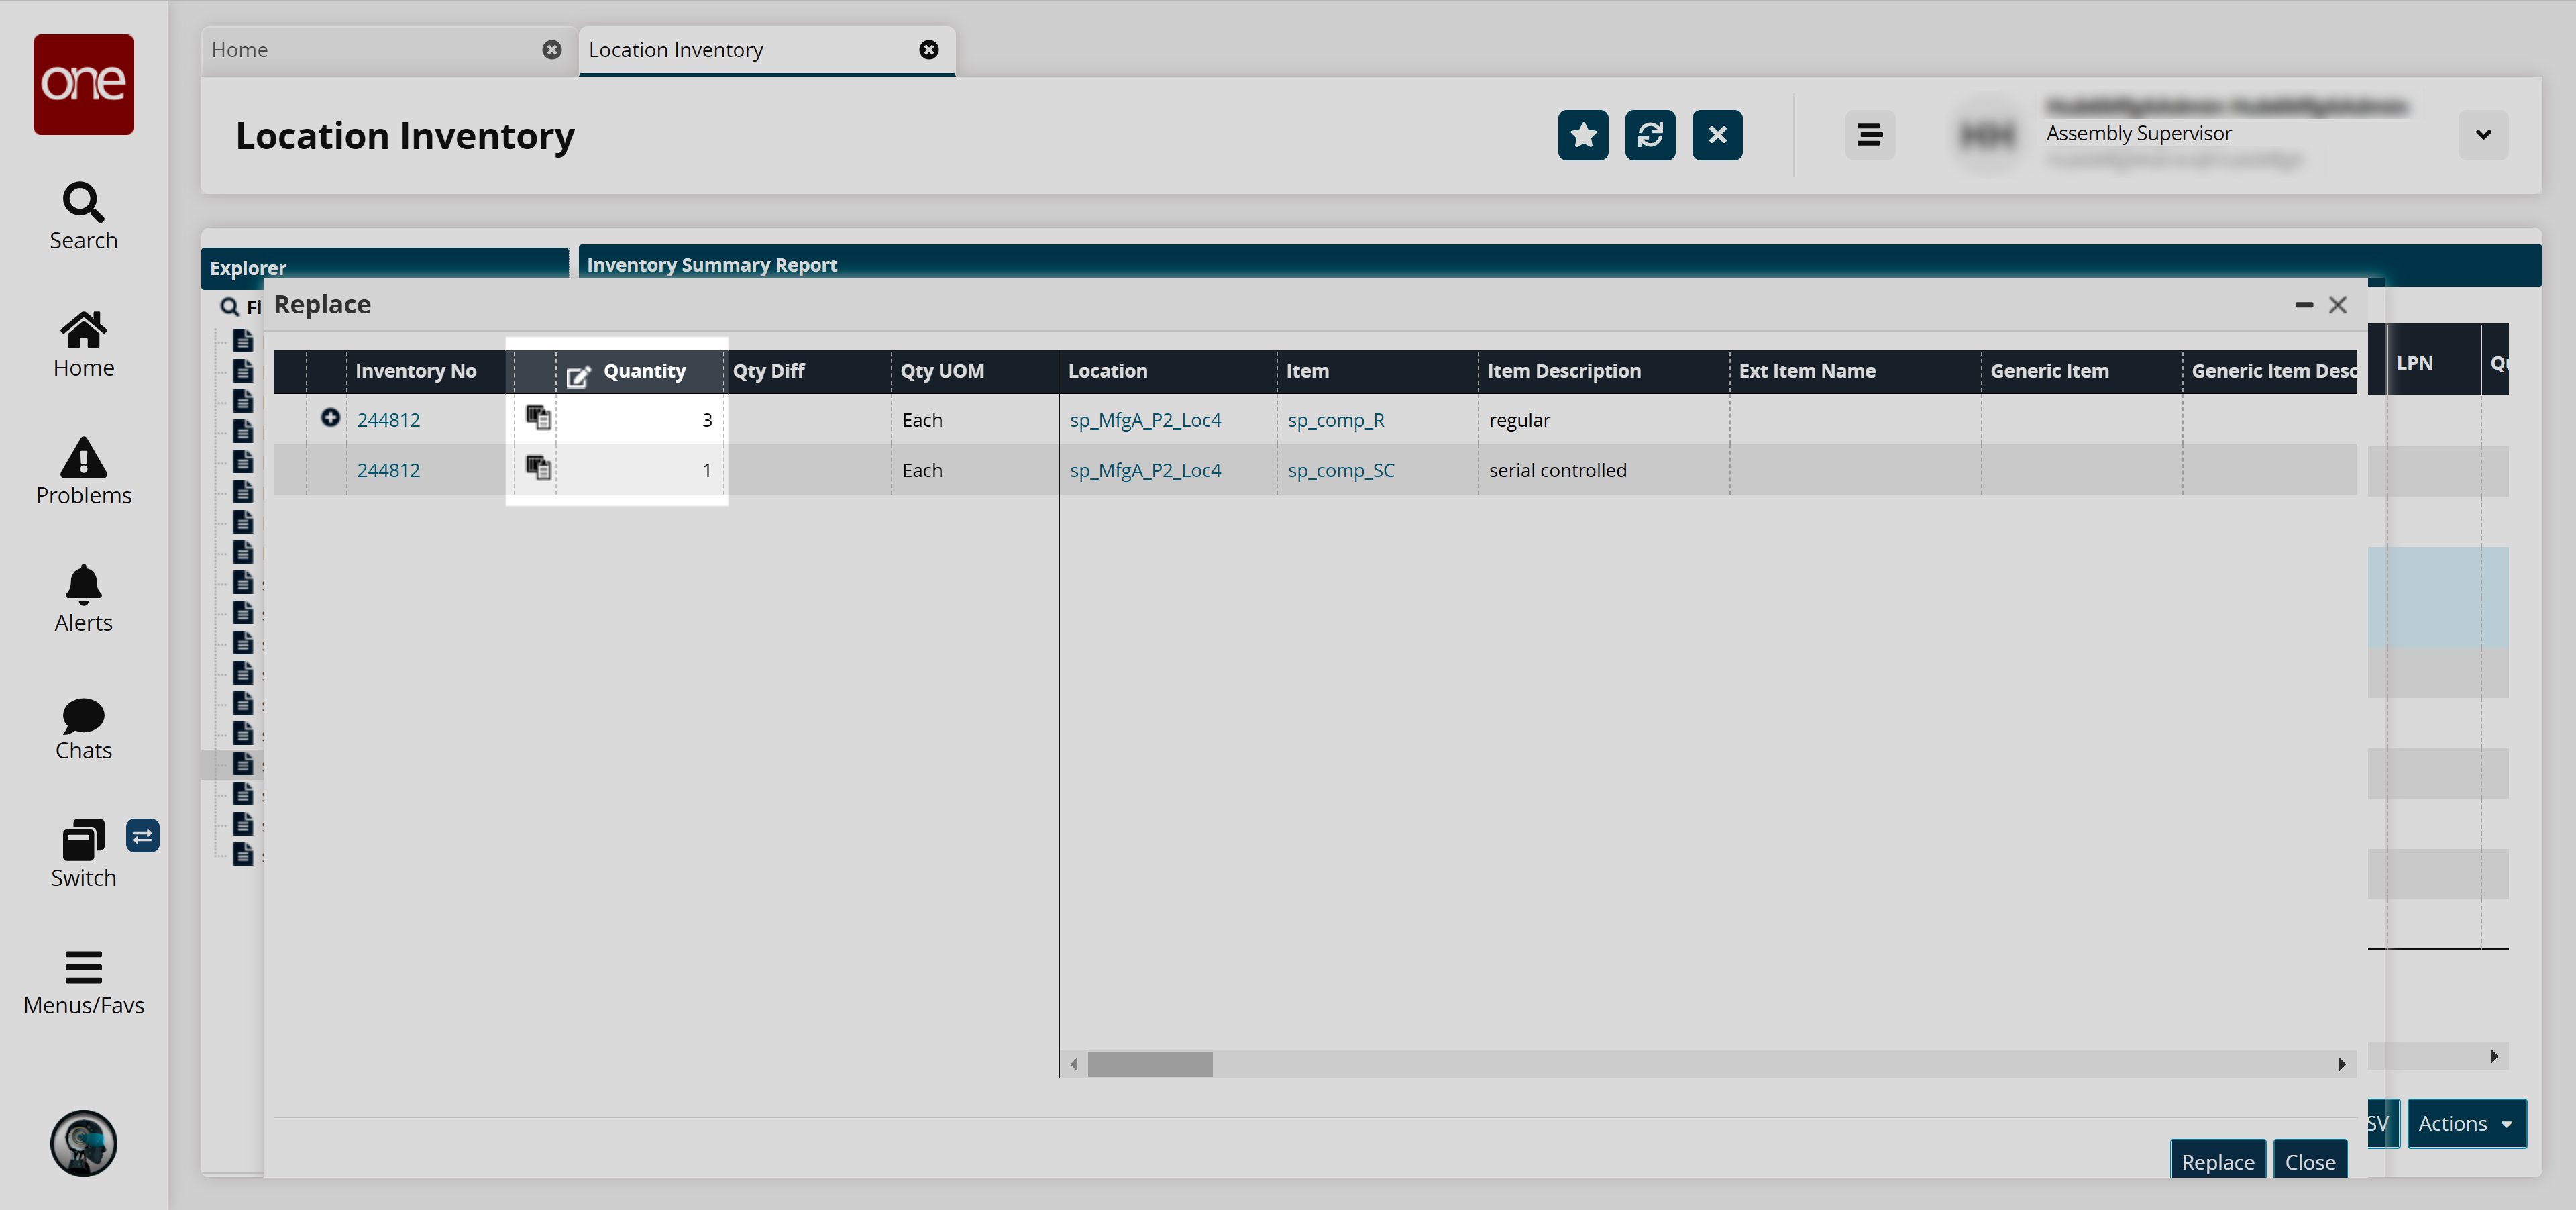
Enter a new value in the Quantity field.
Note
In the Replace popup, the Quantity field is editable. When a new quantity is entered, the rows are highlighted with colors in the following scenarios:
Green: if a new line is added
Yellow: if the quantity is reduced
Red: if the quantity is reduced to 0
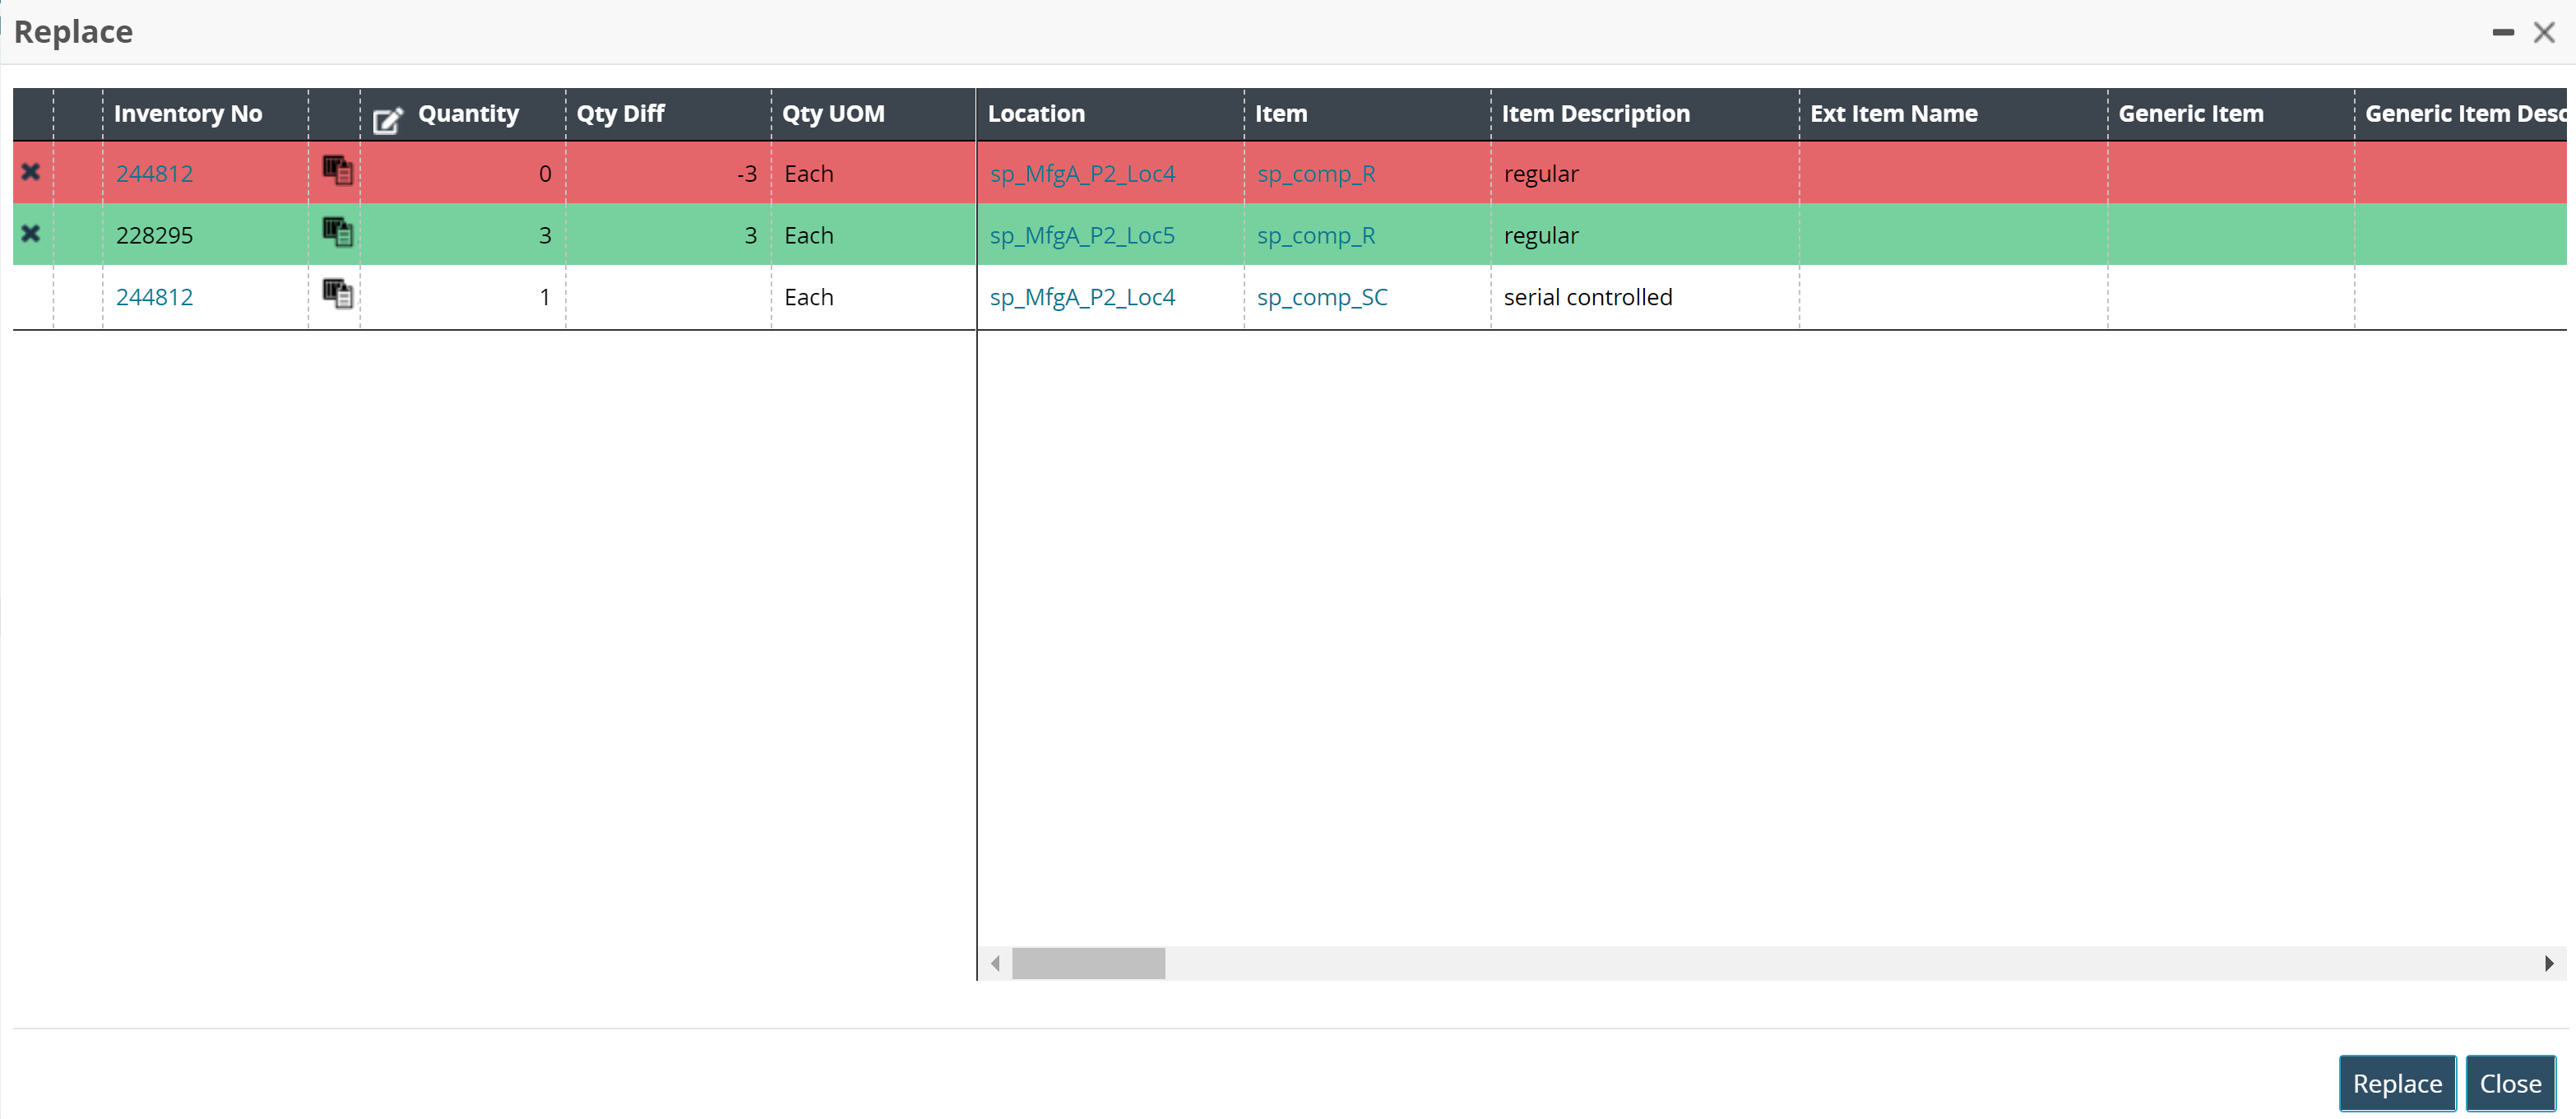
Click the replace inventory icon (
 ) to replace the current inventory.
A popup displays based on the item type. The example below shows Snap-On replacements.
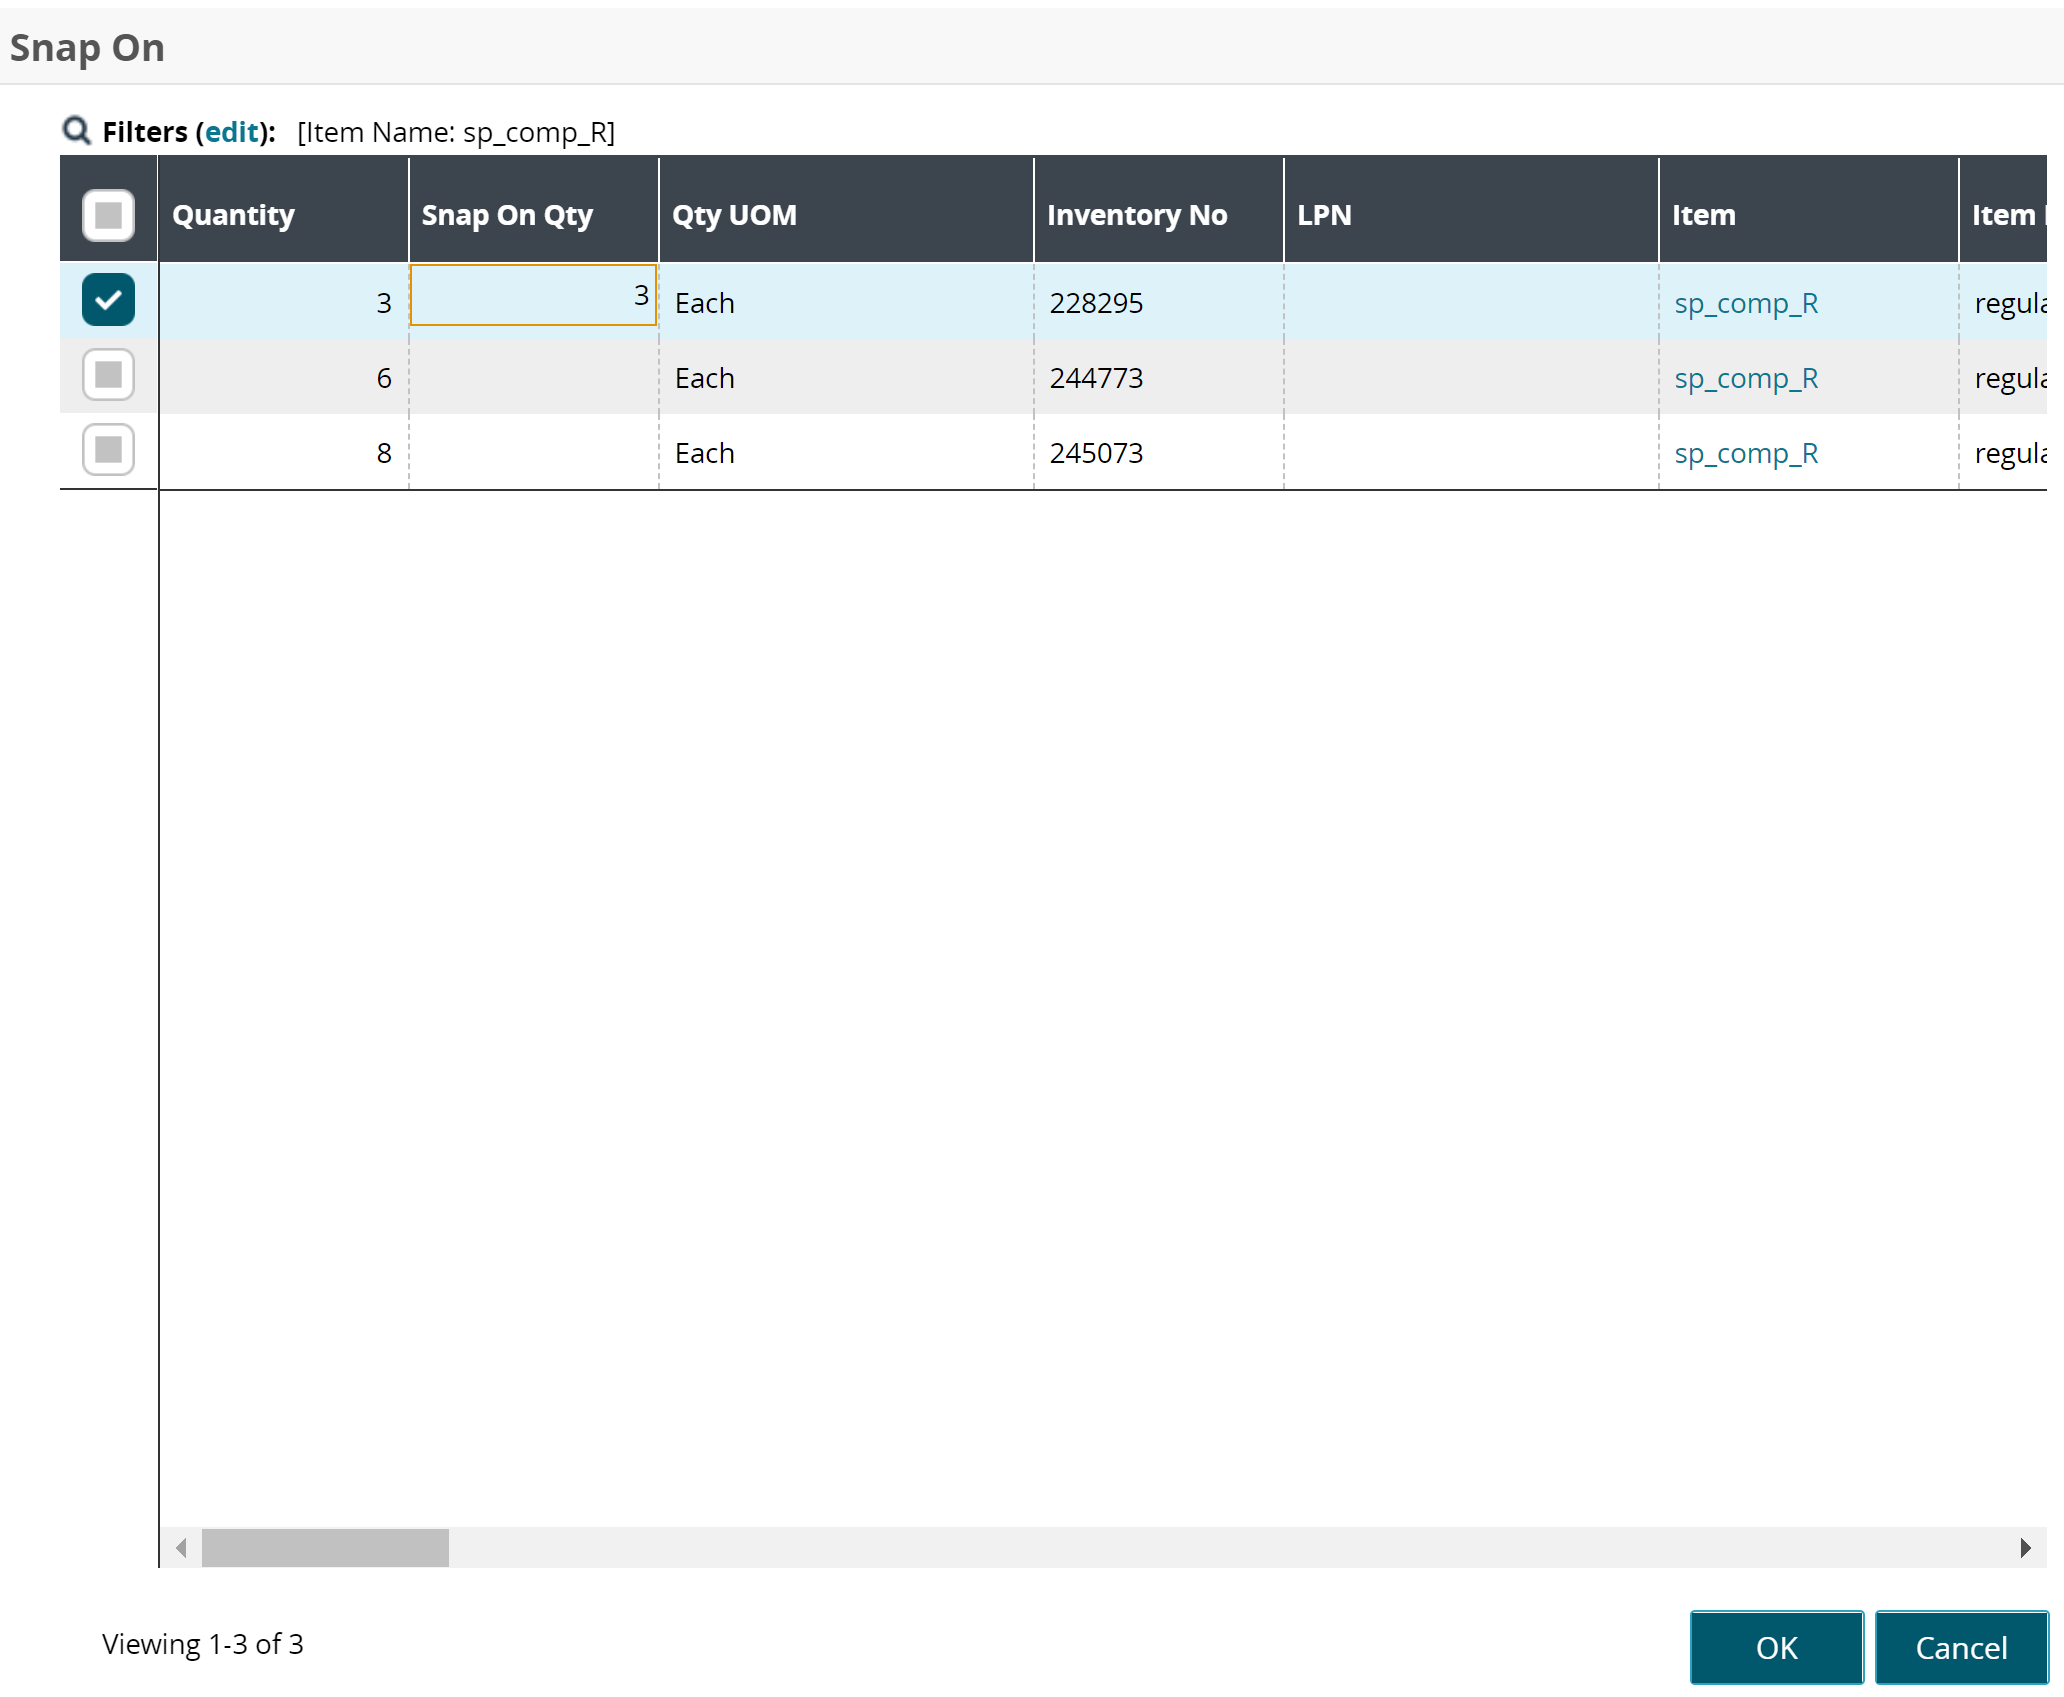
Select the desired record and enter the value for the Snap-On Quantity field.
Click the OK button.
Depending on the values, a new row may display in the Replace popup.Click Replace to replace the components.
The success message appears.