Working with Order Cancellation Approval Process
Users can set policies to manage the cancellation process between buyers and vendors. The new policies are AllowCollaborationOnCancel_PO and AllowCollaborationOnCancel_DO. Once the policy has been enabled, orders are flagged for approval if canceled. This page explains how to set the policy, follow the process workflow, and use the cancellation collaboration status.
Setting the Cancellation Approval Policy
Complete the following steps to set the cancellation approval policy:
Log in to the ONE system.
Click Menus/Favs > Administration > Search Policies.
The Search Policies screen displays.Click the Purchase Order tab for purchase orders or the Deployment Order tab for deployment orders.
The policies for the tab display. (The Purchase Order tab is displayed below.)
Click the pencil icon.
A popup window displays.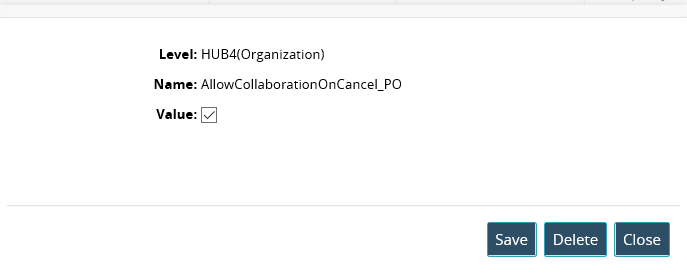
Click the checkbox for Value.
Click the Save button.
The policy displays the value true.
Workflow for the Cancellation Approval Policy
The following steps move between a buyer and a vendor user using the new cancellation approval process. The user is identified at the beginning of each step.
BUYER: places a purchase order or a deployment order, which shows in the system with the status of New.
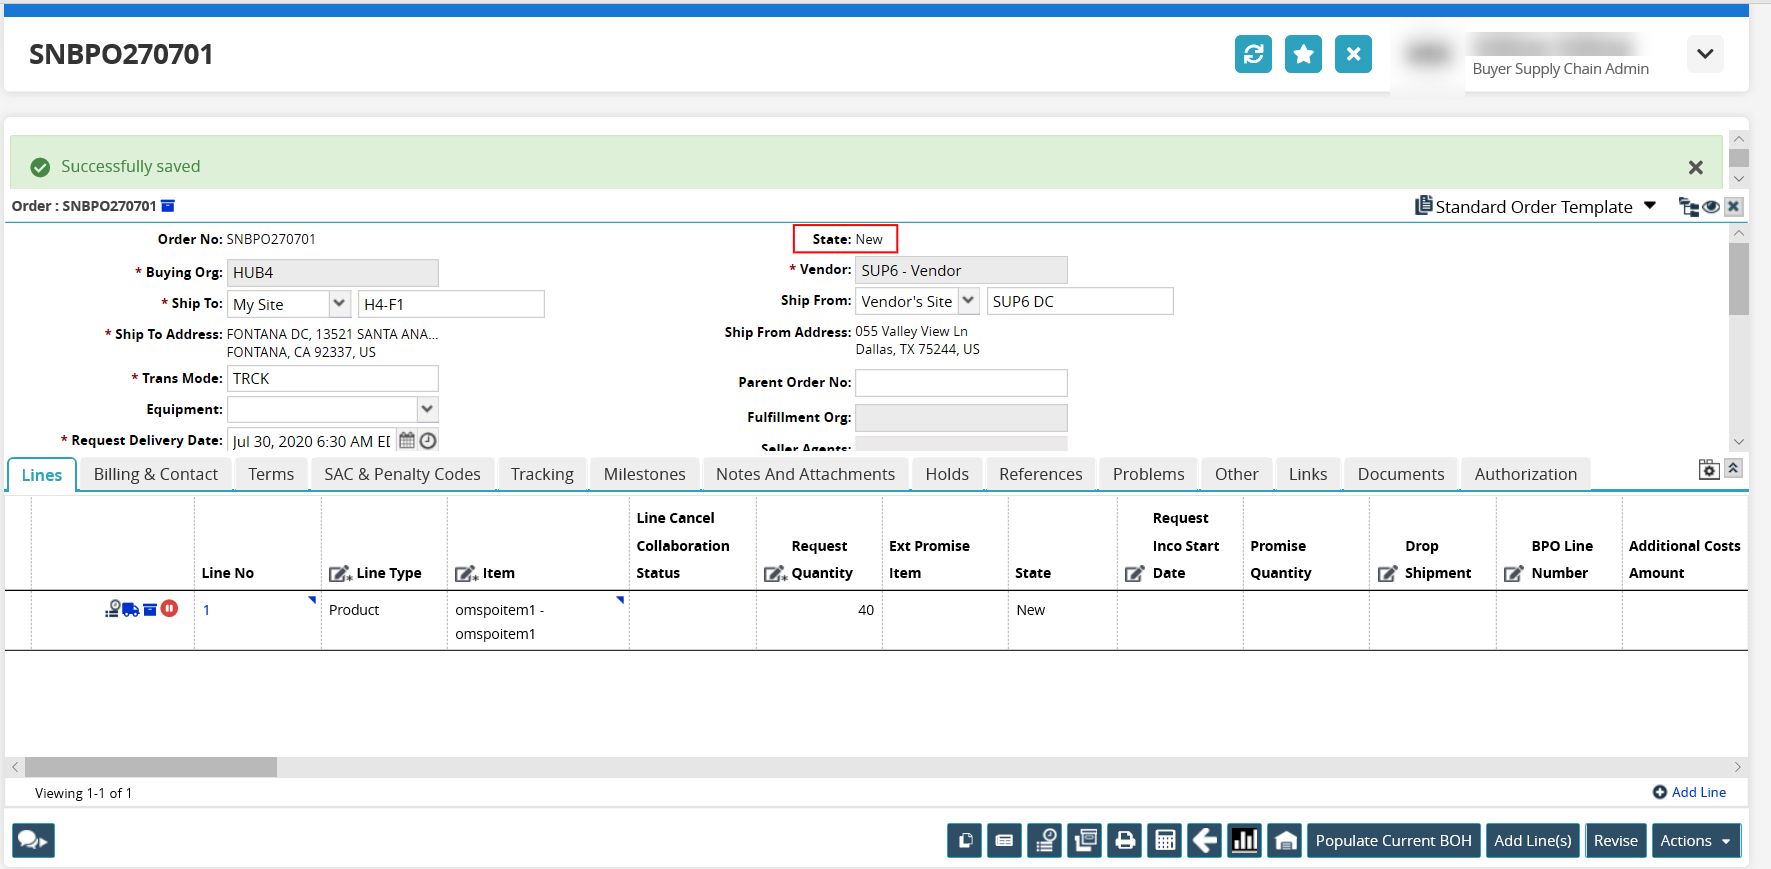
BUYER: requests a cancel at either the order level, the line level, or the request schedule (RS) level for the order as seen in the screenshots below.
Order Level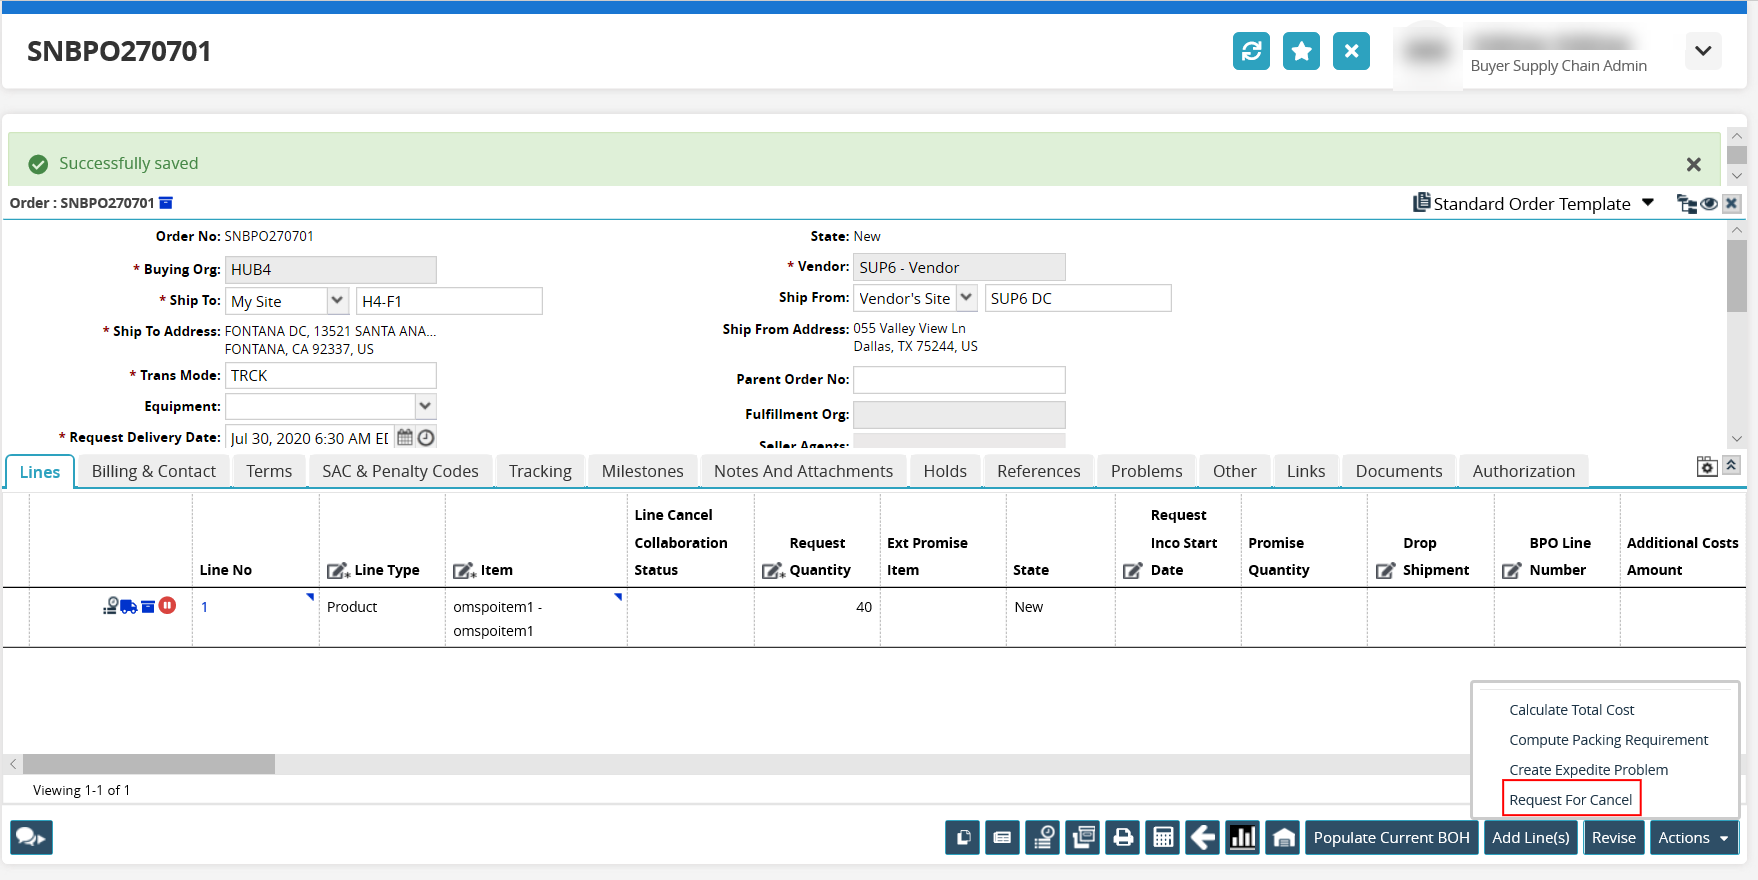
Line Level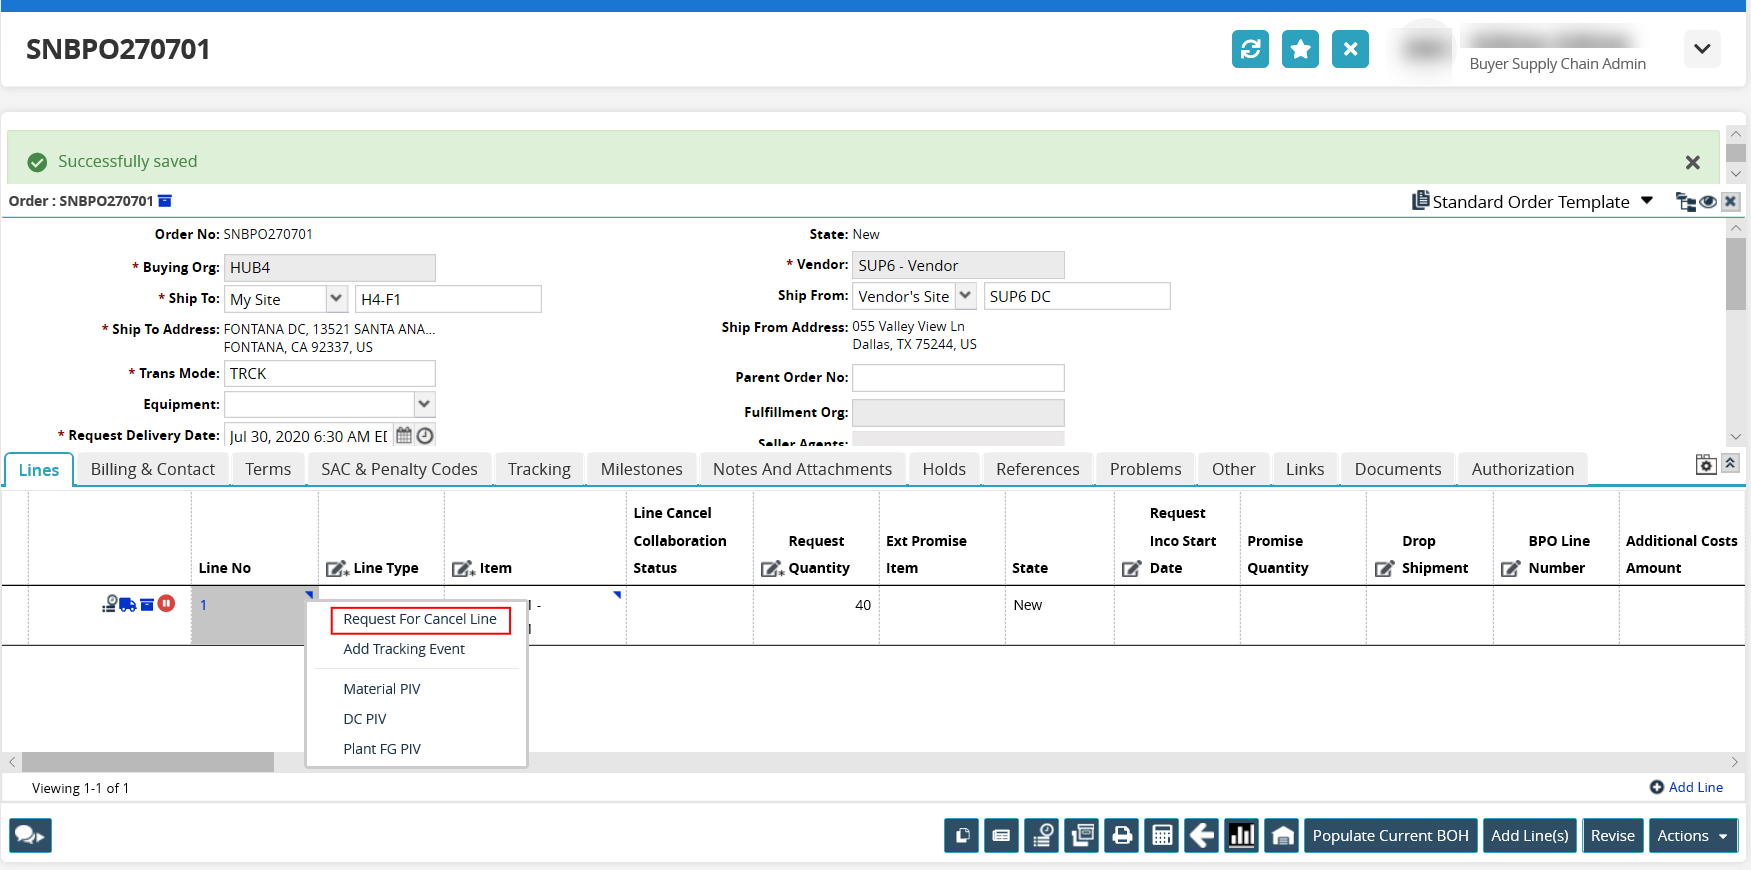
RS Level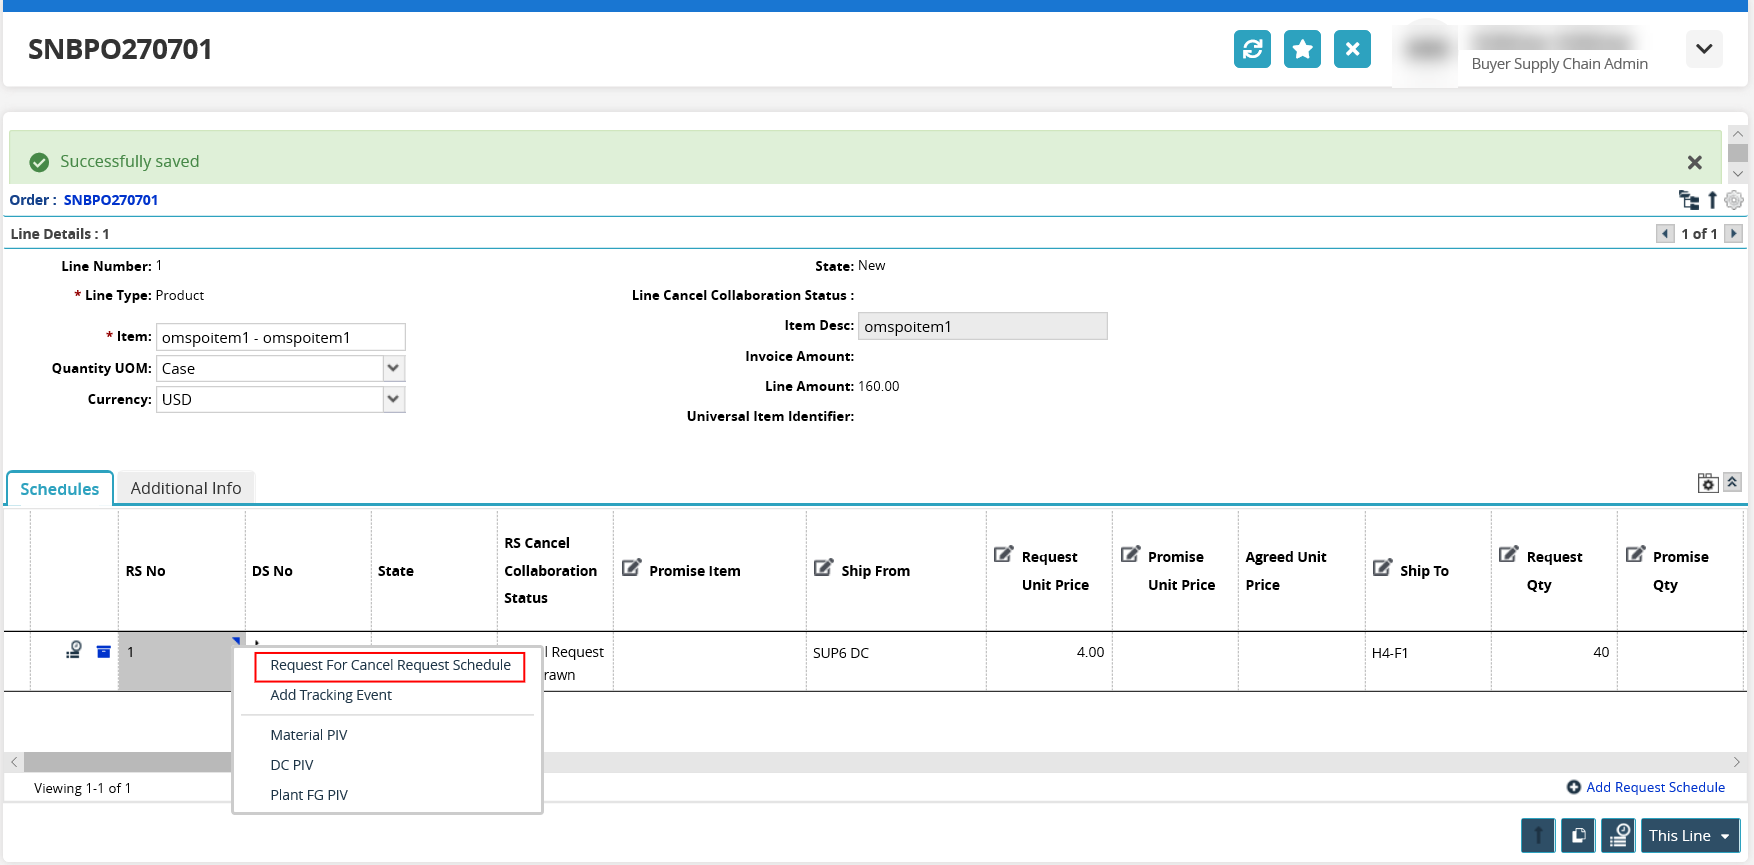
The order screens are updated with the request as seen below for all levels.
Order Level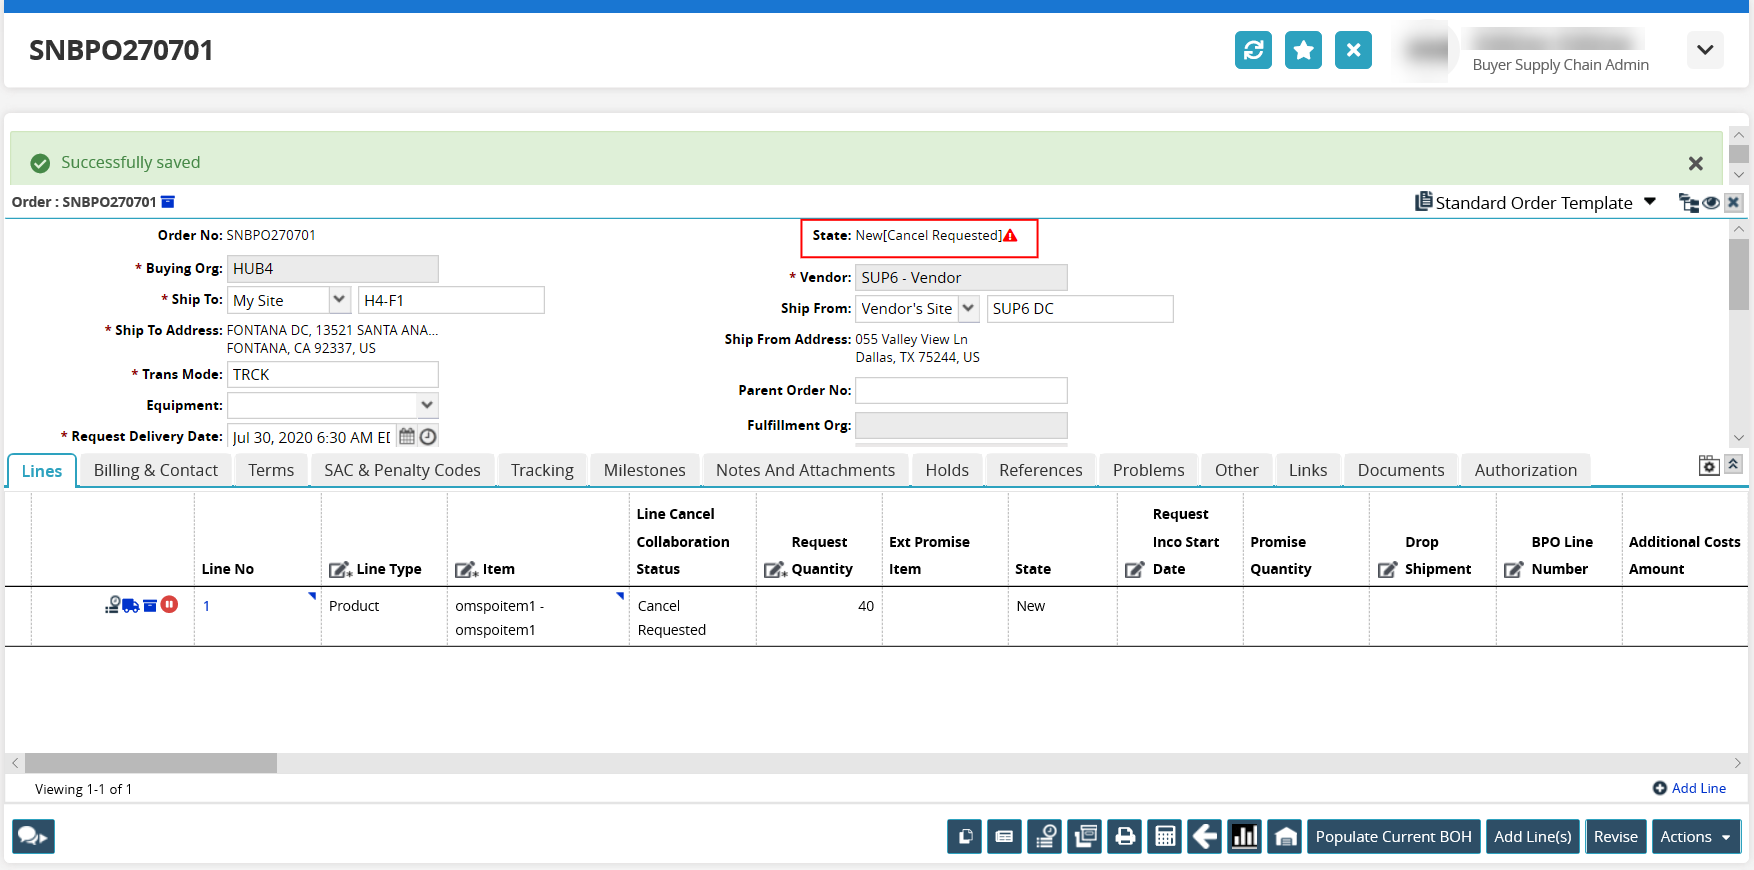
Line Level
RS Level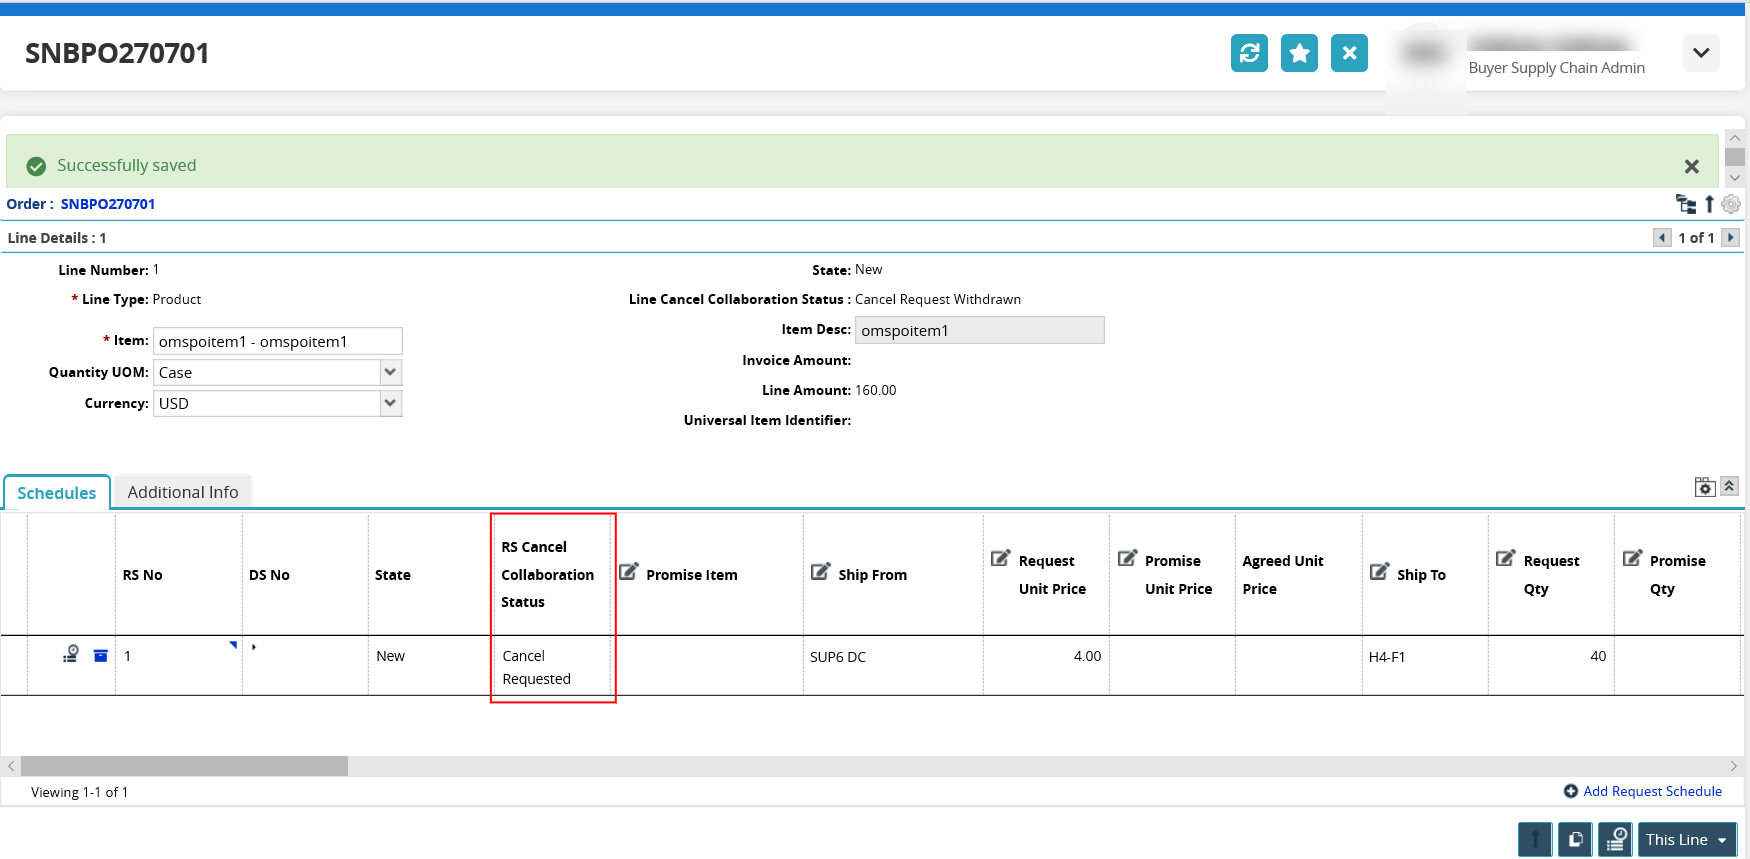
BUYER: can withdraw the cancel request at any of the levels from the same menus as shown above, and the status is updated (Cancel Request Withdrawn) at each level as well.
VENDOR: reviews and chooses to approve or reject the cancel request as seen below for all levels.
Order Level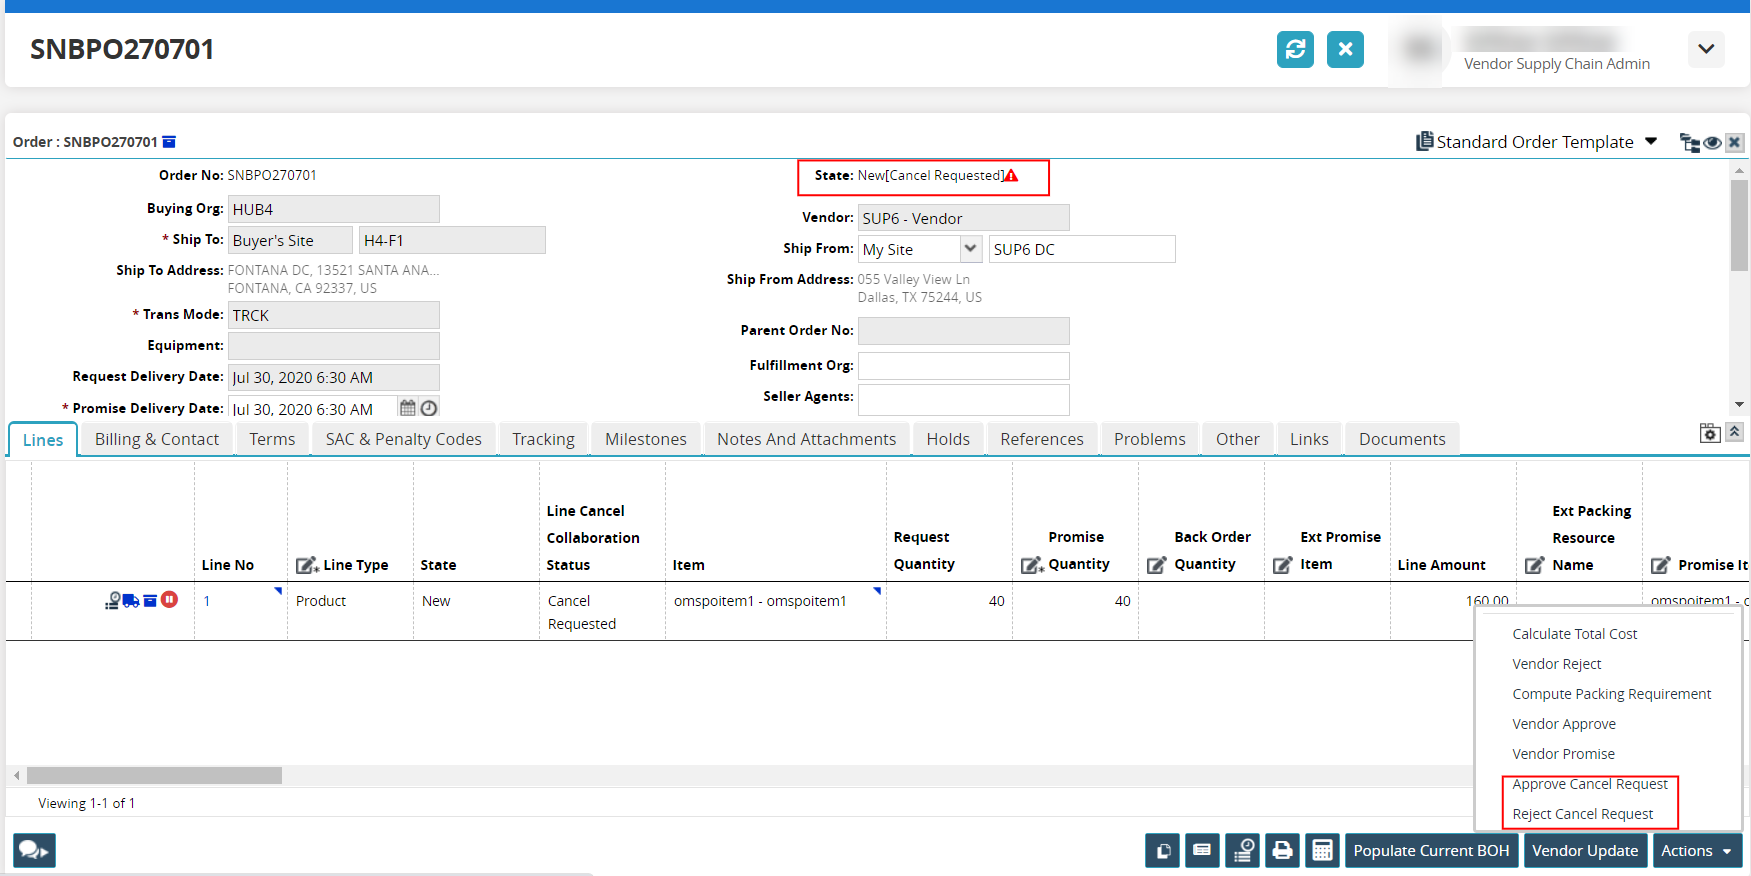
Line Level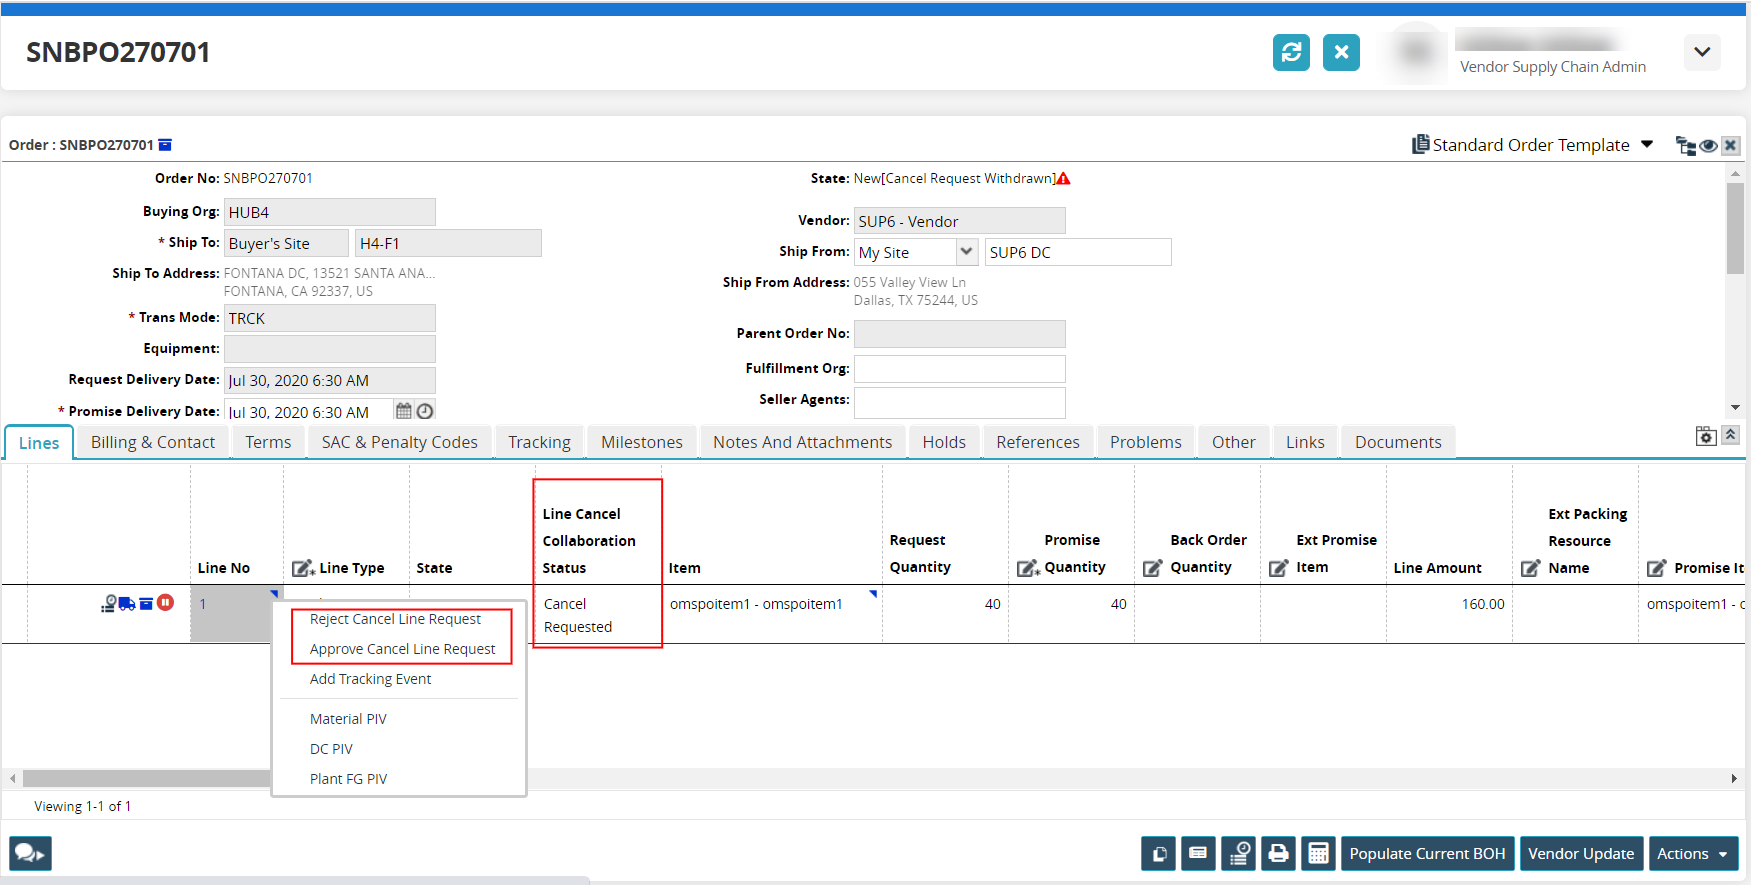
RS Level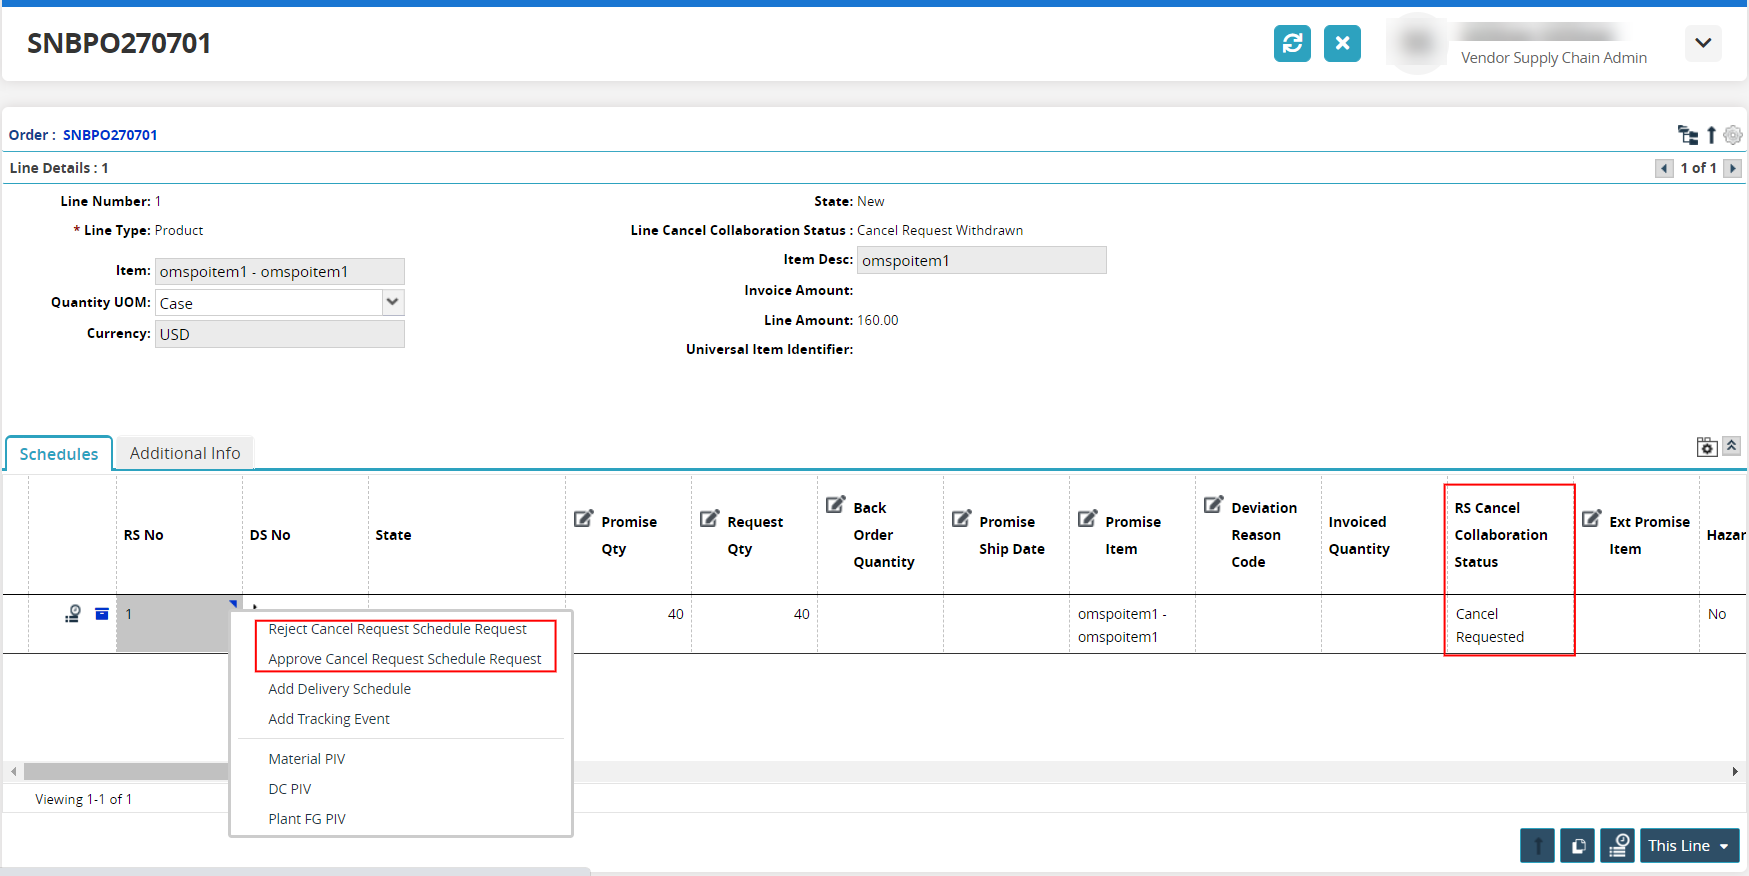
The status updates to either Cancel Request Approved or Cancel Request Rejected at the different levels for both the buyer and the vendor.
Search Criteria Using Cancel Collaboration Status
New fields display on the Search POs and Search DOs screens to allow users to search for POs and DOs by their cancel collaboration status.
Complete the following steps to use the cancel collaboration status as a search criteria.
Log in to the ONE system.
Click Menus/Favs > Order Mgmt > Purchase Orders > Search POs. (Deployment orders follow the same steps.)
The Search POs screen displays. (The new fields may not display, but are available as added fields.)Click the Add Filter link.
The list of available fields to use as filter criteria displays.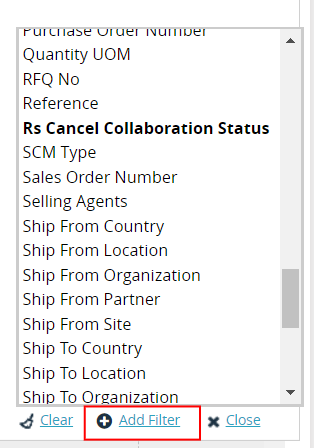
Click the Cancel Collaboration Status, Line Cancel Collaboration Status, or Rs Cancel Collaboration status.
The fields now display on the Search POs screen.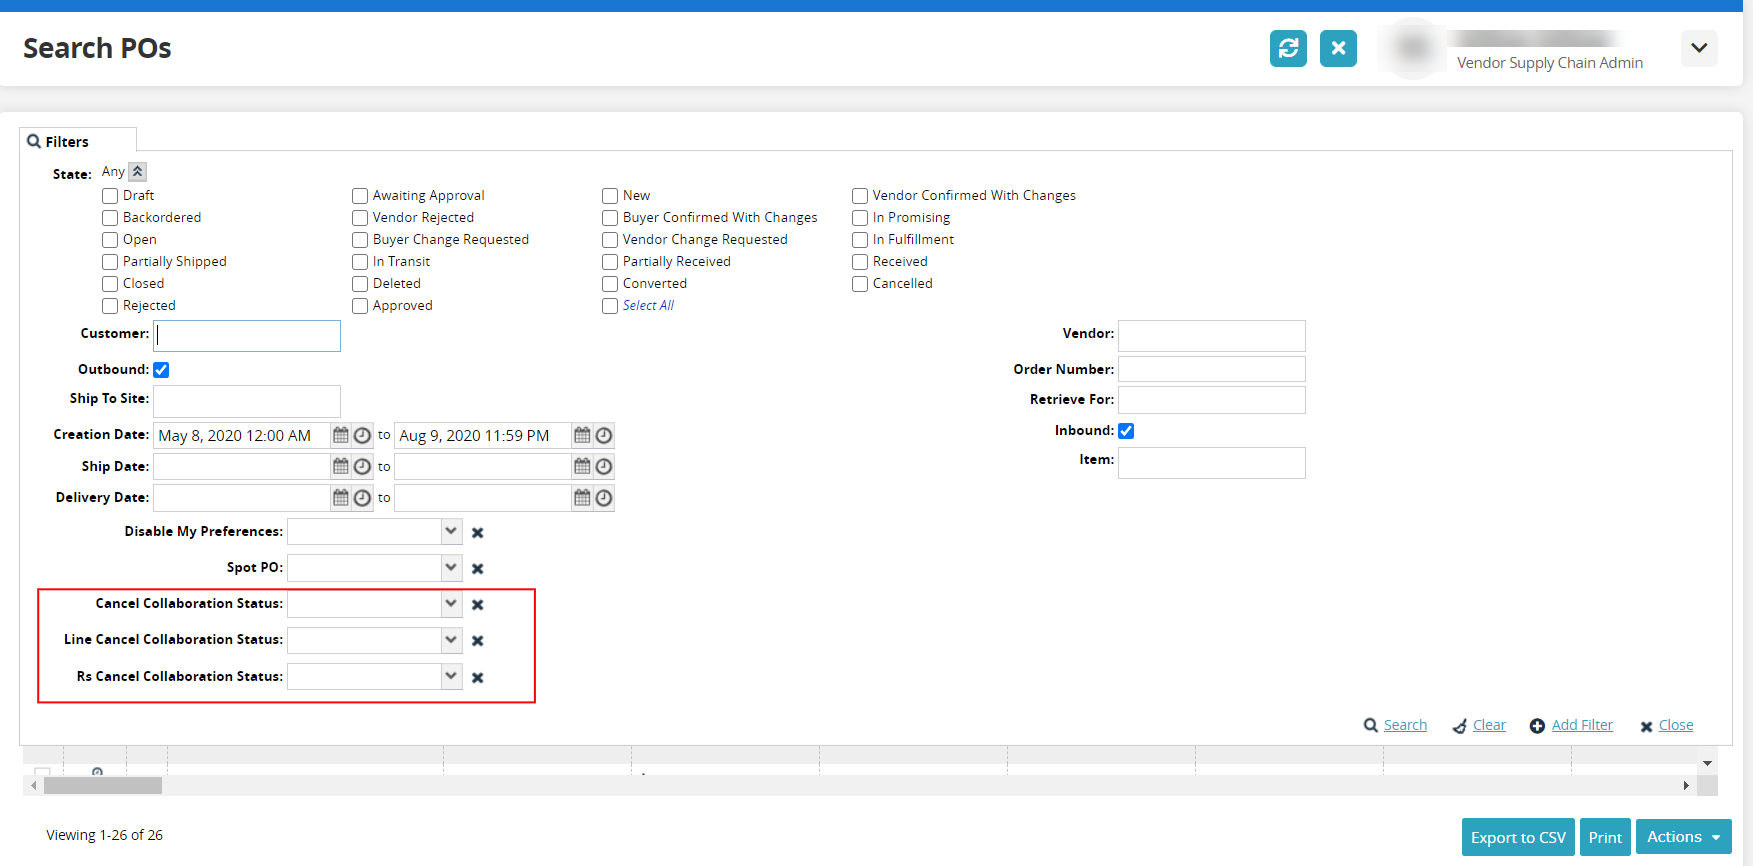
Select a value from one of the new fields.
Click the Search link.
The data results display with columns added for each of the cancel collaboration status levels.