Working with a Bank of Serial Numbers by Site
S erial numbers created for tracking singletons are used for serial-controlled items manufactured or repaired at the site. Users can create a bank (range) of serial numbers with key attributes to identify singletons attached to a specific site. Not all users and roles have access to this particular feature.
Complete the following steps to search a bank of numbers for a site:
Log in to the ONE system.
Click Menus/Favs > Administration > Site > Search Serial Number by Site.
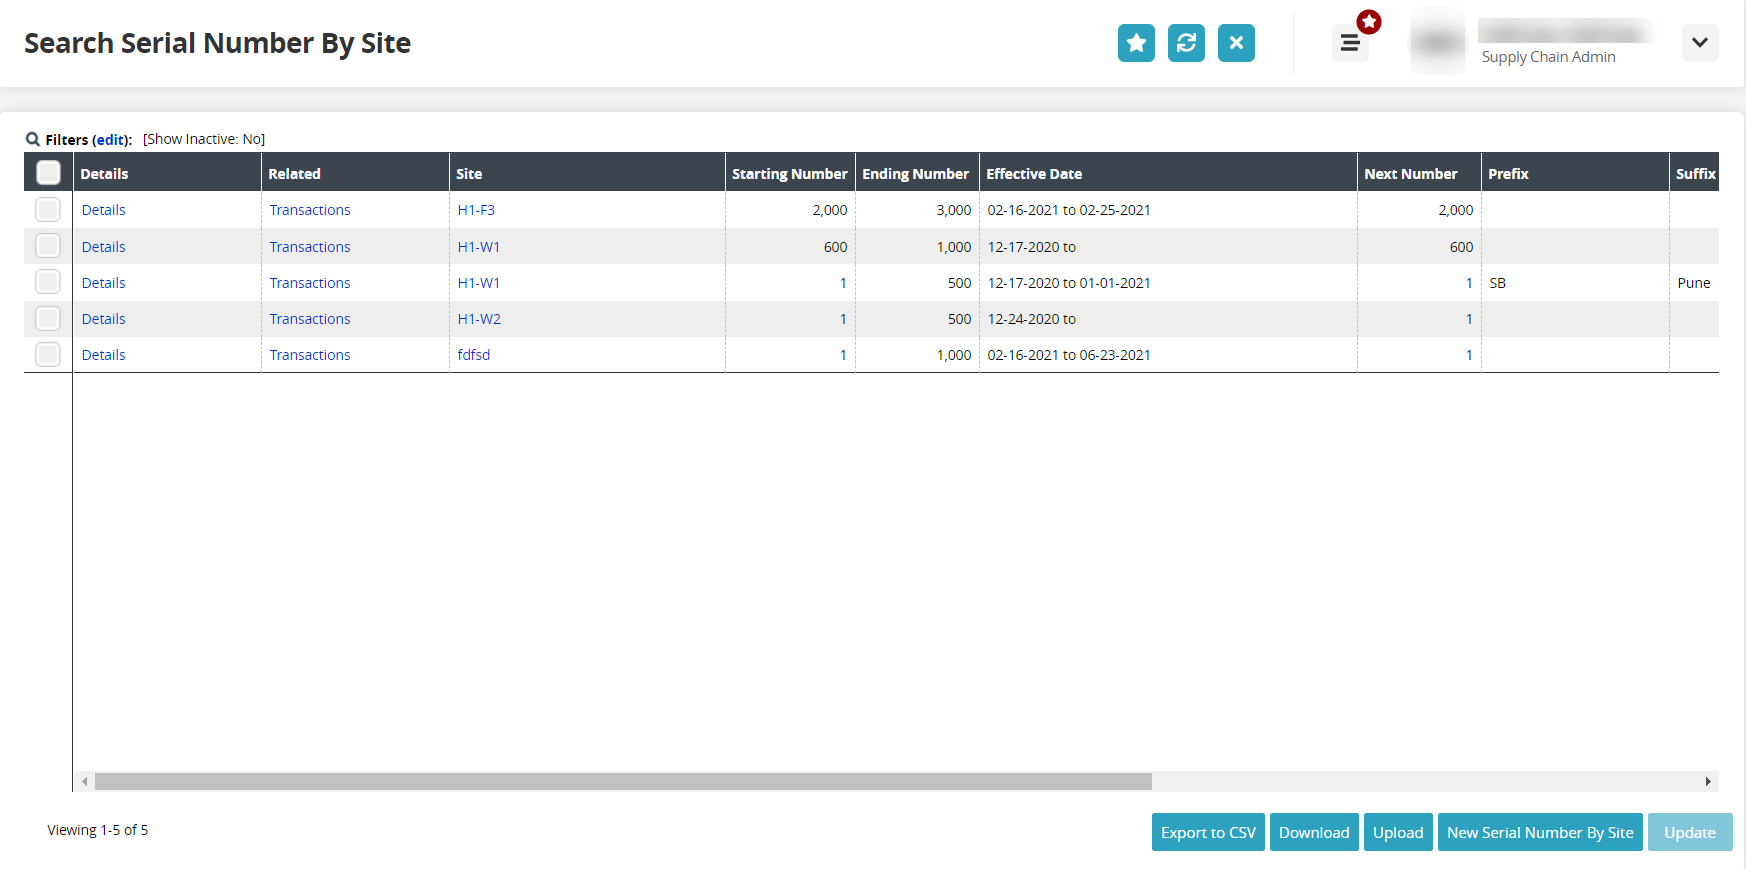
The Search Serial Number by Site screen displays.
Click the Filters (edit) link.
The filters popup displays.
In the Site field, click the picker tool icon to search for a site.
In the Effective Date field, click the calendar icons to select sites within a specific start and end date.
In the Show Inactive field, click the checkbox if you want the search results to show inactive sites. Leaving the field null (unchecked) shows only active sites.
Click the Search link.
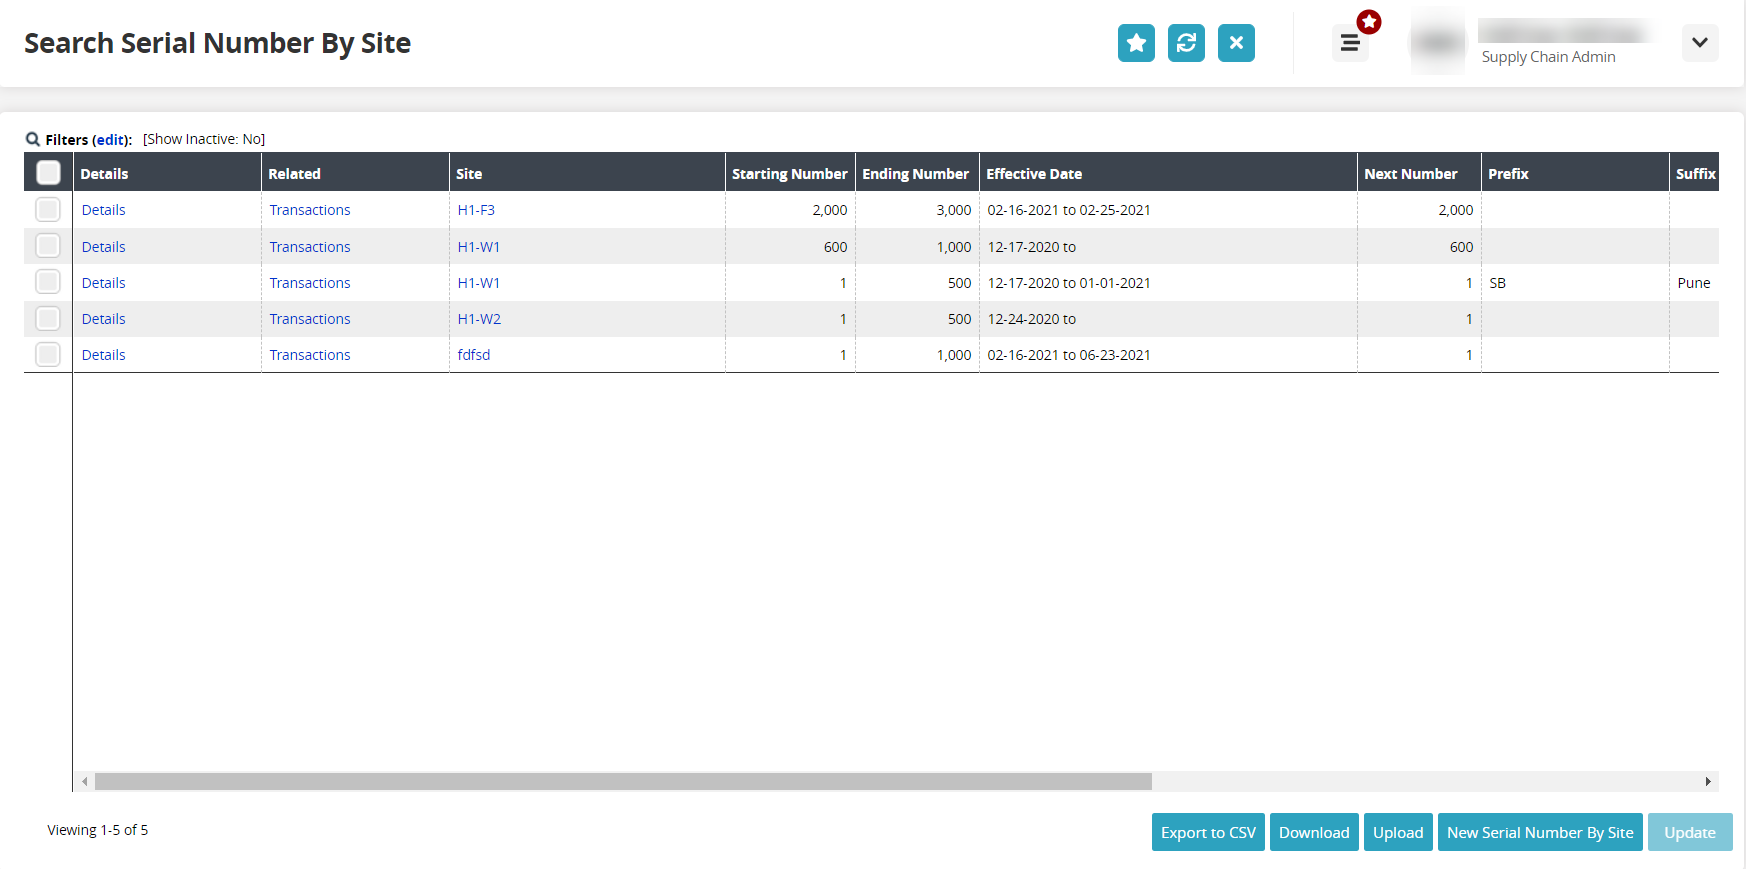
The site search results display.
Complete the following steps to create a new serial number bank for a site:
Log in to the ONE system.
Click Menus/Favs > Administration > Site > Search Serial Number by Site.
The Search Serial Number by Site screen displays.
Click the New Serial Number by Site button.
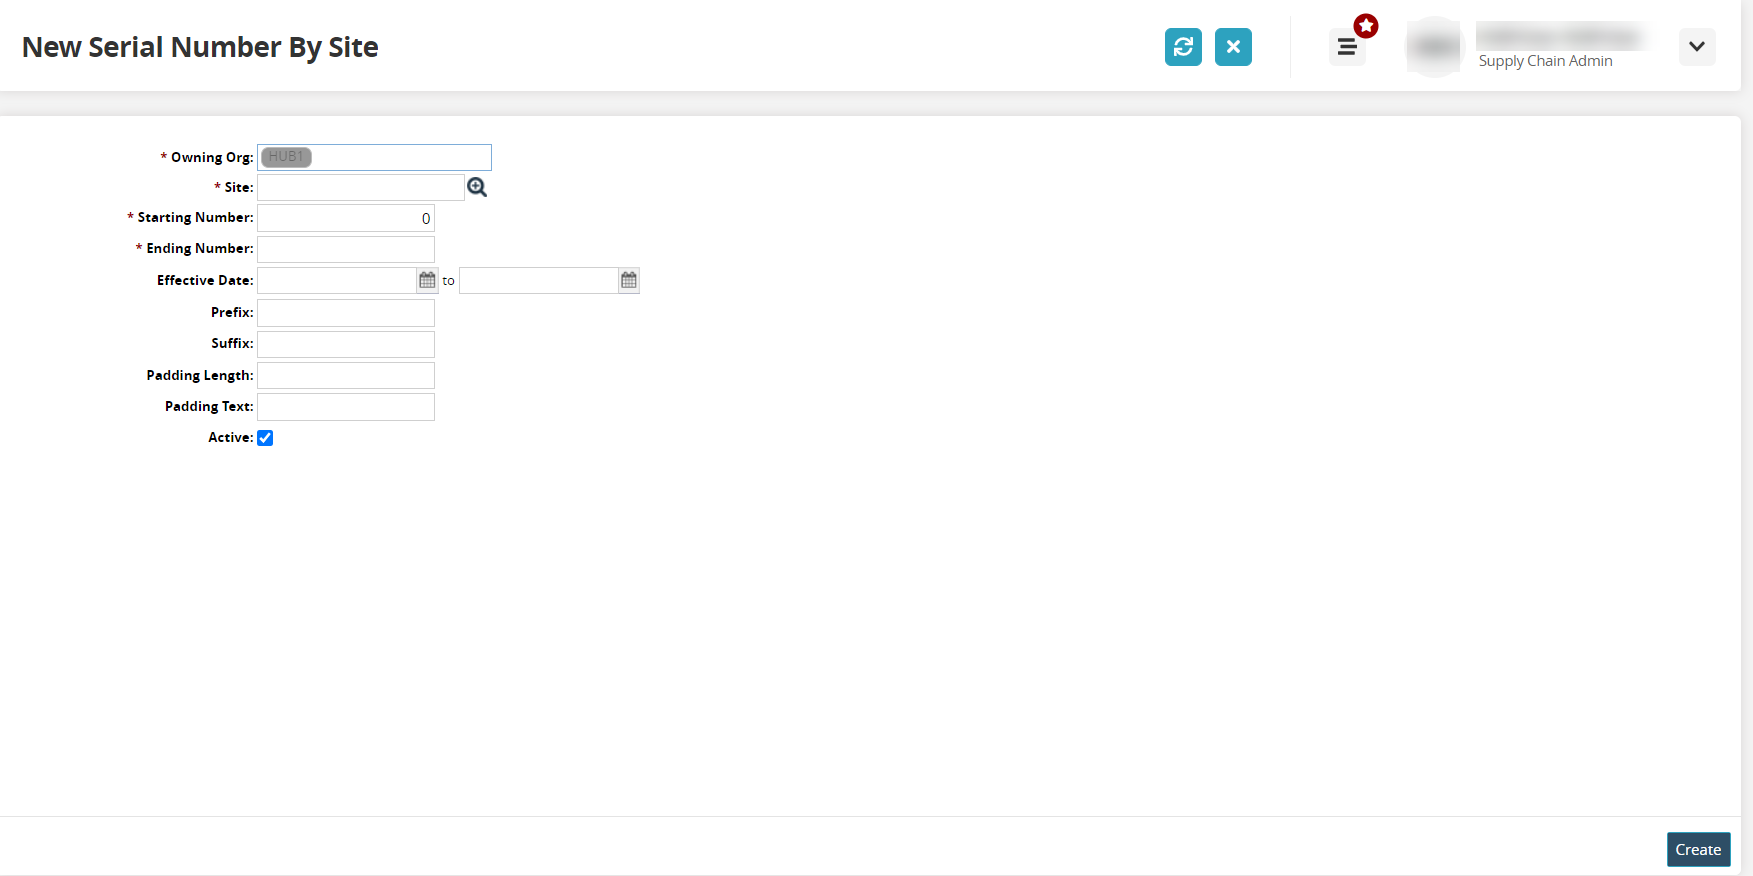
The New Serial Number by Site screen displays.
Complete the following fields for the new serial numbers. Fields with an asterisk ( * ) are required.
Field
Description
* Owning Org
The organization that owns the site and range of serial numbers.
* Site
Use the picker tool to select the site.
* Starting Number
Type in the first number of the serial bank (range) of numbers.
* Ending Number
Type in the last number of the serial bank (range) of numbers.
Prefix
Type in a prefix to use for the serial number
Suffix
Type in a suffix to use for the serial number.
Padding Length
Type in the length of padding for the serial number.
Padding Text
Type in the character padding for the serial number.
Active
Check the checkbox to define the bank of serial numbers as active.
Click the Create button.
A green success message displays.