Working with the Load Consolidation TOSX Engine
This topic describes how to configure and run the Load Consolidation TOSX engine.
Complete the following steps to configure and run the Load Consolidation TOSX engine:
L og in to the ONE system.
Click Menus/Favs > Planning > Load Consolidation TOSX. In the NEO UI, users can click on the Menus/Favs icon on the left sidebar and type in the name of the screen in the menu search bar. For more information, see "Using the Menu Search Bar."
The Load Consolidation TOSX screen opens.
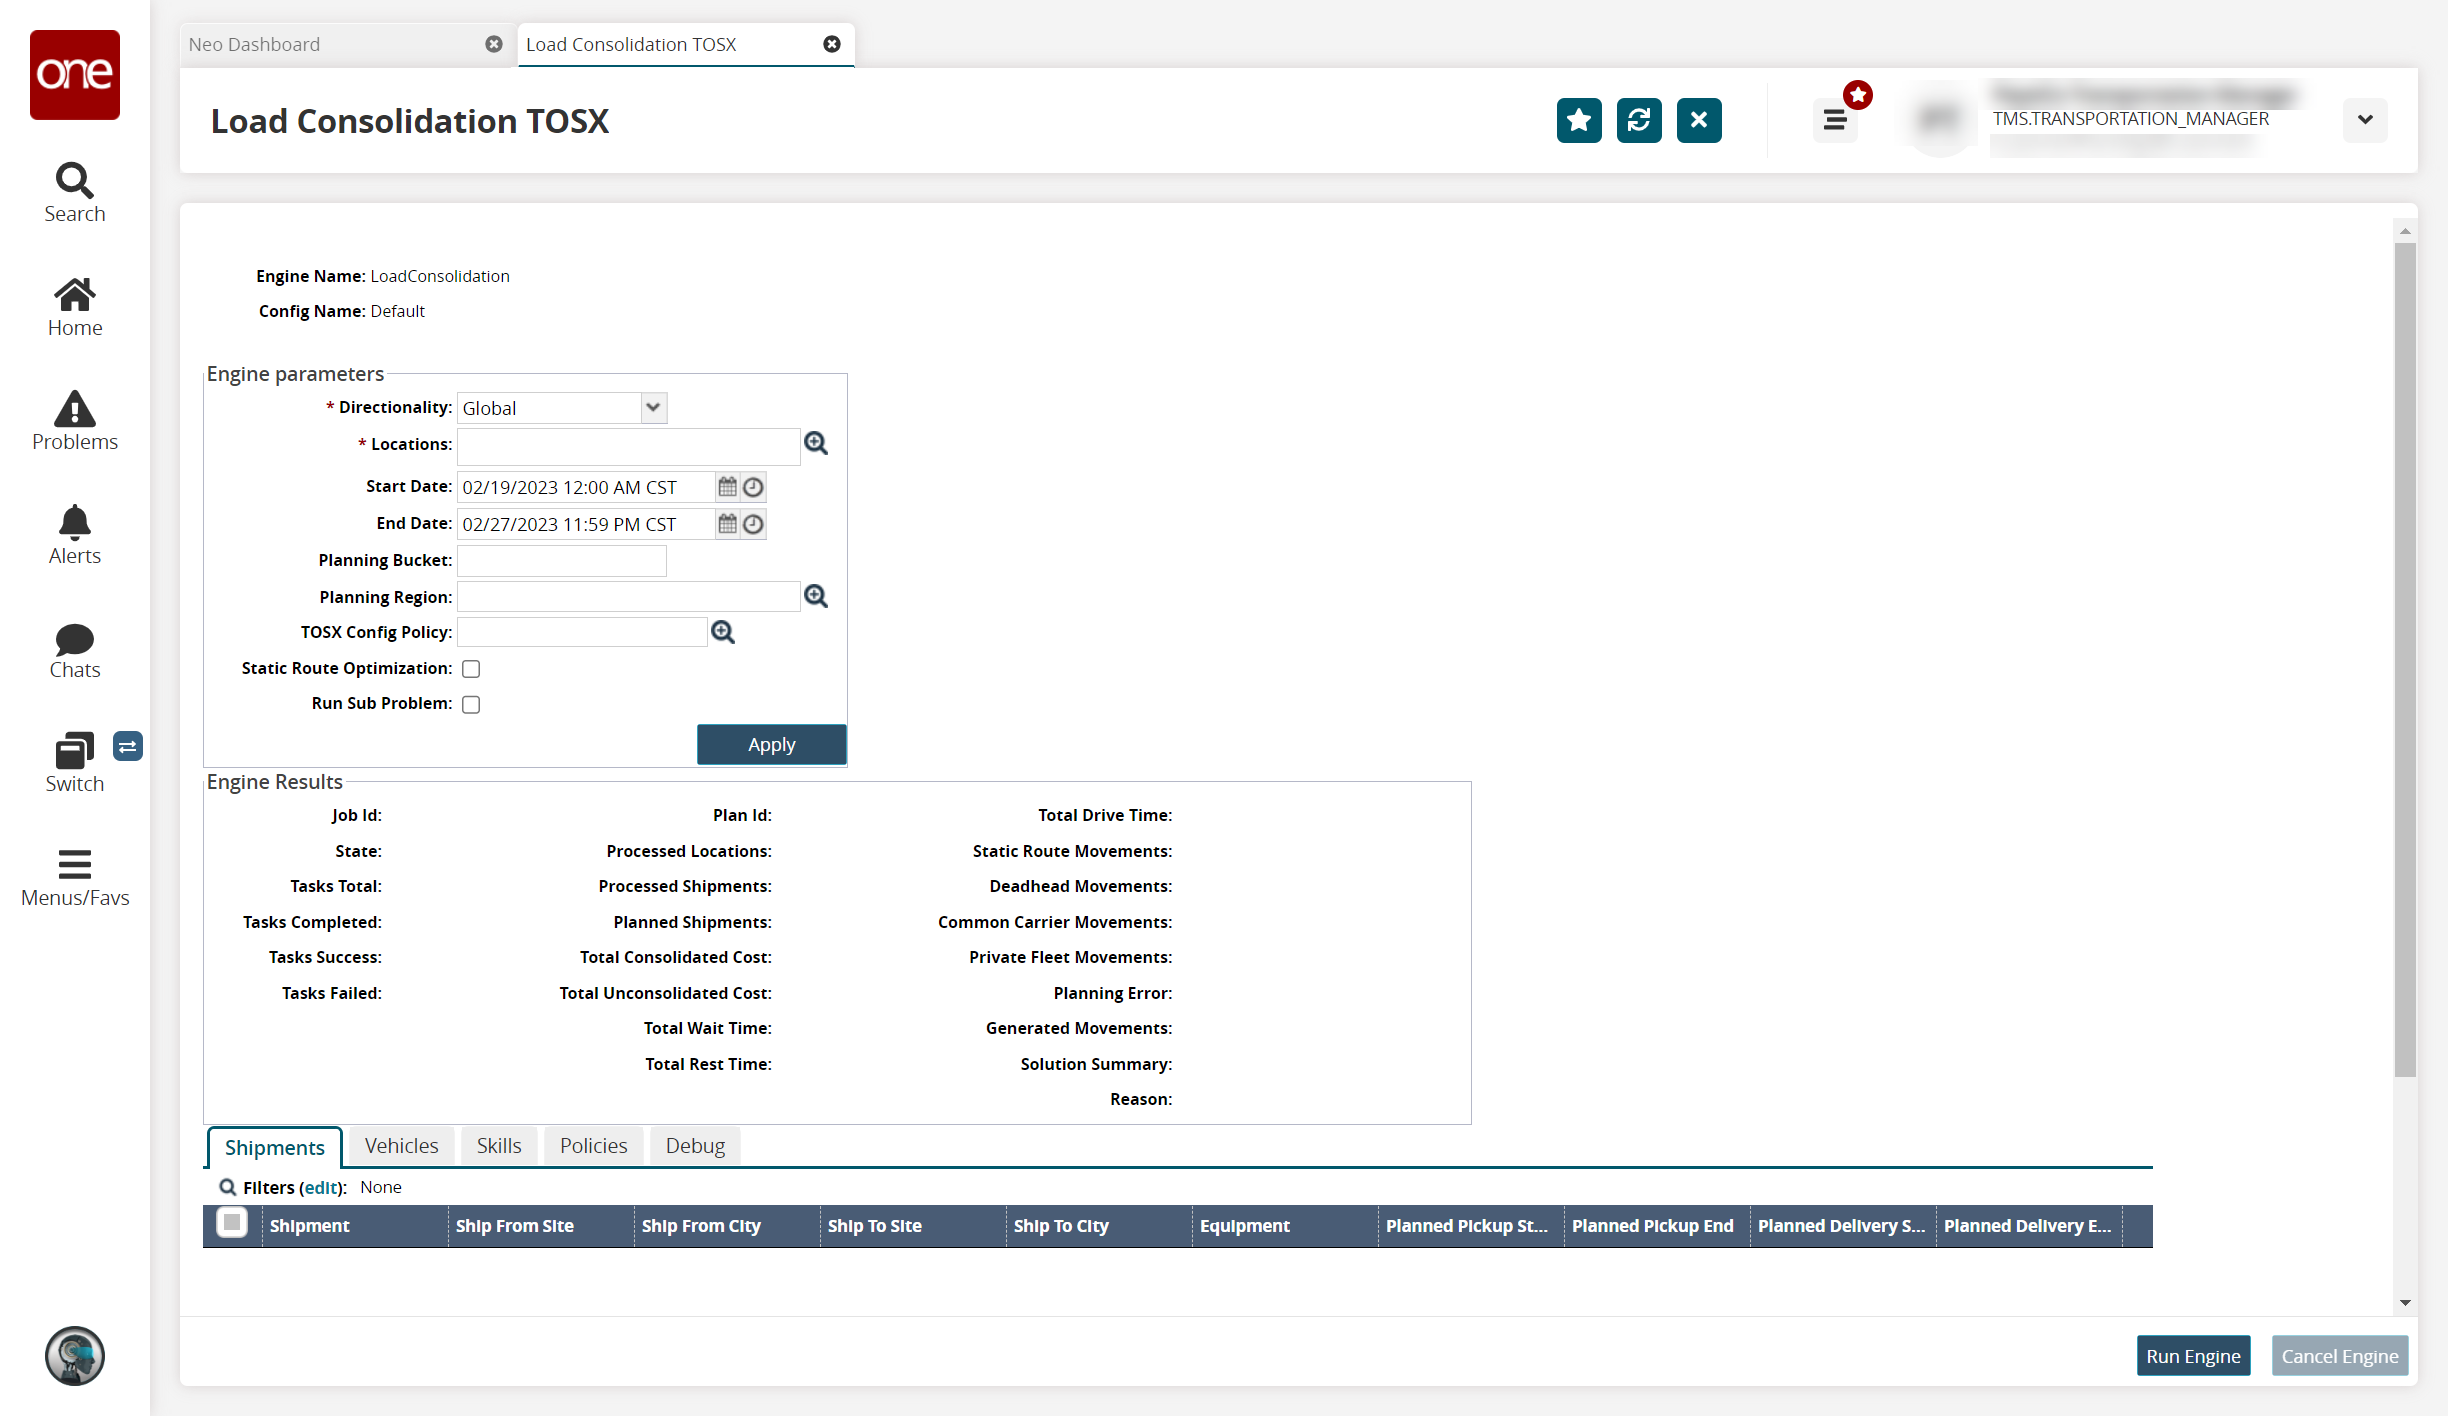
Fill out the following fields. Fields with an asterisk ( * ) are required.
Name
Description
* Directionality
Select the direction for filtering and selecting shipments to run through the engine. The available options are Global, Outbound, and Inbound.
* Locations
Use the picker tool to select the sites associated with shipments you want to consolidate.
Start Date
Use the calendar and clock tools to set the start date for filtering and selecting shipments to run through the engine.
End Date
Use the calendar and clock tools to set the end date for filtering and selecting shipments to run through the engine.
Planning Bucket
Enter a value to filter for a specific set of shipments. The values for this field are captured in the Planning Bucket field for a shipment in the Other Info tab of the shipment detail.
Planning Region
Use the picker tool to select a planning region to select all sites in a certain area.
TOSX Config Policy
Use the picker tool to select a configuration policy.
Static Route Optimization
Select this checkbox to run the engine specifically for optimizing static routes.
Run Sub Problem
Select this checkbox to run only a part of the selected shipment or shipments through the engine.
Click the Apply button.
The relevant shipments, vehicles, skills, and policies display in their respective tabs.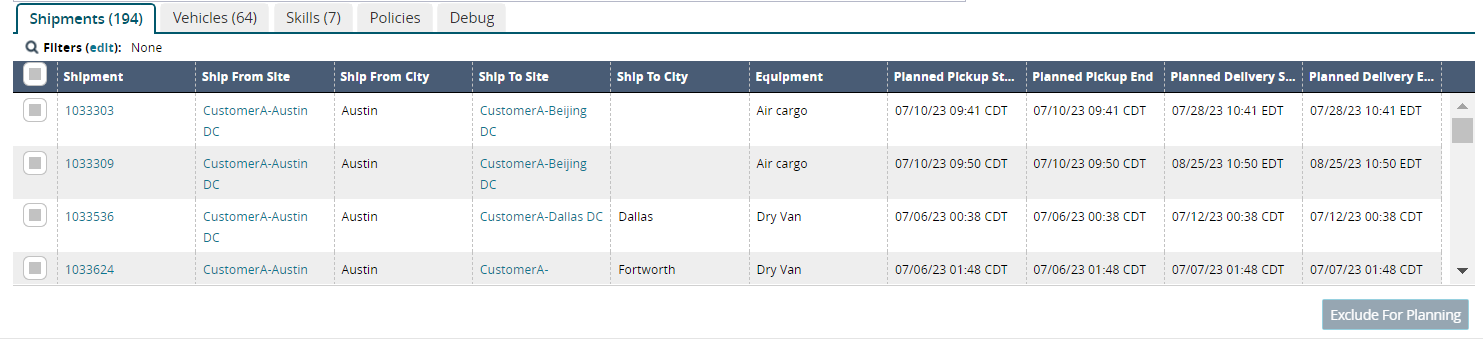
Click the Filters (edit) link on the Shipment tab to filter the shipments based on pickup and/or delivery commodity codes.
Check the box next to any entity you wish to exclude from the planning scenario on the Shipments, Vehicles, and Skills tabs.
Click the Exclude for Planning button.
The entities are removed from the tables on these tabs.Click the Policies tab.
The policies for each site selected as a parameter display pickup and delivery options.
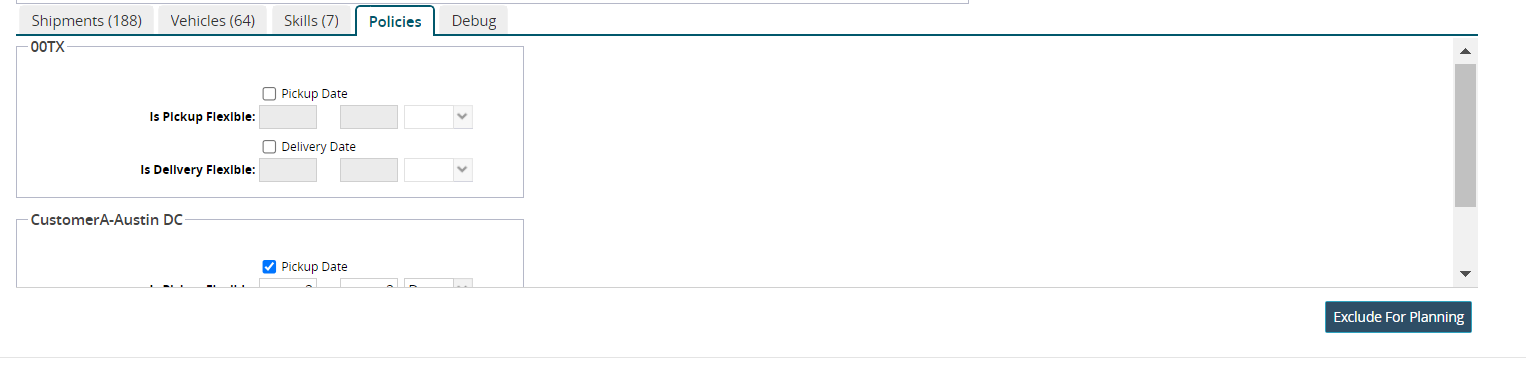
Check the Pickup Date and/or Delivery Date boxes.
The fields for flexibility become active.Enter numerical values for the first and second fields; select Day, Hour, or Minute from the dropdown list in the third field.
Repeat for any other sites.
Click the Debug tab.
Debug options display.
Check the box for Write Request and/or Write Response for the options to write the results.
Click the Run Engine button to run the selected shipments through the planning engine.
The results display in the Engine Results box.Click the Cancel Engine button during the run to cancel.