Adding Line Items to Contracts
You can add a single or multiple line items to contracts.
Complete the following steps to add line items to a contract:
Click the Add Line button.
A new contract line screen displays.
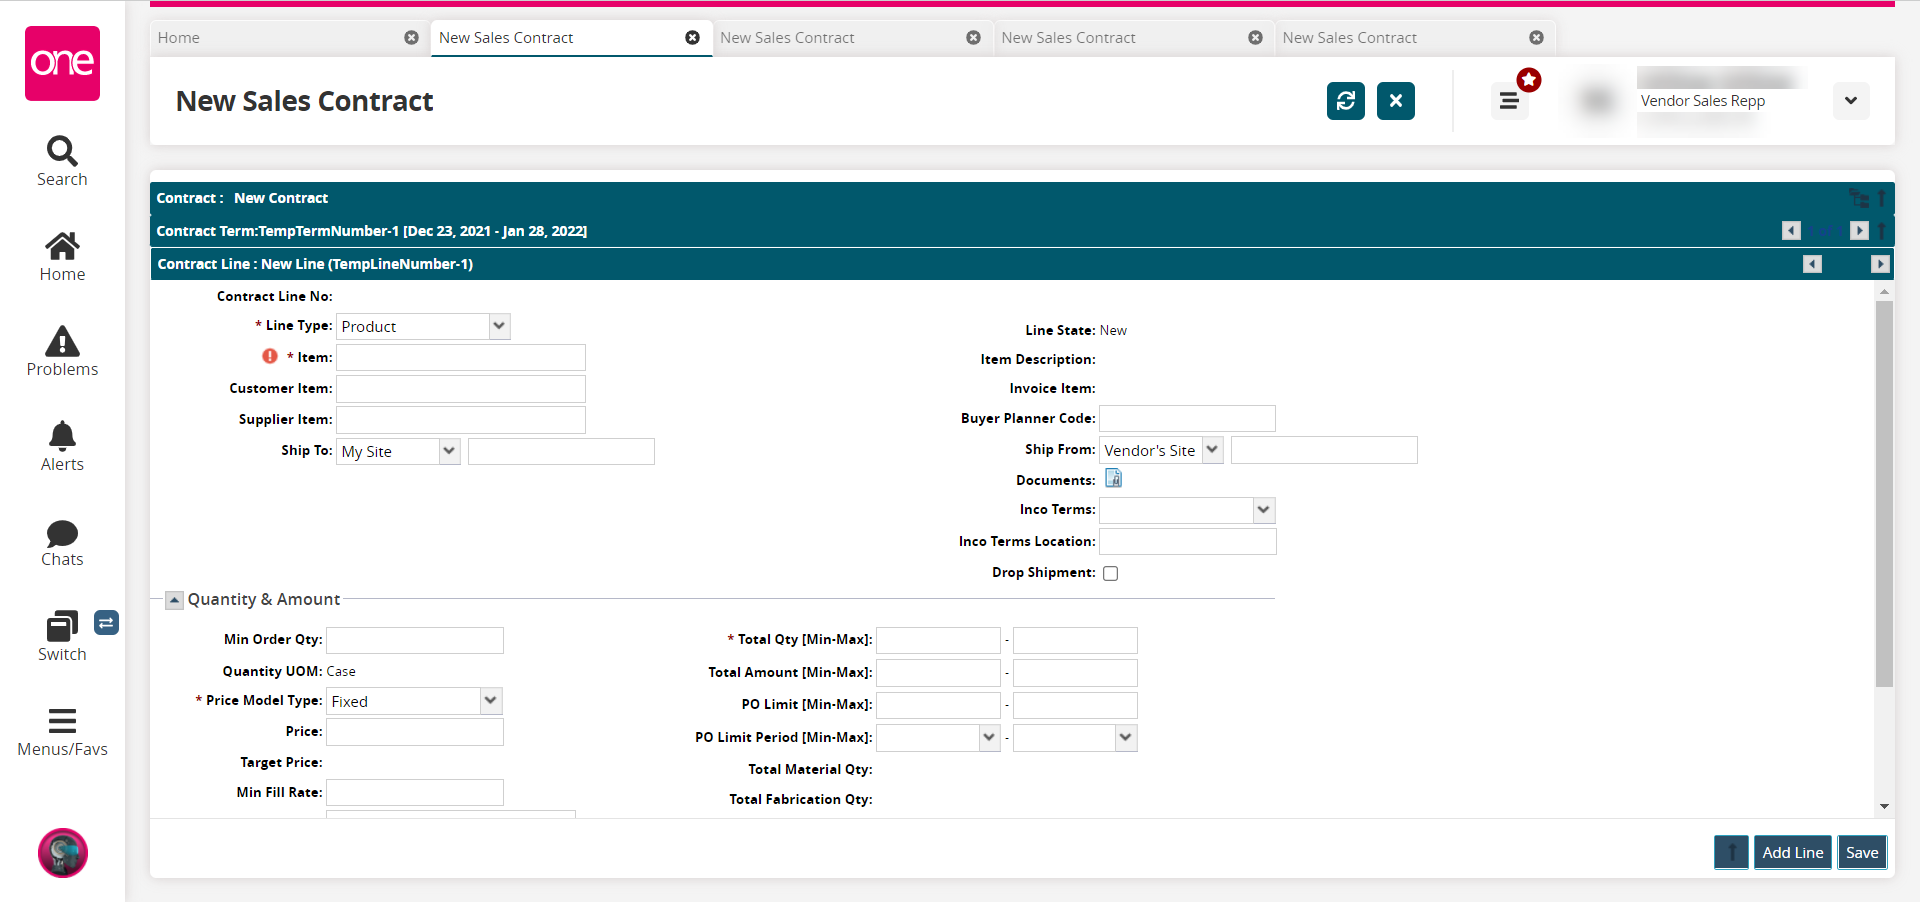
Enter values for fields described in the table below. Fields with an asterisk ( * ) are required.
Field
Description
Contract Line No
This field auto-populates with a system-generated number once the line item is saved to the contract.
* Line Type
Select the line type for the terms from the dropdown list.
* Item
Enter the item name associated with the contracts terms.
Customer Item
Enter the customer item name associated with the line item.
Supplier Item
Enter the supplier item associated with the line item.
Ship To
Select the type of location to ship to from the dropdown list in the first field. Select the specific location in the second field.
Line State
This field auto-populates with the lines' state.
Item Description
This field auto-populates with the item's description when an item is entered.
Invoice Item
This field auto-populates the invoice item associated with the line item.
Buyer Planner Code
Enter the code for the buyer planner.
Ship From
Select the type of location to ship from from the dropdown list in the first field. Select the specific location in the second field.
Documents
Click the icon to attached documents to this line item. This field is only available after the contract has been saved.
Inco Terms
Select the Inco Terms (International Commercial Terms: internationally recognized terms of sale) from the dropdown list.
Inco Terms Location
Enter the Inco Terms location.
Drop Shipment
Click this checkbox to enable dropshipping for this contract.
Note
The system sends a notification to the CPG Buyer Planner whenever a new contract is created or approved. The system also creates a new AVL record for each new contract line item.
Click the up arrow on the Contract Term heading to return to the Terms tab of the contract.
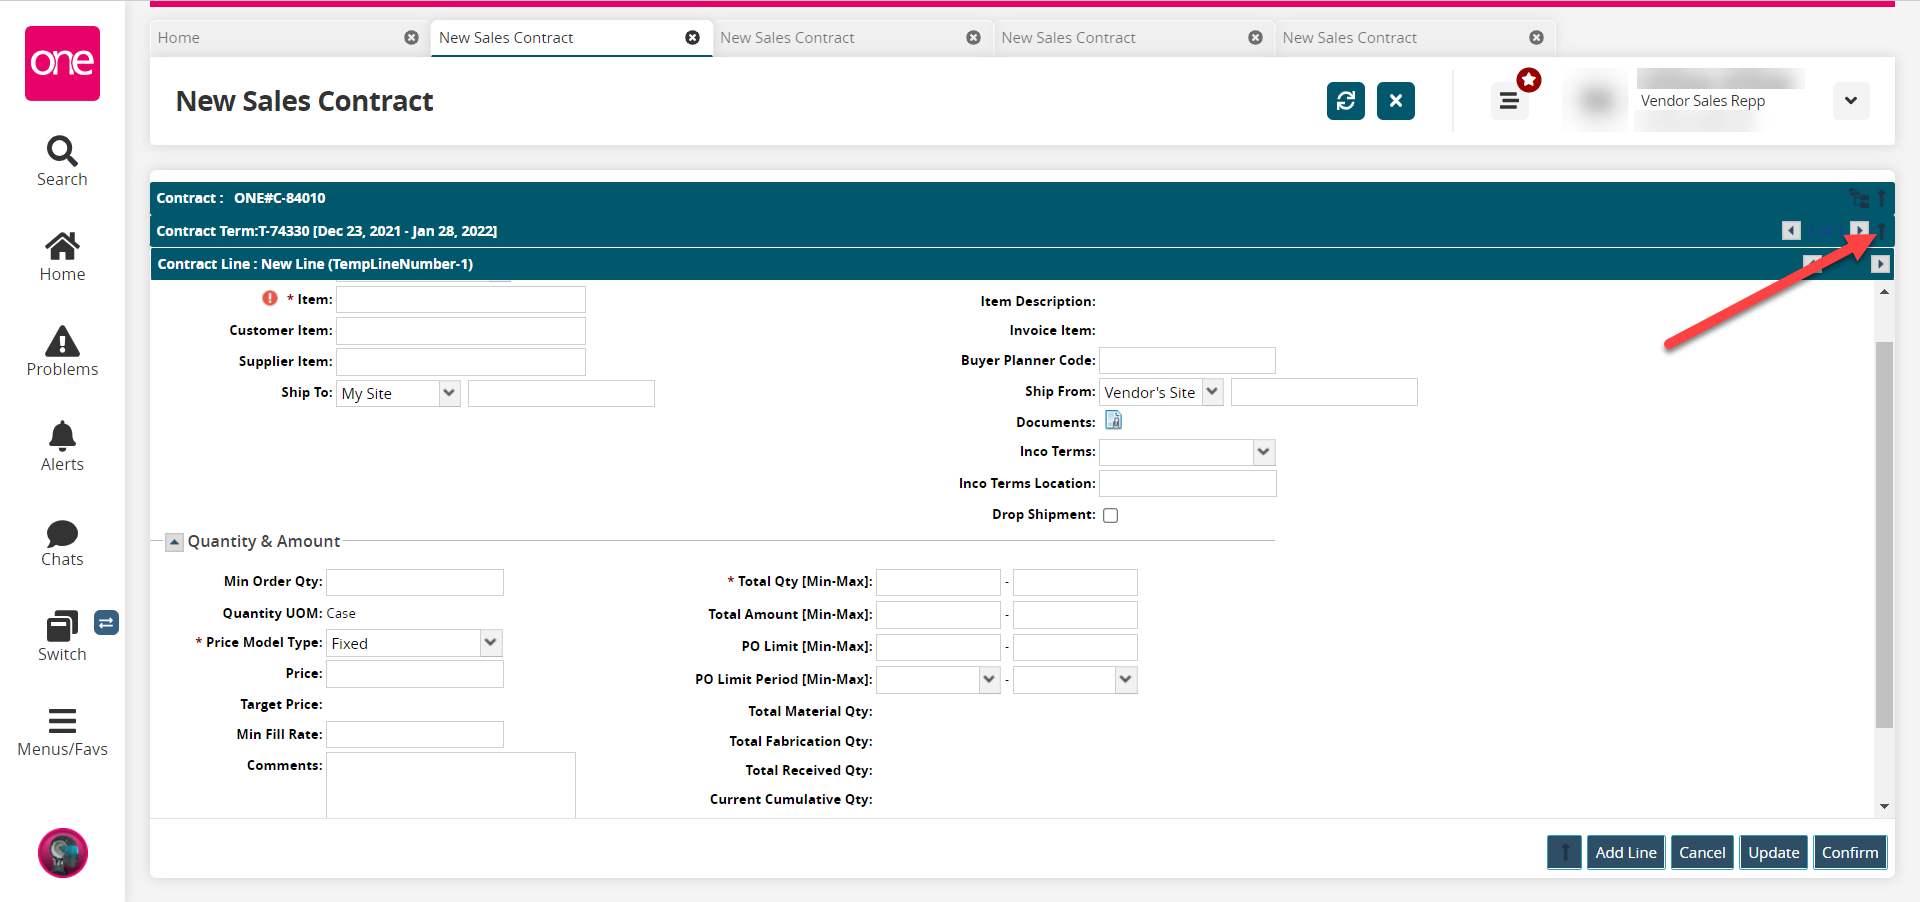
Click on the Add Line button to add another line item.
The current line is added and a new New Line section displays.Click on the Confirm button to confirm saving and adding this line item to the terms of the contract.
Click on the Cancel button to cancel this line item.
Click on the Update button if information on an existing line item has been updated.
The following sections can be expanded and collapsed by clicking on the arrows on the left of the section headers.
Quantity & Amount
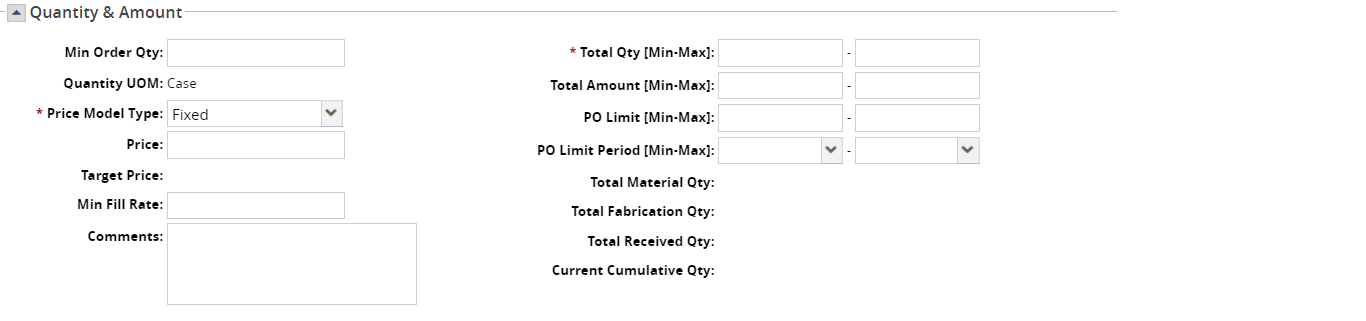
Enter values for fields described in the table below. Fields with an asterisk ( * ) are required.
Field
Description
Min Order Qty
Enter the minimum quantity for orders.
Quantity UOM
This field auto-populates with the unit of measure as it was defined for the item in the system.
* Price Model Type
Select the type of pricing model used for this line item from the dropdown list.
Fixed - the pricing stays fixed according the terms set in the contract.
Price Per - the pricing is set based on the price unit of measurement (UOM). Selecting Price Per in the Price Model Type field enables a Price Per field in the Quantity & Amount section.
Time Varying - the pricing is only applicable during a set time. If you select this option and click on the Price field, the following popup window displays to set the conditions for this line term. Fields with an asterisk (*) are required.
a. Click on the Add period button to add a row to the table.
b. Click in the fields to enter data. (The *Start Date and *End Date fields use the calendar tool to select dates.)
c. Click the OK button.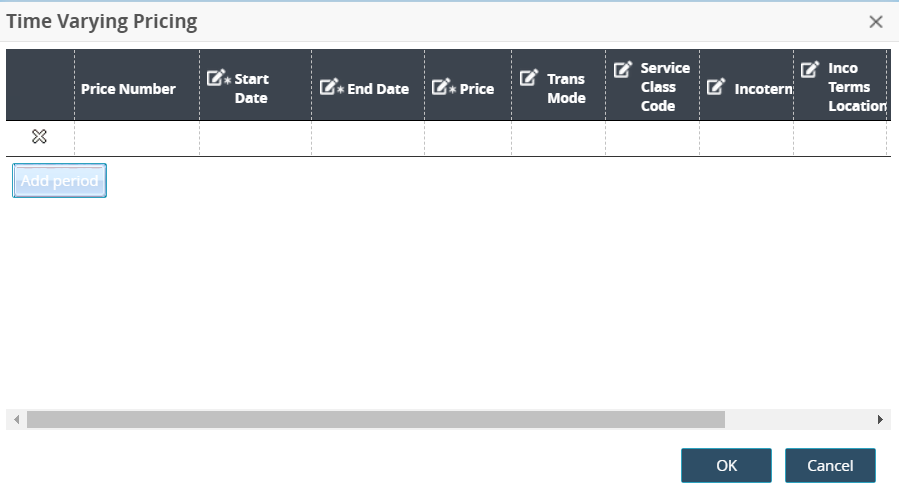
Time Varying & Volume Tiered - the pricing is set with effective beginning and end dates and tiered volume amounts. If you select this option and click on the Price field, the following popup window displays to set the conditions for this line term. Fields with an asterisk (*) are required, and fields will vary based on the selections.
a. Select a * Price Type from the dropdown list.
b. Select the * Period time frame from the dropdown list.
c. Click the Add period button to add a row to the table and enter data. (The *Start Date and *End Date fields use the calendar tool to select dates. Inco Terms and FOB codes are described in sections above.)
d. Click the Add range button to add a row to the table and enter data.
e. Click the OK button.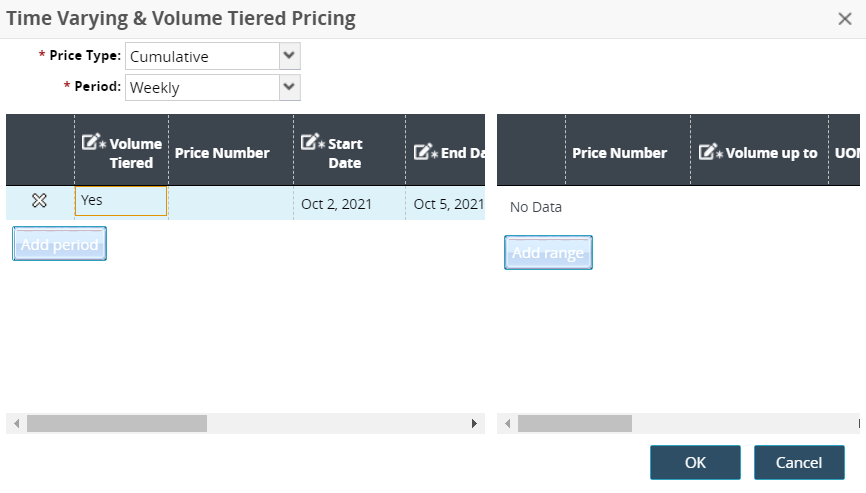
Volume Tiered - the pricing is set according to volume quantity. Normally, discounts are available for larger quantities ordered. If you select this option and click on the Price field, the following popup window displays to set the conditions for this line term. Fields with an asterisk (*) are required, and fields will vary based on the selections.
a. Select a * Price Type from the dropdown list.
b. Click the Add range button to add a row to the table.
c. Enter data in the fields. (Inco Terms and FOB codes are described in sections above.)
d. Click the OK button.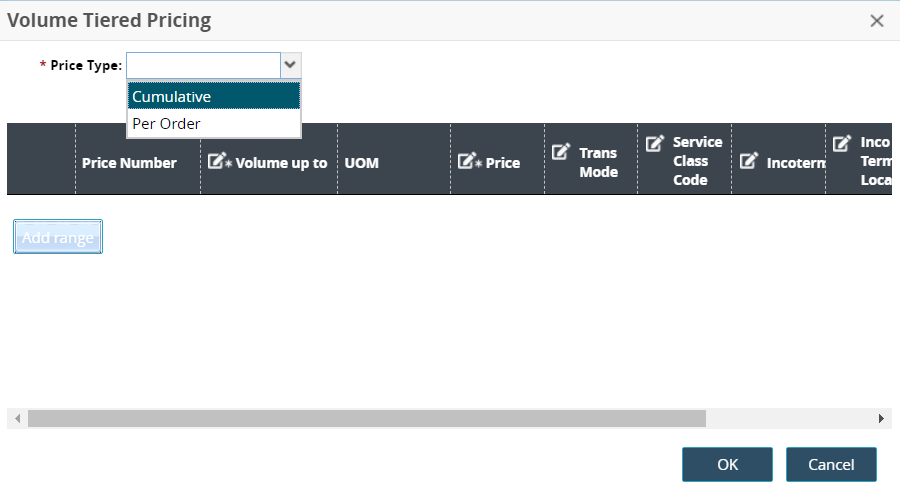
Price
Enter a numerical value for the price.
Price Per
This field becomes active if Price Per is selected in the Price Model Type field. Enter the price unit of measurement (UOM).
Target Price
This field auto-populates a target price for the item.
Min Fill Rate
Enter a value for the minimum fill rate.
Comments
Enter comments for the line item.
* Total Qty [Min-Max]
Enter numerical values for the minimum and maximum total quantity.
Total Amount [Min-Max]
Enter numerical values for the minimum and maximum total amount.
PO Limit [Min-Max]
Enter numerical values for the minimum and maximum limits for purchase orders.
PO Limit Period [Min-Max]
Select limit periods for the minimum and maximum values for purchase orders.
Total Material Qty
This field auto-populates with the total quantity of materials.
Total Fabrication Qty
This field auto-populates with the total quantity of items fabricated.
Total Received Qty
This field auto-populates with the total quantity of items received.
Current Cumulative Qty
This field auto-populates with the cumulative quantity at the current date and time.
Lead Time (In Days)

Enter a number of days for the Order Lead Time field to give the contract a lead time for orders.
Enter a number of days for the Target Order Lead Time field to give the contract a target lead time for orders
Enter a number of days for the Order Ship Confirm Lead Time field to give the contract a lead time for the order's shipment confirmation.
Enter a number of days for the Vendor Commit Lead Time field to give the contract a lead time for the vendor's commitment.