Adding Tracking Events to Singletons
Complete the following steps to add a tracking event to a singleton from the Singleton Hierarchy Screen:
On the Singleton details screen, click the Tracking tab.
The Tracking section appears.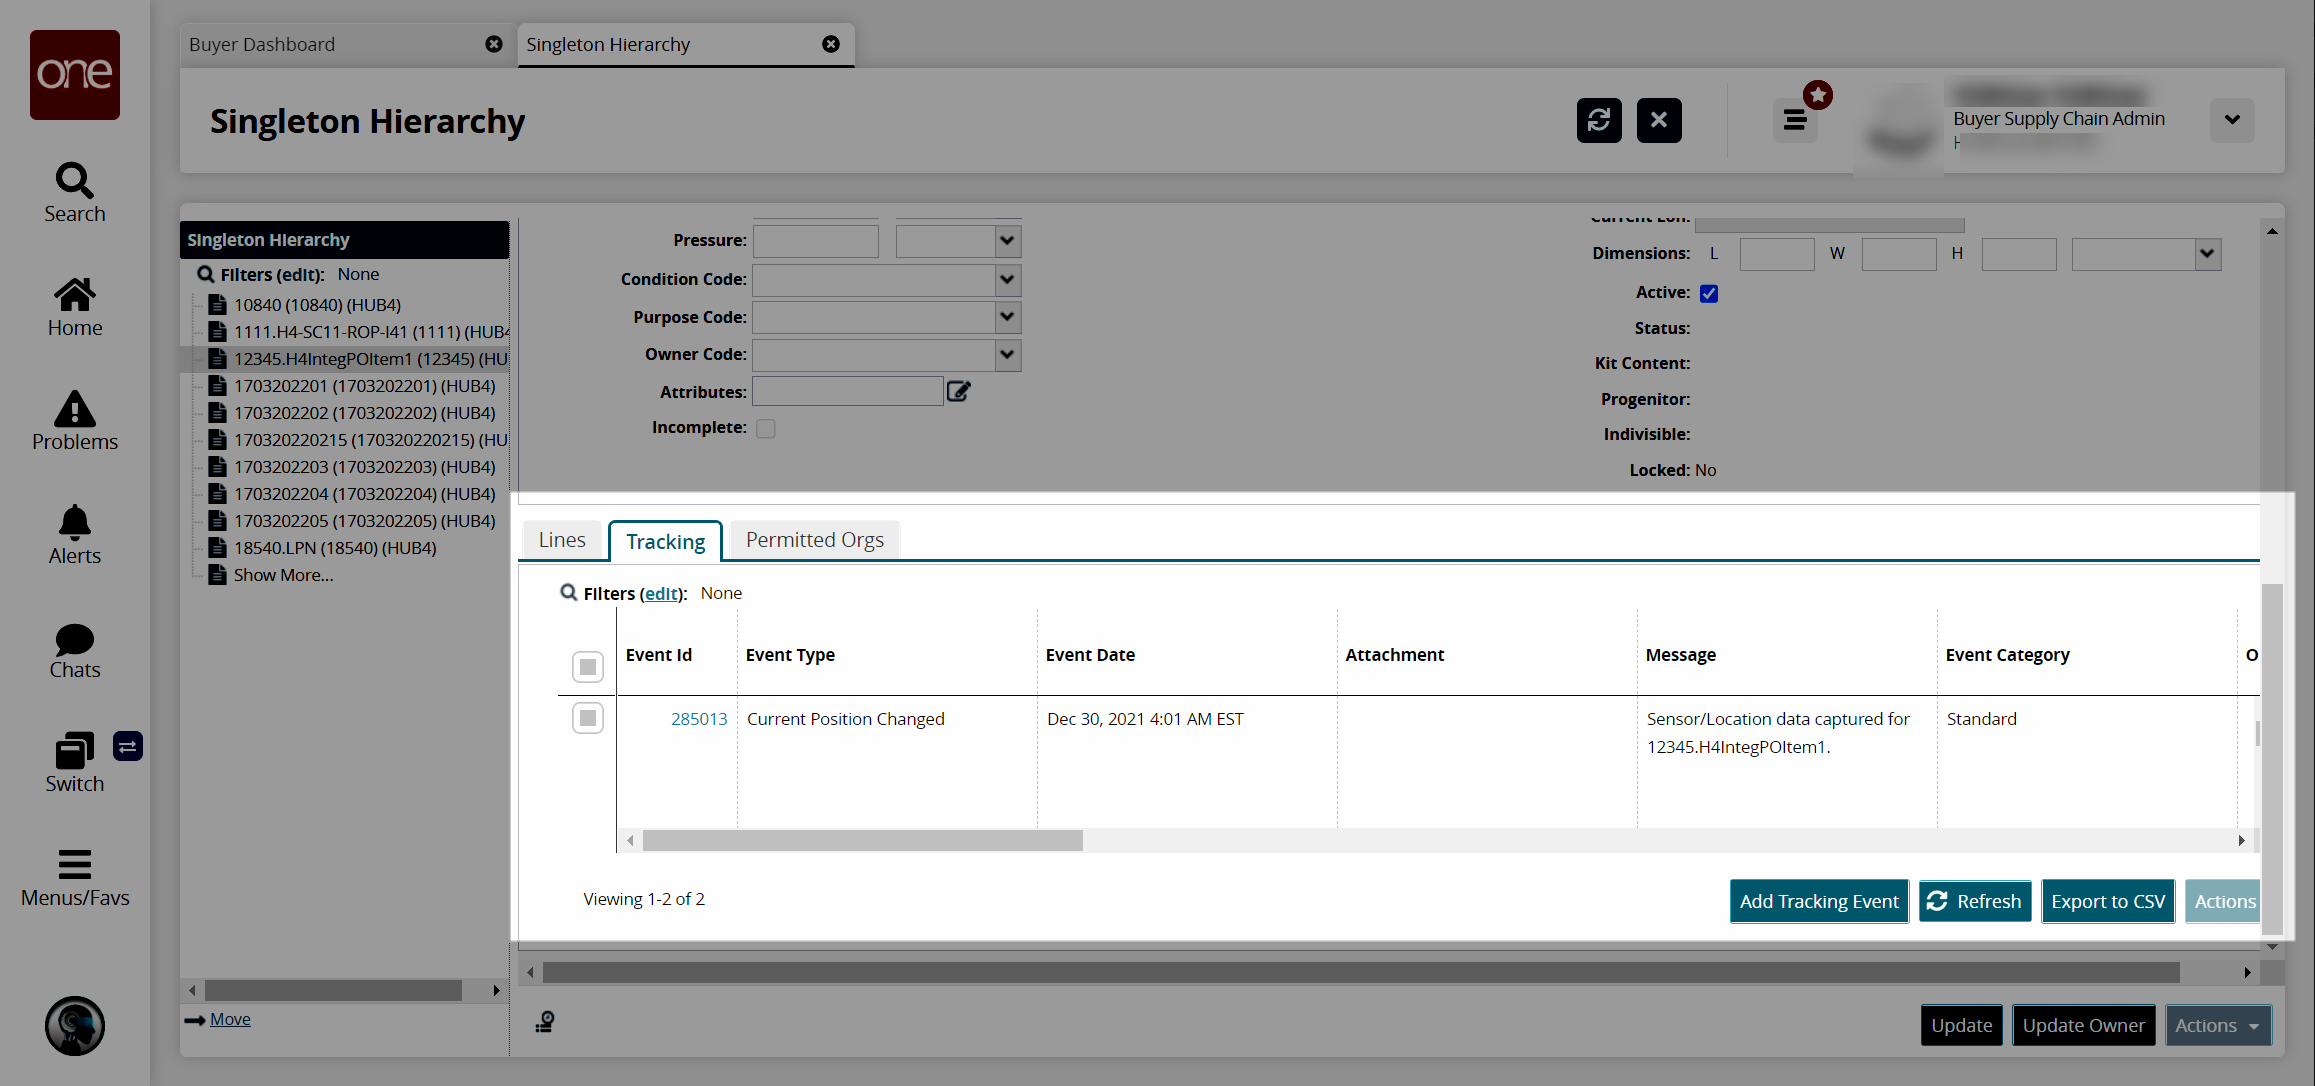
Click the Add Tracking Event button.
The Add Tracking Event popup window appears.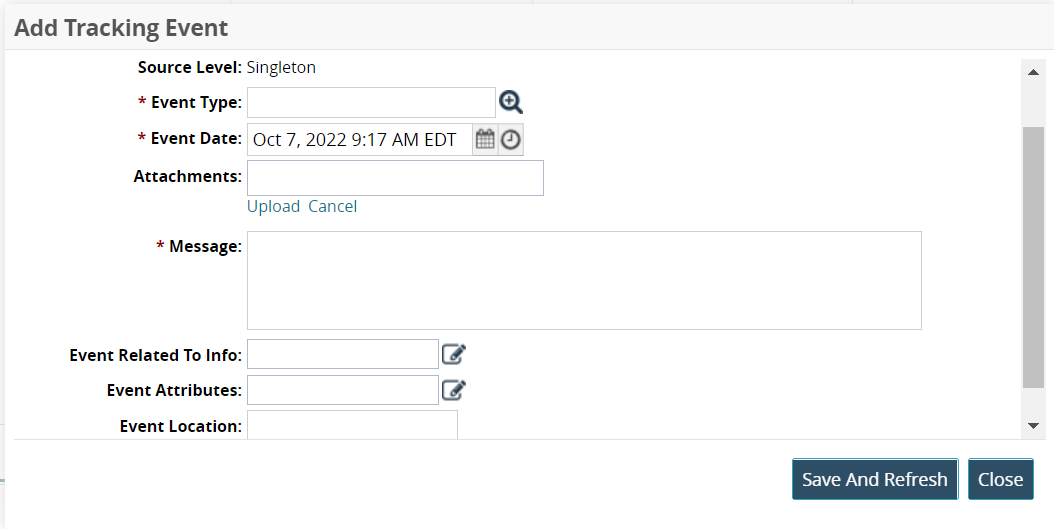
Enter values for fields described in the table below. Fields with an asterisk ( * ) are required.
Field Name
Description
Source Info
This auto-populates the serial number of the singleton.
Source Level
This field auto-populates the source level of the singleton.
Event Type
Use the picker tool to select an event type from a list of event types.
Event Date
Click the calendar icons to enter an event date for the singleton.
Attachments
Click the Upload link to upload documents related to the singleton.
Message
Enter a message related to the tracking event.
Event Related To Info
Click the pencil icon to add event-related information like Address, Longitude, and Latitude. The information fields displayed vary based on the event type selected.
Event Attributes
Click the pencil icon to add event attributes like Temperature, Unit Of Measurement (UOM), Humidity (in percentage), Transportation Mode, Spectrophotometry Reading, and Width Tolerance (within 130-136mm). The available attributes vary based on the event type.
Event Location
Enter the event location.
Click the Save And Refresh button. The tracking event is added to the Tracking section.