Applying Advanced Filters on Custom Analytic Widgets
Users can set up advanced filters on custom analytic widgets, such as specifying the start date as "5 days from today" and the end date as "20 days from today." Users can apply advanced filters when creating a custom analytical widget as described in the "Adding and Creating Custom Analytic Widgets" section or when editing an existing custom analytic widget as described in the "Editing and Cloning Custom Analytic Widgets" section.
Complete the following steps to set up advanced date filters on custom analytic widgets starting in the workbench:
L og in to the ONE system.
The user's dashboard displays.Right-click on the desired widget to edit an existing custom analytic widget, and select the View in Workbench option. If creating a new widget, see the "Adding and Creating a Custom Analytic Widget" section in the Online Help for more information about fields and options. The same instructions apply to creating, cloning, or editing a custom analytic widget.
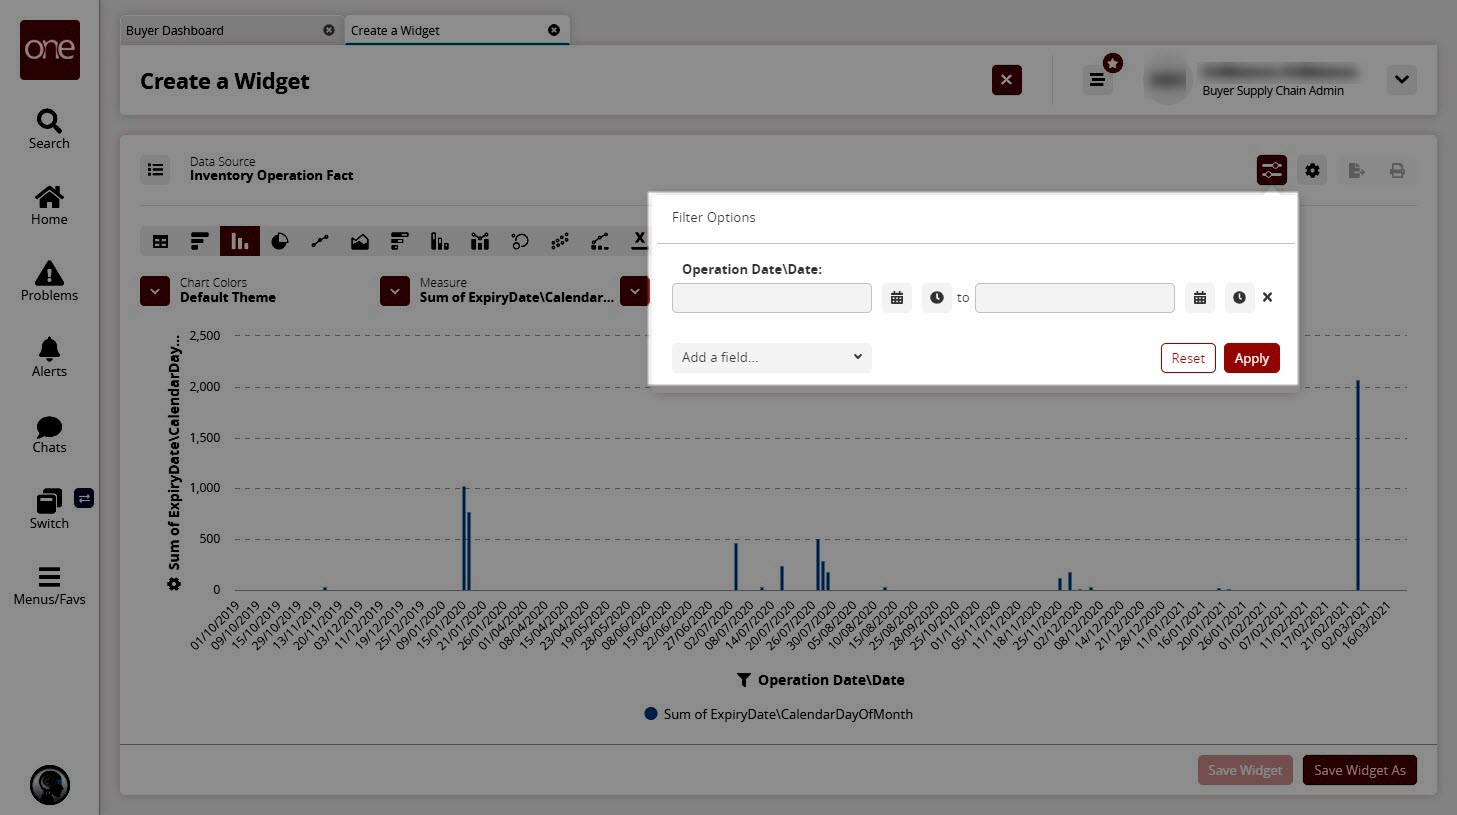
The workbench opens in a new tab.Click the Filter Options button.
The Filter Options popup displays.Select a field from the dropdown menu and select a field.
An extended Filter Options popup displays the field name with date and time options.
Click the calendar and clock tools to populate the beginning and end date/time fields.
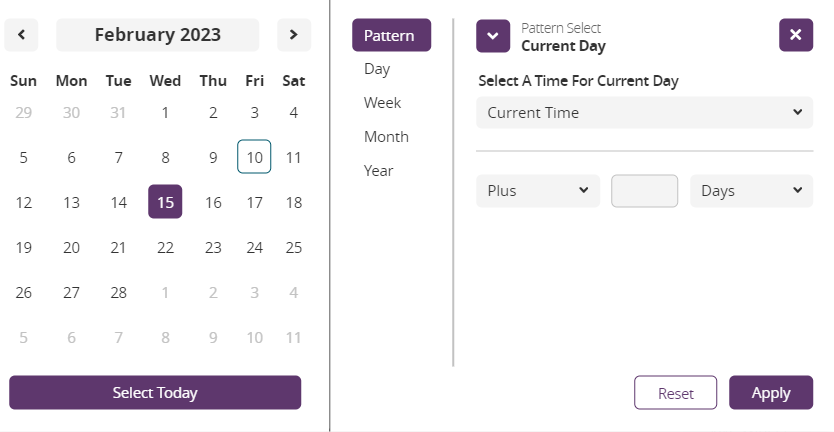
The calendar tool has further advanced options as described in the steps below.
Select a pattern based on the fields described below if desired.
Pattern Select
Fields
Description
Current Day
(Current Time)
Select a time from the dropdown menu.
(Plus/Minus)
Select from the dropdown menu.
(Empty field)
Enter a numerical value relevant to the selection in the next field.
(Days)
Select a time frame from the dropdown menu.
Day of the Week
Select a Day
Select a specific day of the week from the dropdown menu.
Of The Current Week
Select the week type (calendar or fiscal) from the dropdown menu.
(Plus/Minus)
Select from the dropdown menu.
(Empty field)
Enter a numerical value relevant to the selection in the next field.
(Days)
Select a time frame from the dropdown menu.
"Nth" Day
Select "Nth" Day
Select a specific day in the month from the dropdown menu.
Of The Current
Select the time frame from the dropdown menu.
(Plus/Minus)
Select from the dropdown menu.
(Empty field)
Enter a numerical value relevant to the selection in the next field.
(Days)
Select a time frame from the dropdown menu.
"Nth" Day of the week
Select "Nth" Day
Select a specific day in the month from the dropdown menu.
Select a Day
Select a specific day of the week from the dropdown menu.
Of The Current
Select the time frame from the dropdown menu.
(Plus/Minus)
Select from the dropdown menu.
(Empty field)
Enter a numerical value relevant to the selection in the next field.
(Days)
Select a time frame from the dropdown menu.
Alternatively, select Day, Week, Month, or Year for a more specific time frame instead of Pattern.
The far right panel changes to reflect one of the above options.Select from the list.
Click the Apply button for the calendar popup.
The data populates the field.Follow the same steps for the end date/time field.
Select more fields from the dropdown menu as desired and add the date and times using the same process.
The selected date is dynamic, not static. For example, if you select a date range from "2 weeks ago" to "2 weeks from now," the date range will be a rolling four-week period centered on whatever the current date is.
Click the Apply button in the Filter Options popup.
The chart updates.Click the Save Widget As button for a new widget or Save Widget for an existing widget.
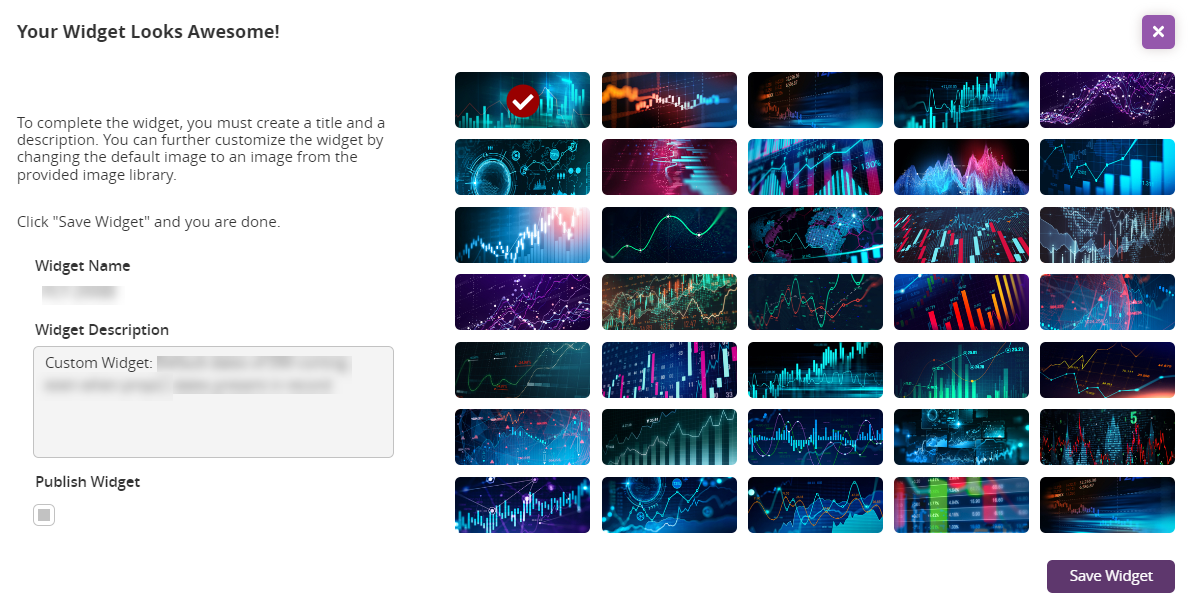
A popup displays.
Enter a Widget Name if this is a new widget. This field is not editable if you are adding filters to an existing widget.
Enter or modify the Widget Description.
Click a graphic to select it.
Click the Save Widget button.
The custom widget with a rolling date range is added to the dashboard.