Canceling Appointment Requests
This topic describes how to cancel an appointment request.
Complete the following steps to cancel an appointment request:
L og in to the ONE system.
Select Menus/Favs > Scheduling > Appointment Requests. In the NEO UI, users can click on the Menus/Favs icon on the left sidebar and type in the name of the screen in the menu search bar. For more information, see "Using the Menu Search Bar."
The Appointment Requests screen displays, showing an Explorer panel and a Details panel.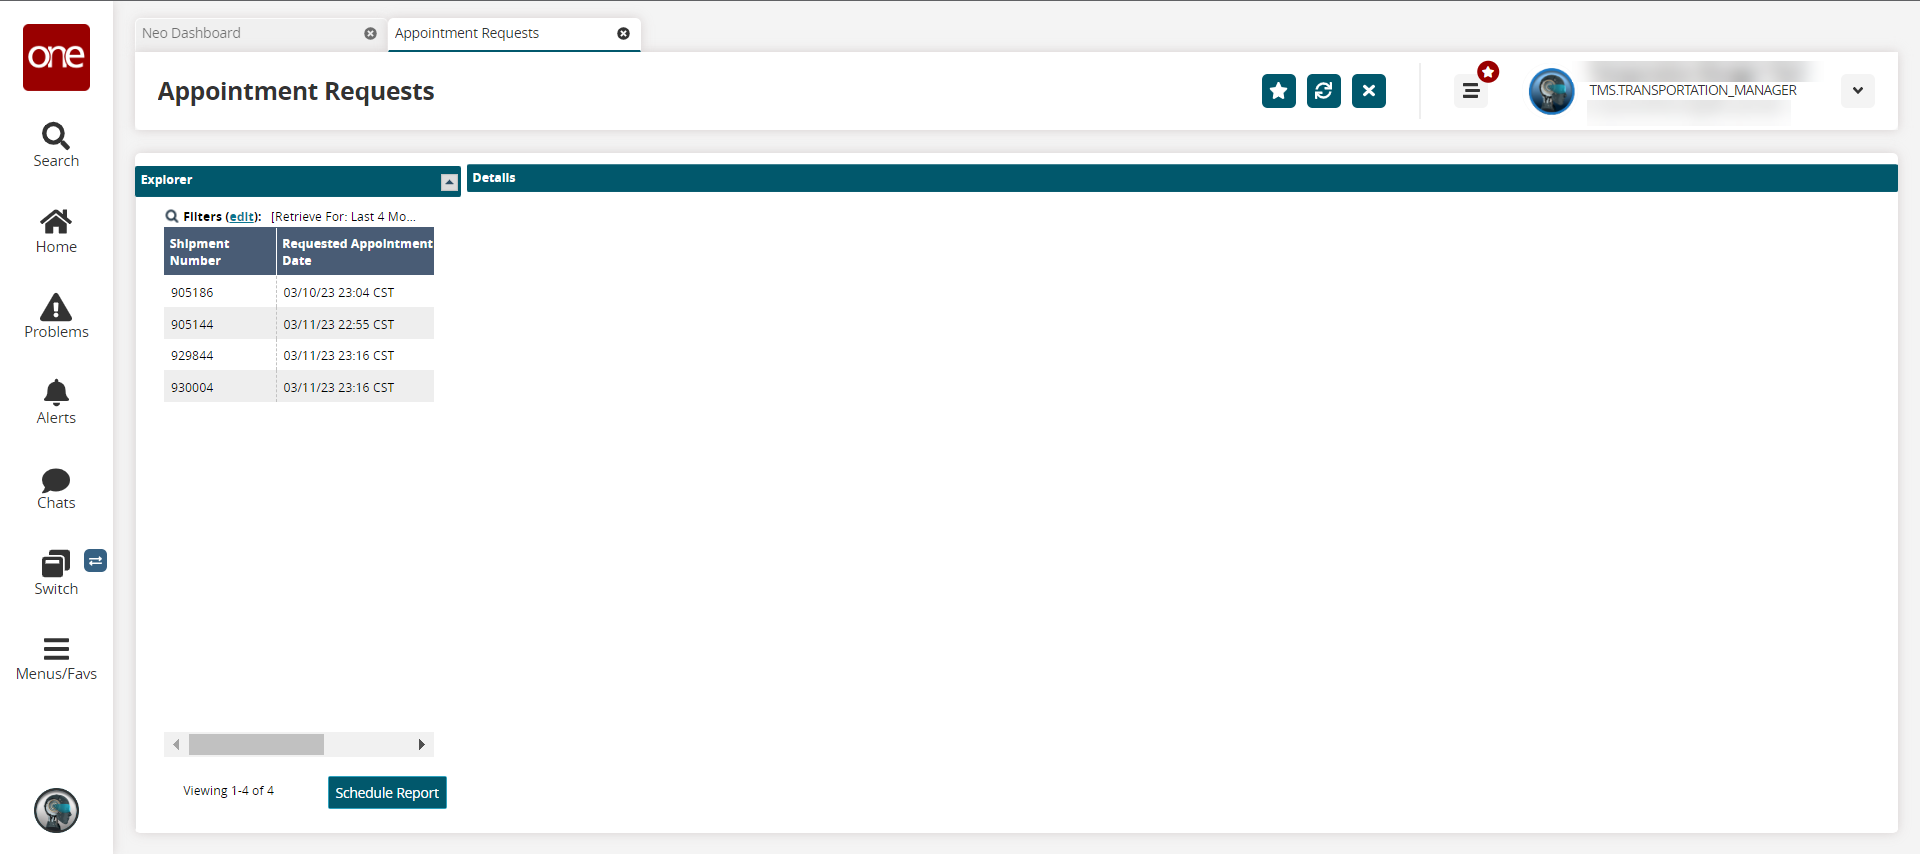
Click either cell for a request.
The request's details display in the right pain.Click Cancel Appointment Request.
The Cancel Appointment Request popup displays with details on the selected appointments.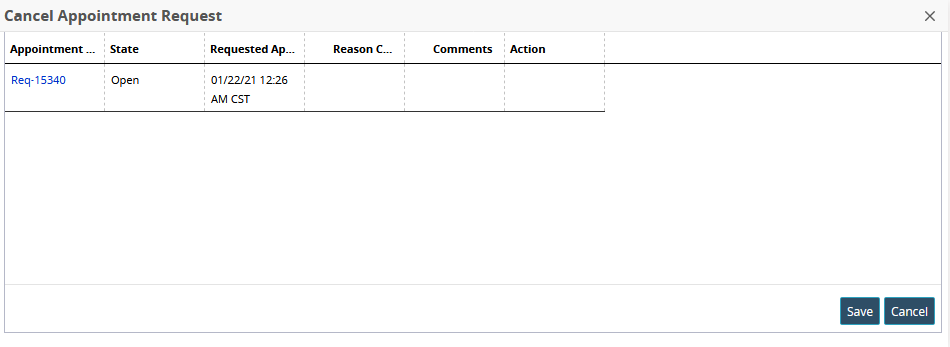
Select a reason for cancellation from the drop-down in the Reason Code column.
Note
If canceling multiple appointment requests, you can specify the reason and comments for one appointment request and click Apply All Reason Codes to apply the same reason code to all other appointment requests selected for cancelation.
If the Hide Reject Reason Code Field for Appointment Request policy is enabled under Scheduling Policies, the Reason Code field is not displayed on the UI when rejecting an appointment request.
Enter any additional information for reference in the Comments column.
Click the Save button.