Chats, Collaborations, and Conversations
The NEO UI offers users the ability to chat and collaborate within the system. The Chats slideout is accessed directly from the left navigation panel and supports individual and group chats. However, the chat feature (also known as conversations and collaborations) is also available on a number of workbenches and screens in the ONE system using the same process.
Using the Chat Slideout
Complete the following steps to use the Chat slideout:
Log in to the ONE system.
Click Chats in the left navigation panel.
The Chats slideout displays.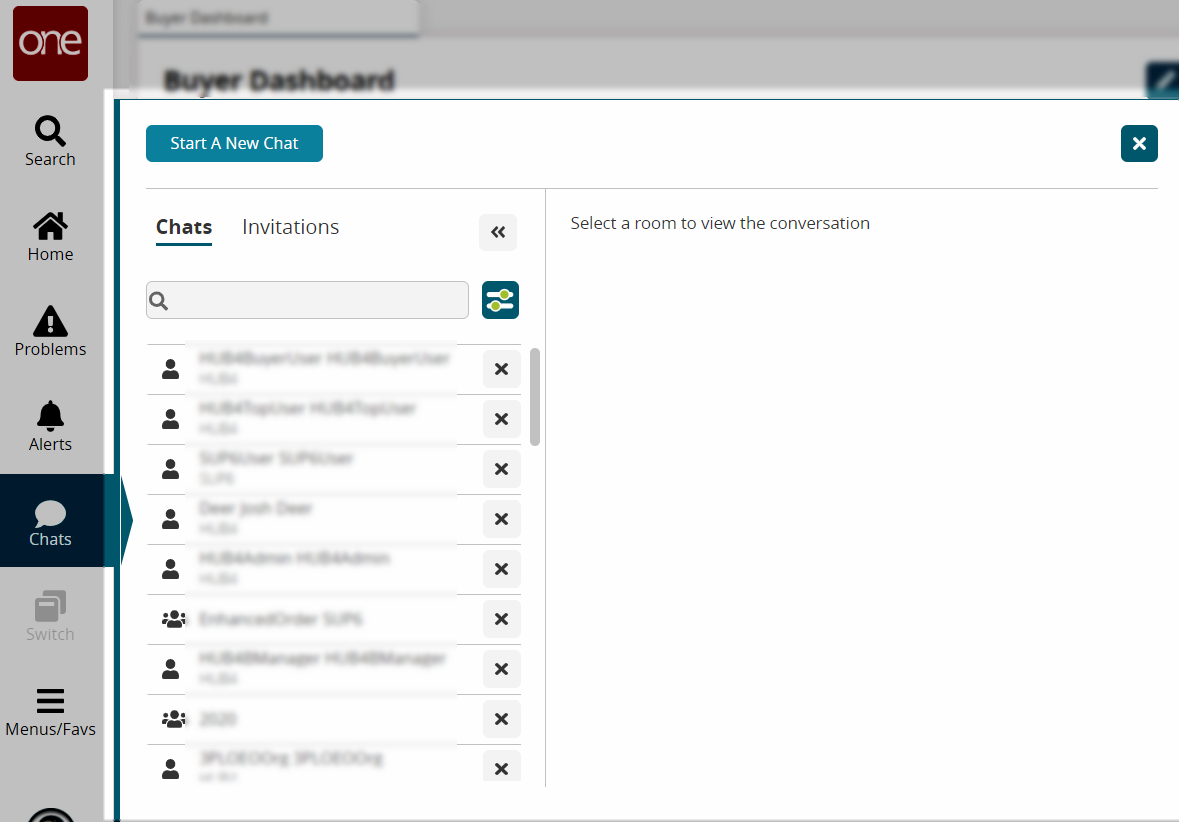
Click the Chats tab (usually showing as the default) to view past chat sessions.
Previous chat sessions display in the list below.To view a previous chat, click a chat session from the list.
The chat messages display in the right pane of the slideout.Click the Invitations tab to view sent/received invitations to chats. See below to send or accept invitations.
Click the filter options button and click the checkboxes to view group chats, chats with coworkers, or chats with partner colleagues. Alternatively, use the search field to search for a specific chat.
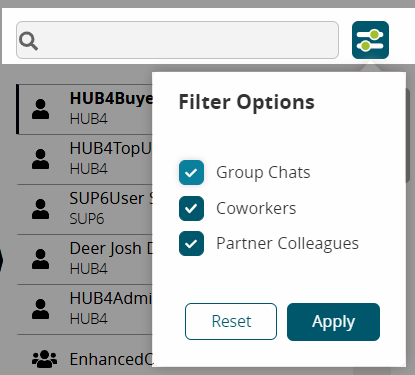
Click the Apply button to apply the filter options.
Using the Chat Icon
The NEO UI offers the chat feature on a number of role-dependent screens.
Click the Chat icon.

The Chat slideout displays.Follow the instructions below to create a personal or group chat.
Using Collaborations and Conversations
Users also have role-based icons for collaborations and conversations in the UI. Click one of the icons to start a chat session with other users.
Collaborations
Click the Collaborations icon.

A popup window displays.Click the Create a New Collaboration button.
The chat slideout for group chat displays.Follow the instructions below to create a group chat collaboration (chat).
Conversations
Click the Open Conversations icon.

The Chat slideout page displays.Follow the instructions below to create a personal or group conversation (chat).
Start a New Chat Session
Complete the following steps to initiate a new chat session:
Click the Start a New Chat button.
A landing page displays chat selections.
Create Personal Chats
Click the Create A Personal Chat button for a chat with one other person.
A screen displays with a search bar and user icons.Click a user icon. Users can also type a username in the search bar to narrow the search.
Users you have chatted with in the past will have a Chat Now button, and the past chat will display.
Users you have never chatted with will have a Send Invite button, and the invitation will display under the Sent divider under Invitations.
Type your message in the message box.
Click the paper clip icon to select a file or drag and drop to attach a file to send in the chat.
Click the Send button.
Create Group Chats
Click the Create a Group Chat button for a chat with a team.
A group chat screen prompts the users to create a name for the chat session.Type in a name for the group chat.
Click the Create Group Chat button.
Two tabs now display: Discussion and Team. An icon card displays for you as the only current member of the group chat.Click the Send Invite button.
An invitation screen displays.Type in usernames to add to the chat.
The field is context-sensitive and brings up users as you type.Click the Select button for users.
The button will change colors and display Selected.Click the View Invitation List button.
Only the user icon cards that were selected are listed.Click the checkmark or the X to confirm or remove users from the invitation list.
Click the Invite Selected Members button.
Click the Send Invitation button.
The invitation will display under the Sent divider under Invitations. When the selected users accept the invitation, a new chat opens.Type your message in the message box.
Click the paper clip icon or drag and drop to attach a file to send in the chat.
Click the Send button.
An email invitation is sent to the recipient with a button to join a chat session.If they are a registered user, after clicking the Join button in the invitation email, they will see the invitation in the chat slideout.
If they are not a registered user, after clicking the Join button in the invitation email, they will be directed to the onboarding screen to join ONE Network.
Accept Invitations
In the Chat slideout, click the Invitations tab.
Click the down (expand) arrow next to Received to view invitations sent to you.
A list of invitations displays below.Click an invitation from the list in the left panel.
The right panel displays the sender's icon card.Click the checkmark to accept the invitation.
The chat session opens in the right pane.
Resend Invitations
In the Chat slideout, click the Invitations tab
Click the down (expand) arrow next to Sent to view the invitations that you sent.
A list of invitations displays below.Click an invitation from the list in the left panel.
The user's icon card displays in the right pane.Click the paper airplane icon to resend the invitation.