Creating Return Orders
Users can create a return order (RO) by entering all the necessary information. If the return is against an existing order, then the source order and schedule details must be specified. Returns can be created through the user interface, or returns can be uploaded to the system in the Awaiting Approval state using integration. Not all users and roles have access to this particular feature.
The process for creating a return order consists of these primary steps:
Creating Return Orders
Complete the following steps to create a return order:
L og in to the ONE system.
Click Menus/Favs > Order Mgmt > Return Order > New Return.
In the NEO UI, users can click on the Menus/Favs icon on the left sidebar and type in the name of the screen in the menu search bar. For more information, see "Using the Menu Search Bar."
The New Return screen displays.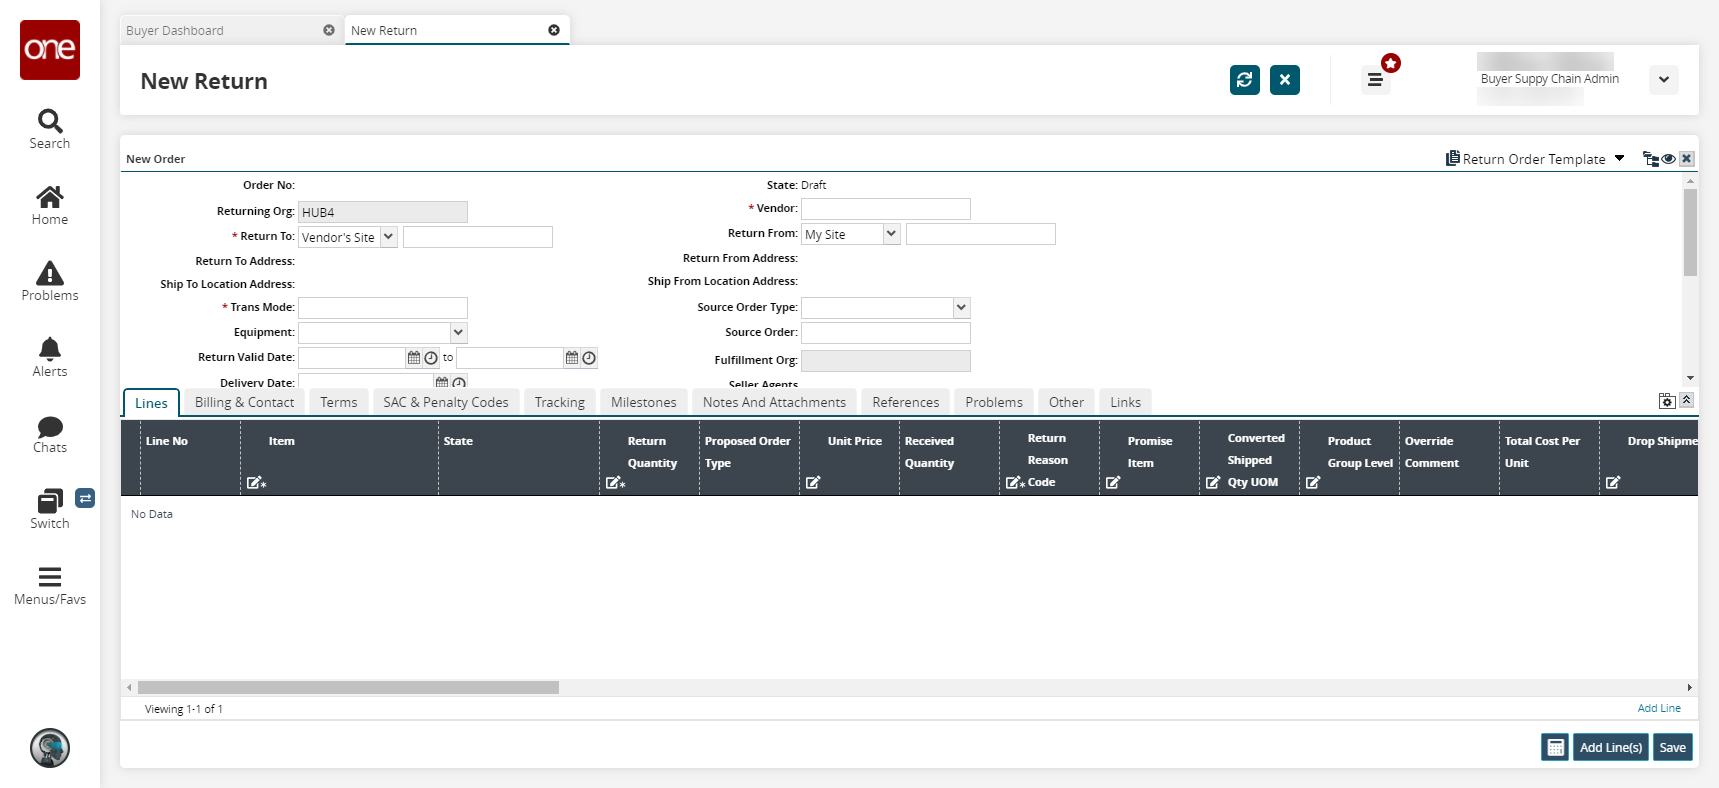
Fill out the following fields. Fields with an asterisk ( * ) are required.
Field
Description
* Order No
A unique number for the order assigned by the system.
Returning Org
Select a returning organization using the picker tool. This organization is requesting the return.
* Return To
Select a return to location using the dropdown menu and the text field. The available options in the dropdown menu are My Site, My Partner Site , and My Location. Begin typing a return to location in the text field and select an auto-complete option.
Return To Address
This field is populated by the system based on your selection in the Return To field.
Ship To Location
This field is populated by the system based on your selection in the Return To field.
* Trans Mode
Begin typing a transportation mode for the return order and select an auto-complete option.
Equipment
Select equipment for the return order from the drop-down menu.
Return Valid Date
Select the date a return is valid to be shipped using the calendar icon.
Delivery Date
Select the date the return order is promised to be delivered by using the calendar icon.
Ship Date
Select the date the return order will be shipped using the calendar icon.
3PL's Order Number
Enter a third-party logistics order number.
OMO's Order Number
Enter an OMO order number.
Total Amount
The total cost of the order. The system populates this field after the return order is submitted.
Total Weight/Quantity/Volume
The total weight, quantity, or volume of the order. The system populates this field after the return order is submitted.
Order Subtype
Select an order subtype from the drop-down menu. The available options are Blank, Consignment, Rebalance, Standard, or VMI.
State
The state of the return order. The system controls this field.
* Vendor
Begin typing a vendor and select an available option.
* Return From
Select a return from location using the drop-down menu and the text field. The available options in the dropdown menu are Vendor's Site, Vendor's Partner Site, Vendor's Location, and Address. Begin typing a return from location in the text field and select an auto-complete option.
Return From Address
This field is populated by the system based on your selection in the Return From field.
Ship From Location Address
This field is populated by the system based on your selection in the Return From field.
Source Order Type
Select a source order type from the dropdown menu. The available options are Purchase Order, Deployment Order, or Sales Order.
Source Order
Begin typing a source order number and select an available option.
Fulfillment Org
This field is not editable for return orders.
Seller Agents OMO Org
This field is not editable for return orders.
Buyer Agents Currency
Select a currency from the dropdown menu.
Ship with Group Ref
Enter a group reference.
RMA No
This field is not editable for return orders.
Planner Notes
Input any planner notes.
Vendor Notes
Input any vendor notes.
Is Expedite
Select the checkbox if the return order needs to be accelerated or hurried.
Is Emergency
Select the checkbox if the return order is in an emergency or very important.
Tip
You can order generic items in place of specific items. For example, you might want ten 40" televisions but do not care about the manufacturer. To order using generic items, you must select the Generic Item Order template. For more information on generic items, see the "Generic Item Orders" section in the Online Help.
You can add duplicate items to multiple lines on the same order if the Duplicate Items on Order feature is enabled. If enabled, items are identified by item name and line number throughout the system. This eliminates the possibility of any confusion resulting from having duplicate items with the same name in the same order. Contact ONE Network support to enable or disable this feature.
Adding Line Items to Return Orders
Perform the following steps to add an item to a return order:
Click the Add Line link.
The new line appears.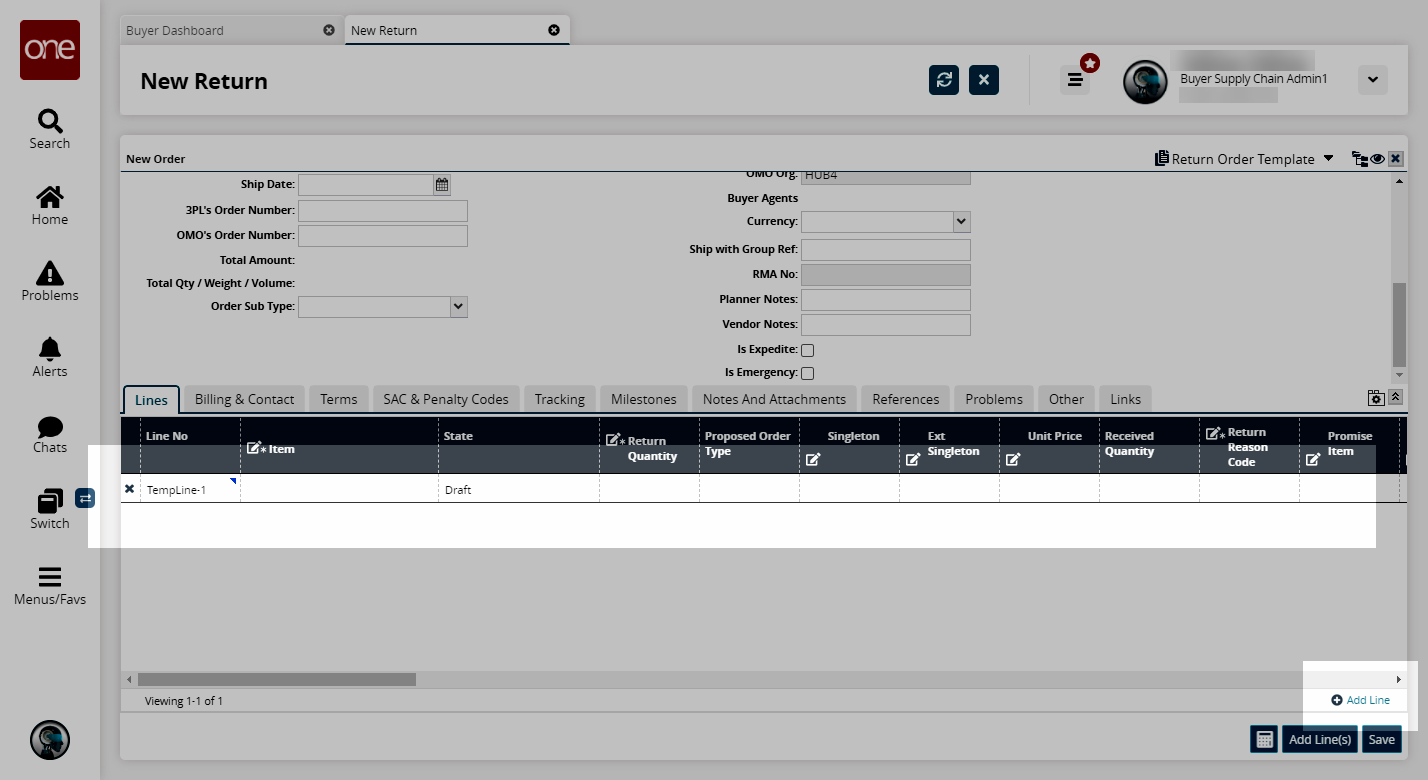
You can add duplicate items to multiple lines to the same order if the Duplicate Items on Order feature is enabled. Contact ONE support to enable or disable this feature.
Select an Item.
The Item Description, Quantity UOM, and Unit Price fields are automatically populated based on the selected item.Enter a Return Quantity.
Select a Return Reason Code.
Click the Save button.
A success message appears.
Adding Billing and Contact Information
Select the Billing & Contact tab.
The billing and contact information displays.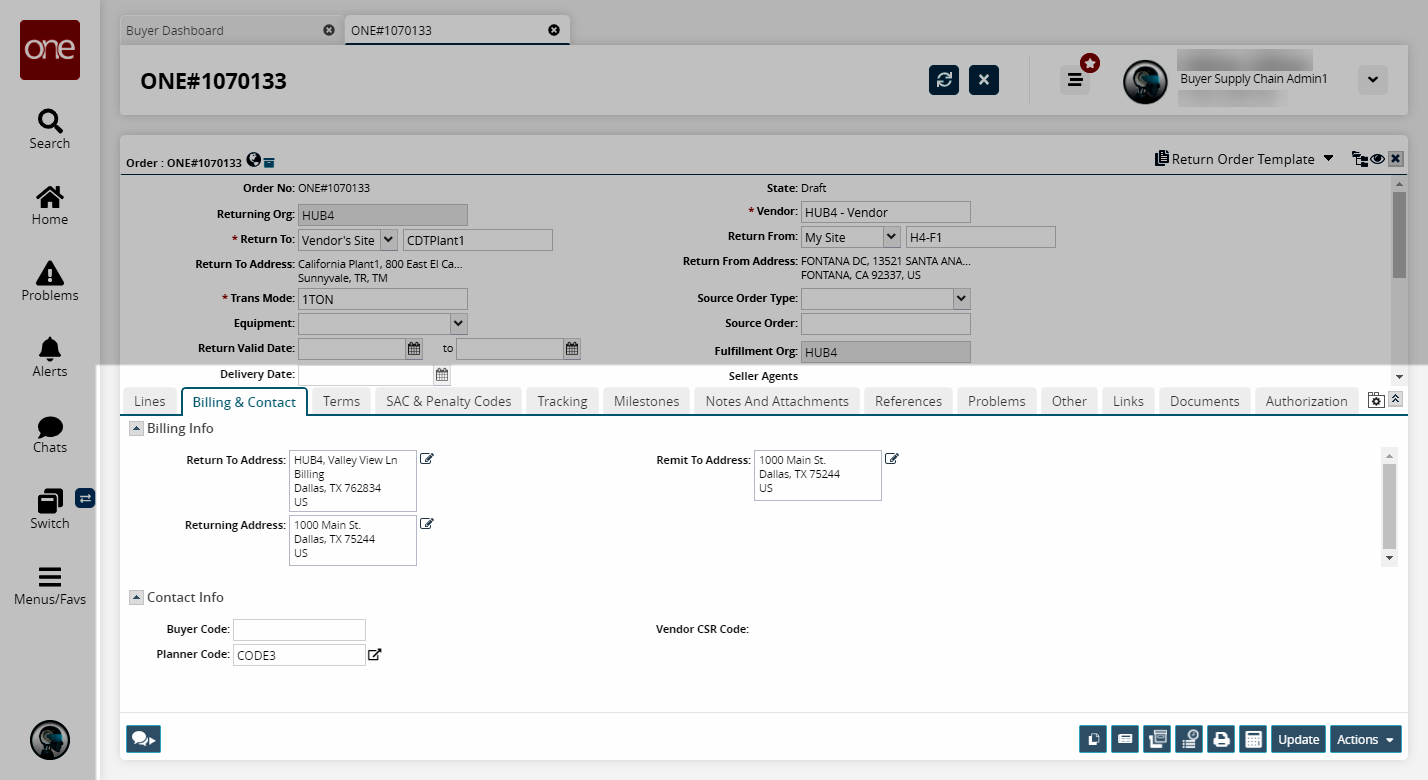
Select a Bill To location using the dropdown menu and the text field. The options in the dropdown menu are My Site, My Partner Site, and Address. Begin typing a Bill To location in the text field and select an auto-complete option. The Bill To Address field populates.
Cl ick the pencil icon for the Purchasing Address field.
An address form appears.

Fill out the following fields. Fields with an asterisk ( * ) are required.
Field
Description
Country
Select a country from the drop-down menu.
* Line 1, Line 2, Line 3
Enter the address in Line 1. Continue the address into Line 2 and Line 3 if needed.
* City
Enter a city.
* State
Select a state from the drop-down menu.
* Zip
Enter a zipcode.
Repeat the above steps for the Remit to Address field.
When finished entering billing and contact information, click the Save button.
A success message appears.Select a Planner Code and a Buyer Code.
The planner code identifies a planner to whom email notifications are sent when events occur for the order. Typically the user creating the order does not need to enter a planner code as it is auto-populated.When finished entering billing and contact information, click the Save button.
A success message appears.
Adding Tracking Events
Select the Tracking tab.
Tracking information appears.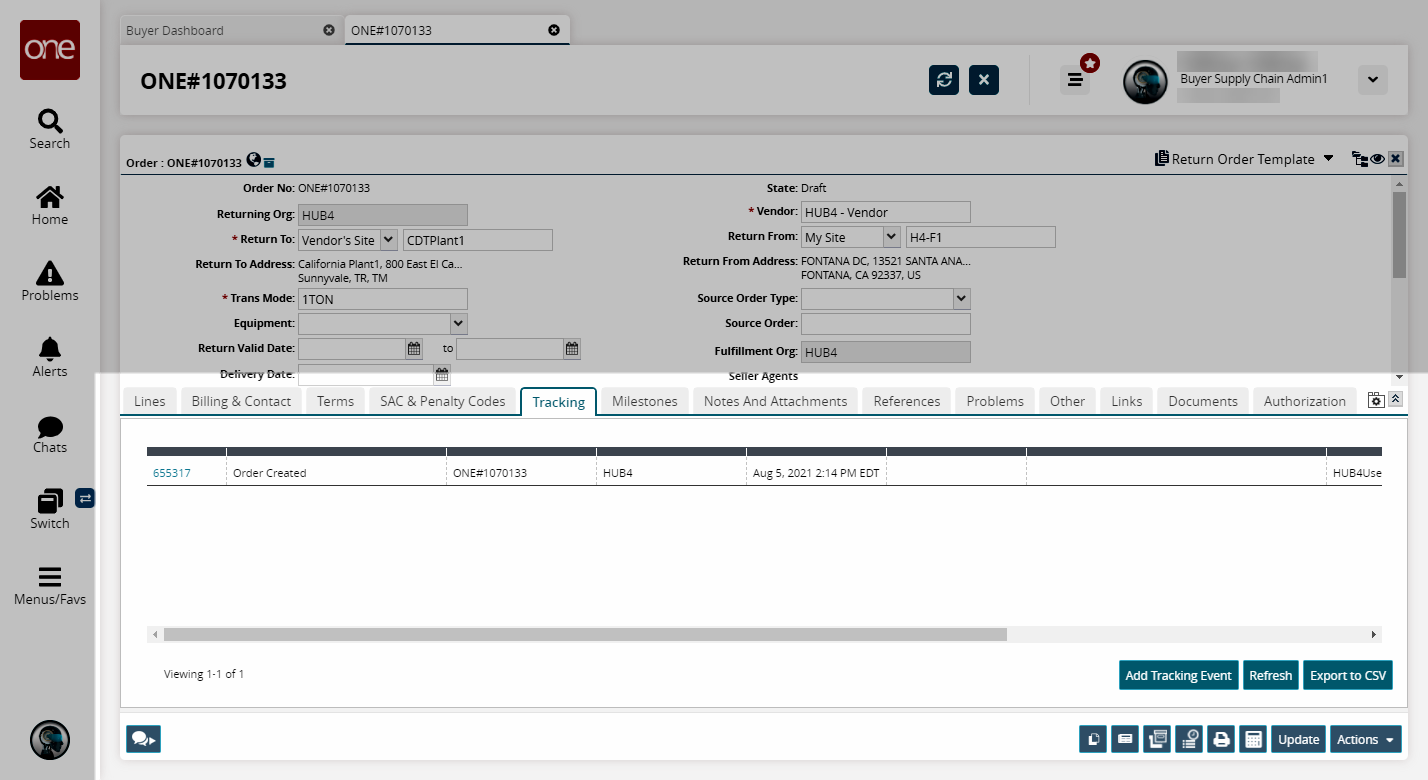
Click Add Tracking Event.
The Add Tracking Event popup window appears.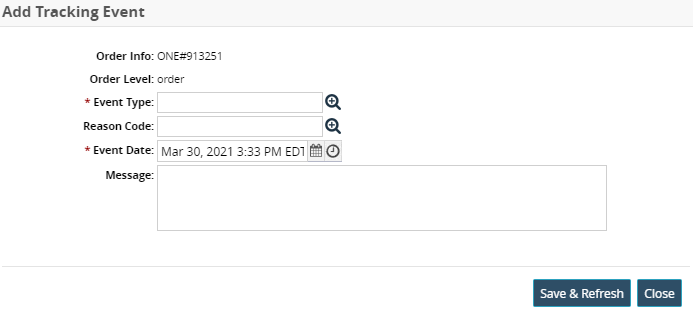
In the * Event Type field, use the picker tool to select an event type.
In the Reason Code field, use the picker tool to select the reason code for the return.
In the Event Date field, click the calendar and clock icons to select the event date and time.
In the Message field, enter an event message if desired.
Click Save & Refresh.
The new event appears in the Tracking view.
Add Notes and Attachments
From the Notes and Attachments tab, you can add planner notes, vendor notes, buyer attachments, and vendor attachments. Only vendors can add vendor notes and attachments. Only buyers can add buyer notes and attachments.
Select the Notes and Attachments tab.

Adding Planner and Vendor Notes
Click the Planner Notes or the Vendor Notes pencil icon to add notes.
The Planner Notes or Vendor Notes window appears.Enter a note in the text box located on the right side of the window.
If the note is a publicly available note, meaning the vendor can also see the note, select the Public check box.
If the note should be included when a PDF of the order is generated, select the Print check box.
Click the Add Note button.
The new note appears on the left side of the window.You can delete notes by clicking the X button to the left of the note.
Adding Attachments
Click the Upload link at the bottom left corner of the Buyer Attachments window.
The Open pop-up window appears.Locate the attachment to upload
Click the Open button.
The attachment appears in the Buyer Attachments window.Click the Save button to save the changes to the order.
A success message appears.
Set Additional Shipment Parameters
Select the Other tab.
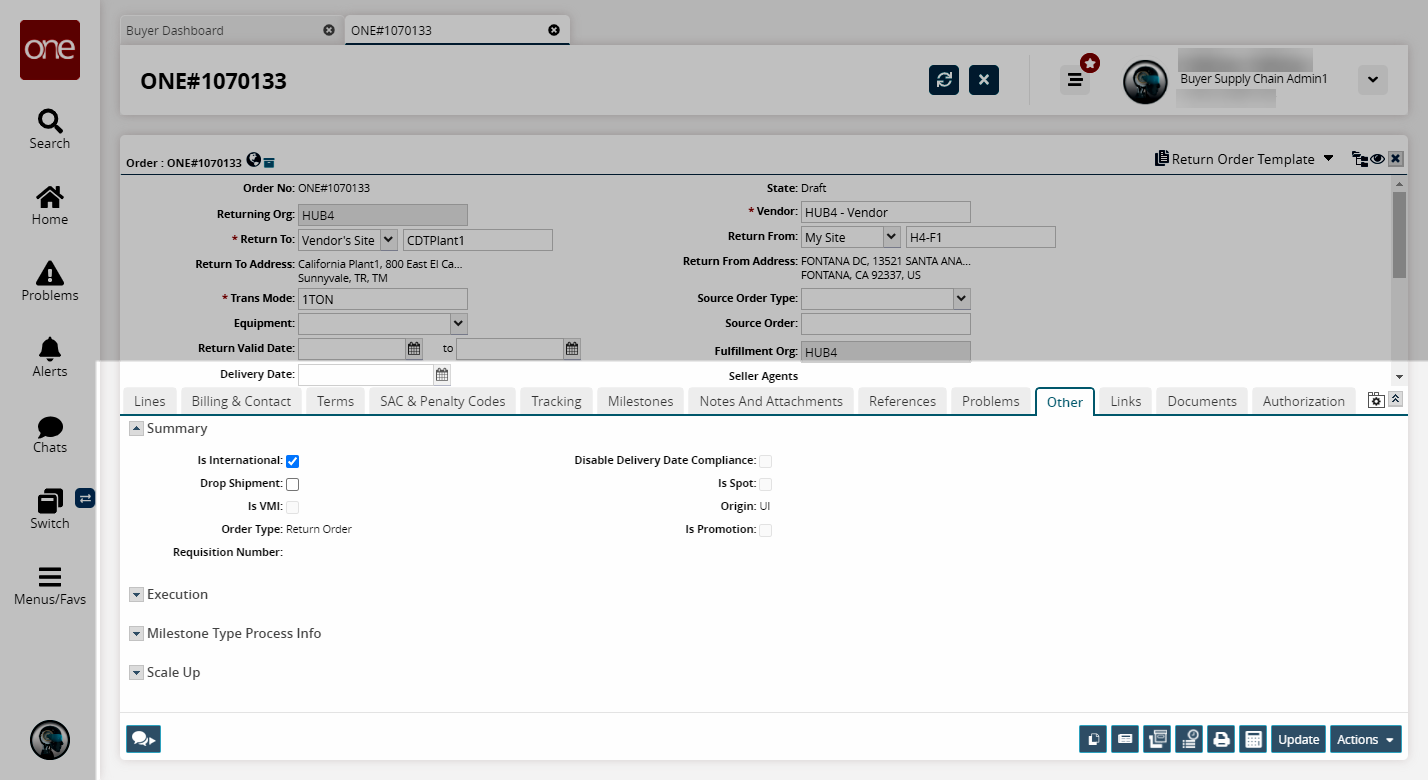
Expand the Summary view. Fill out the following fields. Fields with an asterisk ( * ) are required.
Option
Description
Is International
Select this checkbox to indicate the order is international.
Drop Shipment
Select this checkbox to indicate the order is a drop shipment.
Is VMI
Select this checkbox to indicate the order is vendor-managed inventory.
Disable Delivery Date Compliance
Select this checkbox to disable delivery date compliance.
Is Spot
Select this checkbox to indicate the order is a spot.
Is Promotion
Select this checkbox to indicate the order is a promotion.
Click Save to save the changes to the order.
A success message appears.Expand the Milestone Type Process Info view.
In the Milestone Process field, select a milestone process using the picker tool.
Click Save to save the changes to the order.
A success message appears.The Execution and Scale Up views are not user-editable.
Submit the Return Order
When you finish entering information about the order, click the Actions button and then select Submit.
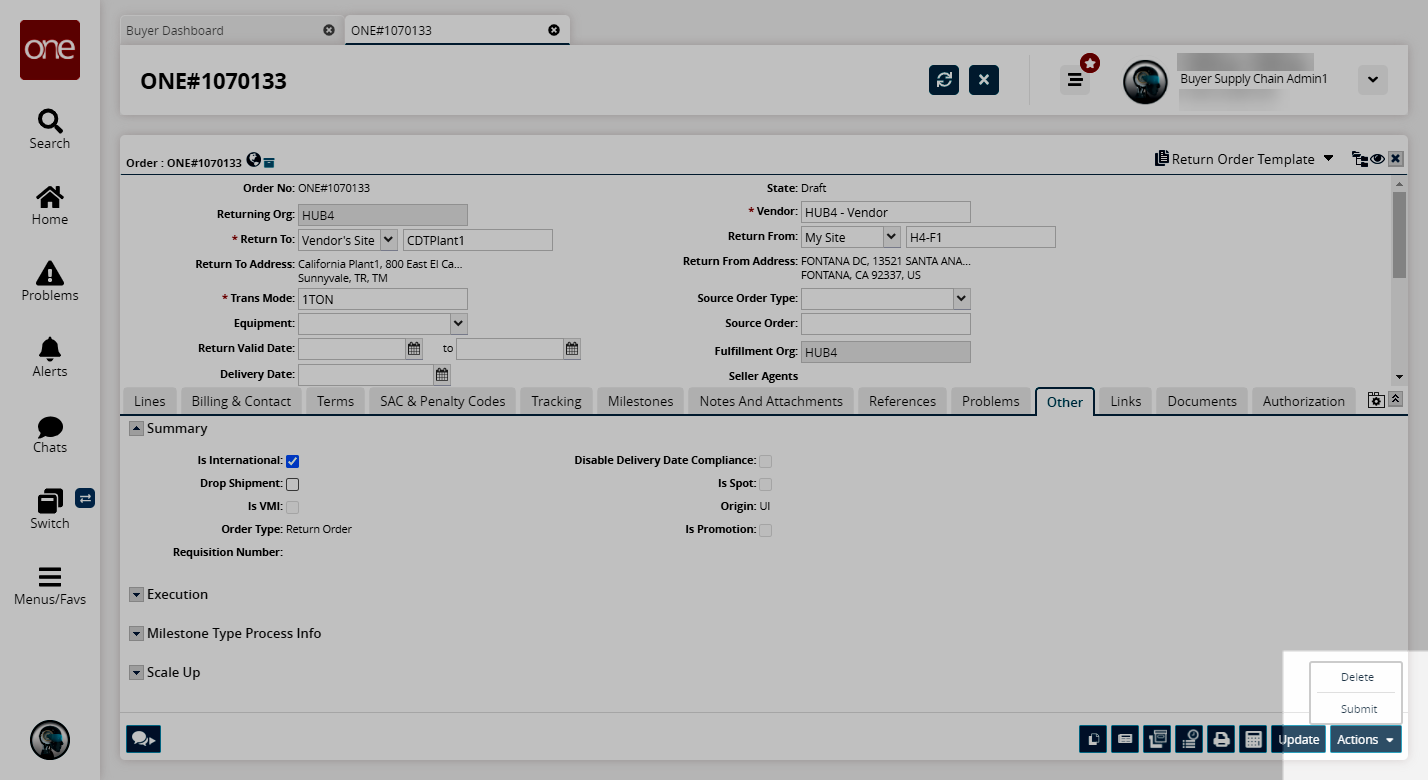
The state changes to Awaiting Approval. The seller must now approve the return order to continue the process.