Creating Static Routes
Users can set up static routes for shipments when routes are consistent and predictable. Volumes, scheduling, and stops are set as parameters for known routes to save time and resources.
Complete the following steps to create static routes:
L og in to the ONE system.
Click Menus/Favs > Contract Mgmt > Static Routes.
In the NEO UI, users can click on the Menus/Favs icon on the left sidebar and type in the name of the screen in the menu search bar. For more information, see "Using the Menu Search Bar."
The Static Routes screen displays.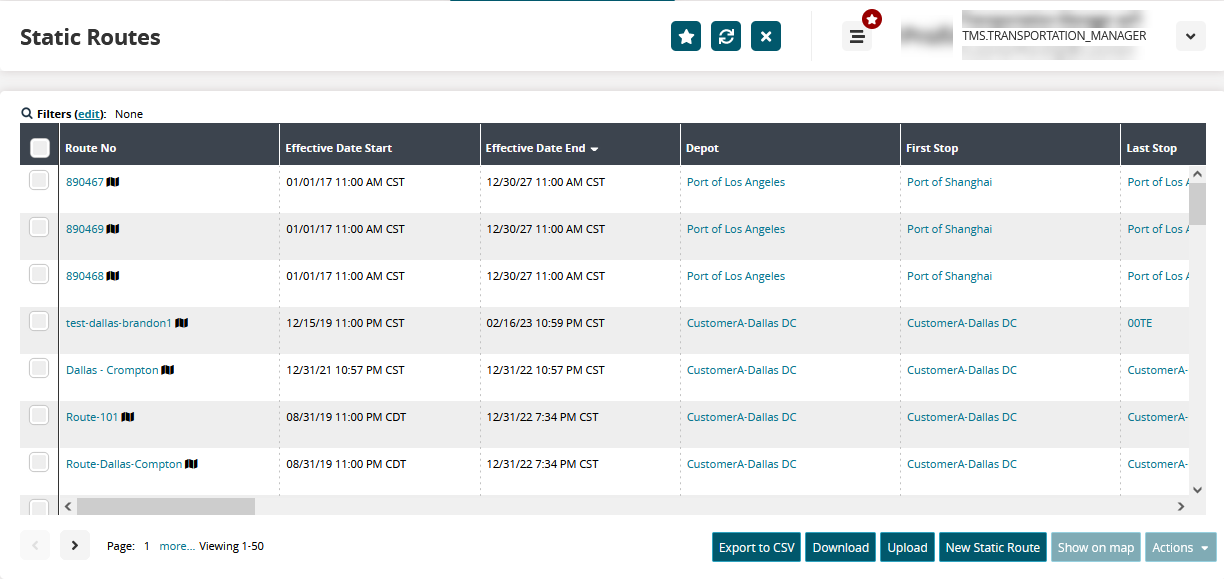
Click the New Static Route button to create a new static route.
The Create Static Route screen displays.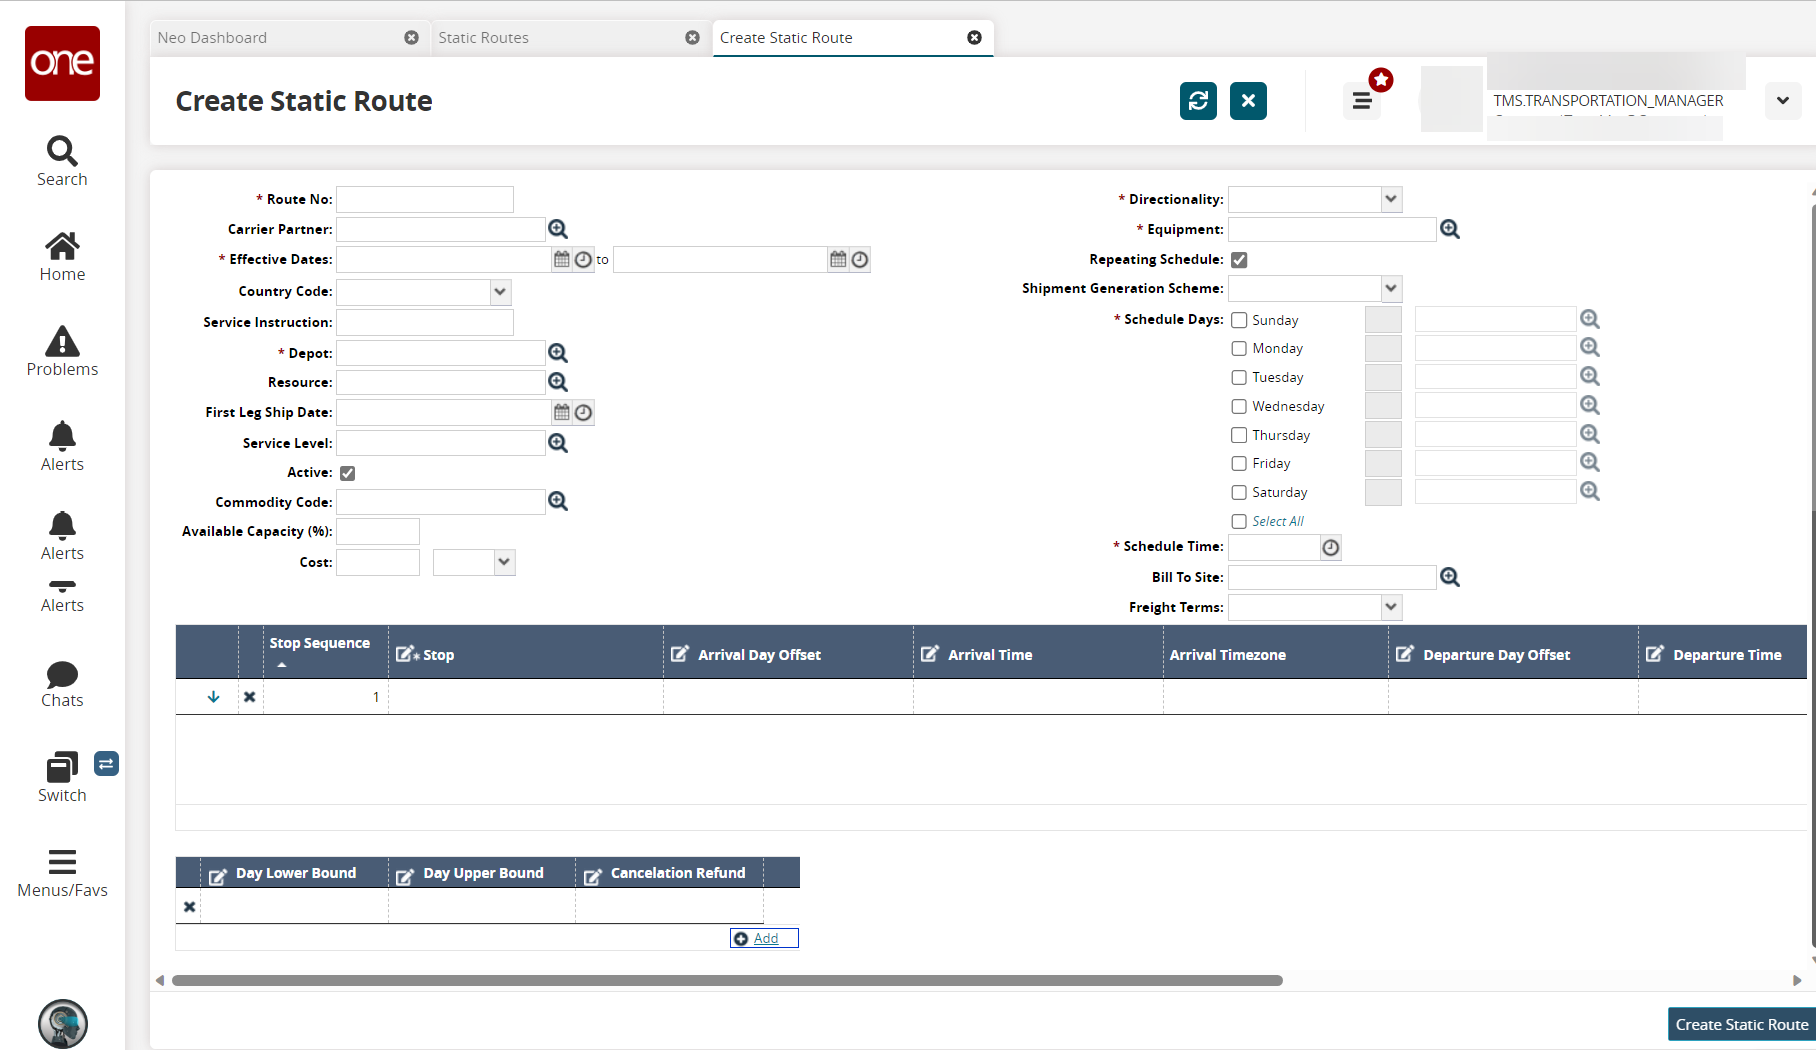
Enter values for fields described in the table below. Fields with an asterisk ( * ) are required.
Field Name
Description
* Route No
Enter a route number.
Carrier Partner
Select a partner carrier using the picker tool.
* Effective Dates
Select a date and time range for which the static route remains effective.
Country Code
Select a country code from the drop-down menu.
Service Instruction
Enter the service instructions.
* Depot
Use the picker tool to select a depot.
Resource
Use the picker tool to select a resource.
First Leg Ship Date
Enter date and time values.
Service Level
Use the picker tool to select a service level.
Active
Select the checkbox to set the static route in the active state.
Commodity Code
Use the picker tool to select a commodity code.
Available Capacity %
Enter the desired capacity for the static route in terms of percentage.
Cost
Enter the cost and select a currency type from the dropdown menu.
* Directionality
Select the desired option from the drop-down menu. The available options are Inbound and Outbound.
* Equipment
Use the picker tool to select equipment.
Repeating Schedule
Select the checkbox to repeat the selected schedule for the route.
Shipment Generation Scheme
Select the desired shipment generation scheme from the drop-down menu. The available options are Daily, Monthly, and Weekly.
Operation
Select the desired operation from the drop-down menu. The available options are Interleaved Pick Drops, Multi Pick Single Drop, and Single Pick Multi Drop. This field becomes visible after selecting a shipment generation scheme.
* Schedule Days
Select the days to schedule shipments and enter the number of movements that can be generated on that day. Use the picker tool to select a Skill.
* Schedule Time
Use the clock icon to enter a time that the route is scheduled for.
Bill To Site
Use the picker tool to select a bill to site at the static route level. This field is auto-populated with the origin stop if the shipment generation scheme is defined with Interleaved Pick Drops operation and freight terms are prepaid. If freight terms are not defined, the Bill To Site field is auto-populated with the destination stop.
Freight Terms
Select the desired option from the dropdown menu. The available options are Collect, Prepaid, and Third Party.
Adding Stops to Static Routes
In the grid below the header, click the +Add link to add a stop.
A new line appears.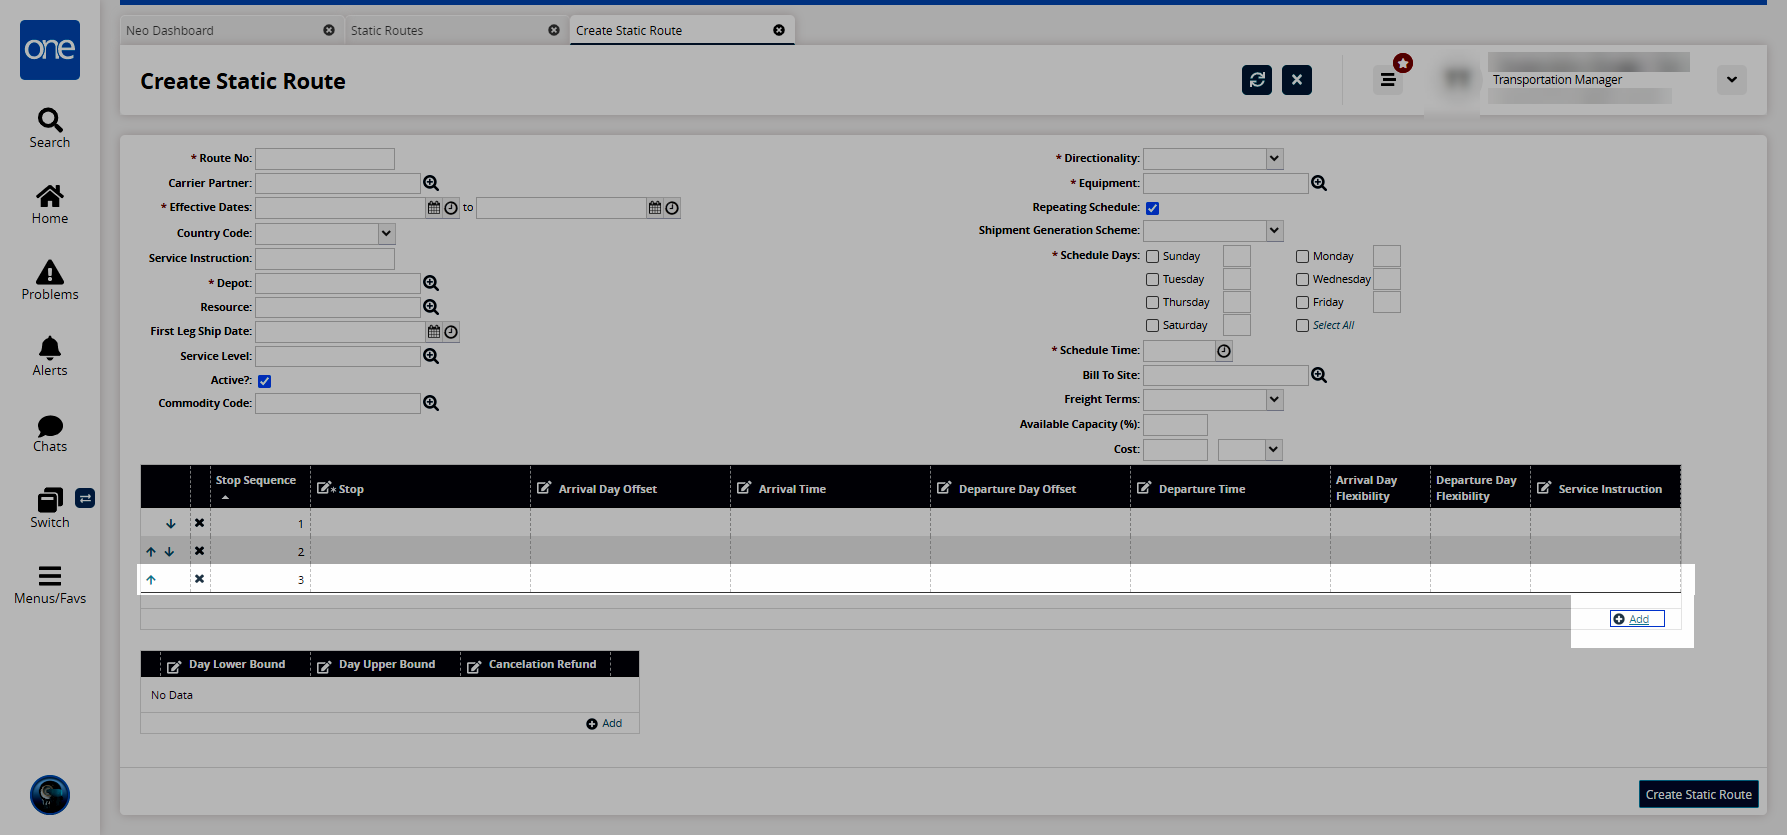
Enter values for fields described in the table below. Fields with an asterisk ( * ) are required.
Field
Description
Stop Sequence
This field is auto-populated with the stop number.
* Stop
Click the picker tool to select a site.
Arrival Day Offset
Enter the offset value for the shipment's arrival at the stop.
Arrival Time
Click the clock icon to enter the shipment arrival time.
Departure Day Offset
Enter the offset value for the shipment departure from the stop.
Departure Time
Click the clock icon to enter the shipment arrival time.
Planned Weight
Enter a planned weight for the stop and a unit of measure.
Planned Quantity
Enter a planned quantity for the stop and a unit of measure.
Shipment Type
Enter a shipment type from the dropdown menu.
Arrival Day Flexibility
Enter the number of days the shipment can arrive early or late.
Departure Day Flexibility
Enter the number of days the shipment can depart early or late.
Disable Auto Shipment Generation
Select Yes to prevent the system from auto-generating extra stops for shipments.
Bill To Site
Select a Bill To site using the picker tool.
Service Instruction
Enter any service instructions.
Click the up and down arrows at the far left of each stop's row in the table to rearrange the stop sequence.
In the grid below the stop sequence, click the +Add link to add daily bounds and refunds.
A new line appears.
In the Day Lower Bound column, enter the minimum cancelation charge.
In the Day Upper Bound column, enter the maximum cancelation charge.
In the Cancelation Refund column, enter the percentage of the cancelation charge for calculating refunds.
When complete, click the Create Static Route button.
A success message appears, and a static route is created.