Creating and Customizing Alert Subscriptions
Users can create new alert subscriptions that monitor alert filters and send email alerts when threshold parameters are crossed. For some users or roles, the alert subscriptions are called subscriptions or issue subscriptions.
Complete the following steps to create alert subscriptions:
Log in to the ONE system.
Click Menus/Favs > Tools > Alert Subscriptions.
In the NEO UI, users can click on the Menu/Favs icon on the left sidebar and type in the name of the screen in the menu search bar. For more information, see "Using the Menu Search Bar."
The Alert Subscriptions screen displays.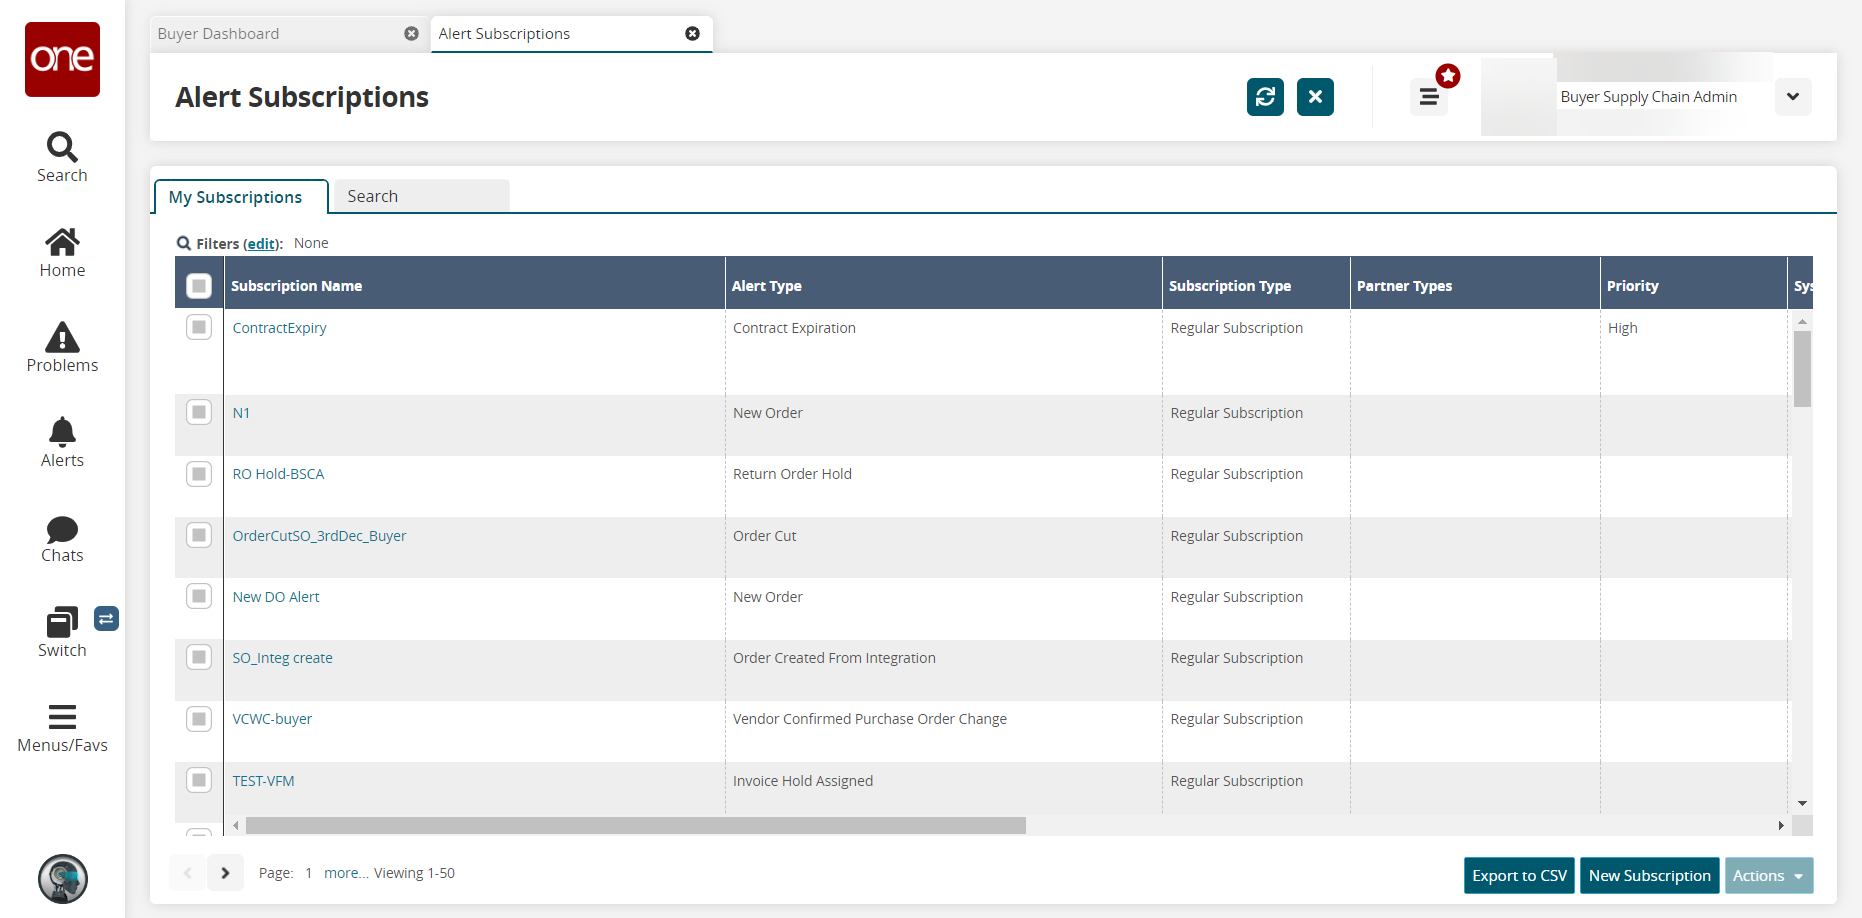
Select a checkbox before the Subscription Name column to select a subscription row and click Actions.
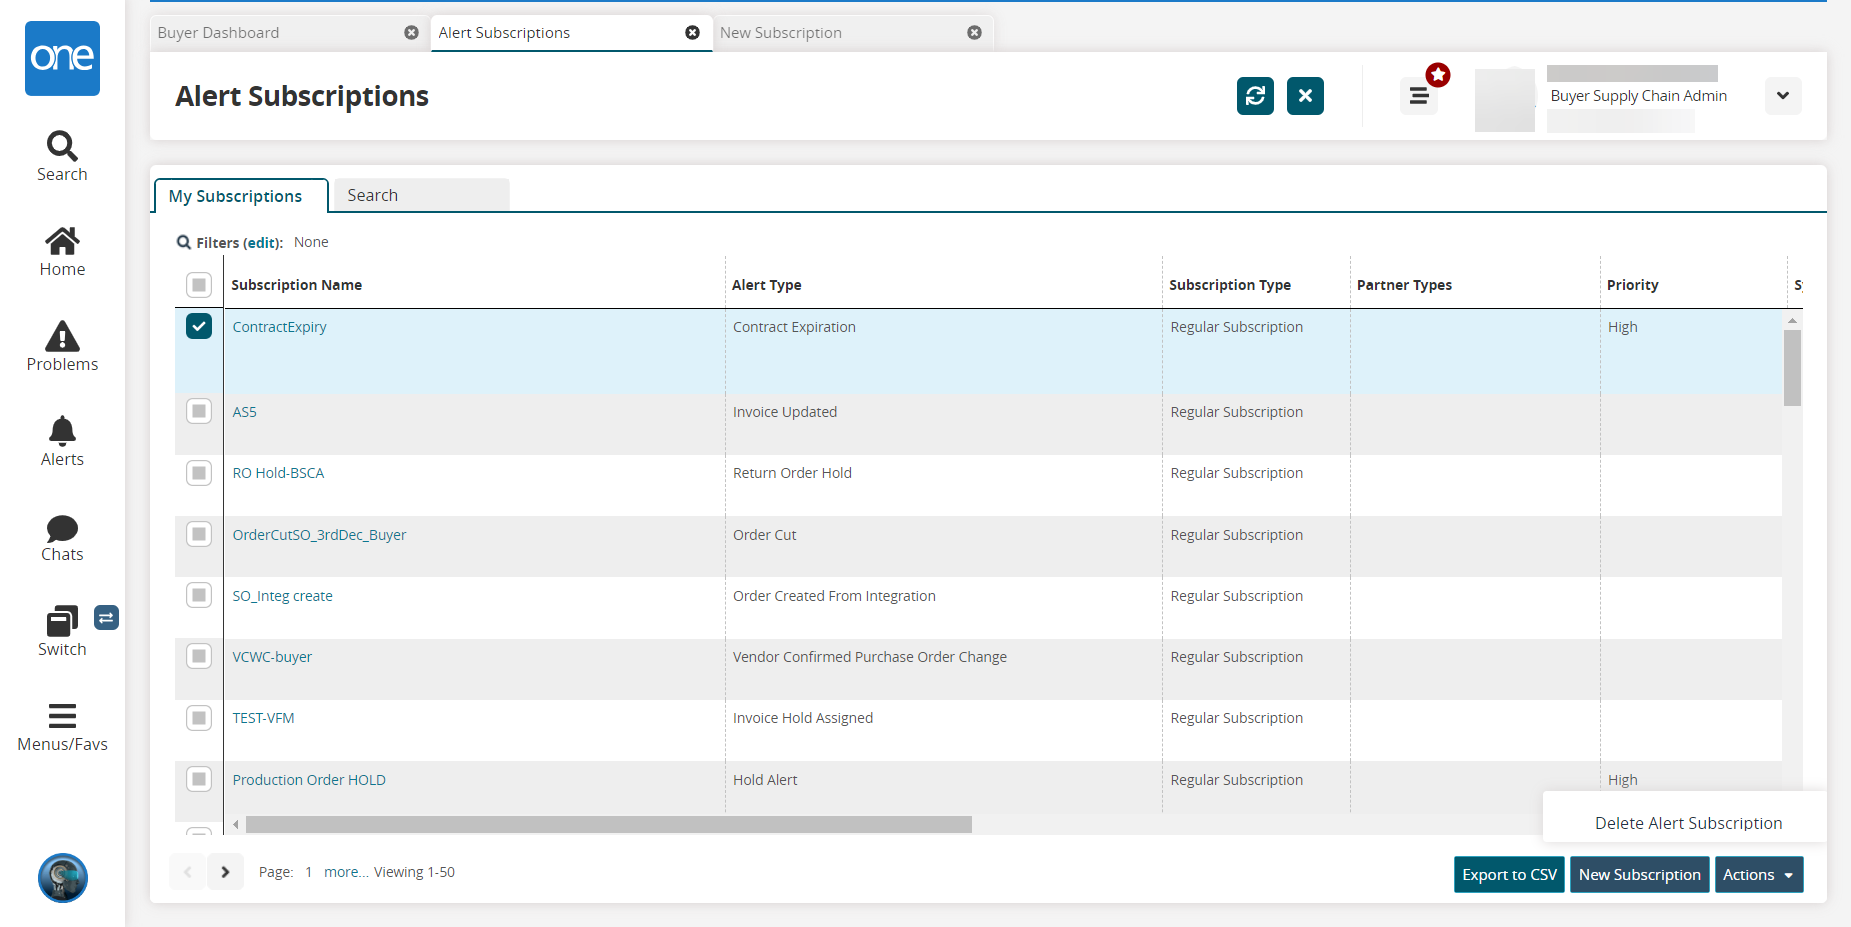
Select the Delete Alert Subscription option to delete the subscription.
The subscription is deleted.Click the New Subscription button.
The New Subscription screen displays.
Fill out the following fields. Fields with an asterisk ( * ) are required.
Section
Field
Description
Alert Information
* Subscription Name
Enter a name for this alert subscription.
* Category
Select an alert category. This selection impacts what values appear in other fields or what fields appear.
Neo Dashboard Category Name
Input a category name for the dashboard.
* Alert Type
From the Alert Type dropdown list, select the desired value. The options that appear in the dropdown list are dependent on what is selected in the Category field.
Publish
When this checkbox is selected, other users in your enterprise can join the subscription to receive alerts.
Active?
Check this checkbox if this is an active subscription.
Priority
Select a priority from the dropdown menu. The options are High, Medium, or Low.
Alert Type
* Subscription Type
Select either Regular Subscription or Partner Recommendation from the dropdown list.
Selecting Partner Recommendation sets up alert subscriptions for your partner's supplier site. When selected, a new field, Partner Types, with checkboxes for all partner types displays. Select the appropriate types.Delivery
Check the boxes for the delivery types required. New fields display after some boxes are checked.

Check System Delivery for alerts delivered internally to the user's alert inbox.
Check My email address for this user. Users can select to use their ONE user email attached to the user profile (displayed to the right). Users can also select Other email addresses and enter different addresses into the text box that displays.
Check Other email addresses to send alerts to other emails.
Check Mobile and select SMS or WhatsApp. Users can then select My Mobile Number, which displays the phone number from the user's profile preferences or Other Mobile Number and enter a number in the text box that displays.
Alert Digest Delivery Schedule
Use the picker tool to select a delivery schedule. This field is not available if Mobile is selected as a delivery option.
Custom Email Template
Enter or use the picker tool to select a custom email template.
Alert Filters
The filter options change depending on the category and type of alert selected above. Not all alert categories will have filters.
Additional Information
The display options change depending on the category and type of alert selected above. Not all alert categories will have the ability to select what fields display.
Additional Contact Types
The options change depending on the category and type of alert selected above. Not all alert categories will have additional contact types. In this section, alerts with Shipment or Attachment selected as the category can be configured to be sent to the contacts listed on the Contacts tab and Other Info tab on the shipment detail screen.
Alert Problem Creation
Generate Problems
Check this box if the ONE system should generate a problem when the alert is generated. Checking this box activates the Auto-Resolve field.
Auto-Resolve
Check this box if a problem should be generated in the Resolved state.
Roles Allowed to See Problem
Enter or select the roles that are allowed to see the problems if generated from this alert.
Click the Create Subscription button.
The screen refreshes, and the new subscription name displays at the top of the screen with a green success message.