Invite Tab
This topic describes how to customize the email invite sent to the participants added to the databot to join and participate in the survey.
Complete the following steps to customize the email invite:
Click the Invite tab.
The Invite tab displays with the default email invite message in the Message text box and some data placeholders highlighted in blue. The placeholders pull the values directly from the system.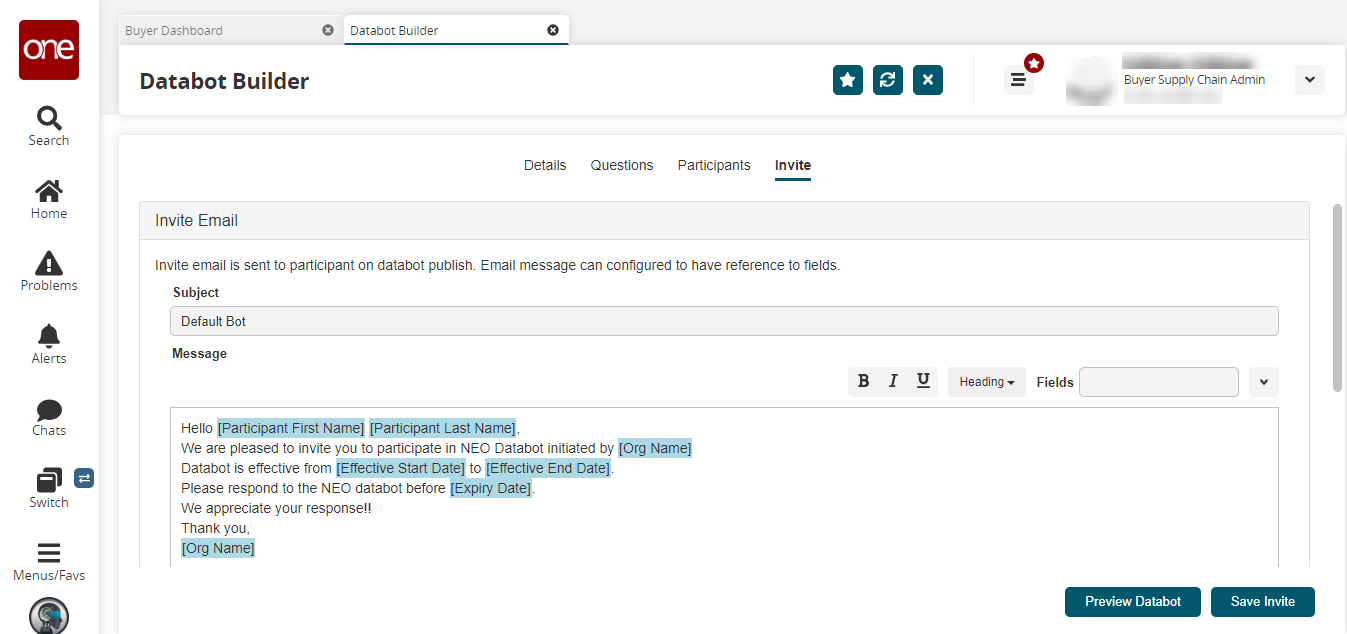
In the Subject field, enter the subject for the email invite. The subject field pre-populates with the databot's name.
In the Message text box, type your custom message or make changes to the default message as needed. You can select some text and use the formatting options to bold, italicize, or underline it. You can also add headings in the message. Up to 6 heading levels are supported.
To add a placeholder field anywhere in your custom message, place the cursor where you want to insert a data field and select the desired placeholder field from the Fields dropdown menu.
The new data field is added to the message.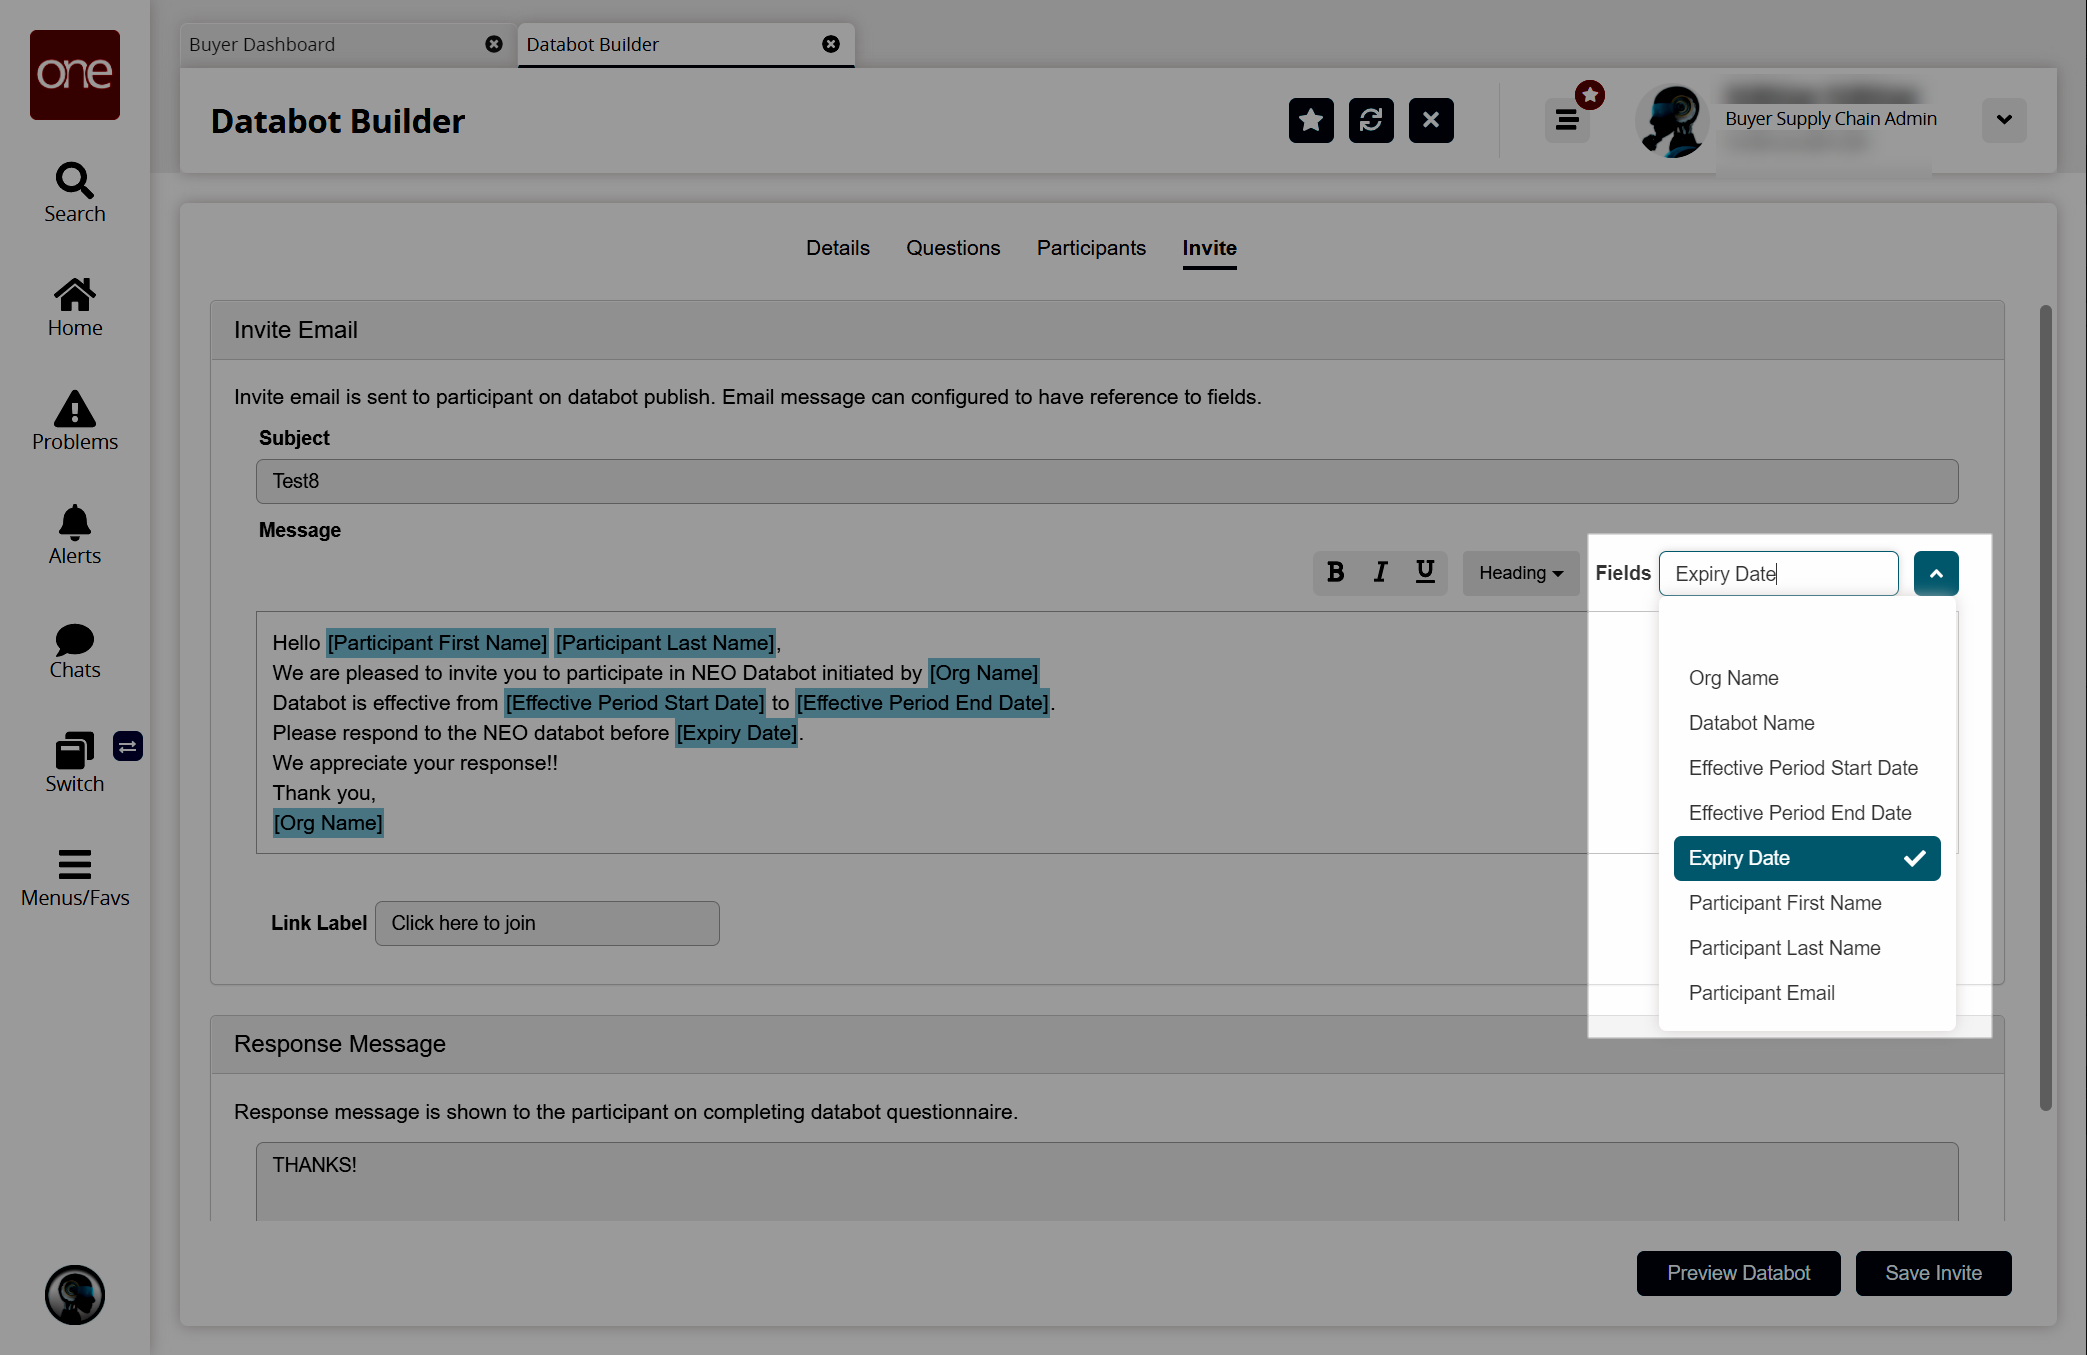
In the Link Label field, enter the label you want to display on the link the user clicks to join the databot. By default, the link text is set to "Click here to join."
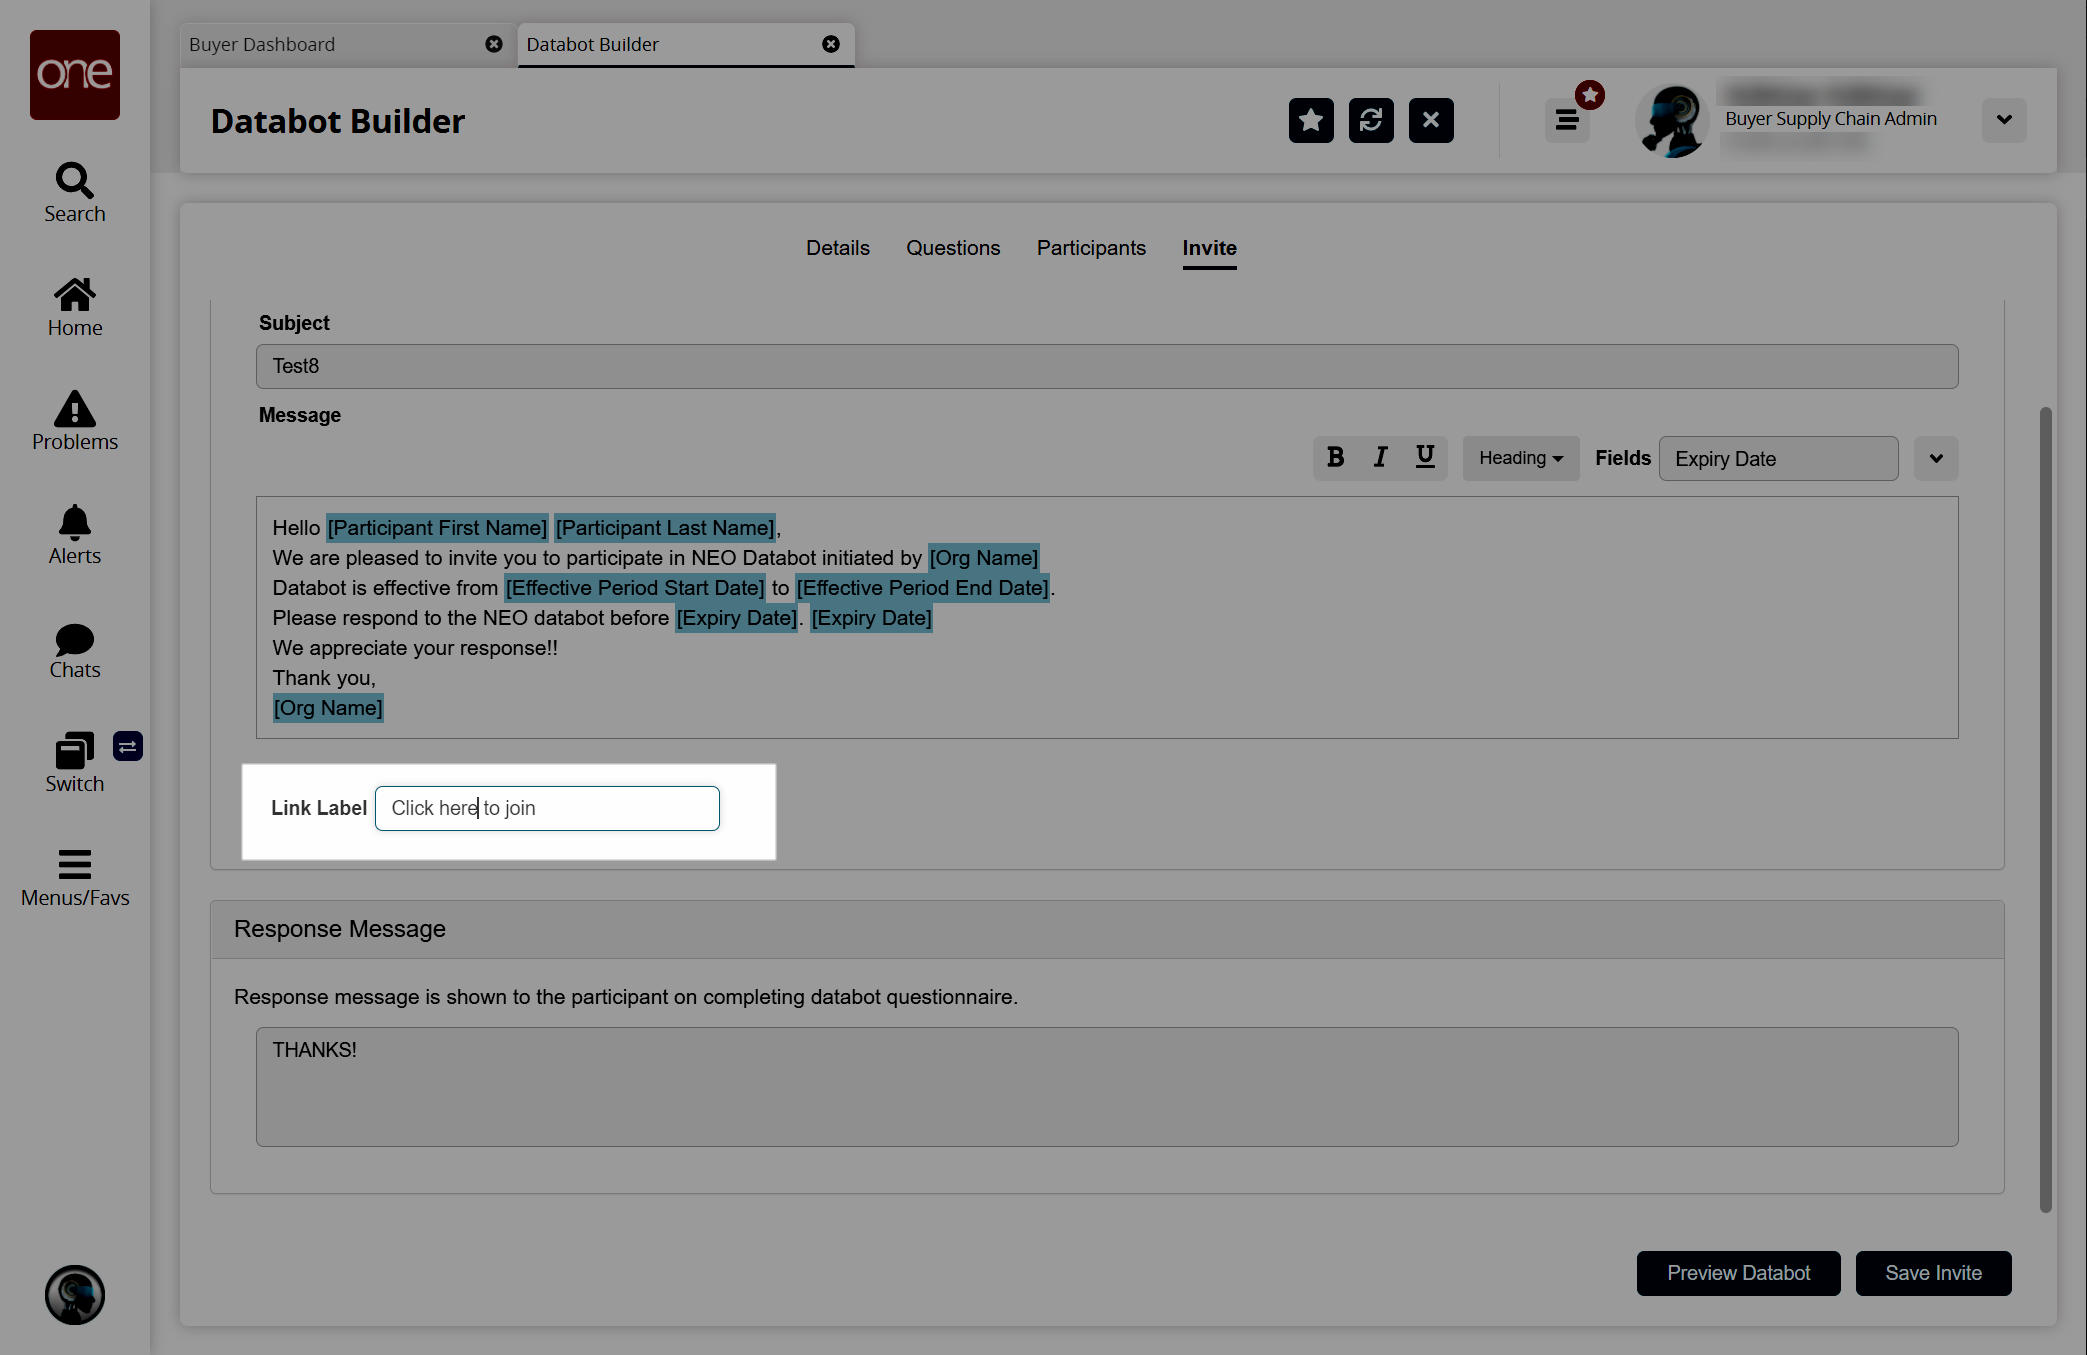
In the Response Message section, enter the message you want the user to see once they complete the databot questionnaire. The default response message is "THANKS!"
Click the Preview Databot button to preview the message as it has been entered and formatted.
The preview screen appears.Click the Save Invite button to save the custom email invite to revisit it later.
A success message appears.