Managing VAS Contracts
Complete the following procedure to manage value add contracts:
L og in to the ONE system.
Click Menu/Favs > Contract Mgmt > Value Add Contracts.
In the NEO UI, users can click on the Menus/Favs icon on the left sidebar and type in the name of the screen in the menu search bar. For more information, see "Using the Menu Search Bar."
The Value Add Contracts screen appears with the Explorer pane hierarchy in the collapsed state.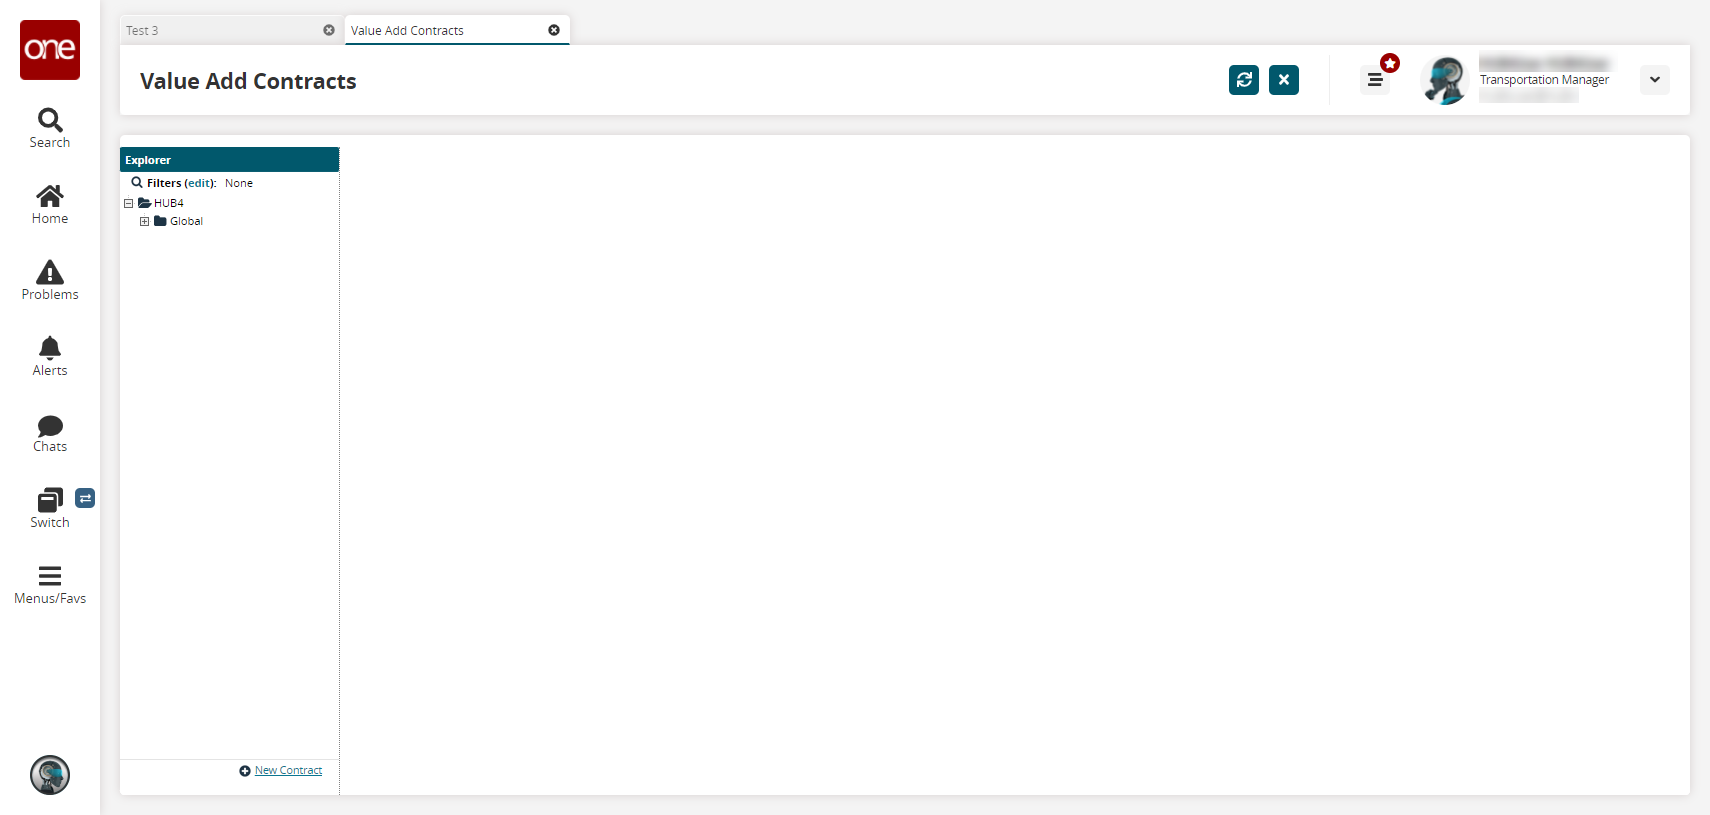
Click the Filters (edit) link to apply search criteria to reduce the number of entries shown.
The Filters menu displays.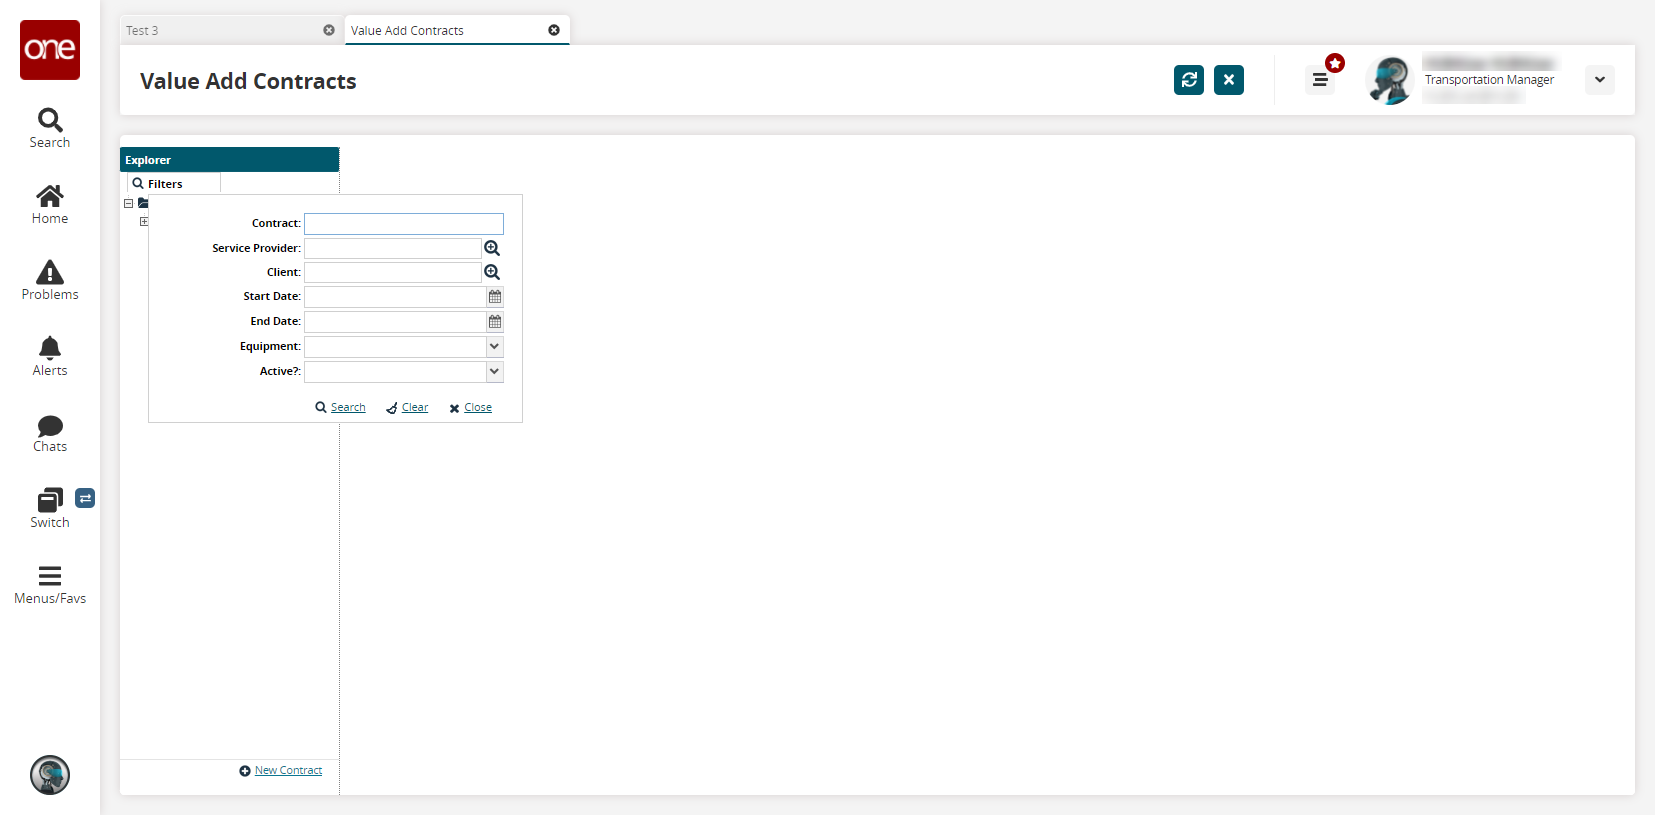
Fill out the filters as desired, and click the Search link.
The search results display.In the Explorer pane on the left, click a value add contract folder to view details about a contract,
Information appears in the right-hand pane.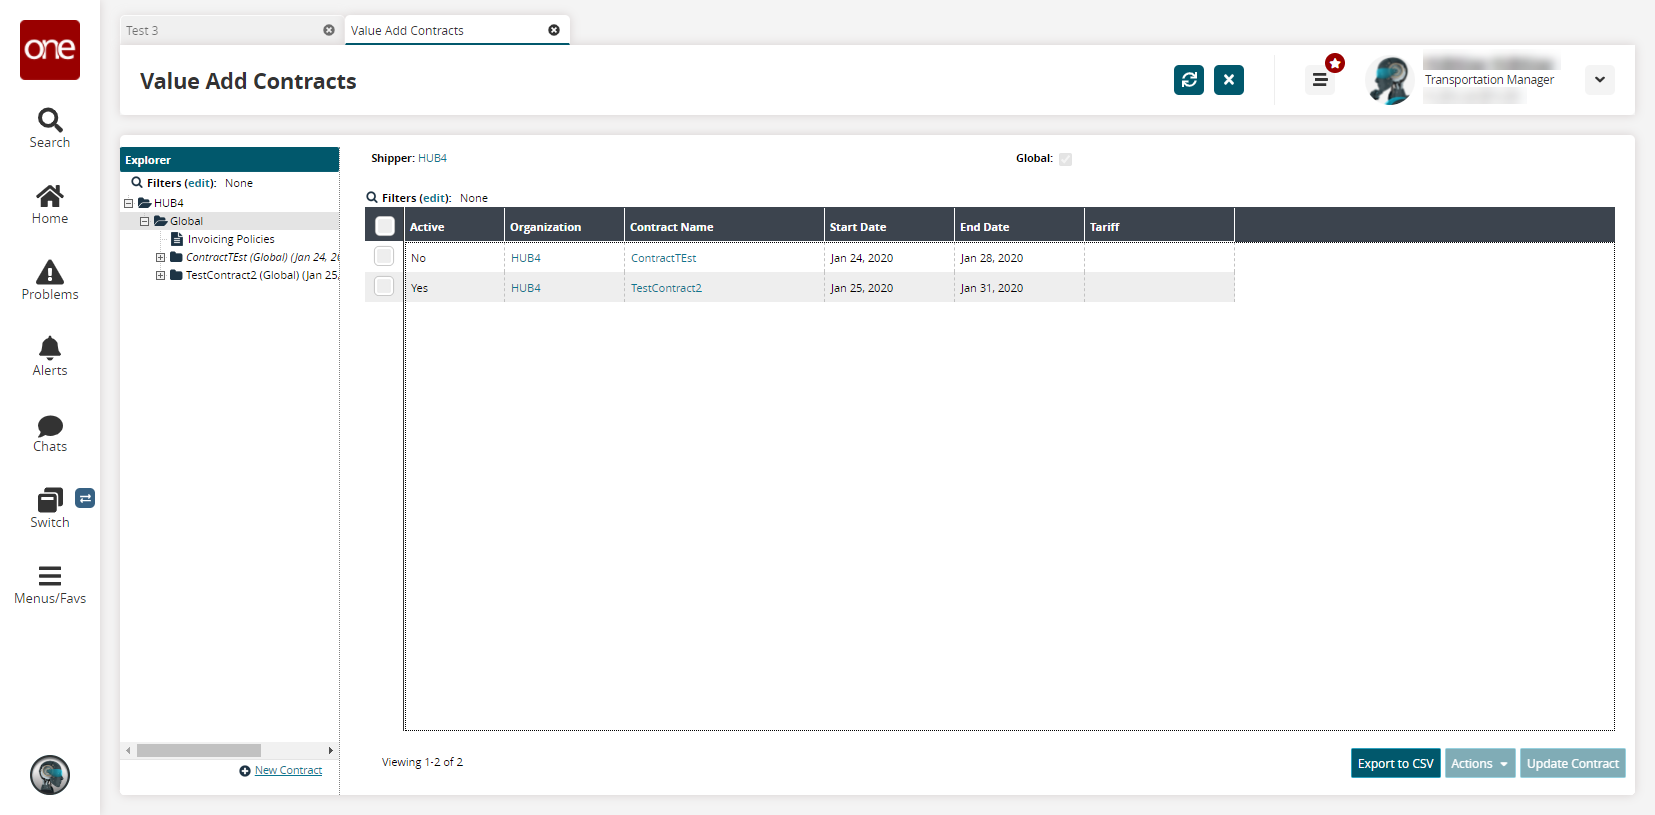
Click the Export to CSV button to export the report to a CSV file.
Select the checkbox next to a contract, click Actions, and then click Activate Contract or Deactivate Contract.
A popup appears based on your selection.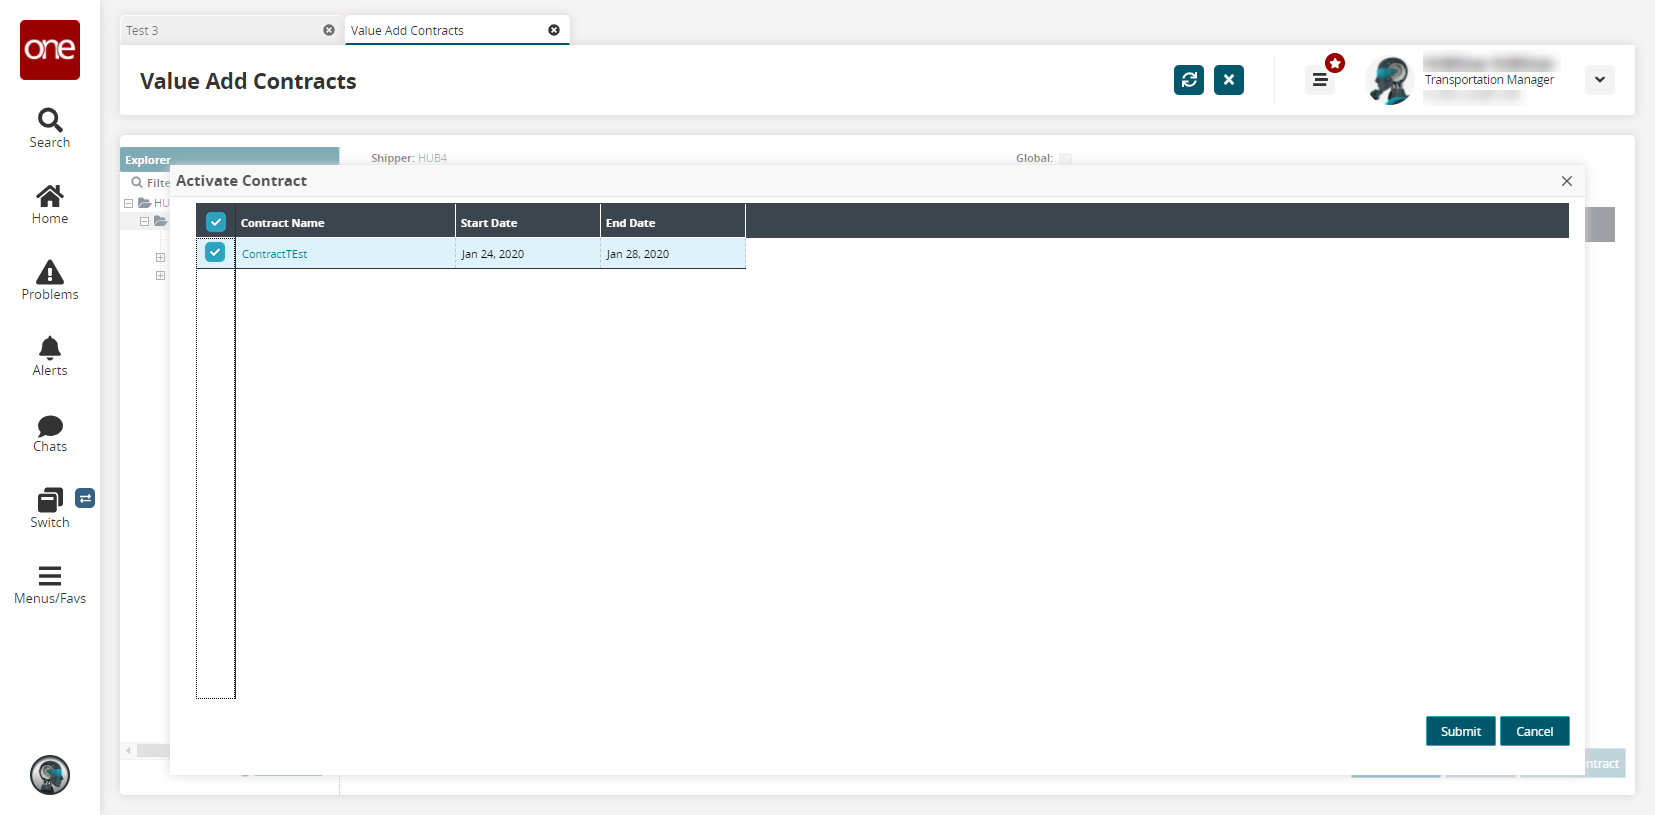
Click Submit.
To update a contract, select the checkbox next to a contract and then click Update Contract.
The row becomes editable.As required, select new values for the Start Date and End Date, and then click Submit.
A success message appears.To create a new contract, click the New Contract link in the left-hand pane.
The right pane updates.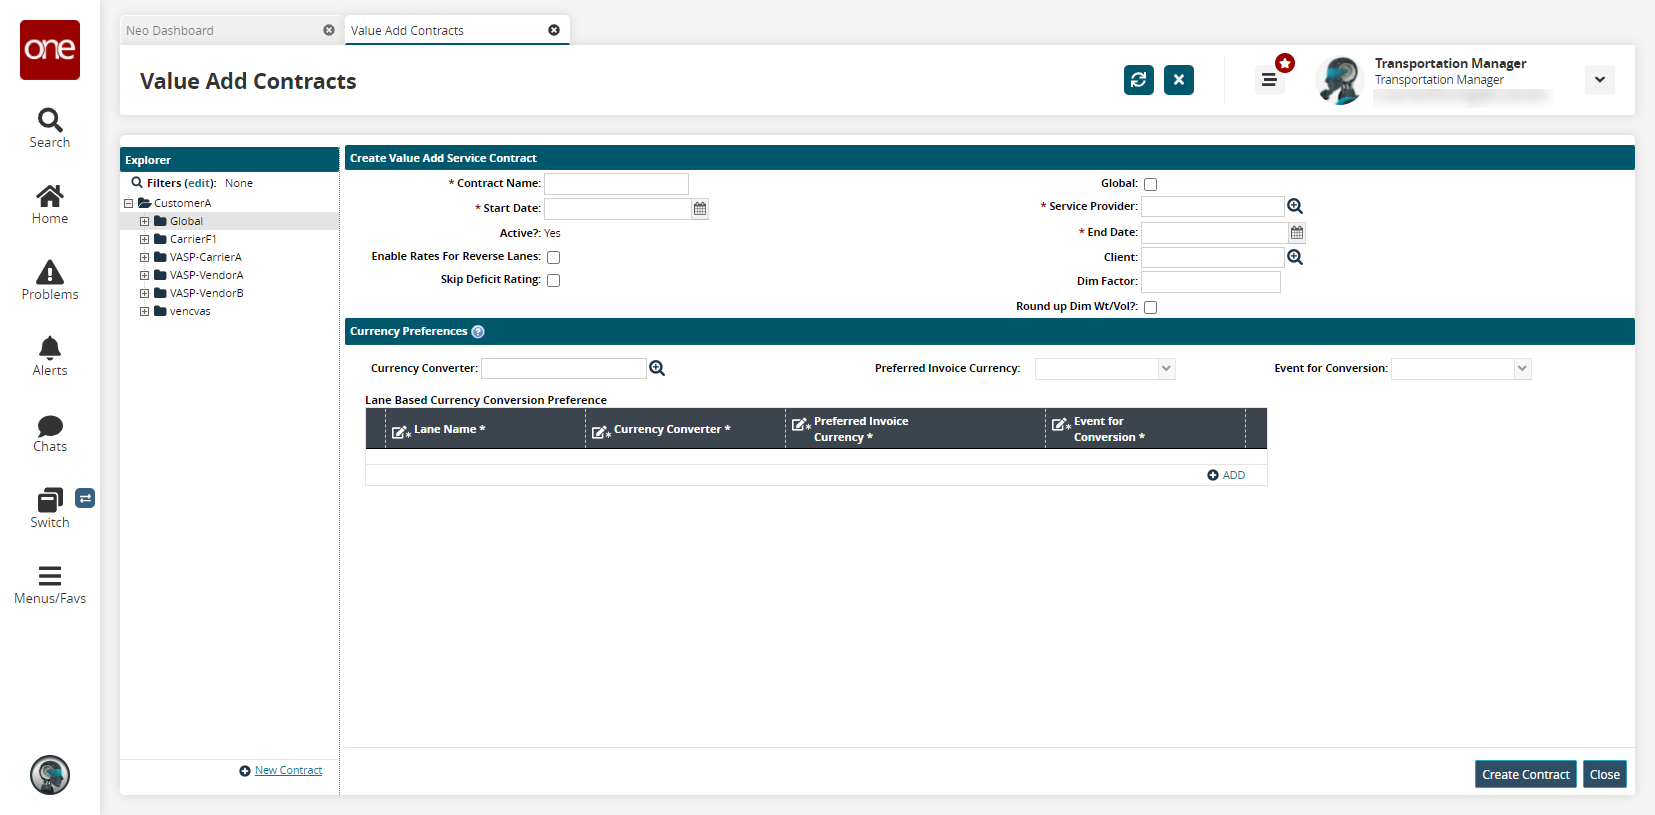
Fill out the following fields. Fields with an asterisk ( * ) are required.
Field
Description
* Contract Name
Enter a contract name.
* Start Date
Select a start date using the date picker.
Enable Rates for Reverse Lanes
Select this checkbox to enable rates for reverse lanes.
Skip Deficit Rating
Select this checkbox to skip deficit ratings.
Global
Select this checkbox if the contract is global.
* Service Provider
Select a service provider using the picker tool.
* End Date
Select an end date using the date picker.
Client
Select a client using the picker tool.
Dim Factor
Enter a dimension factor.
Round Up Dim Wt/Vol?
Select this checkbox to round up dimensional weight and volume.
Currency Converter
Select a currency converter using the picker tool.
Preferred Invoice Currency
Select a preferred invoice currency from the dropdown menu.
Event for Conversion
Select the conversion event from the dropdown menu.
To specify lane-based currency conversion preferences, click the ADD link. A new row appears in the table.
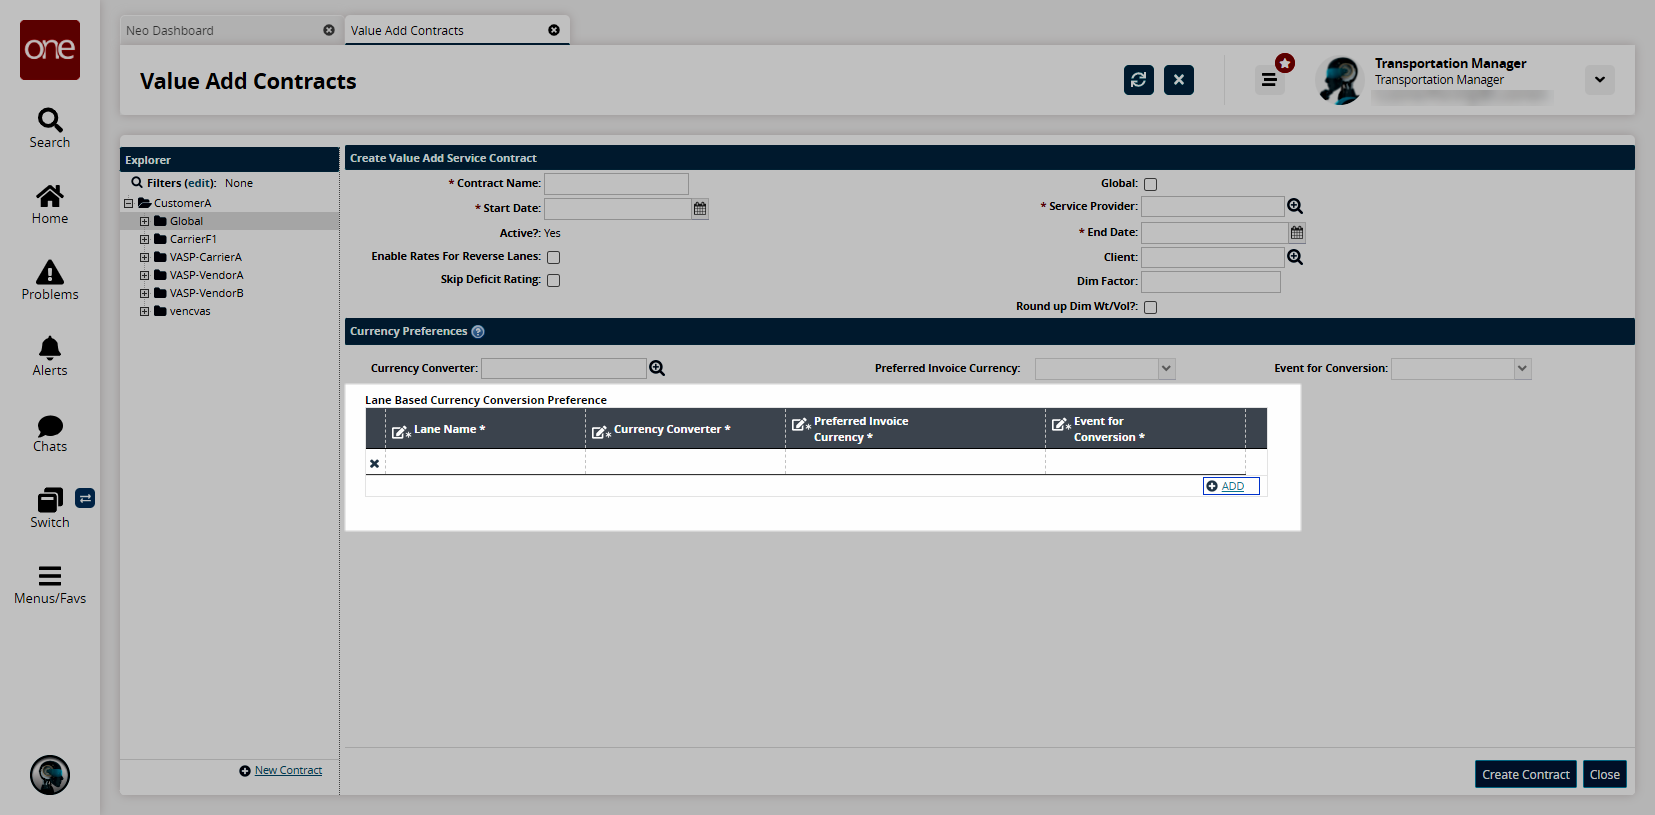
Enter a *Lane Name, *Currency Converter, *Preferred Invoice Currency, and *Event for Conversion.
When complete, click Create Contract.
A success message appears.To see the new contract in the value add contract hierarchy, click the Refresh button.
The New Value Add Contract appears with no defined site accessorial rates.
Site Accessorial Rates
Site Accessorial Rates represent charges that are configured by location, such as demurrage costs and value add service fees. They are defined by site, equipment, and accessorial code.
In the Explorer pane on the left, select the site accessorial rate for a carrier contract to view existing site accessorial rates.
The Site Accessorial Rate pane appears to the right.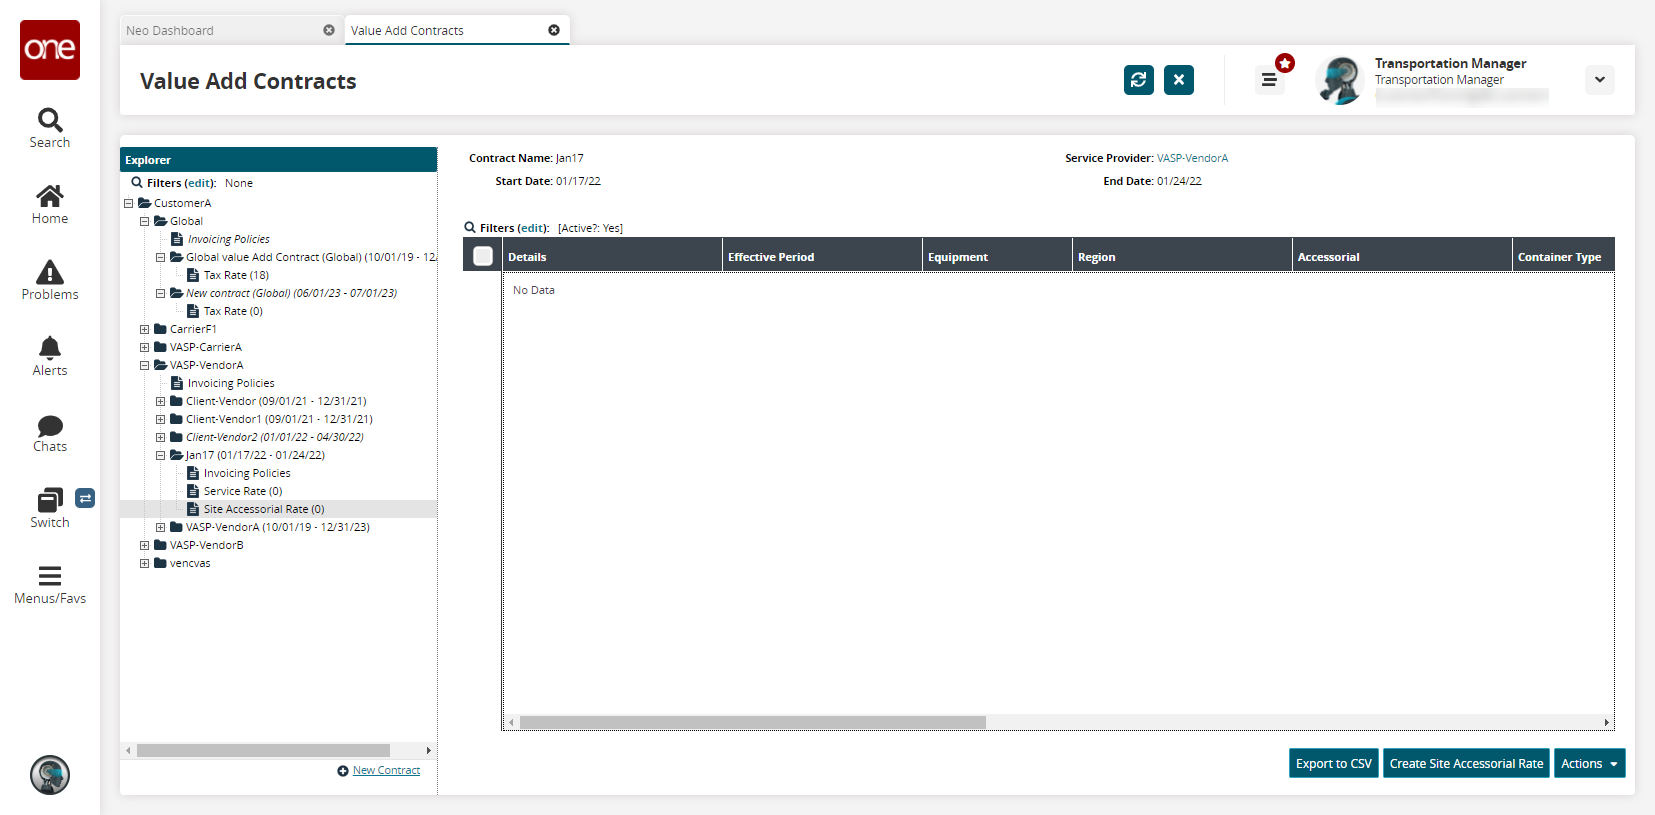
To add a site accessorial rate, click the Create Site Accessorial Rate button.
The Create Site Accessorial Rate screen appears.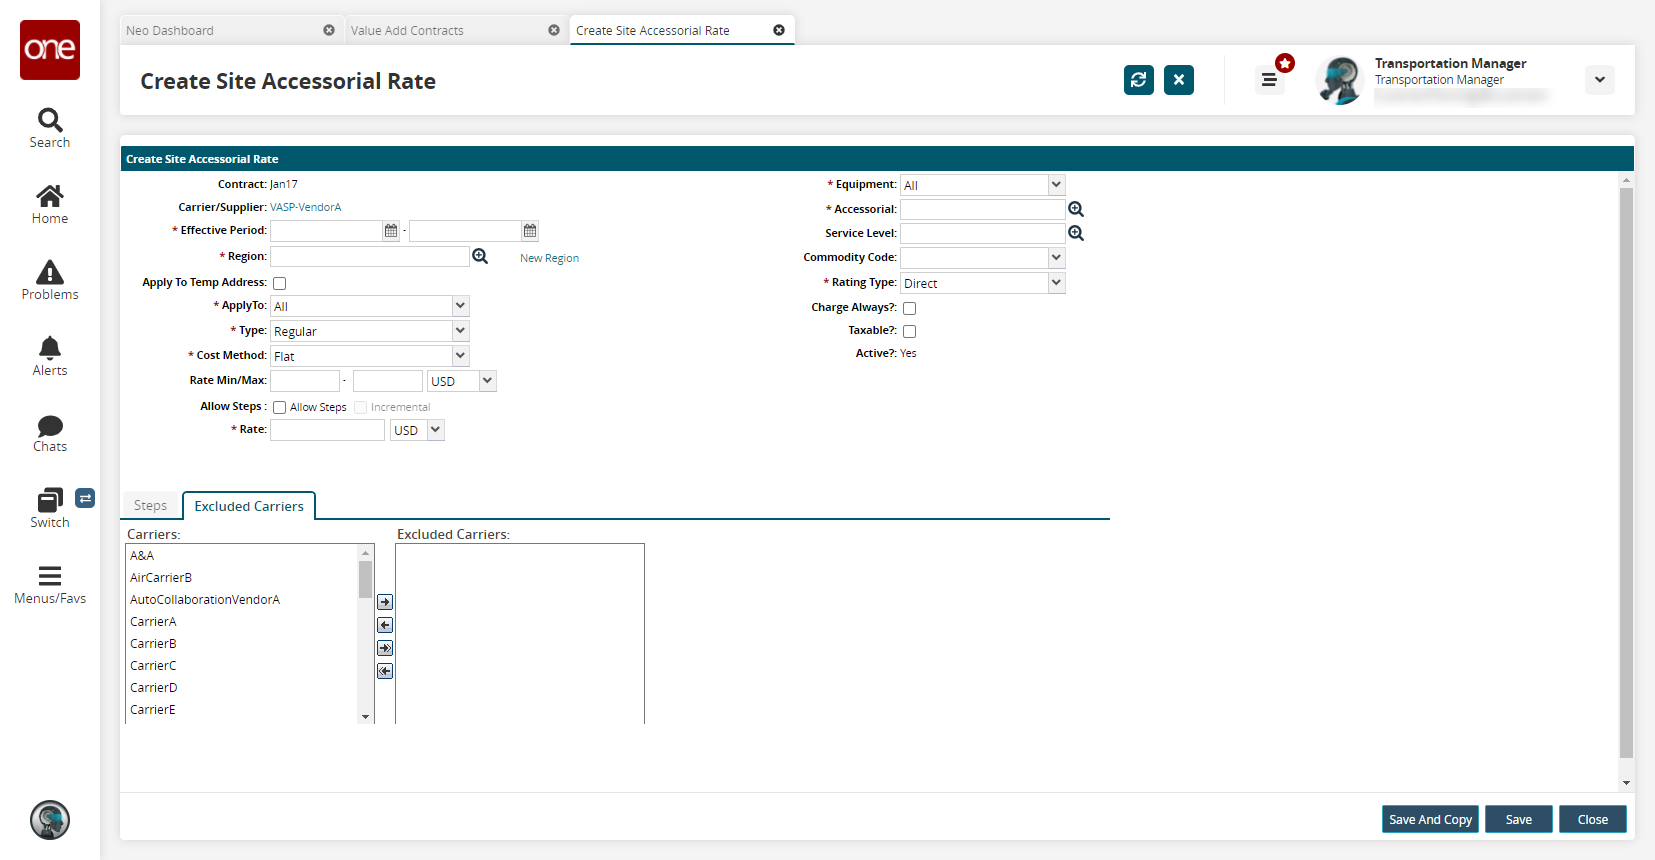
Fill out the following fields. Fields with an asterisk ( * ) are required.
Field
Description
* Effective Period
Select an effective date range.
* Region
Select a region using the picker tool.
Apply To Temp Address
Select this checkbox to apply to a temporary address.
* ApplyTo
Select an apply to option from the dropdown menu.
* Type
Select a type from the dropdown menu.
* Cost Method
Select a cost method from the dropdown menu.
Rate Min/Max
Select a minimum and maximum rate, as well as the currency of measure.
Allow Steps
Select this checkbox to allow steps. If selected the Steps tab becomes available.
* Rate
Select a rate and a currency of measure.
* Equipment
Select an equipment option from the dropdown menu.
* Accessorial
Select an accessorial using the picker tool.
Service Level
Select a service level using the picker tool.
Commodity Code
Select a commodity code from the dropdown menu.
* Rating Type
Select a rating type from the dropdown menu.
Container Type
Select a container type using the picker tool. This field is visible when Demurrage, Detention, or DETMUR is selected from the Type field.
Weekend and Holiday
Select a weekend and holiday policy from the dropdown menu. This field is visible when Demurrage, Detention, or DETMUR is selected from the Type field.
Charge Always?
Select this checkbox if you always want to charge.
Taxable?
Select this checkbox if the rate is taxable.
Steps Tab
Click the Add link.
A new row appears.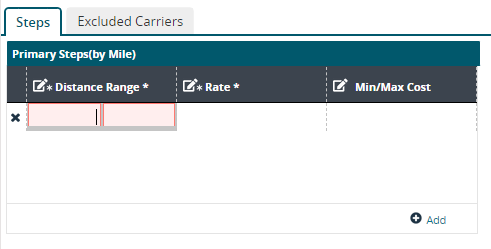
Enter a minimum and maximum range for the new step in the *Distance Range field.
Enter a step rate and currency in the *Rate field.
Enter a minimum and maximum cost in the Min/Max Cost field.
Excluded Carriers Tab
Click the Excluded Carriers tab.
From the Carriers section, double click or use the arrow buttons to move carriers to the Excluded Carriers section.
Tip
You can add all carriers in the Carriers list to the Excluded Carriers list by clicking the Add All button. Similarly, you can remove carriers from the Excluded Carriers list by selecting carriers and then clicking the Remove button. The selected carriers move from the Excluded Carriers list to the Carriers list. You can remove all carriers from the Excluded Carriers list to the Carriers list by clicking the Remove All button.
After the value-add contract details have been specified, click Save.
A success message appears.In the Value Add Contracts tab, click the Refresh button.
The new accessorial rate appears.