Setting Organization Contacts as Visible to Partners
ONE has provided users the ability to publish organization contacts to other partner enterprises. Previously, contact details were available only within the organization (not to partner organizations), which limited collaboration among the supply chain network. This feature opens up opportunities for the many partners in the network to contact each other for process improvements and better efficiencies. Users set site contacts as public or private using the Is Public flag on the Contacts tab of the Site details page, which determines which users can see the contact information. The flag is set to private as the default.
Complete the following steps to set a new contact to public for visibility to partner users from within a site:
L og in to the ONE system.
Click Menus/Favs > Administration > Site > Search Site.
In the NEO UI, users can click on the Menus/Favs icon on the left sidebar and type in the name of the screen in the menu search bar. For more information, see "Using the Menu Search Bar."
The Search Site screen appears.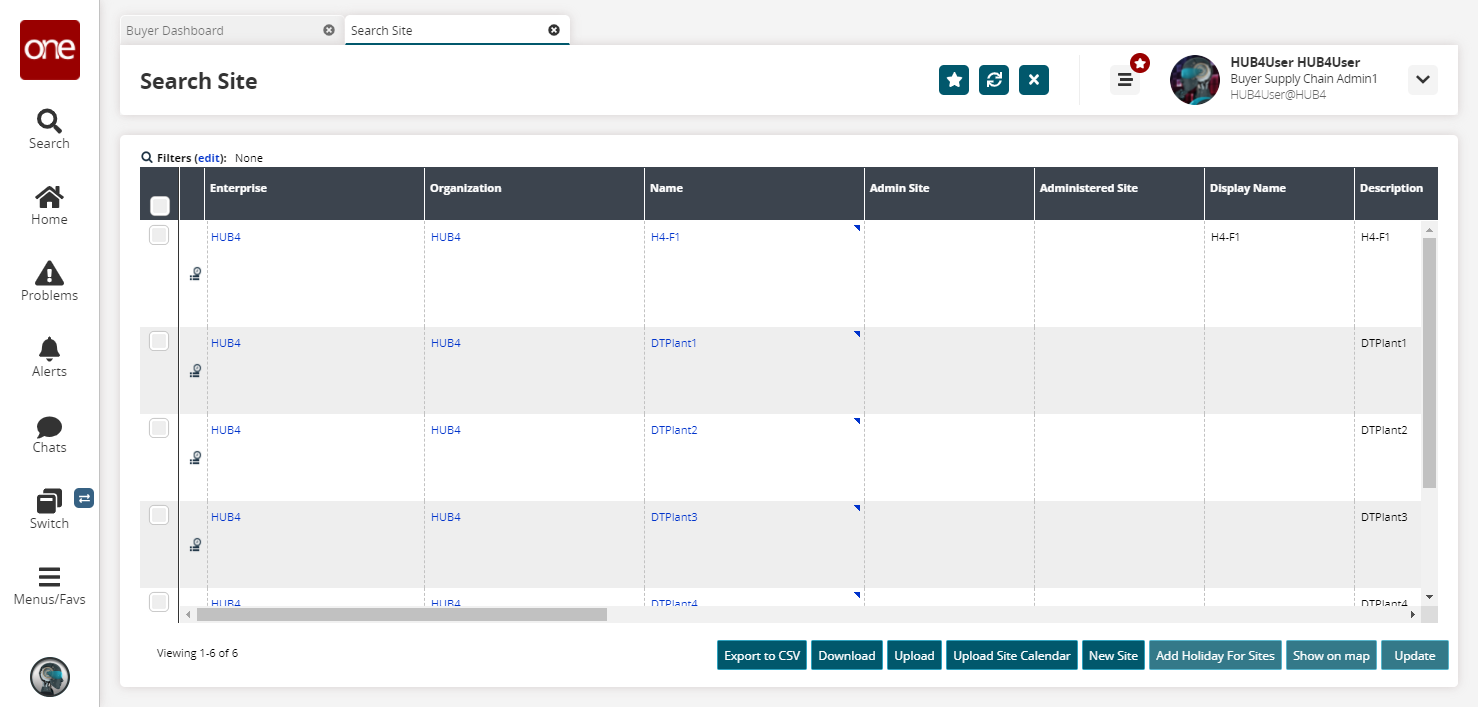
Click the Name link to open the Site Details UI. In this example, site H4-F1.
The Site Details screen appears.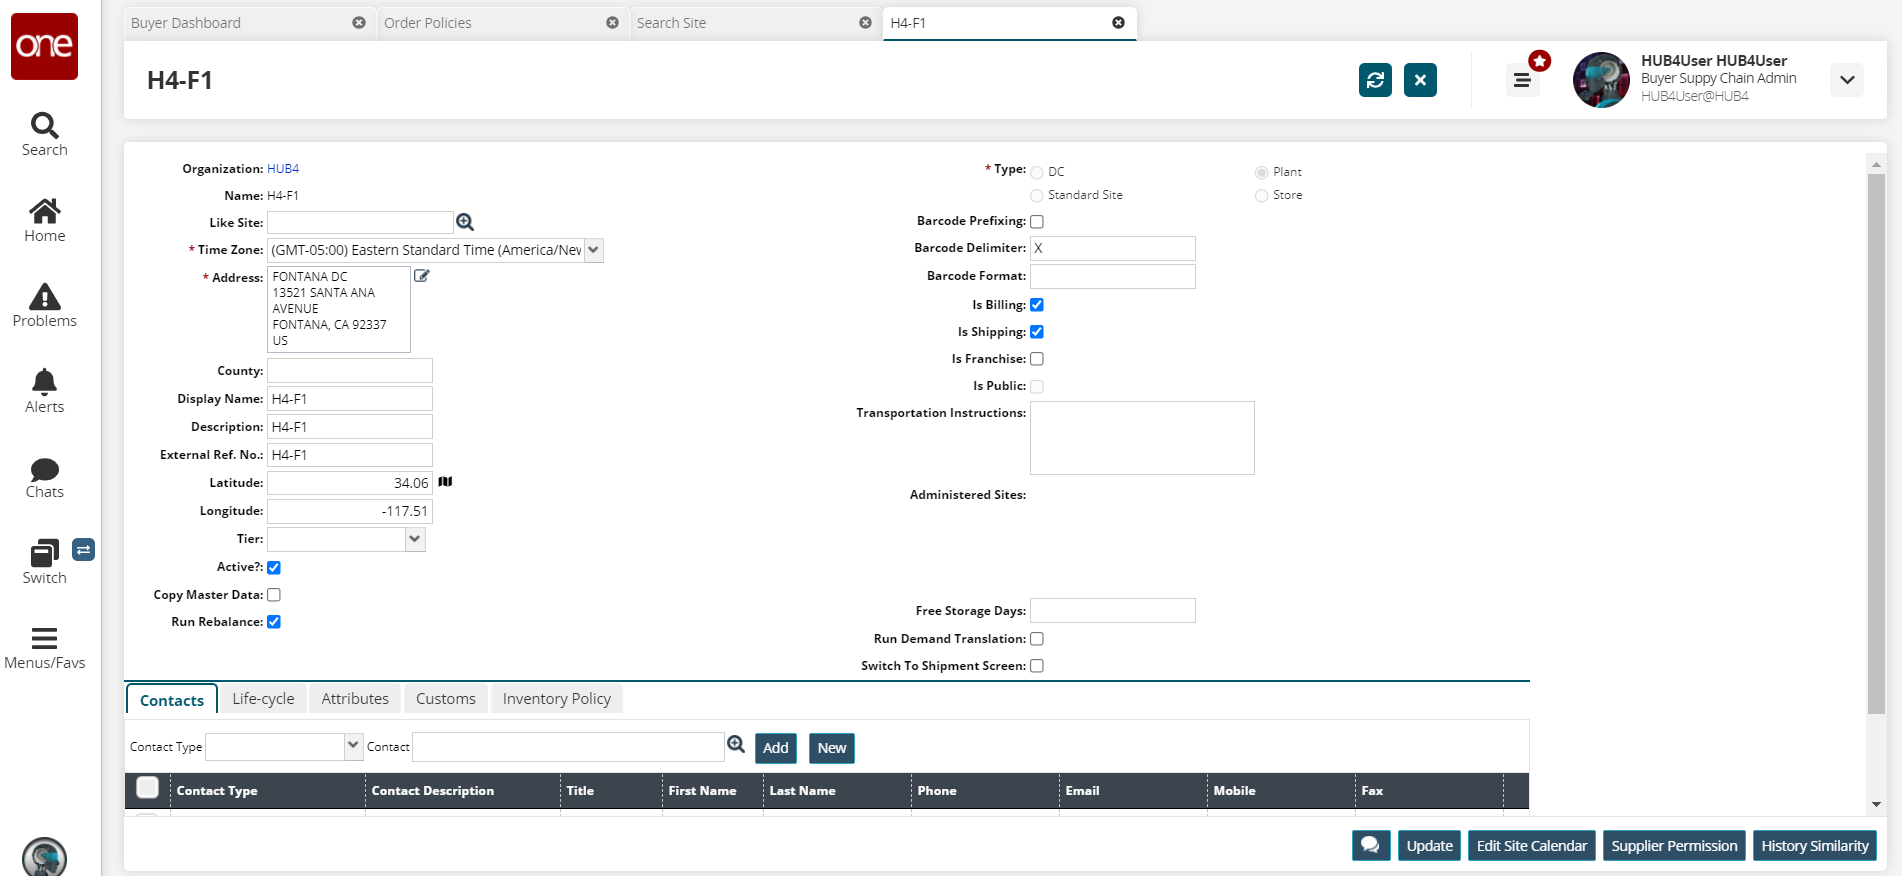
In the Contacts tab, click the New button to create a new contact.
The New Contact popup appears.
If you want to edit an existing contact, please see the instructions below.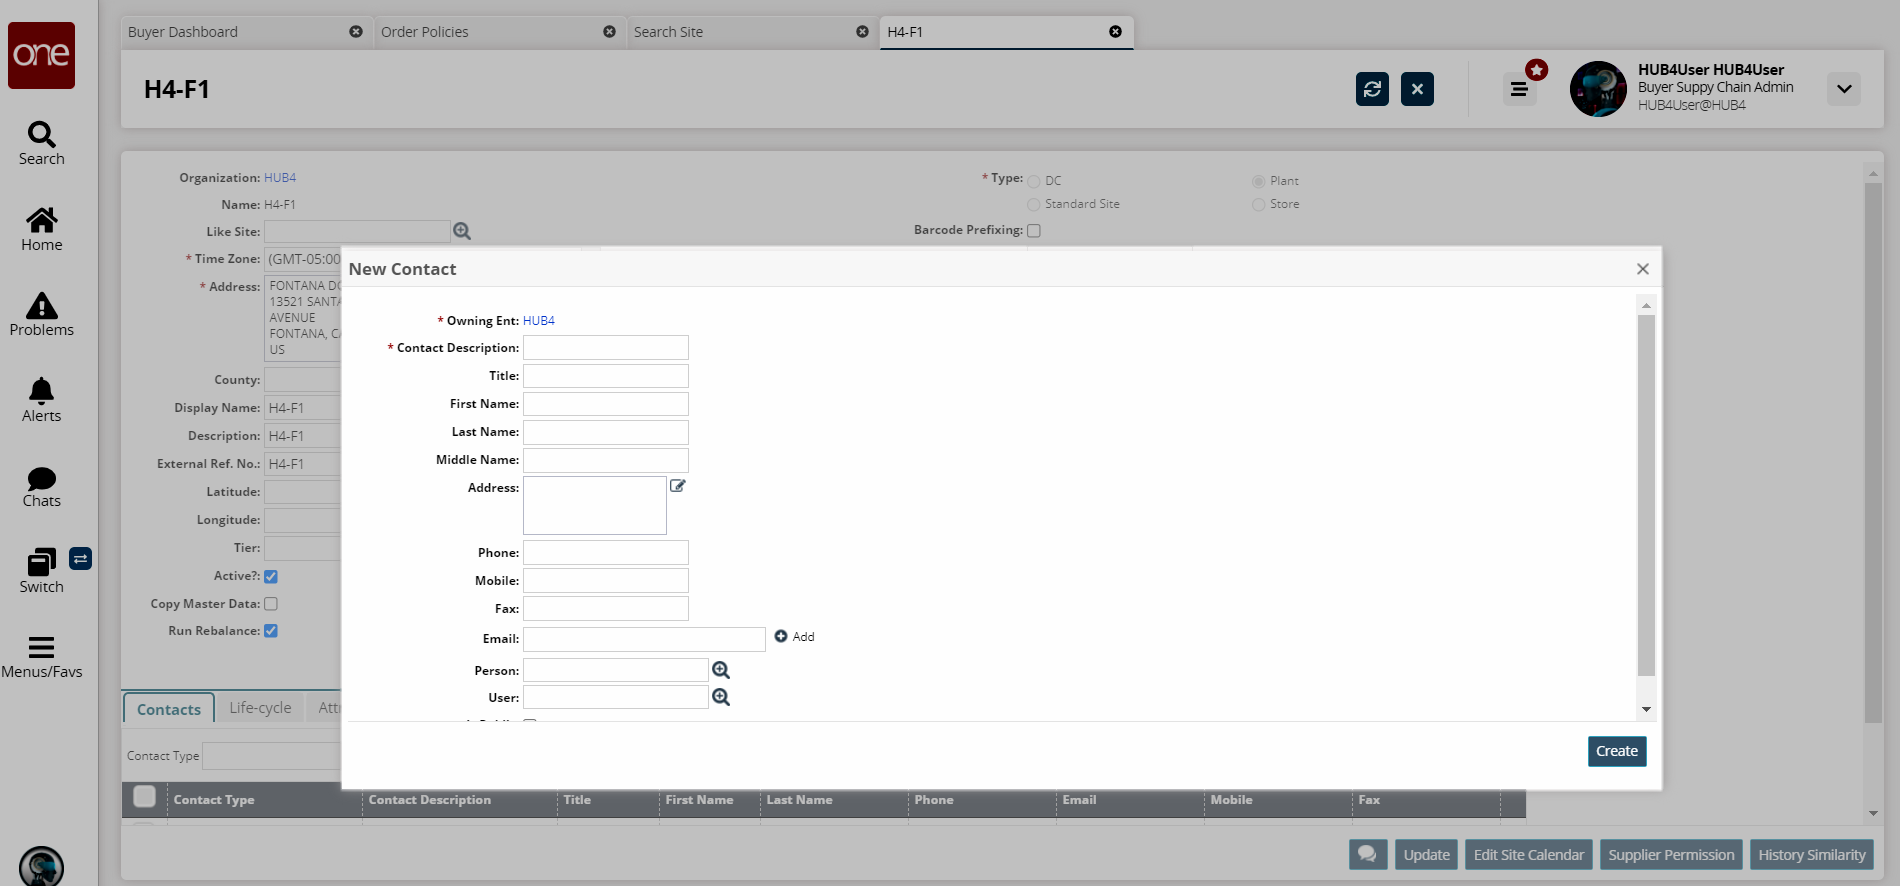
In the * Contact Description field, enter the name for this contact. Fields with an asterisk ( * ) are required.
Fill in the remaining fields as desired.
Click the Is Public checkbox to make this contact public and visible to partner organizations.
Click Create.
A success message appears. In the Contact tab, your newly created contact is prepopulated.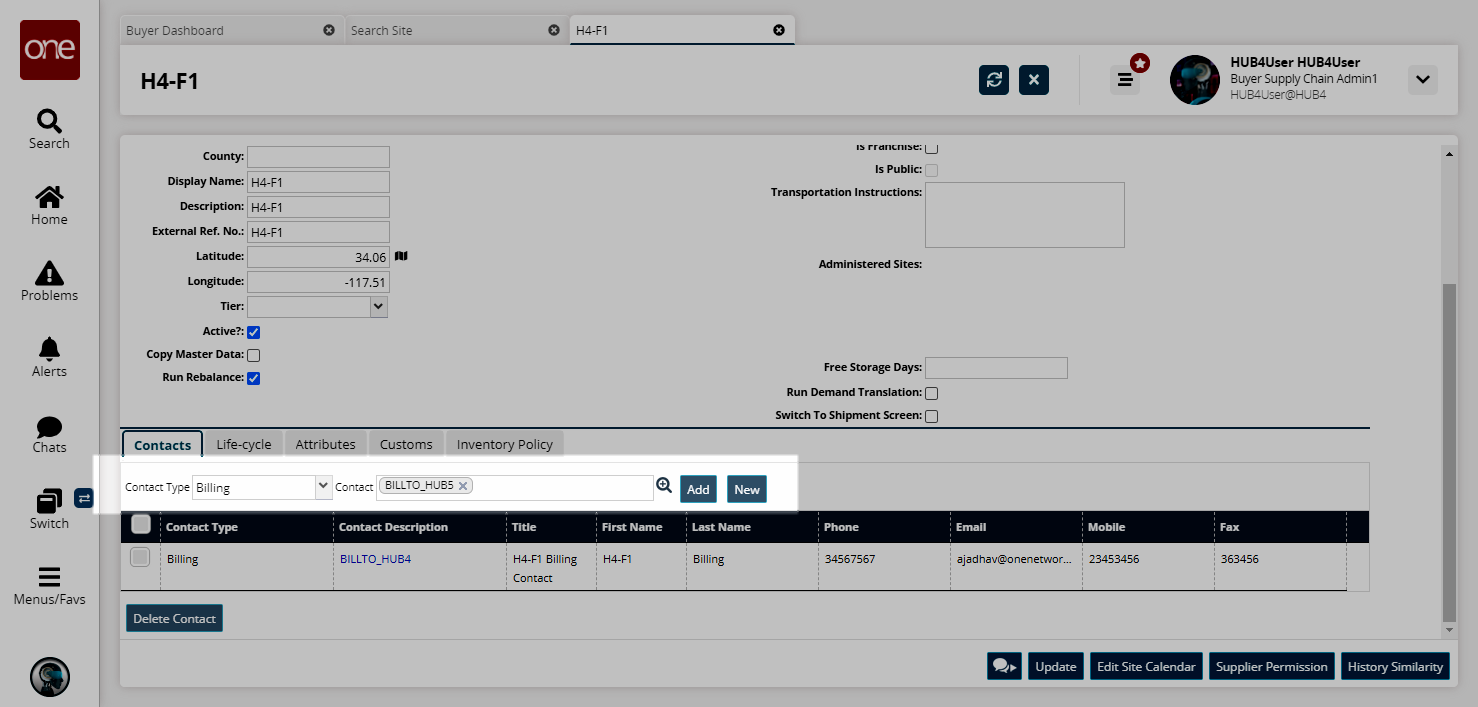
Click the Add button.
The contact appears in the table.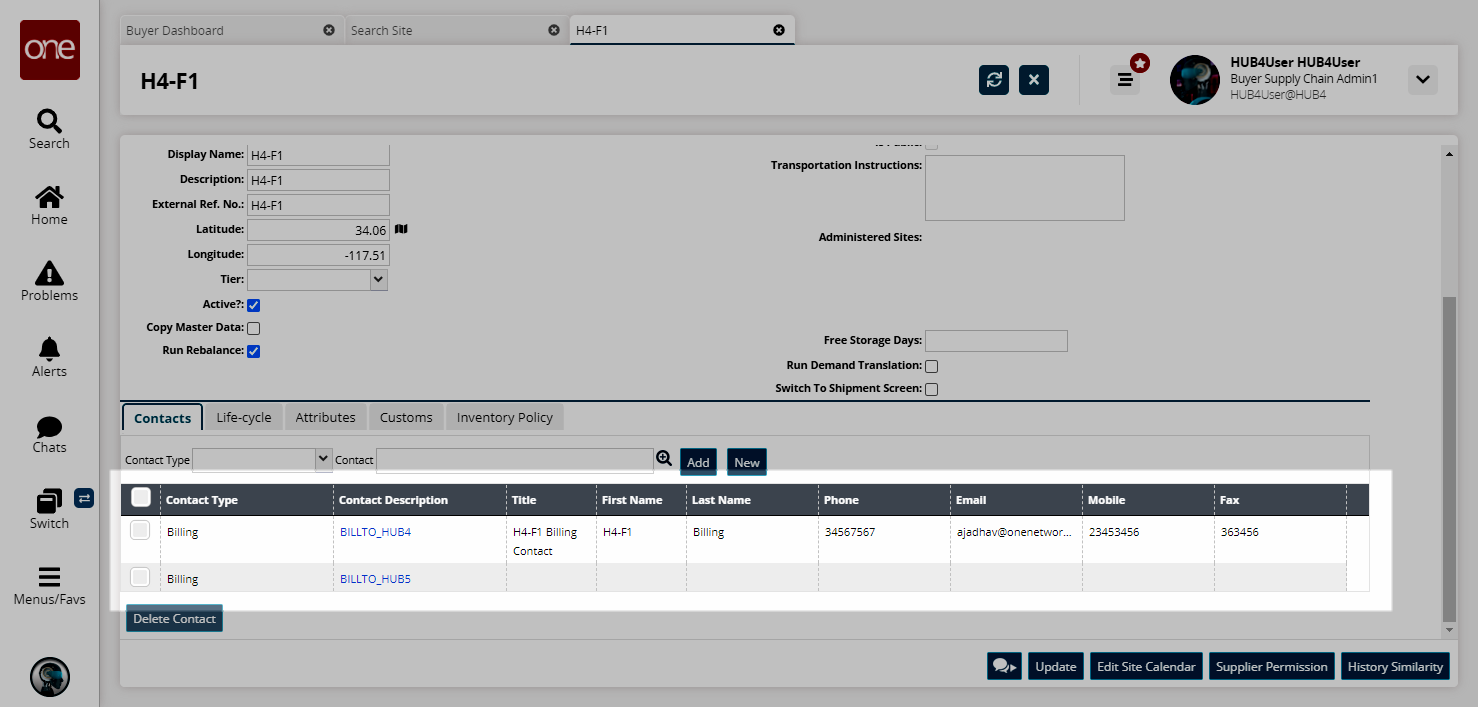
Click the Update button.
The site is updated with the new contact.
Complete the following steps to set an existing contact as public from within a site:
If the user is listed in the table on the Contacts tab, click the Contact Description link and go to step 5. If the user is not listed, perform the following instructions.
From the Contacts tab, select the Contact Type from the drop-down menu.
Click the picker tool for the Contact field.
The Contact popup displays.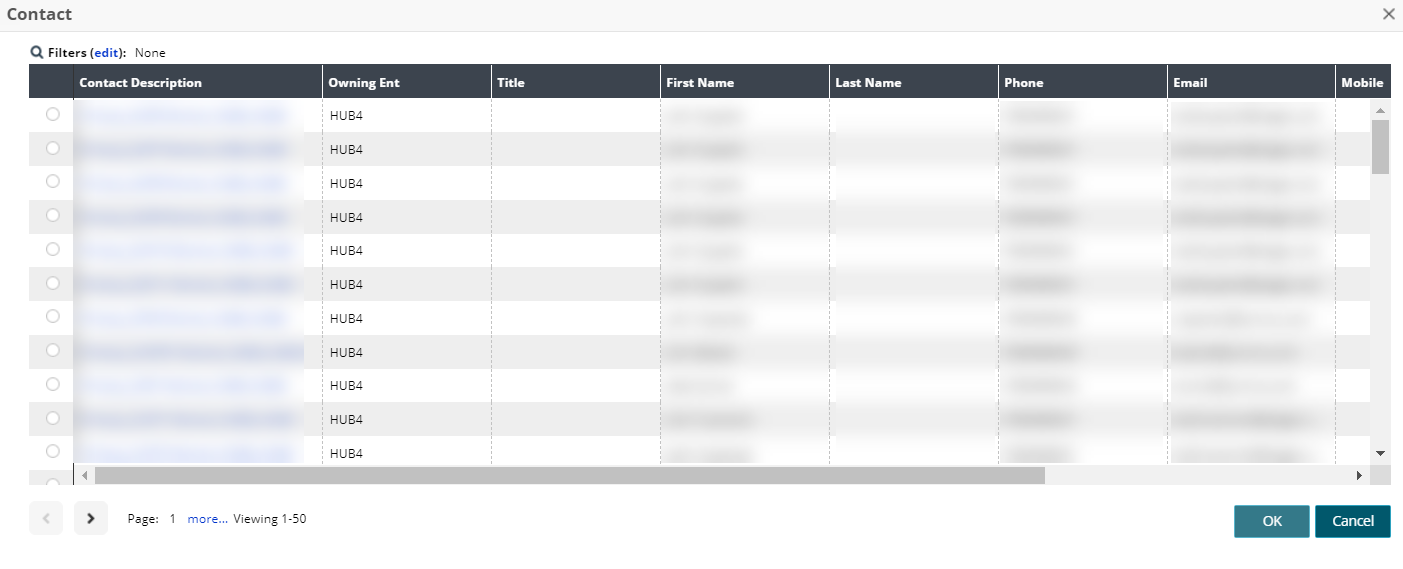
Click the Contact Description link for a site contact.
The Contact Detail screen displays.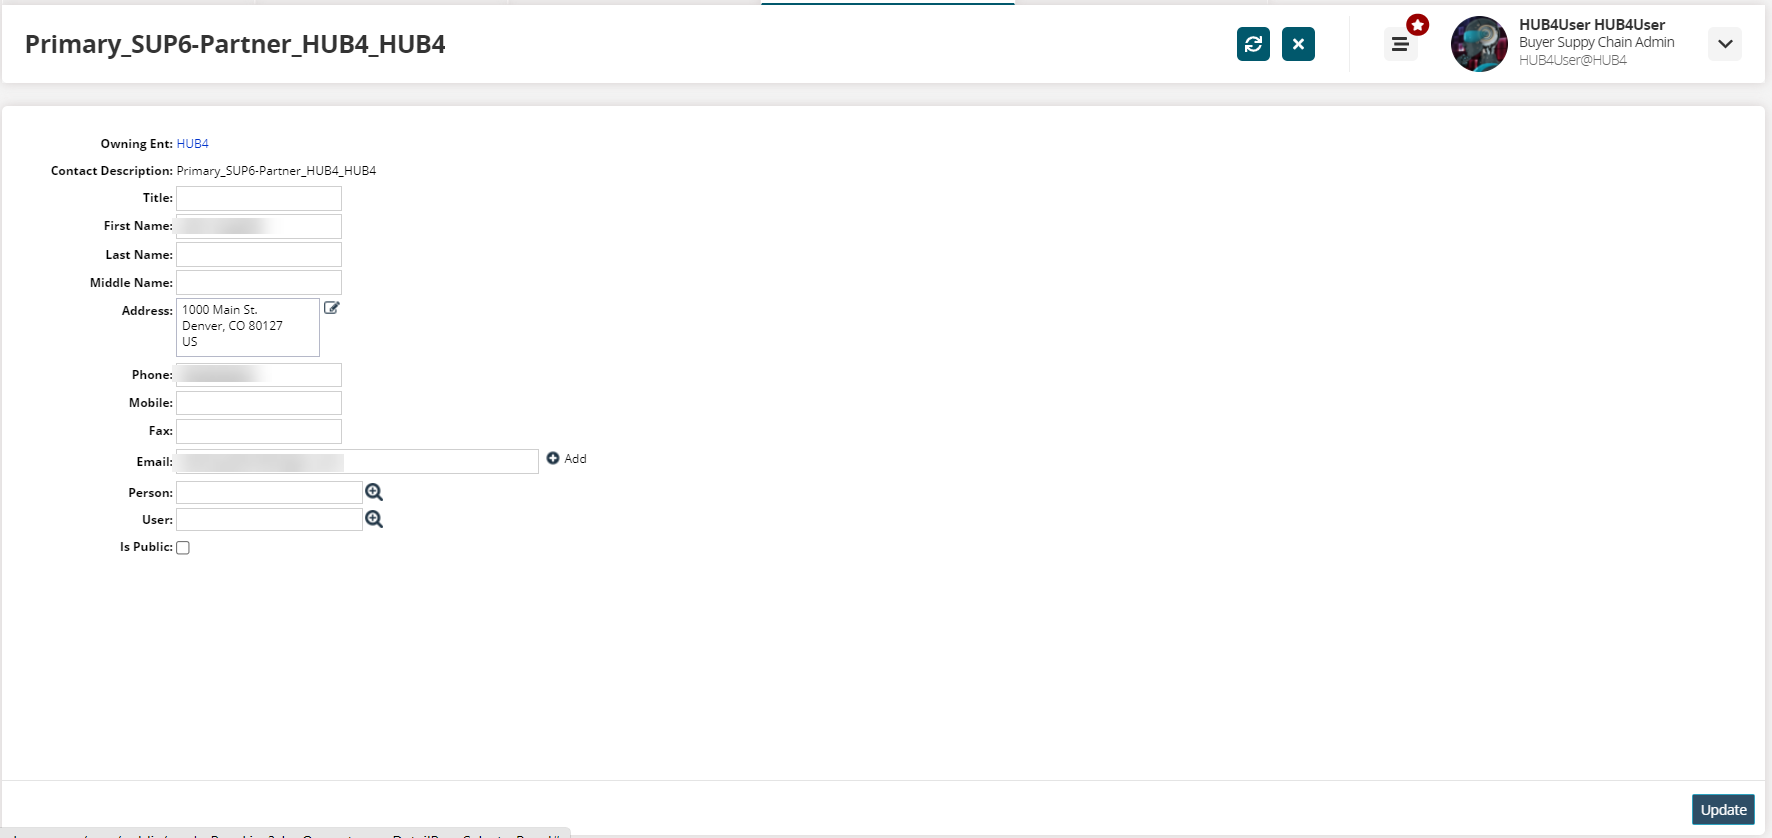
Click the Is Public checkbox to make the contact visible to partner users.
Click the Update button.
A green success message displays.Click the tab or click the Switch button on the left navigation bar and select the Site Details screen.
The Site Details screen displays.Click the Update button.
A green success message displays.
Complete the following steps to update a contact to public from the Search Contact screen:
L og in to the ONE system.
Click Menus/Favs > Administration > Contact > Search Contact.
In the NEO UI, users can click on the Menus/Favs icon on the left sidebar and type in the name of the screen in the menu search bar. For more information, see "Using the Menu Search Bar."
The Search Contact screen displays.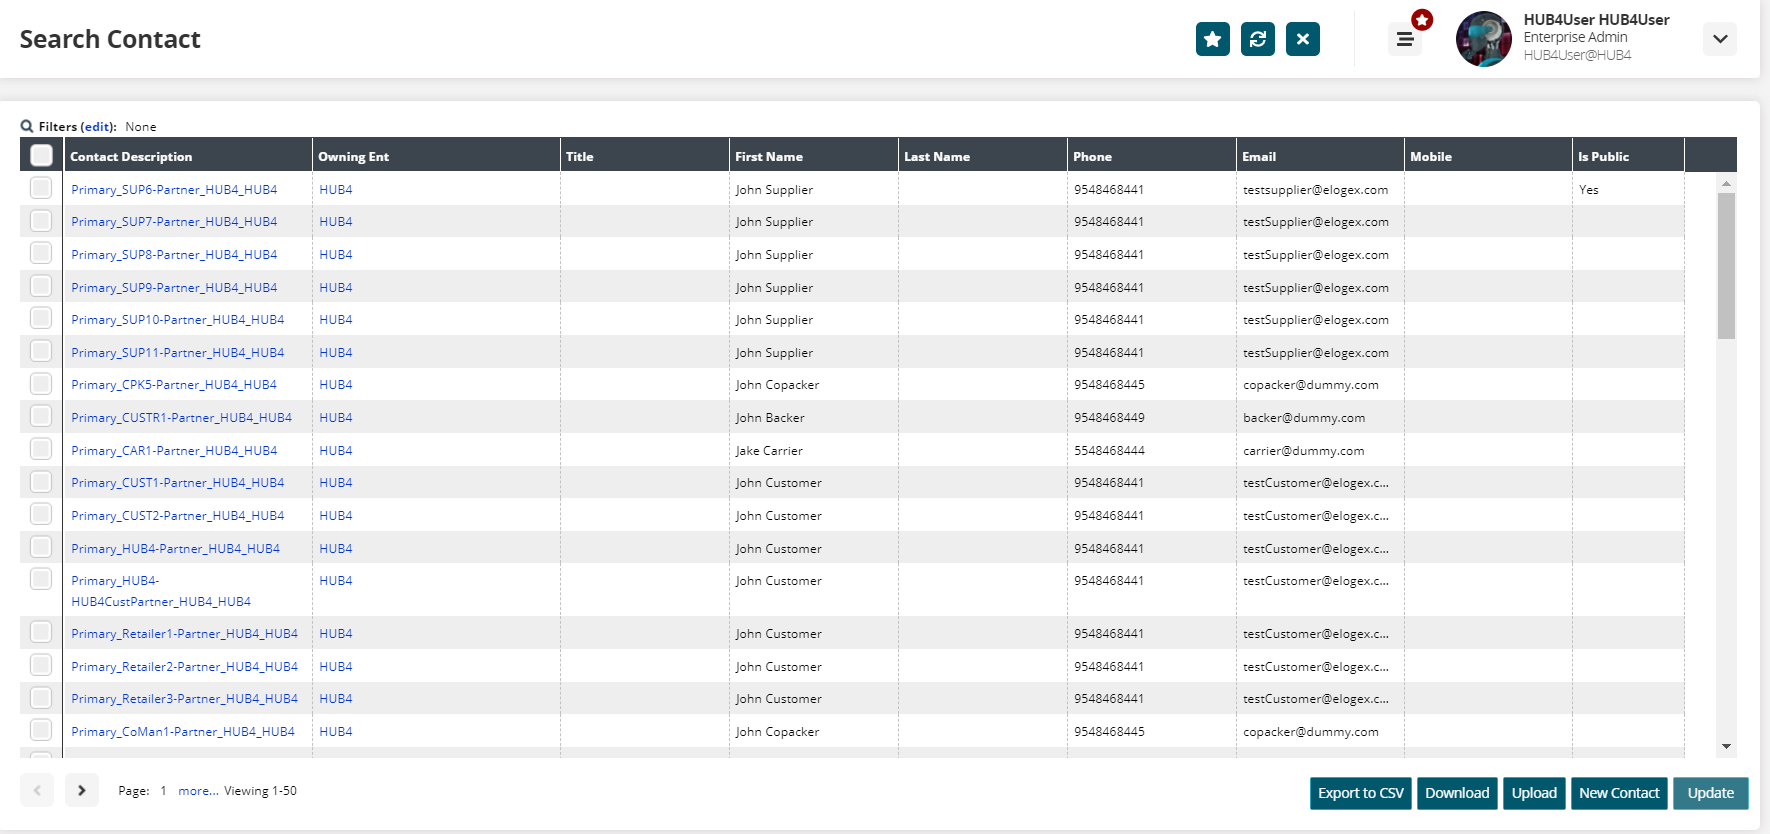
Click the Filters (edit) link to filter the contact results.
The filter fields display.Enter values for the fields to filter by.
Click the Search link.
The search results display.To view a single contact's full information, click the Contact Description link for the contact. To update just the Is Public flag, go to step 11.
The Contact Details screen displays.Click the Is Public checkbox to make the contact visible to partner users.
Click the Update button.
A green success message displays.Click the tab or click the Switch button on the left navigation bar and select the site details screen.
The site details screen displays.Click the Update button.
A green success message displays.To update just the Is Public flag, click the checkbox for the contact.
Click the Update button.
The contact row is displayed and editable.
Click the Is Public field for the contact.
A checkbox displays.Check the box for true (the contact's information is public and can be viewed by partners). Uncheck the box for false (the contact's information is set to private and cannot be viewed).
Click the Submit button.
A green success bar displays, and the contact's information is updated.