Shipping Instructions - Containers Tab
This set of instructions assumes that you are already on the Shipping Instructions screen. Requested and booked container details are auto-populated.
Complete the following steps to complete the Containers tab of the Shipping Instructions screen:
Click the Containers tab.
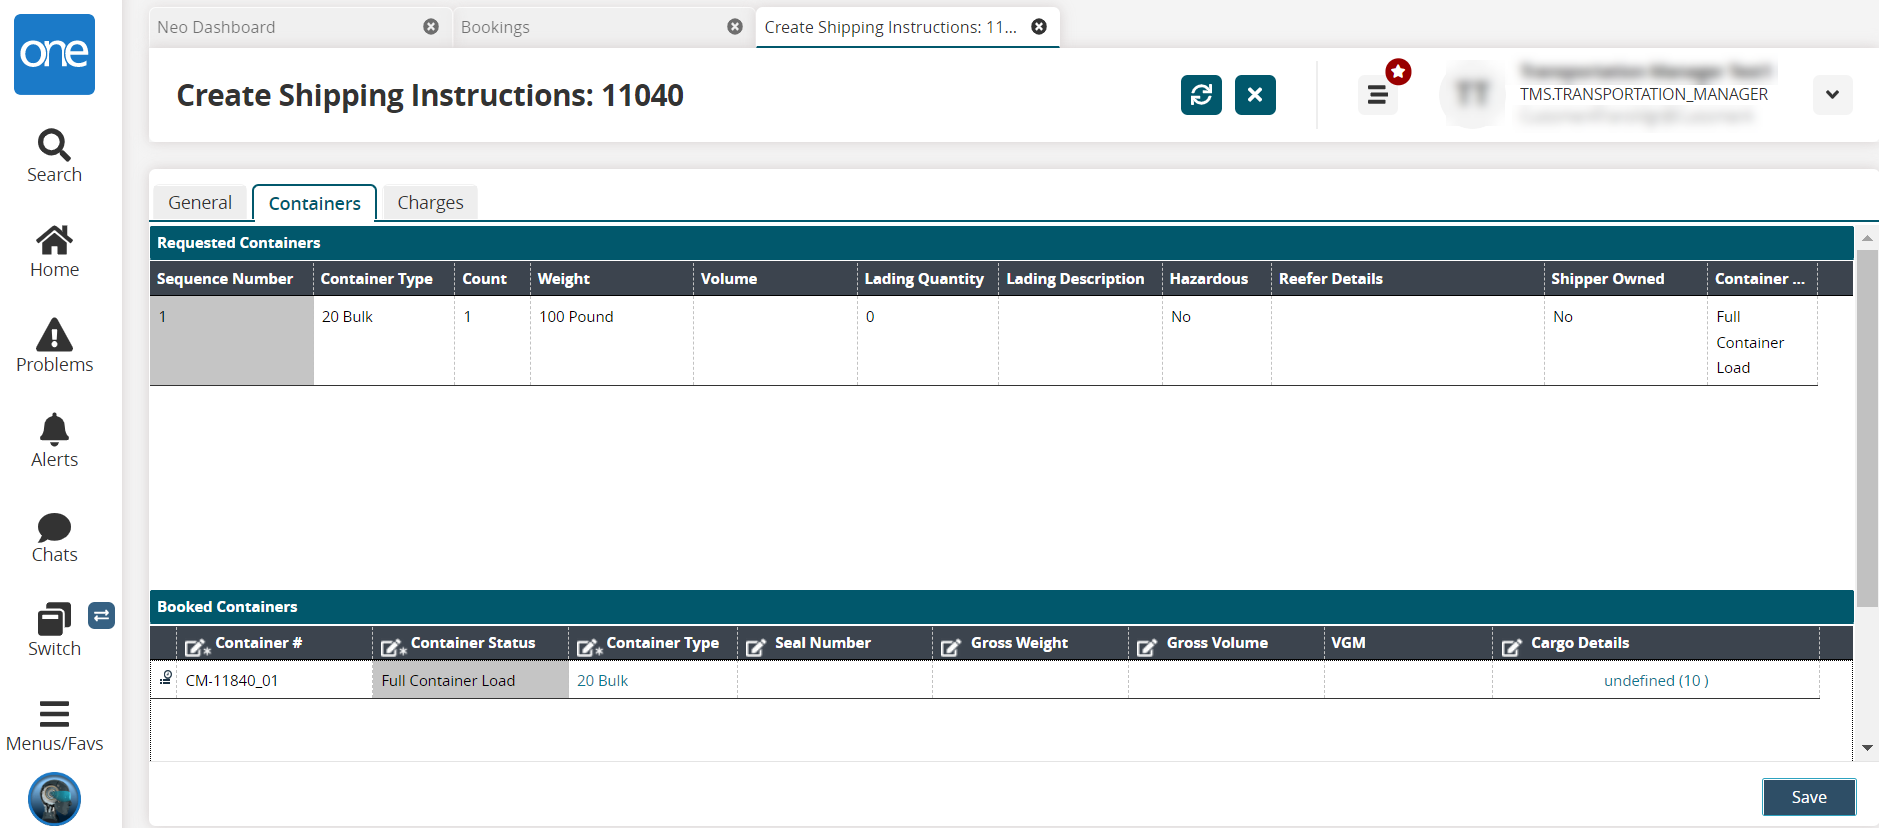
The Containers tab displays sections for requested and booked containers. The Requested Container data is pulled from the shipment or booking details pages.
In the Booked Container section, fields with an edit icon (pencil) are editable, as described in the table below.
Much of the data is auto-populated from the booking and shipping information but can be updated.Field
Description
Container Number
Enter a container identification number, which can be alphanumeric.
Container Status
Select the container status from the dropdown list.
Container Type
Enter or use the picker tool to select the container type.
Seal Number
Enter a seal number.
Gross Weight
Enter a numeric value for gross weight and select the unit of measure (UOM) from the dropdown list.
Gross Volume
Enter a numeric value for gross volume and select the unit of measure (UOM) from the dropdown list.
VGM
This field auto-populates based on values entered. The Verified Gross Mass (VGM) is calculated as the Gross Weight + Tare Weight.
Cargo Details
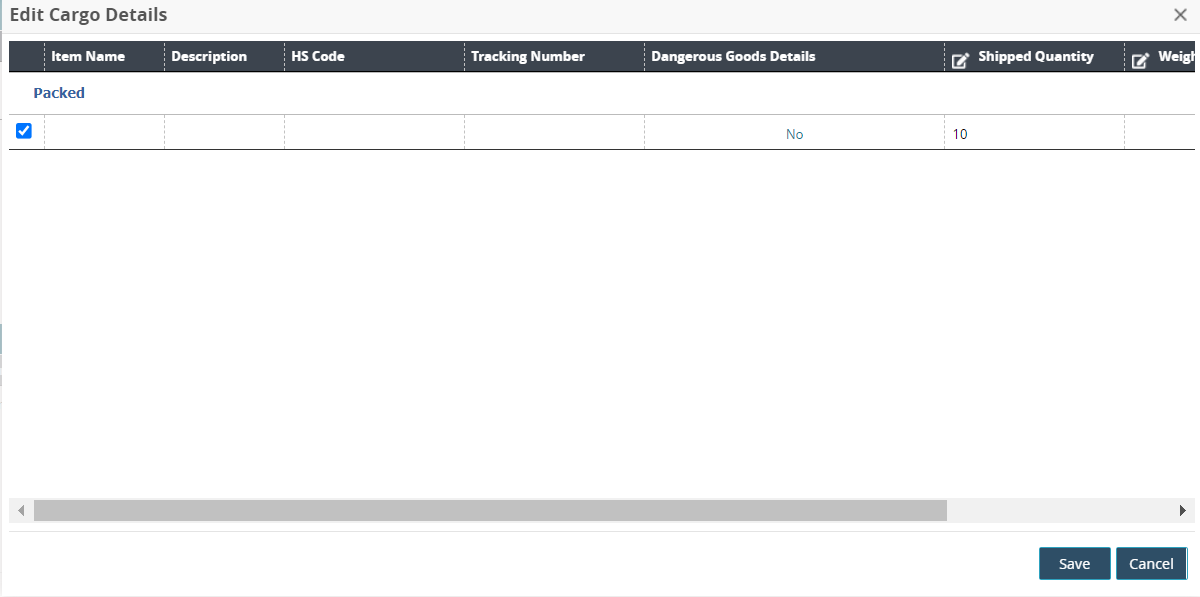
Click the link in the cell, which might be displayed as Edit Cargo Details or the item's name.
The Edit Cargo Details popup displays. Fields with an edit icon (pencil) are editable.
Click the Dangerous Goods Details link.
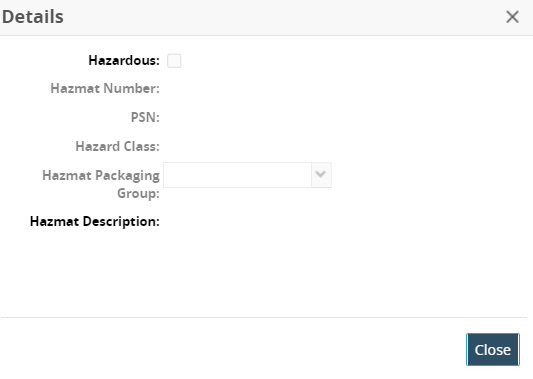
The Details popup displays. The fields are only editable if the Dangerous Goods is set to Yes on the Container tab of the booking details page and cargo details' shipment line (2 locations).

Complete the following fields.
Field
Description
Hazardous
Check the box to identify this shipment as hazardous goods.
Hazmat Number
Enter or use the picker tool to select a hazmat code.
PSN
Enter or use the picker tool to select the Proper Shipping Names (PSN).
Hazard Class
Enter or use the picker tool to select the hazardous goods class.
Hazmat Packaging Group
Select the hazardous materials packaging group from the dropdown list.
Hazmat Description
Enter a description of the hazardous materials.
Click the Save (if available) or Close button.
In the Shipped Quantity field, enter a numerical value for the amount and select the unit of measure (UOM) from the dropdown list.
In the Weight field, enter a numerical value for the amount and select the unit of measure (UOM) from the dropdown list.
In the Volume field, enter a numerical value for the amount and select the unit of measure (UOM) from the dropdown list.
Click the Save button.
The booked container data updates.
Click the Difference with Previous Revision button (

).
The Audit Trail details screen displays.To print the shipping instructions, click Actions > Print.
To issue a Bill of Lading (BL), click Actions > Issue BL.
Once a BL has been issued, the shipping instructions cannot be deleted.To delete the shipping instructions, click Actions > Delete.
See the following sections of the Online Help for more information:
"Creating Ocean Booking Shipping Instructions"