Working with RFx Explorer for Vendor Selection and Grouping Based on Partner Group Type
Buyer users can select and group vendors according to the Partner Group Type on the RFx Explorer. The users can use the Vendor groups during the RFQ (Request For Quote) creation.
Complete the following steps for Vendor selection on the RFx Explorer:
Log in to the ONE system.
Click Menus/Favs > Contract Management > RFx Explorer.
The RFx Explorer screen appears.Click the New RFx button.
The RFx General Information popup window appears.
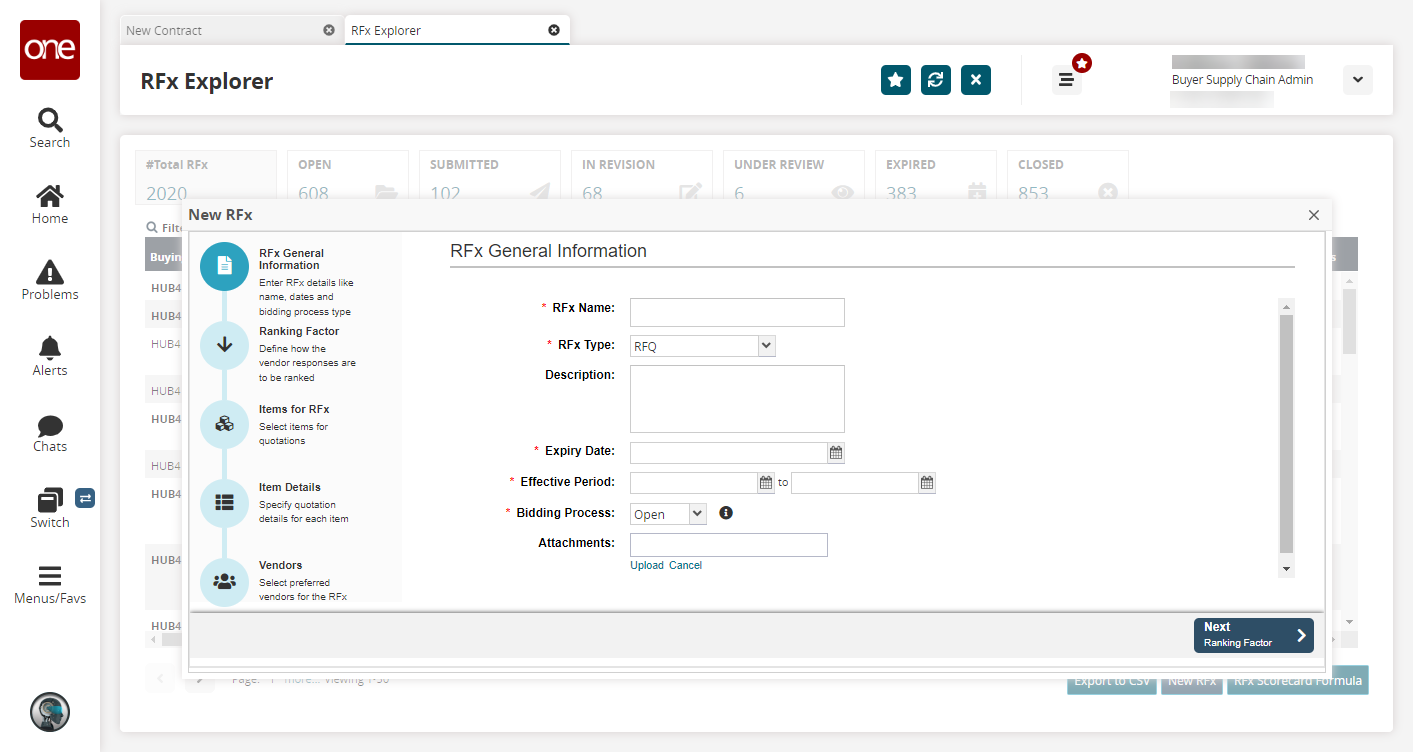
Fill out the following fields. Fields with an asterisk ( * ) are required.
Field
Description
* RFx Name
Enter an RFx name.
* RFx Type
Select an RFx type from the dropdown menu.
Description
Enter a description.
* Expiry Date
Select an expiry date.
* Effective Period
Select an effective date range.
* Bidding Process
Select a bidding process from the dropdown menu.
Attachments
Upload any relevant attachments.
Click Next.
The Ranking Factors for Vendor Responses screen appears.
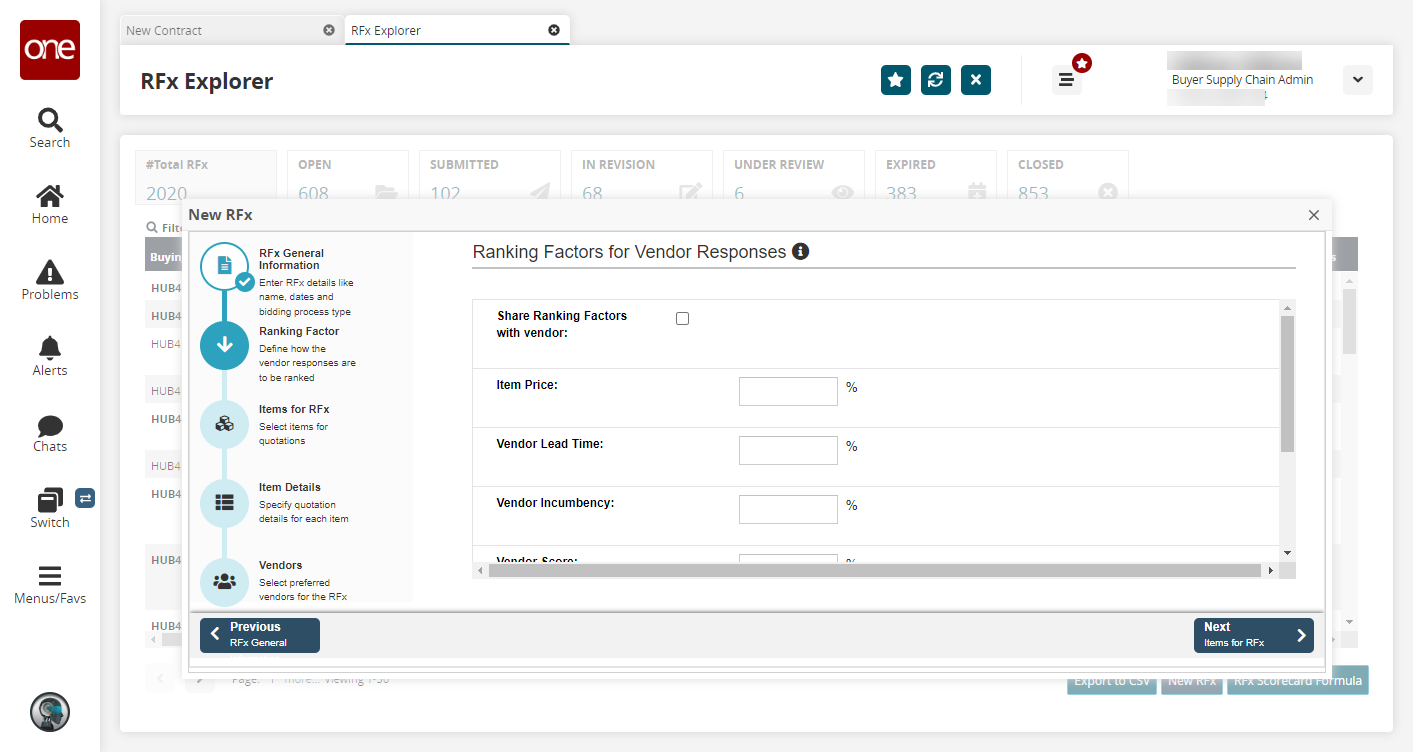
Select the checkbox for Sharing Ranking Factors with vendor and enter numerical values in terms of percentage in the Item Price, Vendor Lead Time, Vendor Incumbency, and Vendor Score fields.
Click Next.
The Items for RFx screen appears.
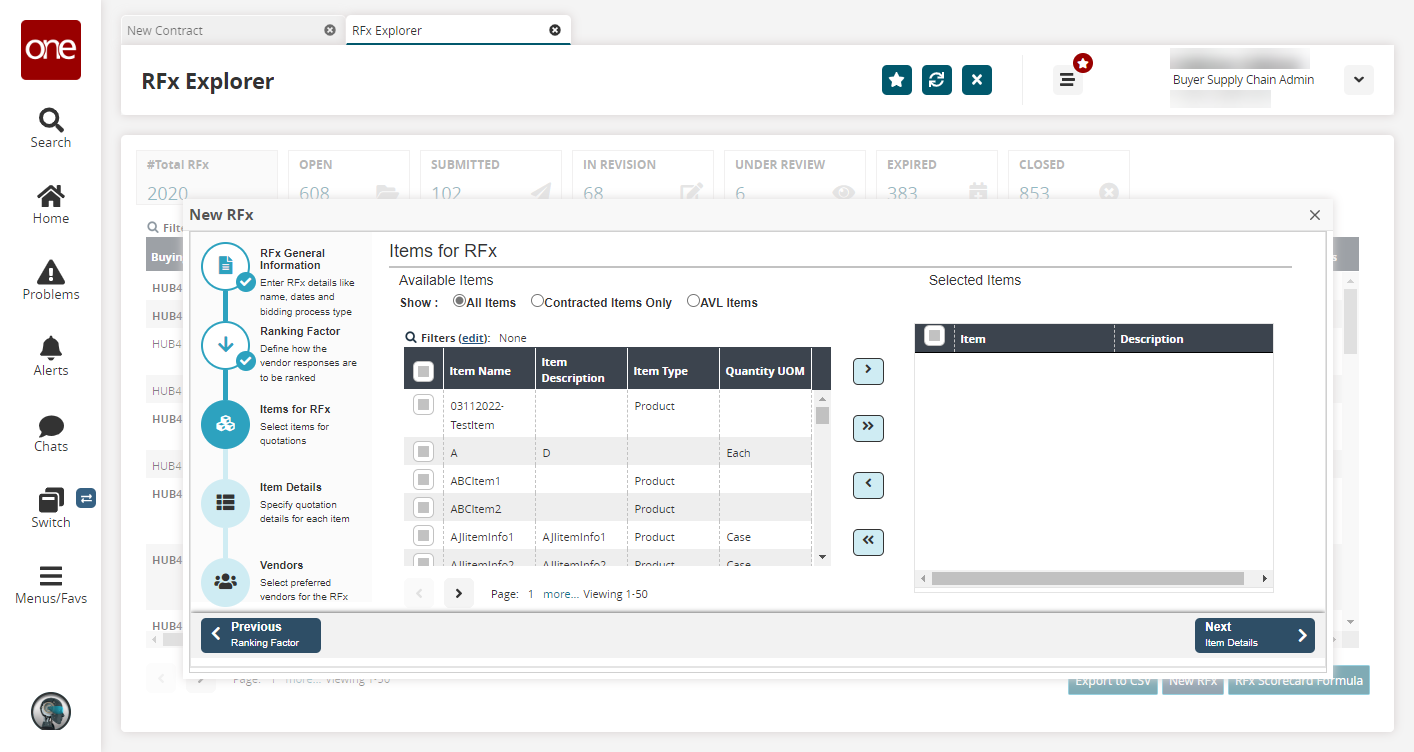
Select the Available Items as All Items or Contracted Items Only.
The items selected appear in the list.Click the checkbox of the Item Name to be added to the Selected Items and click the right arrow to add the selected items and the double right arrow to add the entire lists. Similarly, click the left arrows to discard the selections.
Click Next.
The Request Details per Items screen appears. The selected items from the previous screen appear in a tabular format.
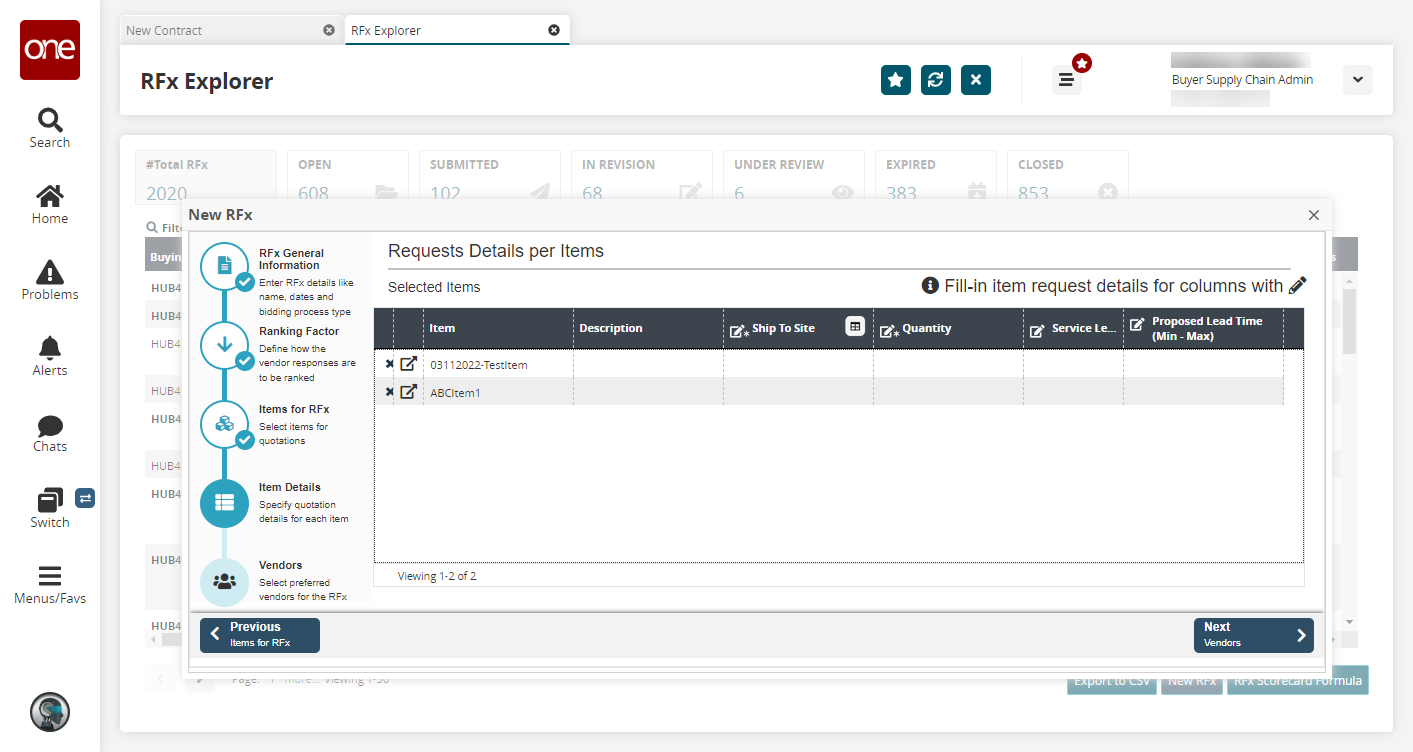
Click in the columns and add required details like Ship To Site and Quantity.
Click Next.
The Vendors screen appears.
Users can directly jump to the Vendors screen after filling the mandatory information on the RFx General Information screen by clicking the Vendor screen icon on the left.
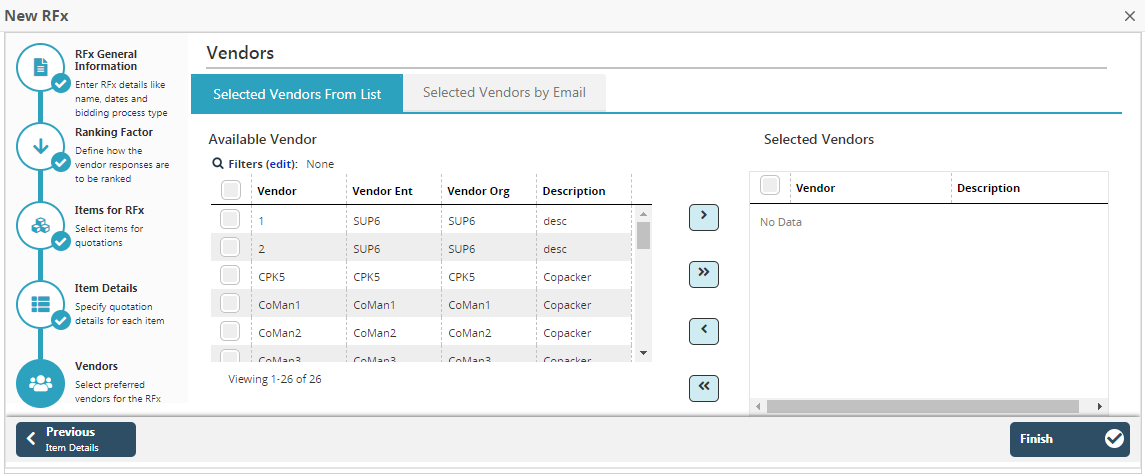
Click the Selected Vendors From List option to select the vendors from the Available Vendor lists.
Select the checkbox of the Vendor and click the right arrow icon to add the vendors to the Selected Vendors list on the right and the double right arrow to add the entire lists. Similarly, click the left arrows to discard the selections.
Click the Selected Vendors by Email option to select the vendors by entering their email ids in the Vendor Email(s) box.
Click the Finish button at the bottom to finish the vendor selection.
The screen with RFQ Details header selected appears.Click the Save button to save the information.
A success message appears.