Creating Credit Memos
The Financials Manager role can create and update credit memos. Not all fields and tabs are available until a credit memo is saved.
Complete the following steps to create a credit memo:
L og in to the ONE system.
Click Menus/Favs > Financials > New Credit Memo. In the NEO UI, users can click on the Menus/Favs icon on the left sidebar and type in the name of the screen in the menu search bar. For more information, see "Using the Menu Search Bar."
The New Credit Memo screen appears.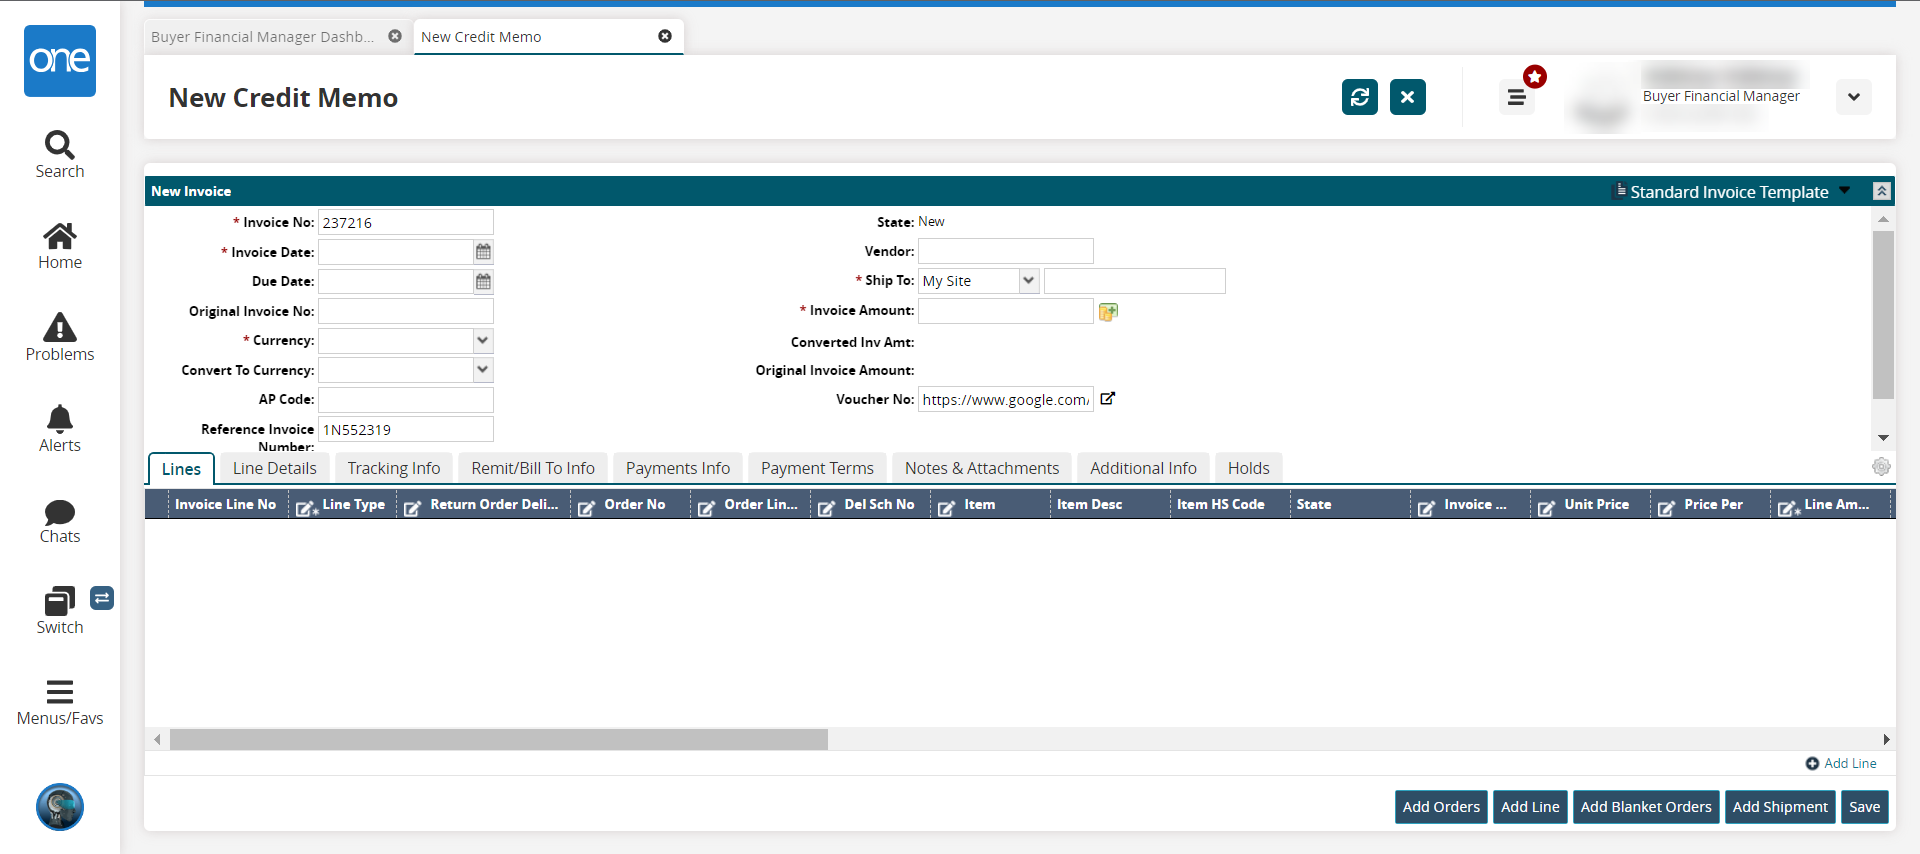
Enter values for fields described in the table below. Fields with an asterisk ( * ) are required.
Field
Description
* Invoice No
Enter an invoice number.
* Invoice Date
Click the calendar icon to select an invoice date.
Due Date
Click the calendar icon to select a due date.
* Original Invoice No
Enter the original invoice number.
* Currency
Select a country currency code from the dropdown menu.
Convert To Currency
Select a country currency code to convert to from the dropdown menu.
AP Code
Enter an AP code.
Reference Invoice Number
Enter a reference invoice number
Documents
This is a non-editable field until the invoice is saved.
State
This field auto-populates.
Vendor
Enter a vendor.
* Ship To
Select a ship-to option from the dropdown list. The options are My Site or Address. If My Site is chosen, enter a site in the text field to the right. If Address is selected, click the edit icon to enter an address.
Ext Ship To Site Name
This field appears if the Address option is chosen for the Ship To field. Enter a ship-to site.
* Invoice Amount
Click the green and gold icon
 to calculate the invoice amount. This populates the field with the total amount based on the Invoice Line Qty.
Converted Inv Amount
This field auto-populates.
Original Invoice Amount
This field auto-populates.
Voucher No.
Enter a voucher number. By default, a link is posted.
Click the Save button.
A green success message displays, and an invoice number is assigned.Click the Submit button.
The credit memo moves from the New state to the Discrepancy Hold state.Click the Add Orders button to add orders to the credit memo.
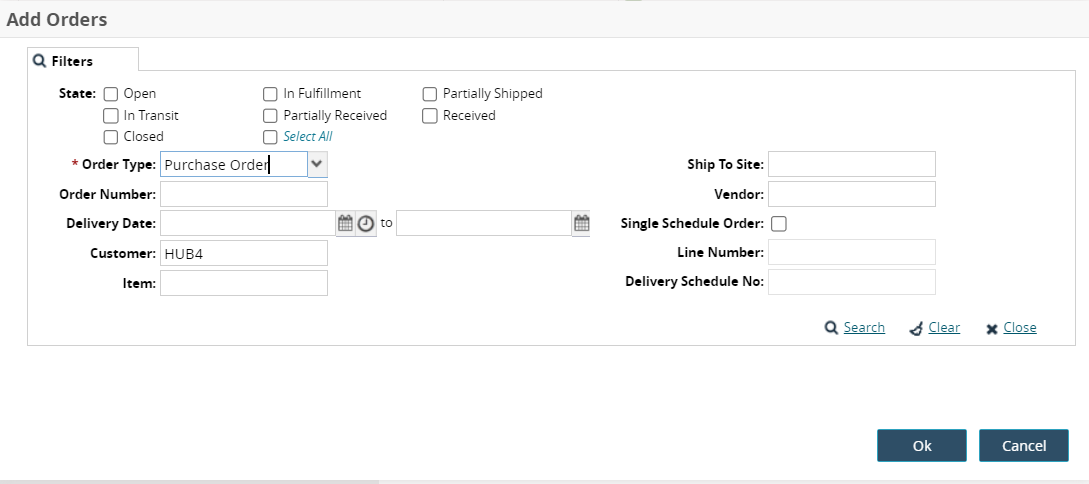
Enter values for fields described in the table below. Fields with an asterisk ( * ) are required.
Field
Description
State
Check the box for the order state.
Order Type
Select the order type from the dropdown list.
Order Number
Enter the order number. This field is context sensitive, and will list existing values as you type.
Delivery Date
Use the calender and clock tools to set a date range for the delivery.
Customer
This field is auto-populated, but you can enter another customer. This field is context sensitive, and will list existing values as you type.
Item
Enter the item name. This field is context sensitive, and will list existing values as you type.
Ship To Site
Enter the ship to site. This field is context sensitive, and will list existing values as you type.
Vendor
Enter the vendor's name. This field is context sensitive, and will list existing values as you type.
Single Schedule Order
Check the box if this order is single schedule.
Line Number
Enter the line number. This field is not available until other conditions have been met.
Delivery Schedule No
Enter the delivery schedule numer. This field is not available until other conditions have been met.
Click the Ok button.
Click the Add Line button to add a line to the credit memo.
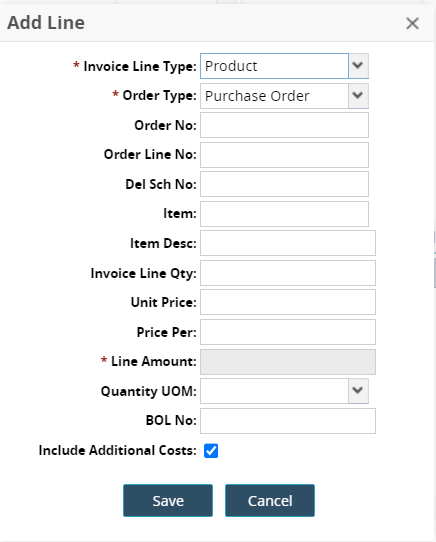
Enter values for fields described in the table below. Fields with an asterisk ( * ) are required.
Field
Description
* Invoice Line Type
Select the invoice line type from the dropdown list.
* Order Type
Select the order type from the dropdown list.
Order No
Enter the order number. This field is context sensitive, and will list existing values as you type.
Order Line No
Enter the order line number. This field is context sensitive, and will list existing values as you type.
Del Sch No
Enter the delivery schedule number. This field is context sensitive, and will list existing values as you type.
Item
Enter the item name. This field is context sensitive, and will list existing values as you type.
Item Desc
Enter the item description.
Invoice Line Qty
Enter a numerical value for the invoice line quantity.
Unit Price
Enter a numerical value for the unit price.
Price Per
Enter a numerical value for the price per unit.
* Line Amount
This field auto-populates.
Quantity UOM
Select the quantity unit of measure from the dropdown list.
BOL No
Enter the Bill of Lading number.
Include Additional Costs
Check the box to include additional costs. Uncheck the box to ignore additional costs.
Click the Save button.
The line is added to the table on the Lines tab. For more information on completing this tab without the popup, see the "Credit Memo - Lines Tab" section in the Online Help.Click the Add Blanket Orders button to add blanket orders to the credit memo.
The Add Blanket lines popup displays.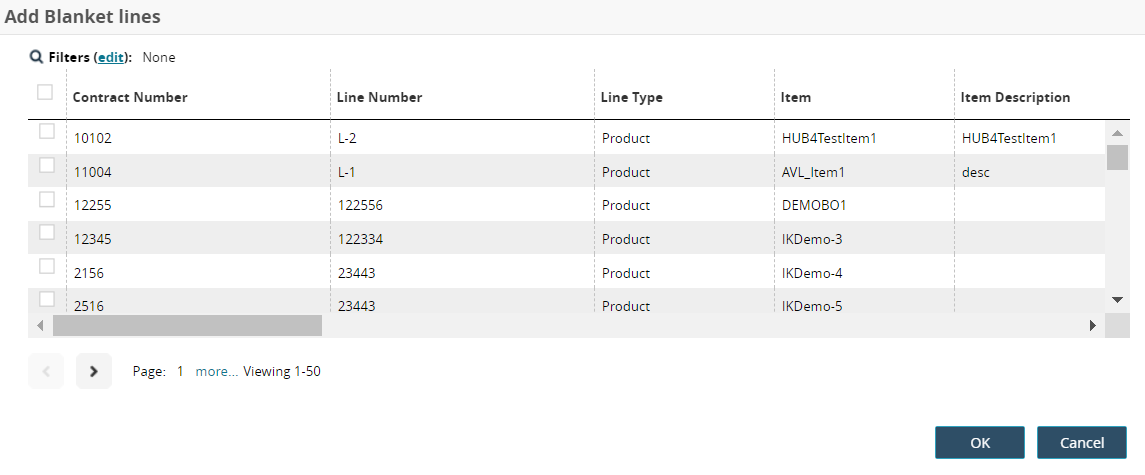
Click the checkbox for one or more blanket lines.
Click the OK button.
The blanket lines are added to the Lines tab. For more information on completing this tab without the popup, see the "Credit Memo - Lines Tab" section in the Online Help.Click the Add Shipment button to add shipment to the credit memo.
The Add Shipment Lines popup displays.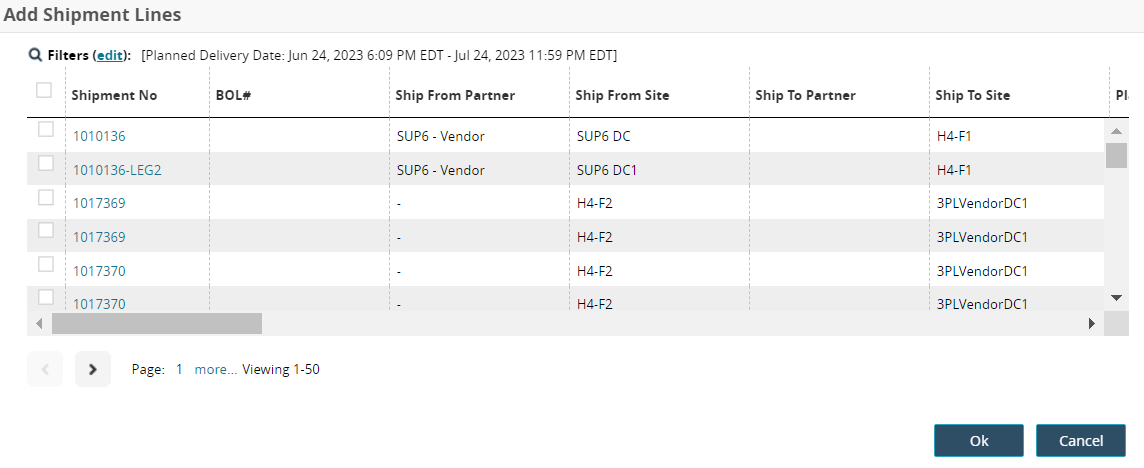
Click the checkbox for one or more blanket lines.
Click the OK button.
The blanket lines are added to the Lines tab. For more information on completing this tab without the popup, see the "Credit Memo - Lines Tab" section in the Online Help.The New Credit Memo displays a number of tabs. Find the information on individual tabs in the subsections below:
The Payments Info, Additional Info, and Holds tab are enabled after the invoice is saved.
Click the Save button.
The credit memo saves as an invoice.